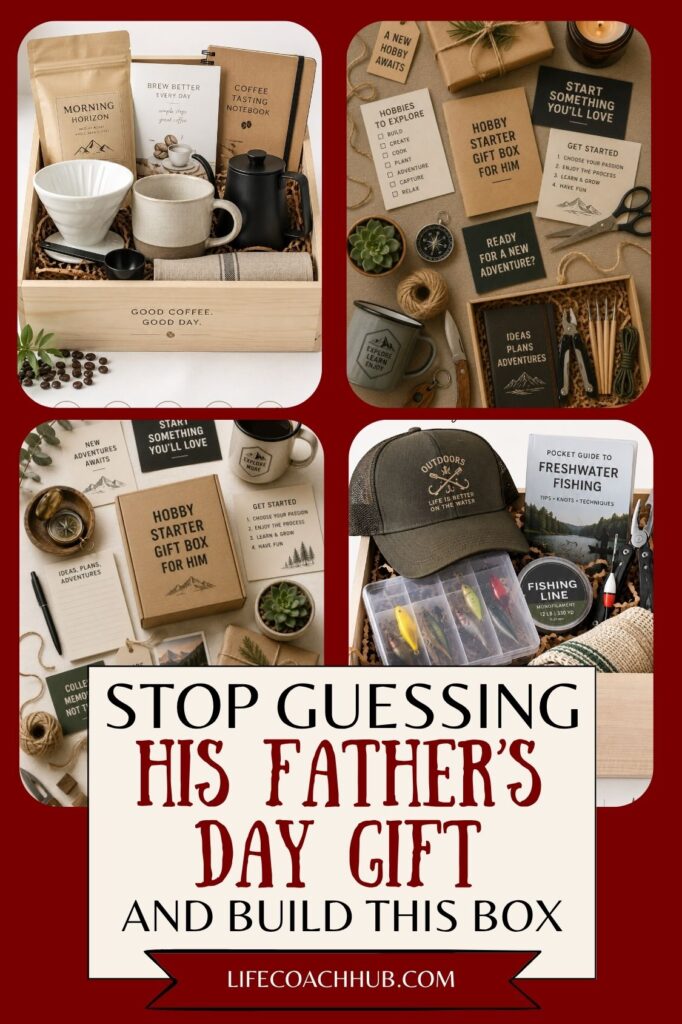
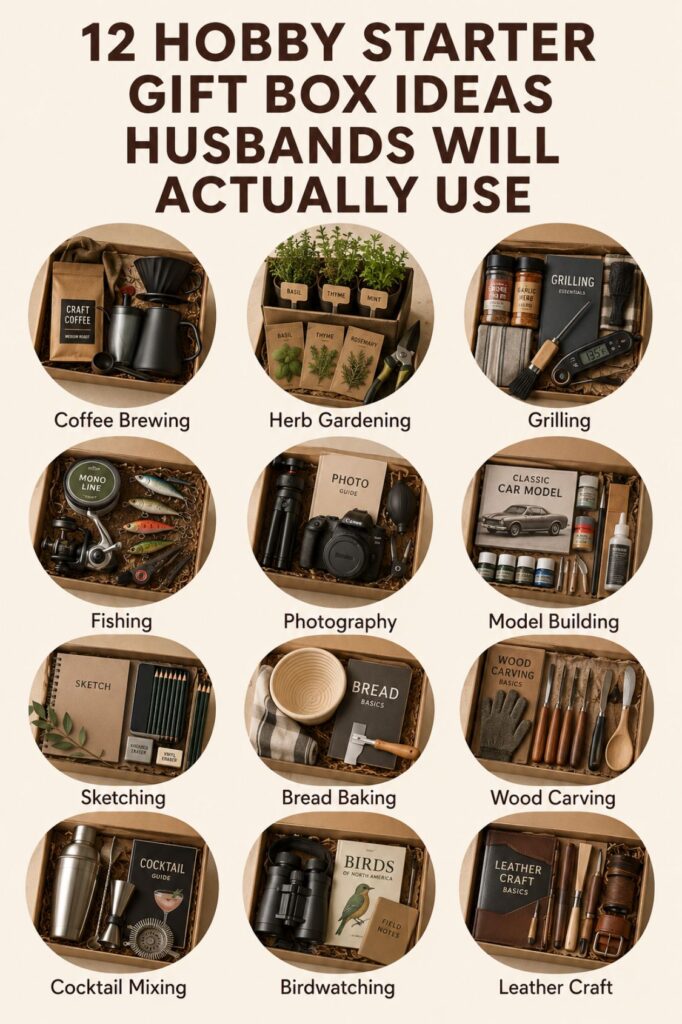
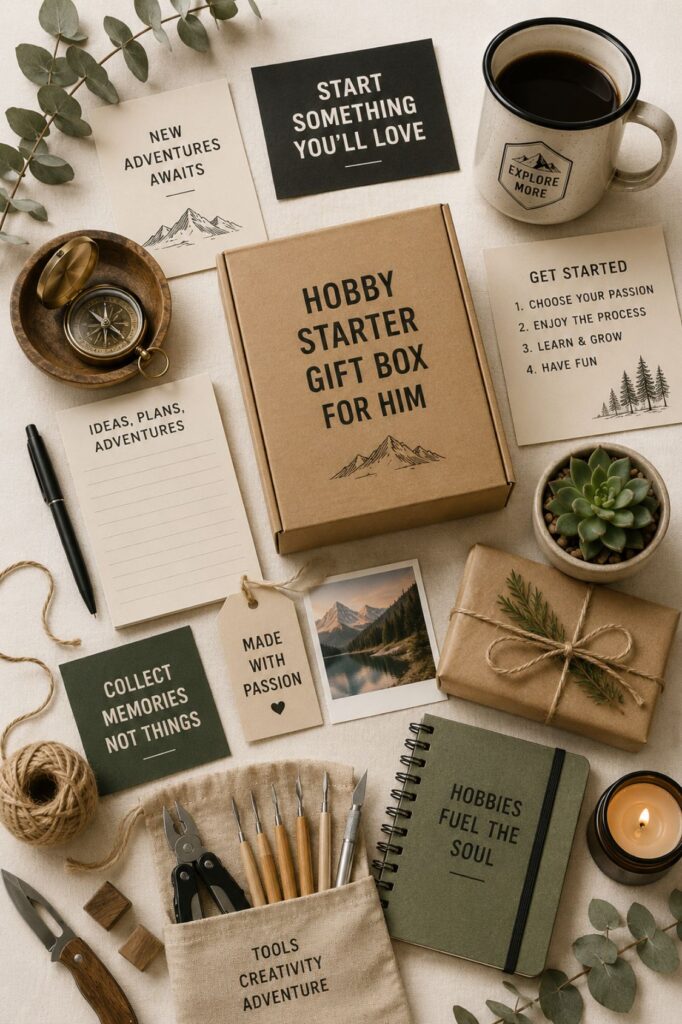
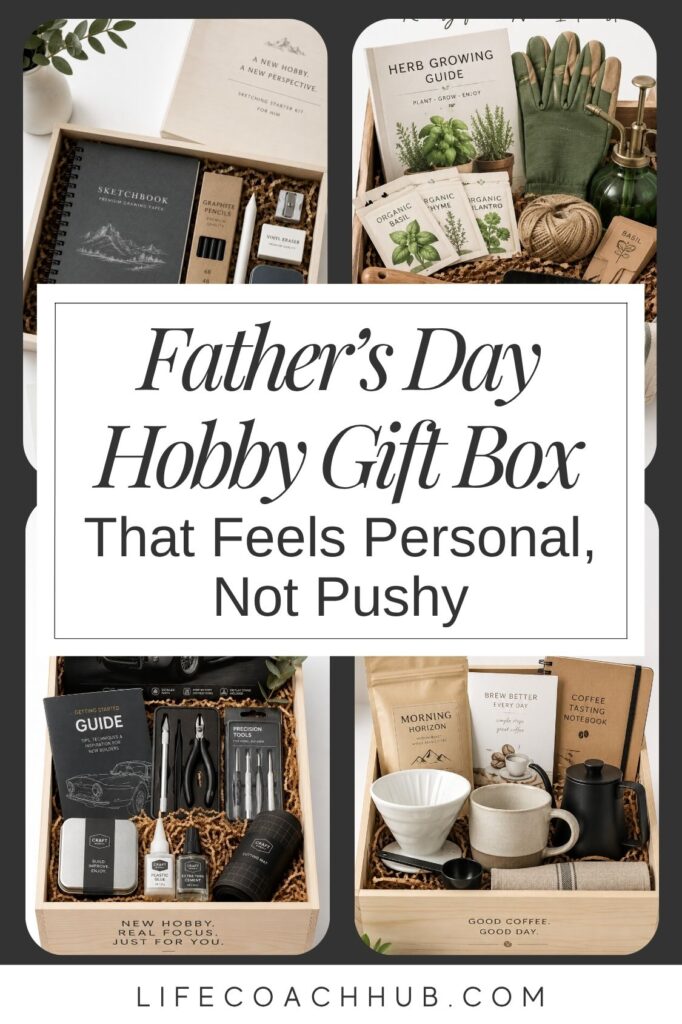
Hobby Starter Gift Box for Husbands Ready for a New Interest
A hobby starter gift box is a thoughtful way to give your husband something that feels personal, useful, and fun without handing him another random item that may end up in a drawer. Instead of guessing at one expensive gift, you are building a small experience around something he might genuinely enjoy trying.
The best part is that this kind of gift does not have to be complicated. It works because it removes the hard part of starting something new. He does not have to research supplies, compare beginner kits, figure out what to buy first, or wonder whether he has everything he needs. You are giving him a clear starting point.
This is especially helpful if your husband has mentioned wanting a new hobby but never follows through. Maybe he has talked about cooking more, learning coffee brewing, trying sketching, starting a small garden, getting into woodworking, learning chess, or doing something creative with his hands. A starter box turns that loose idea into something he can actually open and use.
It can work for many occasions too. You could give it for his birthday, Father’s Day, Christmas, an anniversary, or even as a “you deserve something for yourself” gift after a busy season. The key is to make it feel encouraging, not like a project you are assigning him.
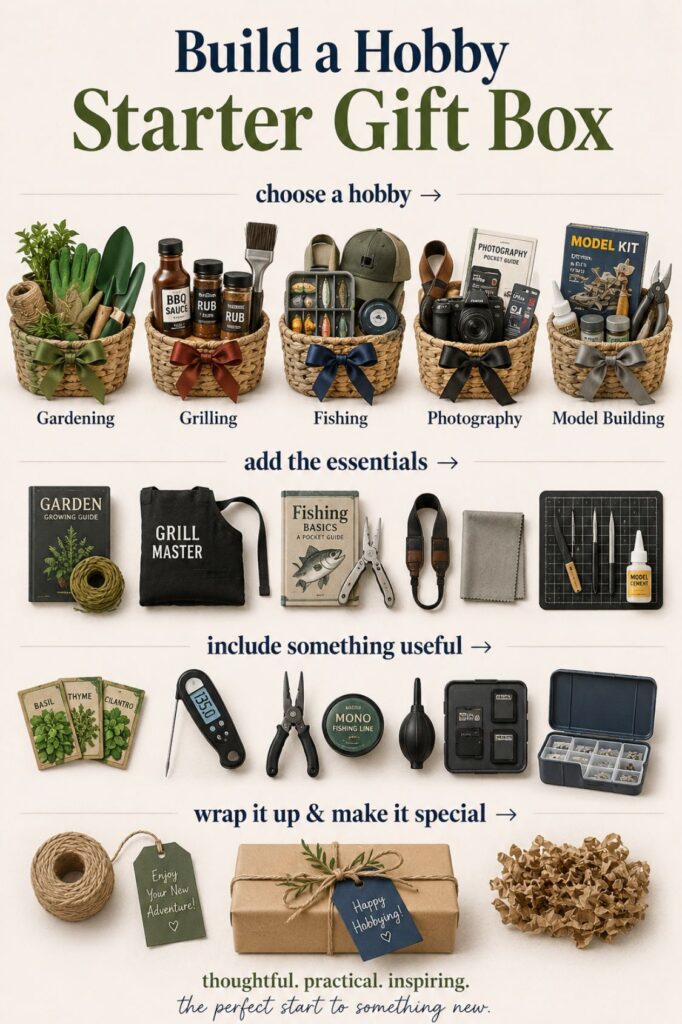
A strong hobby starter gift box usually includes:
One clear hobby theme
Beginner-friendly supplies
Simple guidance
One small upgrade item
A personal note
A realistic first-step plan
The goal is not to buy everything he could ever need. The goal is to make the first try feel easy, inviting, and enjoyable.
The biggest mistake with a hobby gift box is trying to include too many ideas at once. It can be tempting to add a little grilling item, a puzzle book, some coffee gear, a drawing pad, and a tool set because they all seem useful. But when the box has too many directions, it stops feeling like a starter kit and starts feeling like a collection of random things.
Start by choosing one hobby. One clear theme makes the gift easier to understand and much more likely to be used. Your husband should be able to open the box and immediately think, “Oh, this is for trying this.”
Think about how he naturally relaxes. Does he like quiet time, hands-on projects, food, learning, problem-solving, being outside, or making things? The best hobby is not always the most impressive one. It is the one that fits the kind of energy he already has.
For example:
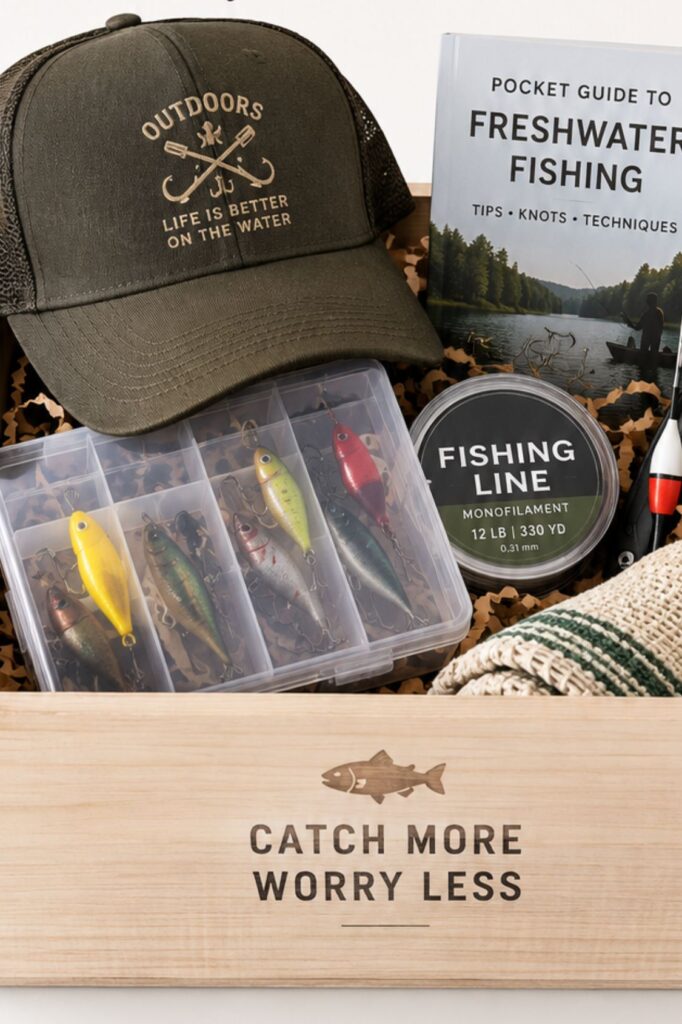
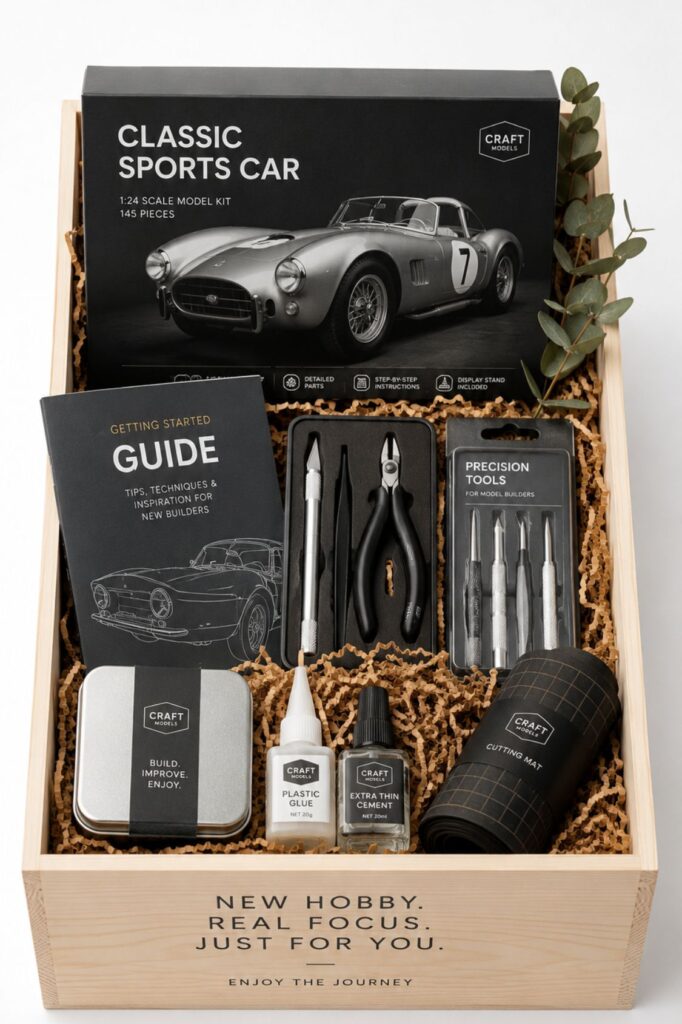
If he likes calm evenings, try sketching, chess, journaling, puzzles, coffee tasting, or model building.
If he likes working with his hands, try beginner woodworking, leathercraft, small repairs, gardening, or carving.
If he enjoys food and drinks, try hot sauce making, grilling spices, coffee brewing, tea tasting, or homemade pizza.
If he likes learning skills, try photography, language practice, card tricks, music basics, or strategy games.
Also think about his real schedule. If he is busy, tired, or already balancing work and family life, choose something he can try in a short session. A hobby that needs three hours, a large workspace, or a lot of cleanup may feel like too much before he even starts.
A good rule is to ask, “Could he try this for 20 to 60 minutes without needing to rearrange his whole day?” If the answer is yes, it is probably a strong starter box idea.
You are not choosing his new identity. You are giving him a low-pressure doorway into something new.
Build the Box Around Beginner-Friendly Supplies
Once you have chosen the hobby, build the box around the basic supplies he needs to begin. This is where the gift becomes useful. Instead of giving him an idea and leaving him to figure out the rest, you are giving him the pieces that make the first step feel doable.
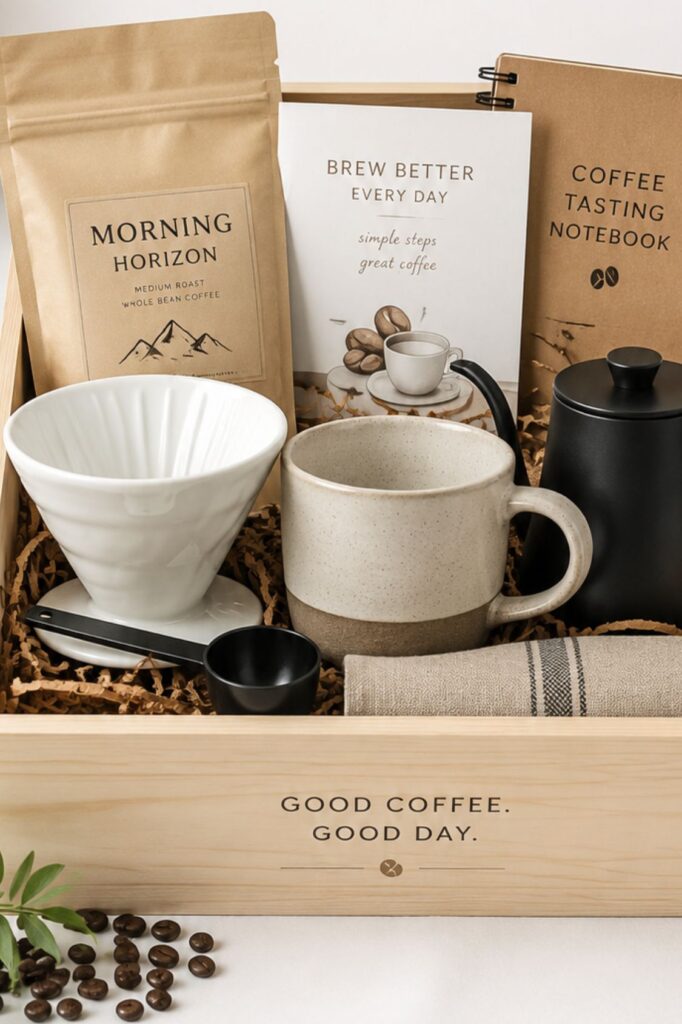
Start with the core starter item. This is the item that defines the hobby and makes the box feel complete. For a sketching box, that might be a sketchbook. For a coffee hobby box, it could be a pour-over dripper or sampler set. For gardening, it might be a small herb kit. For woodworking, it could be a beginner carving kit or sanding block set.
Then add only the basics. Try not to overload the box with too many accessories. Beginners often need less than we think. Too much gear can make the hobby feel complicated, especially if he has to figure out what every item is for.
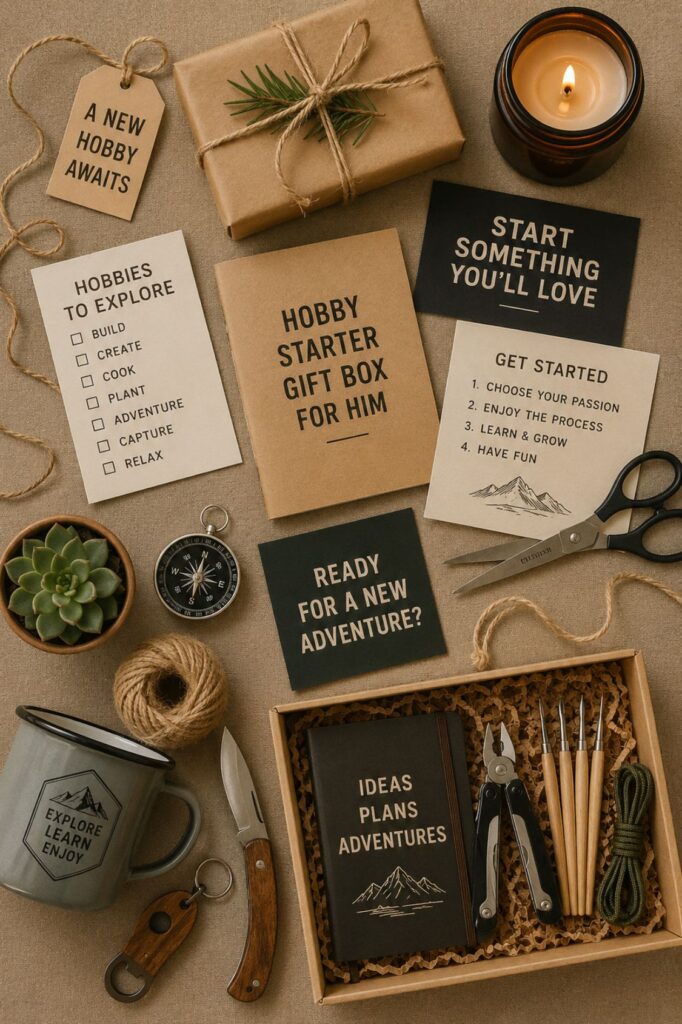
A simple beginner box might include:
The main starter tool or material
Two or three supporting supplies
One guide or instruction card
One storage item
One small upgrade piece
Look for items labeled beginner, starter, easy, first project, or no experience needed. These words matter because they usually mean the item was designed for someone who is not already deep into the hobby. That keeps the gift from feeling intimidating.
Quality matters, but it does not have to be premium. Choose supplies that feel nice enough to use, but not so expensive that he feels pressure to take the hobby seriously right away. A starter gift should feel fun, not like a commitment.
Also think about how the box looks when opened. Choose items that feel visually connected. Similar colors, textures, packaging, or materials can make the box look more intentional. A coffee box with warm browns, a simple mug, and kraft paper feels cohesive. A gardening box with seed packets, gloves, twine, and small labels feels charming and easy to understand.
The supplies should say, “You can start today.”
Add Simple Guidance So He Knows What To Do First
Supplies are useful, but guidance is what turns the box into a real experience. A lot of people do not start hobbies because they do not know the first step. They may have the tools, but they are not sure what to do with them. A little direction can make the difference between “nice gift” and “I actually tried this.”
Include one simple beginner guide. This could be a small book, printed tutorial, project card, recipe, checklist, video link, QR code, or handwritten “start here” note. The guide should be short and clear. Avoid anything that feels like homework.
The goal is to give him one first project, not a full course. If the hobby is sketching, choose a simple object to draw. If it is coffee brewing, create a first tasting plan. If it is gardening, include instructions for planting the first herb pot. If it is chess, include a beginner puzzle set or first strategy card.
A helpful “start here” card might include:
Step 1: Open the guide or watch the short video.
Step 2: Set out the supplies on a table.
Step 3: Try the first mini project for 30 minutes.
Step 4: Put everything back in the box for next time.
This removes decision fatigue. He does not have to decide where to begin, what to use first, or how long it should take. You have already made the first step easy.
Keep the tone encouraging. Instead of writing, “Learn this skill,” try something like, “Try this when you want a quiet half hour for yourself.” That feels much more inviting. It also keeps the hobby from sounding like another productivity goal.
You can also include a personal note about why you chose the hobby. Maybe you noticed he likes watching cooking videos, fixing things, trying new coffee, or talking about wanting more time away from screens. That small explanation makes the gift feel seen and specific.
The best guidance is gentle. It gives him a path without making him feel pushed.
Include One Small Upgrade Item
A hobby starter gift box feels more special when it includes one small upgrade item. This is the piece that makes the gift feel more thoughtful than a basic kit. It should be useful, tied to the hobby, and a little nicer than the standard beginner supply.
The upgrade does not have to be expensive. In fact, it usually works better when it is small but thoughtful. A nicer pen, upgraded coffee beans, a quality seasoning blend, a sturdy storage pouch, a personalized notebook, a better brush, or a comfortable pair of gloves can make the whole box feel more gift-worthy.
Think of the upgrade as the “little treat” inside the box. It gives him something to notice when he opens it. It also shows that you did not just grab the first starter kit you found. You thought about what might make the first experience more enjoyable.
For example:
For a coffee hobby box, add a small bag of locally roasted beans.
For a sketching box, add a smooth, quality pencil or fine liner.
For a gardening box, add wooden plant markers or a nice pair of gloves.
For a cooking box, add a specialty spice, sauce, or small kitchen tool.
For a puzzle or game box, add a comfortable notebook for tracking scores or strategies.
For a woodworking box, add a better sanding block, apron, or storage roll.
The upgrade should support the hobby, not distract from it. If the box is for coffee brewing, the upgrade should not be a random wallet or keychain. If the box is for sketching, the upgrade should not be unrelated tech. Keeping everything connected makes the gift feel cleaner and more intentional.
Place the upgrade where it stands out. You can wrap it separately, put it near the top, or add a small label that says “a little upgrade.” This creates a nice moment when he opens the box.
The upgrade is not about making the hobby serious. It is about making the first try feel good enough that he wants to come back to it.
Make the Gift Box Feel Personal
The personal touches are what make this gift feel like it came from you, not from a generic gift guide. A hobby starter box is already thoughtful, but a few specific details can make it much more meaningful.
Start with a handwritten note. It does not need to be long or overly sentimental. A simple message explaining why you chose this hobby can make the whole gift feel warmer. Maybe you noticed he has seemed curious about something. Maybe he mentioned wanting something relaxing to do after work. Maybe you thought he deserved a hobby that belongs just to him.
You could write something like:
“I thought this might be a fun thing to try when you want a quiet night.”
“You mentioned this once, and I wanted to make it easy for you to start.”
“I love the idea of you having something that is just for you.”
“No pressure to become an expert. I just thought you might enjoy playing around with it.”
That last part matters. A hobby gift should feel low-pressure. If your husband tends to be practical, busy, or hard on himself, he may need permission to simply try something without needing to master it.
Tie the box to something personal if you can. If he always talks about wanting better coffee, build the box around a first brewing setup. If he loves being outside but never makes time for it, try a small gardening or nature journal box. If he enjoys problem-solving, choose puzzles, chess, model building, or strategy games.
You can also include a shared option, but only if it fits. Add a small card that says, “I’ll try the first one with you,” or “This can be your solo thing, but I’m happy to join.” That gives him choice. It makes the gift feel supportive instead of intrusive.
Avoid making the hobby sound like self-improvement. Even if the hobby is healthy, creative, or good for him, the gift should not feel like a fix. It should feel like a sweet invitation to enjoy something new.
That is what makes it personal. Not the price, but the thought behind it.
Package It So It Feels Easy To Start
Packaging matters because it shapes how the gift feels the moment he opens it. A hobby starter box should look organized and inviting. If he opens it and immediately understands what the box is for, you have already made the hobby feel easier.
Choose a container that fits the theme. A simple gift box works for almost anything, but you can make it more useful by choosing something he can keep. A wooden crate, small toolbox, storage bin, basket, canvas pouch, or lidded box can become part of the hobby setup.
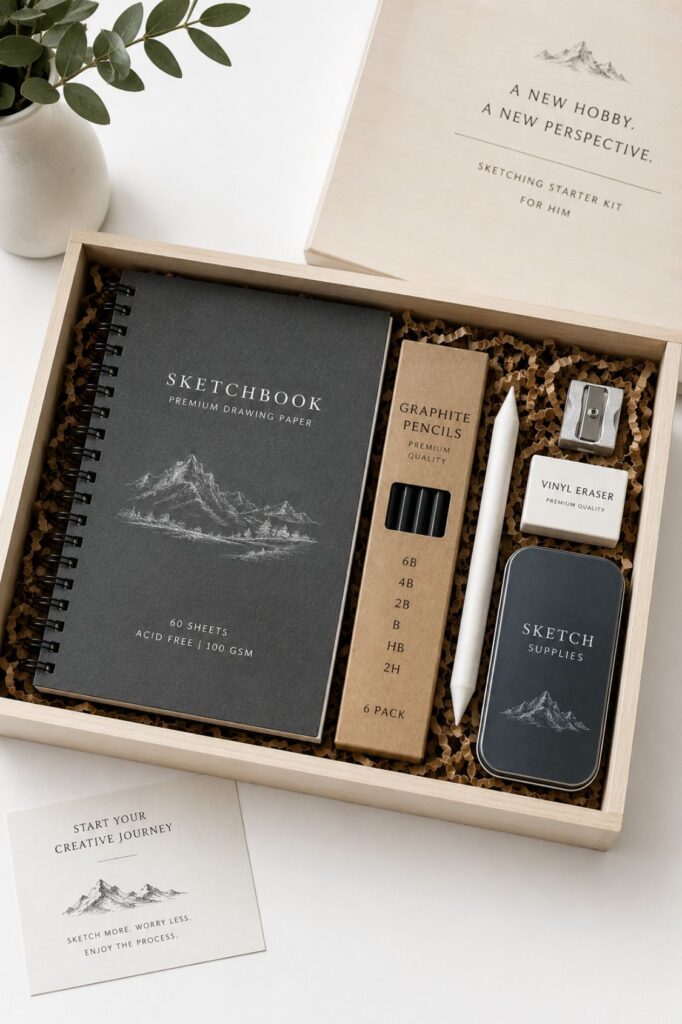
For example, a woodworking or repair hobby might look good in a small toolbox. A sketching hobby could go in a flat storage box or canvas pouch. A gardening hobby could go in a small crate. A coffee tasting hobby might fit nicely in a basket with tissue paper and labels.
Arrange the items in order of use. Put the first-step guide or starter item near the top. Place supporting supplies underneath or beside it. Keep the upgrade item visible so the box has a small “wow” moment.
You can make the box easier to understand with simple labels:
Start Here
First Try
For Later
Little Upgrade
Supplies
Keep This For Next Time
Labels are especially helpful if the hobby has several pieces. They make the box feel thoughtful and remove the need for him to guess what each item is for.
Do not cram the box too full. Empty space can actually make the gift look better. When every item has room to be seen, the whole box feels more intentional. Use tissue paper, shredded paper, fabric, or small dividers to keep things neat.
Finish with simple wrapping. Kraft paper, ribbon, twine, a handwritten tag, or a clean gift label is enough. The goal is not to make it overly fancy. The goal is to make it feel like an easy, ready-to-use experience.
When packaging is clear, the gift silently says, “You can open this and begin.”
Add a First Hobby Session Plan
A hobby starter gift box becomes even better when you include a first session plan. This is a small card or note that tells him exactly how to use the gift for the first time. It can feel simple, but it is incredibly helpful because it turns the box from “supplies” into “an experience.”
Pick a realistic first session length. For most beginners, 20 to 60 minutes is enough. You want the first try to feel easy, not like a commitment. If the hobby requires more time than that, break it into a setup session and a first project session.
A first session plan could look like this:
Make coffee or grab a snack.
Clear one small space on the table.
Open the guide.
Try the first project for 30 minutes.
Stop before it feels frustrating.
Put everything back in the box for next time.
That last step is helpful. Ending the first session cleanly makes the hobby feel manageable. If he finishes and the supplies are scattered everywhere, he may be less likely to come back to it.
Pair the hobby with a comfort item if it fits. Add a favorite drink, snack, playlist suggestion, candle, or cozy detail. A coffee hobby might include biscotti. A sketching hobby might include tea. A puzzle hobby might include a snack mix. A gardening hobby might include a small outdoor drink or playlist card.
Make the first session feel like something he gets to enjoy, not something he has to complete perfectly. You can write, “Try this once and see if it feels fun.” That takes the pressure off.
This is also a good place to add a shared option. You might write, “I can join you for the first try, or you can make this your solo thing.” That gives him room to decide what feels best.
The first session plan is the bridge between receiving the gift and actually using it. It makes the next step obvious.
How a Coach Could Help Him Turn the Hobby Into a Real Habit
A hobby starter gift box is a beautiful beginning, but sometimes the real challenge is follow-through. Many people like the idea of having a hobby, but everyday life gets in the way. Work, family responsibilities, chores, screens, and tired evenings can push personal interests to the bottom of the list.
This is where a coach could be helpful, especially if your husband wants more personal time but struggles to protect it. A coach does not need to turn the hobby into a serious goal. The point would be to help him create a realistic rhythm that fits his life.
A coach could help him clarify why the hobby matters. Maybe it gives him quiet time. Maybe it helps him feel creative again. Maybe it gives him something to look forward to after a long week. Maybe it helps him spend less time scrolling at night. Knowing the reason makes the habit easier to keep.
A coach could also help turn the hobby into a tiny goal. Instead of saying, “I want to learn photography,” he might choose, “I’ll take 10 photos every Saturday morning.” Instead of “I want to get into cooking,” it could be, “I’ll try one new spice blend this month.” Small goals are easier to repeat.
Helpful coaching questions might include:
What kind of hobby would feel enjoyable, not draining?
When would this fit naturally into your week?
What usually gets in the way of personal time?
What is the smallest version you could actually do?
How can you make it easy to start again next time?
A coach could also help with obstacles like perfectionism. Some people quit hobbies quickly because they do not feel good at them right away. A coach can help reframe the hobby as practice, play, or rest instead of performance.
That is the real value. The hobby does not have to become impressive. It just has to become something he enjoys enough to return to.
Add a Follow-Up Gift Idea for Later
One of the nicest parts of a hobby starter box is that it can become the beginning of a gift tradition. You do not have to buy every possible supply at once. In fact, it is usually better if you do not. Start small, watch what he actually uses, and let the next gift build from there.
If he enjoys the hobby, your follow-up gift can be a natural next step. This makes future birthdays, holidays, anniversaries, or Father’s Day gifts easier because you already have a theme that feels personal.
For example:
If he liked the coffee starter box, give him new beans, a grinder, or a tasting journal.
If he enjoyed sketching, give him better paper, a drawing class, or a new pen set.
If he tried gardening, give him new seeds, plant markers, or a small raised planter.
If he liked woodworking, give him a beginner project kit or tool storage.
If he enjoyed cooking, give him a specialty ingredient, cookbook, or small cooking class.
If he liked puzzles or strategy games, give him a harder set or a new game night idea.
The trick is to watch before buying more. Notice what he reaches for. Notice what he talks about. Notice whether he enjoys the process or just liked opening the gift. That helps you avoid turning a tiny spark of interest into a pile of unused supplies.
Keep the follow-up gift encouraging. It should say, “I noticed you liked this,” not “I expect you to keep doing this.” That difference matters. A hobby should feel like an open door, not an obligation.
You can also make the follow-up gift smaller. A single add-on can be more meaningful than a huge second box. The point is to support the interest without overwhelming it.
This is what makes the original starter box so useful. It gives you a thoughtful gift now, and it gives you clues for future gifts that feel even more personal.
A Thoughtful Way To Give Him Something That Feels Like His Own
A hobby starter gift box works because it gives your husband something many adults quietly need: an easy way to begin again. It is not just about the supplies. It is about giving him a small pocket of curiosity, personal time, and enjoyment.
The best version is simple. Choose one hobby, add beginner-friendly supplies, include clear guidance, and tuck in one small upgrade that makes the gift feel special. Then package it in a way that helps him understand exactly how to use it.
This kind of gift is especially meaningful if your husband often says he does not need anything. He may not need another gadget, shirt, or practical item. But he might appreciate something that helps him try a new interest without having to plan it himself.
It can also be a thoughtful gift for husbands who are dads. So much of daily life can revolve around work, family, errands, and responsibilities. A hobby box quietly says, “You still get to have something that is just yours.”
Keep the pressure low. He does not have to become an expert. He does not have to stick with it forever. He does not even have to be good at it. The gift is successful if it gives him a first try that feels enjoyable.
Before you finish the box, check that it answers these questions:
Is the hobby clear?
Can he start without buying anything else?
Does he know what to do first?
Is there one special item that makes it feel gift-worthy?
Does the note make it feel personal?
Can he try it in a realistic amount of time?
If the answer is yes, you have built more than a gift box. You have built a small invitation. A chance to try something new, take a little time for himself, and enjoy a hobby without making it complicated.
New-Dad Survival Kit: Father’s Day Gifts That Actually Help (Sleep, Gear, Routine)
Curated practical gifts new parents will use daily—organized as a single ‘survival kit’ or by need (sleep, feeding, outings).
You know that funny little problem with buying gifts for a new dad?
He probably does not need another random “World’s Best Dad” thing, but he also might not know what would actually make his day easier. So what do you give the dad who is running on weird sleep, half-finished coffee, baby gear everywhere, and a calendar that no longer belongs to him?
Maybe the answer is not one big impressive gift. Maybe the better move is a practical little survival kit: something he can use in the car, by the bed, in the kitchen, outside, or during those tiny windows of quiet he now appreciates way more than he used to.
Pick the one that sounds most like his real life right now.
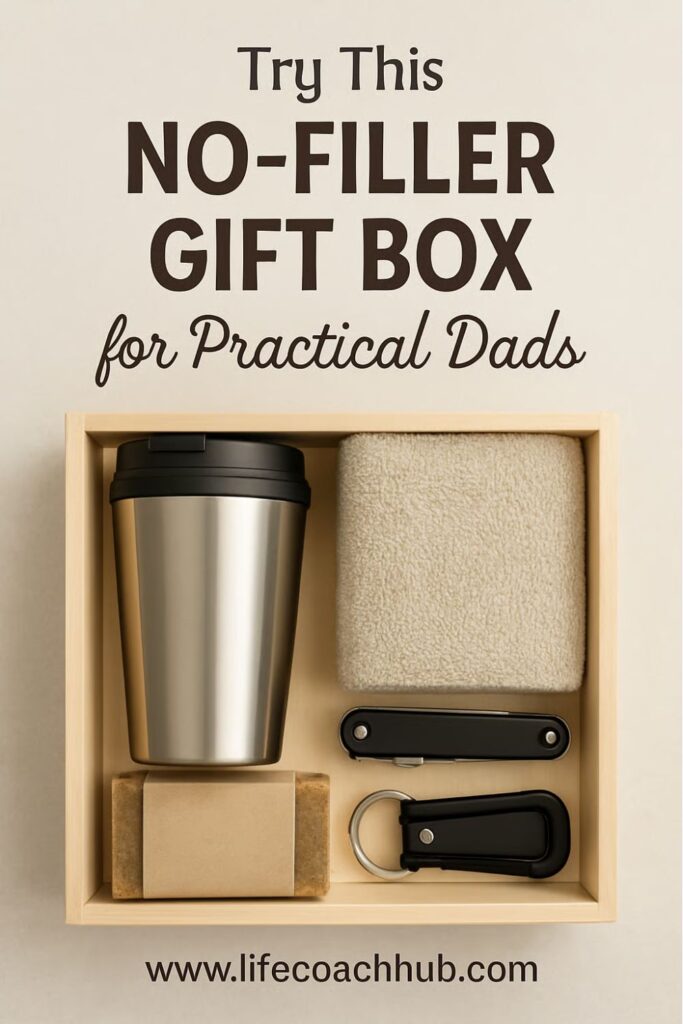
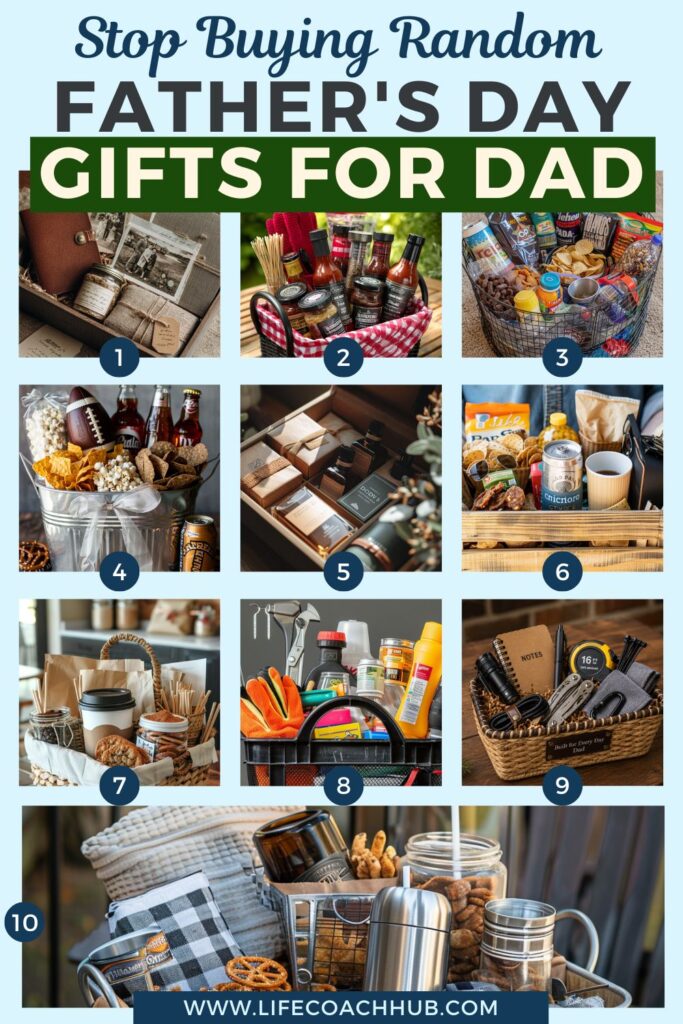
You know that moment when you want to give Dad something thoughtful, but you also know he does not want more stuff sitting around? This one is perfect for the dad who appreciates useful things, not decorative filler pretending to be a gift.
Great for dads who say they “do not need anything”
Keeps the gift small, useful, and easy to store
Helps you avoid the random basket problem
What makes this one so useful is that the whole gift has to earn its space. That is exactly the kind of thinking new parents need, because the house already has enough baby gear, burp cloths, bottles, and mystery items taking over every surface.
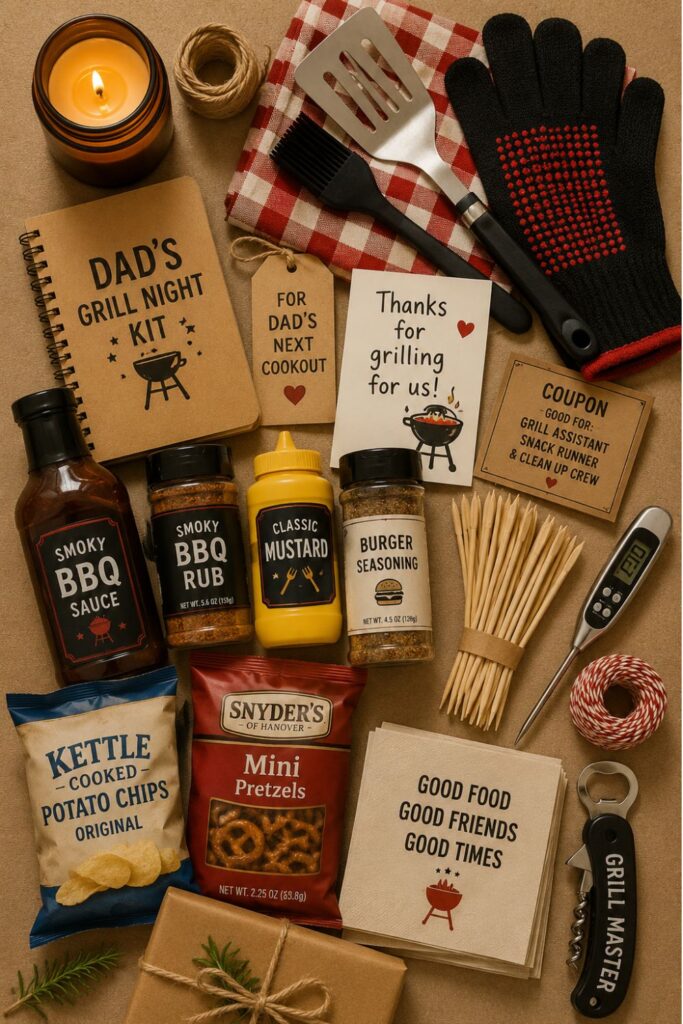
Maybe Dad’s best reset is standing outside by the grill for a little while, feeling like a normal person again. If he loves burger night, barbecue chicken, steak, or casual backyard meals, this bundle turns dinner into a small event without making anything complicated.
Works for Father’s Day, birthdays, or any “you deserve a good night” moment
Easy for kids to help assemble
Feels personal without needing a huge budget
The nice thing about this one is that it gives Dad a real-life moment to enjoy, not just another object to put away. For a new dad, that can feel surprisingly thoughtful.
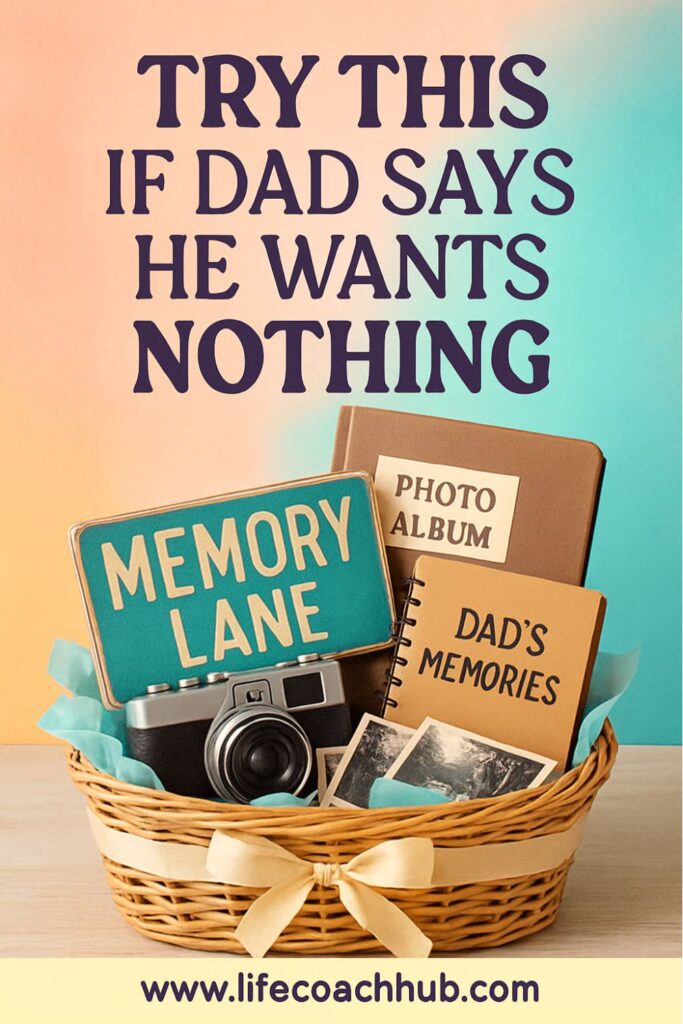
Some dads will smile politely at gadgets, but completely melt over a photo, a note, or a tiny reminder of a moment everyone else still remembers too. This is for the dad who loves meaning more than price tags.
Uses photos, notes, keepsakes, and family memories
Especially sweet for a first Father’s Day
Can be low-cost but still feel deeply personal
What feels refreshing here is that the gift is not trying to be impressive in the usual way. It is quiet, specific, and keepsake-worthy, which is often exactly what makes a new-dad gift feel unforgettable.
When little kids want to help, the gift can get adorable fast, but also chaotic fast. This one keeps the project simple enough for small hands while still making Dad feel genuinely seen.
Uses one treat, one coupon, and one decorated bag
Great for toddlers, preschoolers, and early elementary kids
Keeps the project cute without turning it into a craft marathon
What makes this worth saving is how doable it feels. You are not trying to create a perfect handmade masterpiece; you are helping a child give Dad something sweet, usable, and clearly made with love.
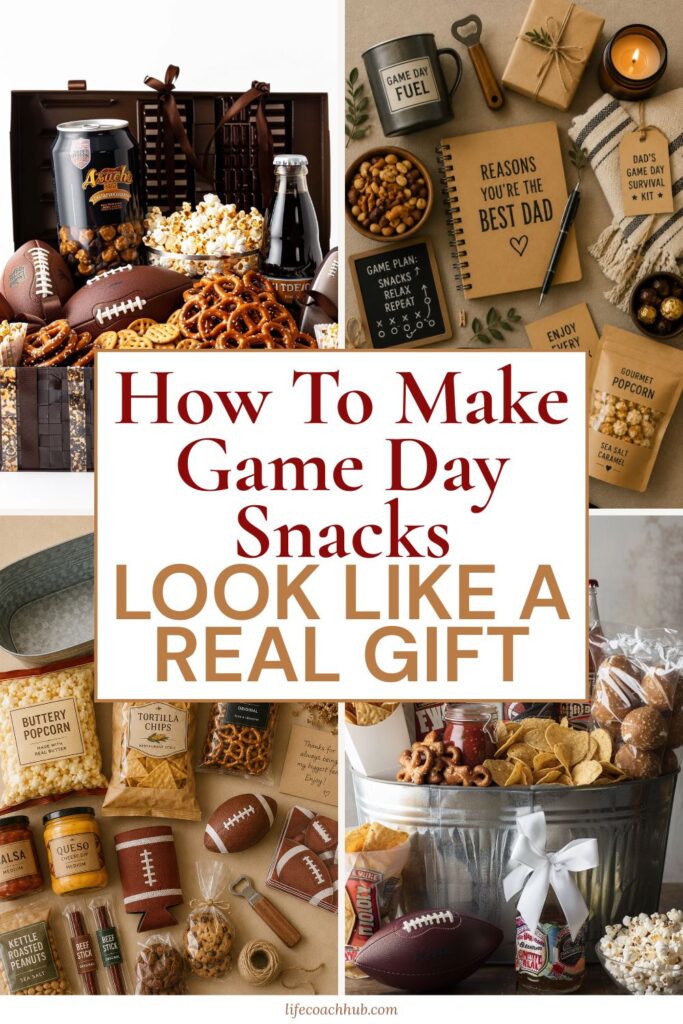
You know the dad who would be perfectly happy with snacks, drinks, and one uninterrupted game? This basket is for him. Especially if the new-baby season has made his old game day routine feel a little more scattered.
Built around his actual snack and drink habits
Easy to keep under $50
Can include team colors, notes, inside jokes, or kid-made details
The useful part here is that the basket does not need to be fancy to feel fun. It just needs to look intentional instead of like someone panic-bought groceries five minutes before kickoff.
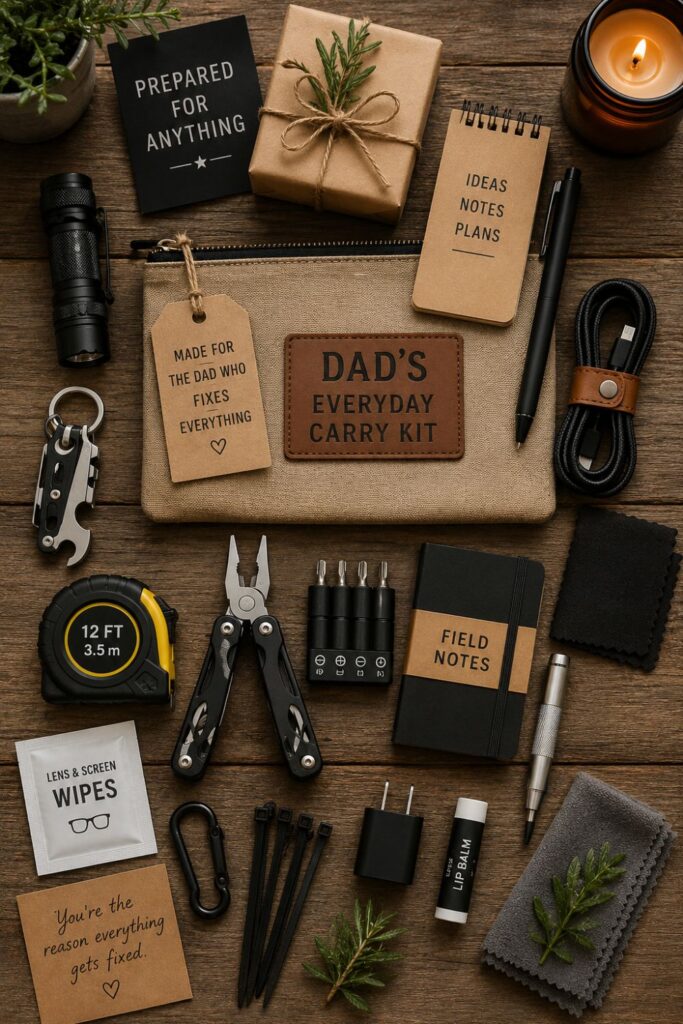
Some dads relax by fixing the thing, organizing the thing, cleaning the thing, or finding the exact little tool everyone else forgot existed. If that sounds like him, this kit meets him right where he already spends time.
Great for repair, cleanup, and small household projects
Works for fix-it dads without getting overly sentimental
Easy to personalize by the kind of projects he actually does
What makes this one smart is that it gives Dad supplies he can use long after the gift moment is over. That matters when you want something thoughtful but not wasteful.
Maybe Dad does not want a big plan. Maybe he just wants to sit outside for twenty minutes with a drink, a snack, and no one asking where the wipes are. This bundle is for that exact little pocket of peace.
Built around patio time, grilling, drinks, snacks, or quiet outdoor moments
Includes comfort items and evening-use extras
Feels ready to use right away
The best part is how real-life-friendly it is. A backyard wind-down bundle does not ask Dad to go anywhere, schedule anything, or pretend he has a whole free afternoon.
If Dad spends a lot of time driving, the car basically becomes a second command center. Add a new baby into the mix, and suddenly the car needs wipes, cleanup supplies, snacks, chargers, and a little more sanity.
Useful for commuting dads and on-the-go dads
Combines cleanup supplies, comfort items, and small essentials
Helps the gift feel organized instead of like random car accessories
What feels especially practical here is that the kit can be set up where Dad will actually use it. Not tucked away in a closet. Not forgotten in a gift bag. Right there in the car, ready for real life.
New dads and early mornings are already very familiar with each other. If coffee is part of his survival system, this kit makes that daily routine feel a little more noticed.
Uses coffee he already likes
Adds a treat, practical container, and personal touch
Easy for kids to help put together
The nice thing about this one is that it does not try to reinvent his morning. It simply makes the thing he already reaches for feel a little more thoughtful.
Some dads love small useful things. A flashlight that actually works. A pen where he needs one. A charging cable that saves the day. A tiny repair item that makes him feel prepared instead of annoyed.
Focuses on compact problem-solvers
Easy to customize for commuter dads, desk dads, or fix-it dads
Keeps the whole gift practical and under control
What makes this kit satisfying is that every item has a job. For a new dad who is constantly juggling tiny emergencies, that kind of everyday readiness can feel like a gift in itself.
The easiest way to make this feel like one complete gift is to stop thinking in terms of “basket” and start thinking in terms of daily pressure points.
Where does Dad need the most help right now?
Maybe mornings are rough, so the coffee kit makes sense. Maybe outings are the chaos zone, so the car care kit or everyday carry kit will get used constantly. Maybe the house is already packed, so the no-clutter gift box is the safest win. Maybe what he really needs is a small emotional pause, which makes the memory bundle the one that will hit hardest.
A survival kit does not need to solve everything. It just needs to say, “I see the part of your day that has been harder lately, and I made that part a little easier.”
The Sweet Spot: Practical Plus Personal
The best new-dad gifts usually land somewhere between useful and personal.
Too practical, and the gift can feel like errands in a box. Too sentimental, and it might not help with the real tired, messy, daily parts of new parenthood. The sweet spot is a useful gift with one personal detail tucked inside.
That could mean a kid-made card in a grill bundle. A handwritten note in a car kit. A photo in a coffee kit. A tiny coupon in a treat bag. The personal detail does not have to be big. It just has to feel like it came from his real life, not a generic gift aisle.
Next Steps
Pick the gift that matches the dad you are actually buying for right now. The tired morning dad. The commuter dad. The sentimental dad. The grill-night dad. The practical dad who will absolutely notice if the gift is useful.
Start with one section that sounds like his real routine, then build from there.
10 Budget-Friendly Father’s Day Alternatives (Gifts Dads Will Use)
Practical and inexpensive gift ideas targeted to dads who value function over fuss.
You know that weirdly hard moment when you want to get Dad something thoughtful, but every gift idea feels either too expensive, too random, or destined to sit in a drawer forever?
Maybe he says he does not need anything. Maybe he already buys what he wants. Maybe you are trying to help the kids give him something sweet without turning the whole thing into a giant craft-store production.
So what do you give a dad who values function over fuss?
Honestly, something he can actually use. Something that fits into his real life. His car, his coffee, his grill, his garage, his game day, his quiet evening outside. Pick the one that sounds most like your dad, then build from there.
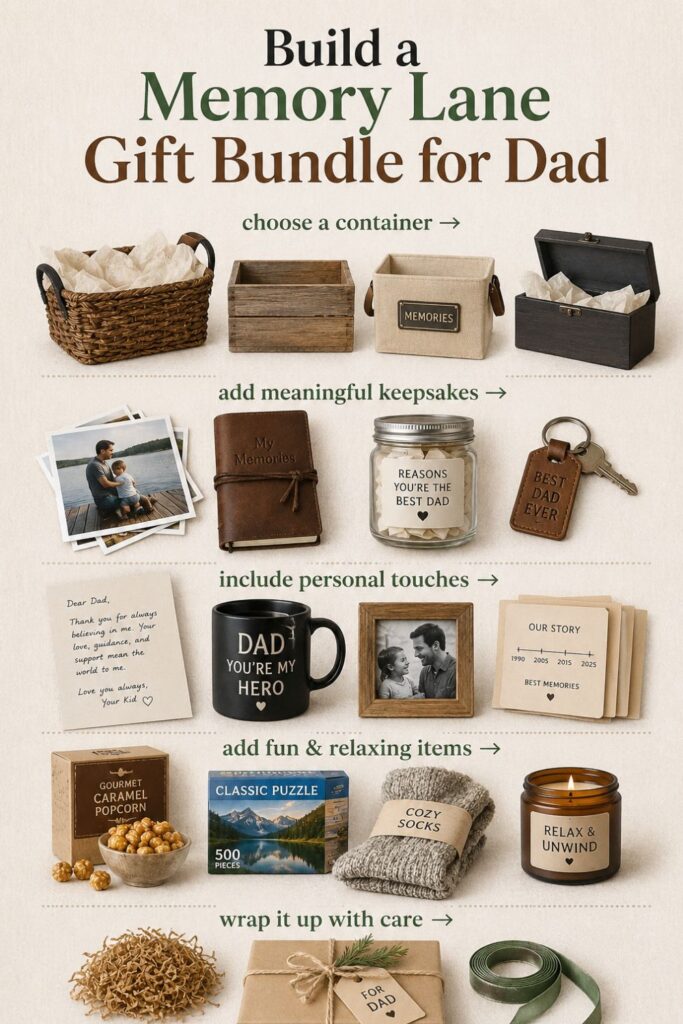
Maybe your dad is the type who saves old cards, brings up family stories at random, or acts casual about sentimental things while secretly loving them. A memory lane gift bundle is for that dad who does not need another gadget, but would absolutely pause over a photo, a note, or a little reminder of a moment everyone still remembers.
Great when you want the gift to feel personal, not pricey.
Perfect for kids, siblings, or the whole family to help with.
Sweet without becoming overly complicated.
The nice thing about this one is that it turns small things into something that feels lasting. A handwritten note, one old photo, or a tiny keepsake can feel more meaningful than a gift card when it is tied to a real memory.
You know the dad who somehow becomes happiest when he is standing near a grill with a drink, a spatula, and a strong opinion about seasoning? This gift is for that exact backyard-dinner energy.
Works for burger dads, steak dads, barbecue dads, and spicy-sauce dads.
Feels useful because it starts with how he already grills.
Easy for kids to help assemble without needing a big craft project.
What makes this gift feel smart is that it avoids the random barbecue basket problem. Instead of grabbing five unrelated grill items, you build around one clear food theme, so the whole thing feels intentional and ready to use.
Some dads basically live part-time in their cars. Work drives, errands, school pickups, weekend sports, long commutes, last-minute hardware store runs. A road trip snack box is one of those gifts that sounds almost too simple until you realize he will probably use it all the time.
Best for commuter dads, road trip dads, and always-on-the-go dads.
Keeps snacks, wipes, mints, and small extras in one place.
Feels practical without feeling boring.
This one is especially good when Dad is hard to buy for because the gift solves a real little annoyance. No digging around for gum. No gas station snack stop. No messy glove compartment situation.
Maybe Dad’s ideal gift is not a thing. Maybe it is permission to sit down, watch the game, eat his favorite snacks, and not have to organize anything. A game day gift basket works because it turns something he already enjoys into a small event.
Great for dads who love sports but do not want fancy gifts.
Easy to personalize with team colors, favorite snacks, or inside jokes.
Makes grocery-store items feel more gift-worthy.
The refreshing part is that this does not need to be expensive to feel fun. When the snacks match his actual game day habits, the gift feels like someone paid attention instead of just buying “sports dad” stuff.
This is for the dad who says, “I don’t need anything,” and kind of means it. Not because he is impossible, but because he really does not want more random stuff taking up space.
Ideal for minimalist dads and practical dads.
Built around useful items that earn their spot.
Works for a desk, car, garage, travel bag, or bedside drawer.
What makes this one worth clicking is the no-filler mindset. Instead of trying to make the box look huge, you keep it small, useful, and specific. Honestly, that is probably exactly why a practical dad would like it.
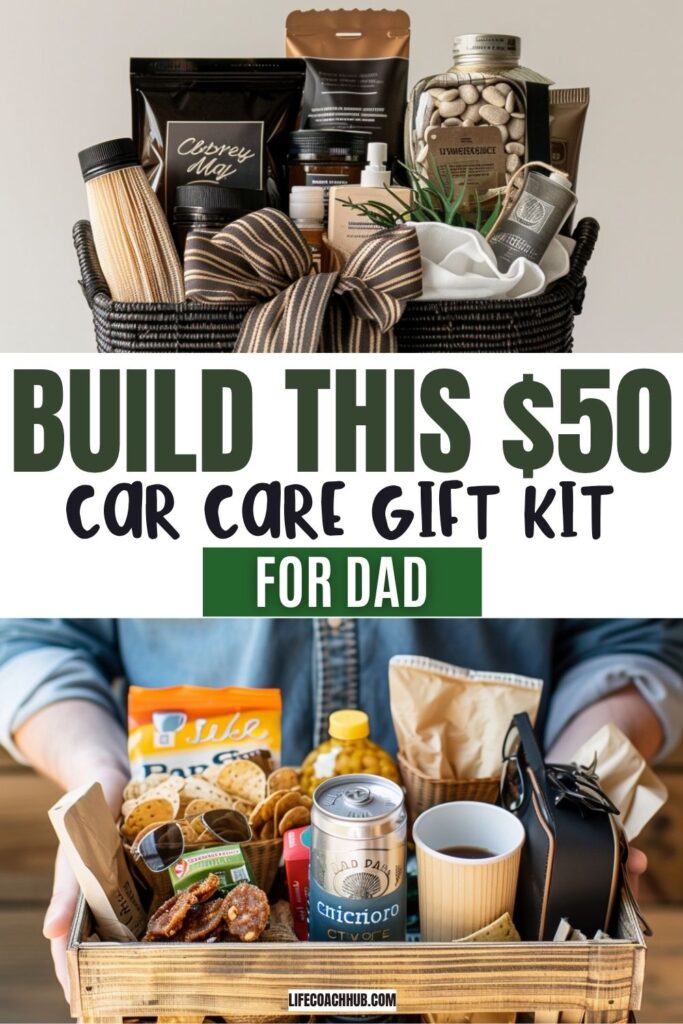
You know how a car can slowly become a second office, snack zone, storage closet, and weather shelter all at once? If Dad commutes or drives a lot, a small car care kit can feel weirdly thoughtful because it meets him in a part of life that probably gets annoying every single week.
Good for dads with long commutes or messy car routines.
Combines cleanup supplies, comfort items, and road essentials.
Easy to keep compact and under budget.
The best part is that this gift can be set up so he uses it immediately. Not someday. Not when he figures out where to put it. Right in the car, right where it helps.
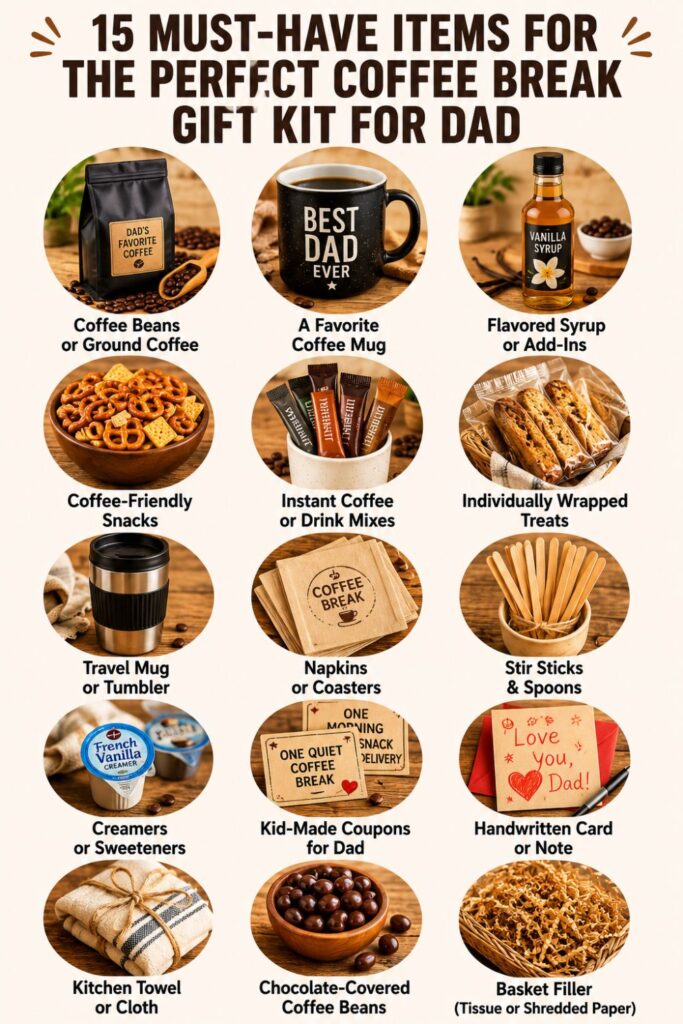
Some dads are up before everyone else, making coffee in the quiet, heading to work, or starting the day while the house still feels half-asleep. A coffee break gift kit is a small way to say, “We see that.”
Perfect for early risers and coffee routine dads.
Easy to build around coffee he already likes.
Kid-made touches fit naturally without taking over the gift.
This one feels especially sweet because it is not trying too hard. It takes a regular morning habit and makes it feel a little more noticed, which is often what dads appreciate most.
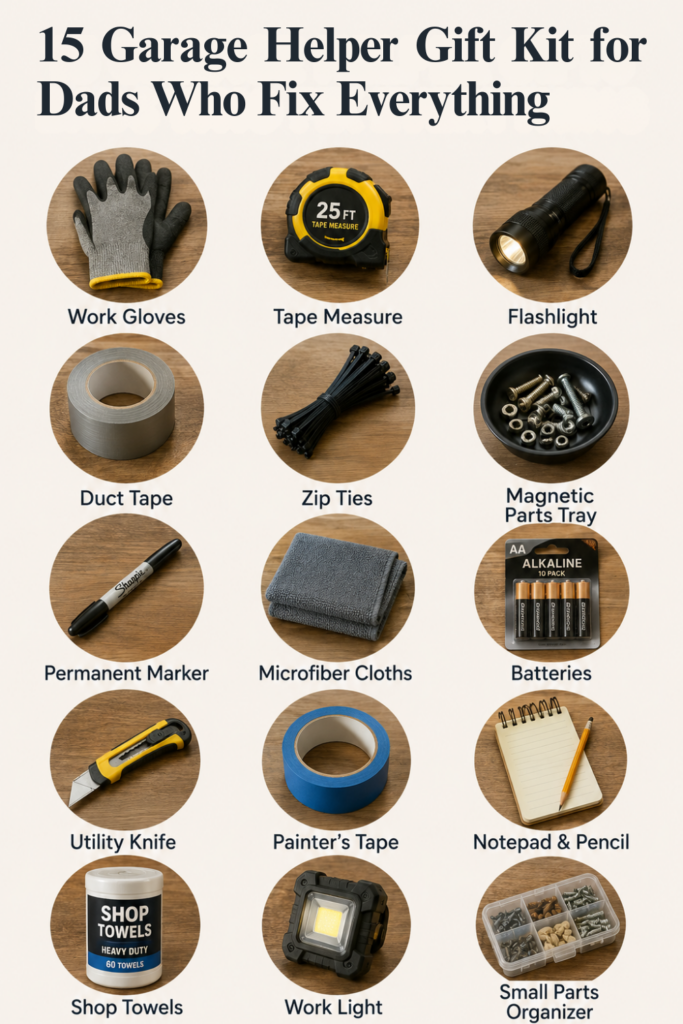
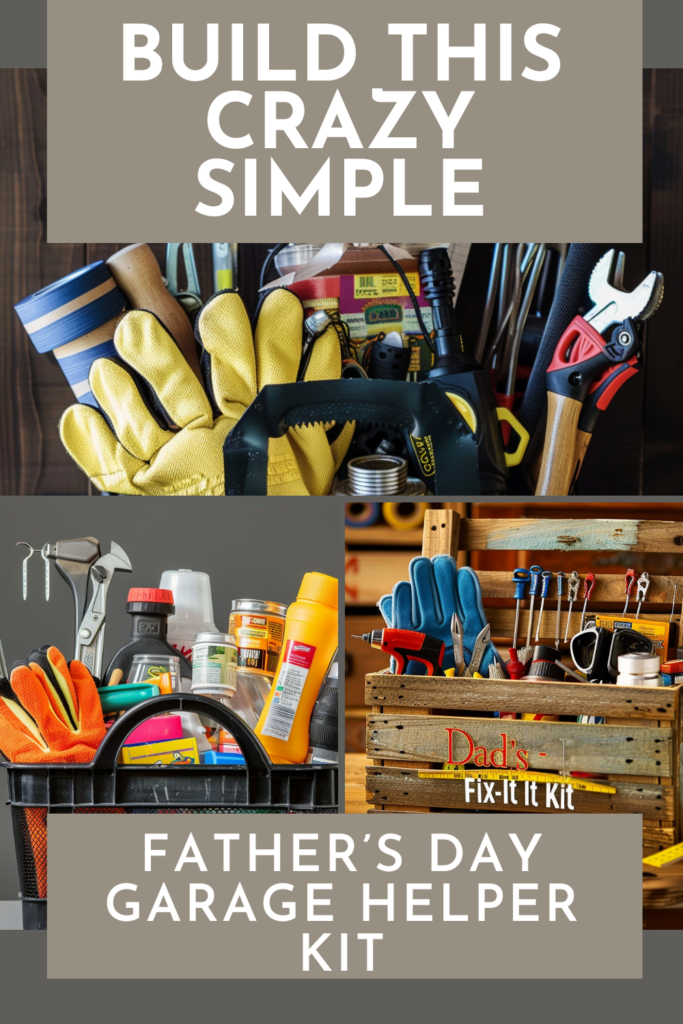
There is always one dad who somehow has the tool, the tape, the cleaner, the screw, the battery, or the random little part nobody else can find. A garage helper gift kit is for the dad who is always fixing, tightening, organizing, cleaning, or solving some tiny household problem.
Great for handy dads and project dads.
Practical enough for Father’s Day, birthdays, holidays, or just because.
Easy to customize based on what he actually does in the garage.
What makes this useful is that the gift can be built around real tasks instead of generic “dad tools.” Cleanup supplies, small repair items, one clever upgrade, and a reusable container can go a long way.
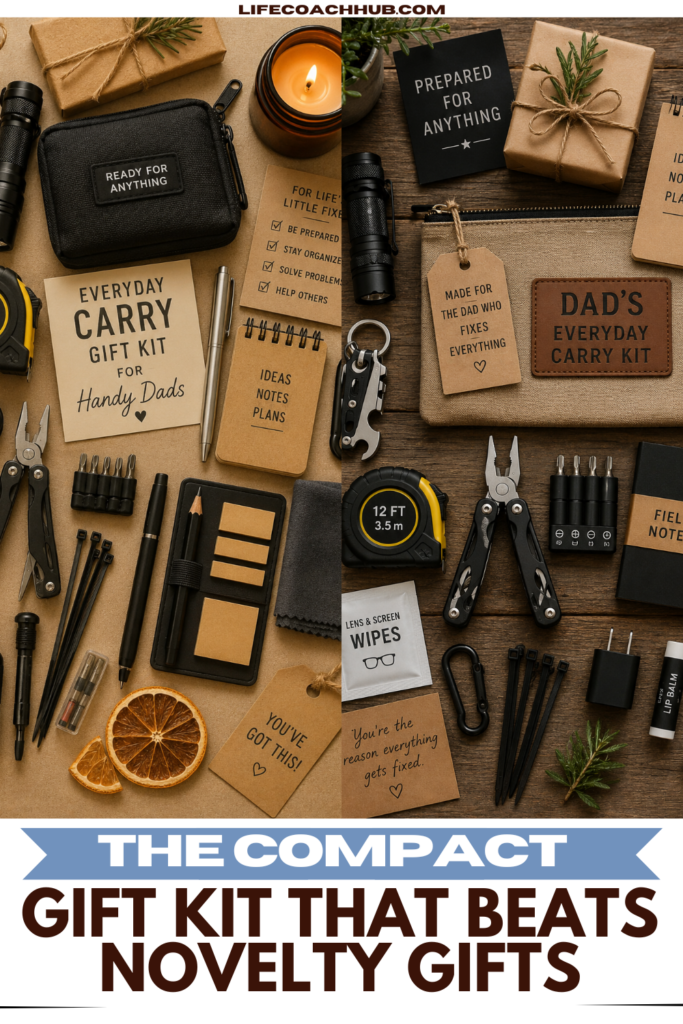
Maybe Dad does not need a huge tool set. Maybe what he actually needs is a few small problem-solvers he can keep close. A pen that works. A flashlight. A charging cable. A tiny notebook. A tape measure that is not missing when he needs it.
Smart for commuter dads, desk dads, and fix-it dads.
Small items feel more useful when they are grouped by routine.
Great when you want a compact gift that still feels complete.
The curiosity here is in how much better a gift feels when it is organized by real-life use. Instead of “here are some small items,” it becomes “here is a kit for the little problems Dad is always solving.”
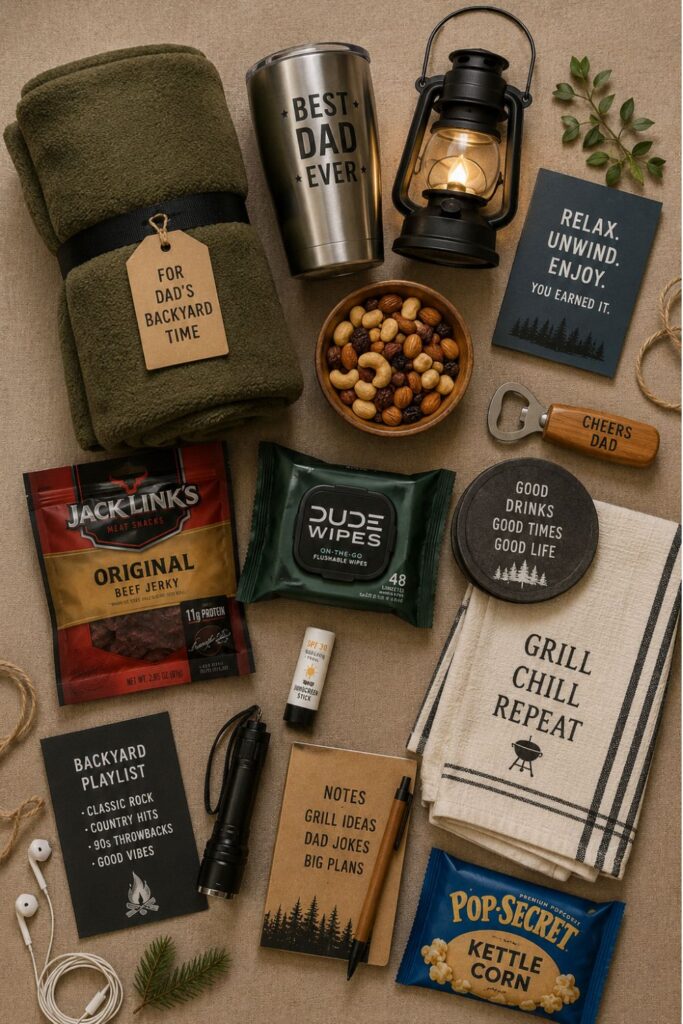
Some dads do not want a big outing. They want a chair outside, a snack, maybe a drink, maybe the grill nearby, maybe five quiet minutes where nobody asks where the tape measure is. A backyard wind-down bundle is for that kind of dad.
Great for patio dads, grilling dads, and quiet-evening dads.
Built around comfort, snacks, drinks, and evening-use extras.
Feels ready to enjoy right away.
The nice thing about this one is that it gives Dad an experience without making a big production out of it. It is simple, relaxed, and useful, which is exactly the point.
The Best Budget Dad Gifts Usually Start With His Real Routine
The easiest way to avoid a random gift is to stop asking, “What should I buy Dad?” and start asking, “Where does Dad already spend his time?”
That one shift makes the whole thing easier.
If he is always in the car, go with the road trip snack box or car care kit. If he loves being outside, the grill night bundle or backyard wind-down basket makes more sense. If he fixes everything, the garage helper kit or everyday carry kit probably feels more natural than another mug.
The gift does not need to be big. It just needs to feel like it belongs in his actual life.
Thoughtful Does Not Have to Mean Complicated
There is a lot of pressure to make dad gifts either impressive or sentimental, but most useful gifts live somewhere in the middle.
A practical gift can still feel personal. A snack box can include his favorite road trip candy. A coffee kit can include a note from the kids. A no-clutter box can include one small thing that quietly says, “I know what you actually use.”
That is the sweet spot. Not overdone. Not generic. Just specific enough that Dad can tell someone paid attention.
Next Steps
Pick the gift idea that sounds most like your dad’s everyday life. Start small, keep the theme clear, and do not worry about making it look perfect.
The best budget-friendly Father’s Day alternative is usually the one he will actually reach for again.
A decision framework plus a practical, step-by-step checklist to plan and execute a career change with minimal risk.
You know that weird, frustrating moment when your job looks fine on paper, but something in you keeps whispering, “I don’t think I can keep doing this”?
Maybe you’re not even sure what the problem is. Are you burned out? Bored? In the wrong role? In the wrong field completely? Or just having a rough season that will pass if you make a few changes?
That’s the hard part about career confusion. Everything can start to blur together.
One bad week can feel like a sign. One exhausting project can make you want to quit. But staying too long in the wrong career can quietly drain your confidence, your energy, and your sense of possibility.
So where do you start?
Pick the section that sounds most like your situation right now. Some of these are for the “I think I need a change” stage. Some are for the “I know I need help” stage. And some are for the “please give me a practical plan before I accidentally rage-apply to 47 jobs” stage.
You know that feeling when Sunday night starts ruining your whole weekend? Not because you have one annoying meeting on Monday, but because the thought of going back to work makes your whole body sink a little.
That is the kind of signal worth paying attention to.
Helps you separate a bad job season from a deeper career mismatch.
Makes career change feel normal, not like you failed at your first plan.
Gives you permission to notice what you keep pushing down.
The useful thing here is that it does not treat every bad mood as a reason to quit. Sometimes the problem is a boss, a commute, a workload, or a company culture issue. But sometimes the problem is that the work itself no longer fits who you are becoming.
Maybe you know you need support, but then you run into the next confusing question: career coach or career counselor?
And honestly, that question matters. Because the kind of help you need when you have no idea what career fits you is different from the kind of help you need when you know the direction, but cannot seem to move.
Clarifies which kind of support fits your current stage.
Helps you avoid paying for the wrong kind of guidance.
Makes the coaching vs counseling difference feel practical, not academic.
What makes this one helpful is that it gives you a cleaner way to think about support. If you are still exploring who you are and what kind of work might fit, counseling may make more sense. If you already have a goal but need strategy, momentum, and accountability, coaching may be the better fit.
Maybe your problem is not that you hate working. Maybe your problem is that the thing you care about most has been sitting on the sidelines for too long.
You keep telling yourself it is “just a hobby” or “not realistic” or “something I’ll do later.” But later keeps moving.
Gives you realistic ways to bring your passion into daily life.
Makes passion feel less like a fantasy and more like something you can test.
Opens up options beyond immediately quitting your job.
The refreshing part is that living your passion does not have to mean blowing up your life overnight. It can start with a class, a community, a part-time opportunity, or a tiny business experiment that lets you see what actually feels alive for you.
You know when you technically know you want “something better,” but every next step feels foggy?
That is where career coaching can start to make sense. Not because a coach magically hands you a perfect career answer, but because the right support can help you untangle what you want, what you are good at, and what is actually blocking you from moving.
Helps you understand what career coaching can actually do.
Shows where coaching fits into resumes, interviews, motivation, and direction.
Useful if you feel stuck but do not want to keep spinning alone.
The nice thing about this one is that it frames career coaching as both practical and personal. Yes, there may be resumes and networking and job search strategy. But there is also the deeper stuff: confidence, purpose, work-life balance, and the mental blocks that make a next step feel harder than it should.
This is for the moment when your brain jumps from “I need a change” to “Should I quit tomorrow?”
Please do not let panic become the plan.
A career change can be brave without being reckless. And this checklist is especially useful if you want to move carefully, protect your income, and leave your current role in a way your future self will thank you for.
Helps you slow down without staying stuck forever.
Turns “I need out” into actual steps.
Covers the practical pieces people forget when emotions are running high.
What makes this worth clicking is the low-risk angle. You get help thinking through money, timing, transferable skills, networking, resignation, handoff, and references. Basically, all the unglamorous details that can make a career change feel much safer.
Career dissatisfaction can be so annoying because burnout, boredom, and misfit can all sound the same in your head.
“I’m tired.” “I don’t care anymore.” “I need something different.” “I can’t keep doing this.”
Same feelings. Very different solutions.
Helps you name the real problem before making a huge move.
Gives you a way to test whether the issue is burnout, boredom, or true misfit.
Useful when you are tempted to make a dramatic decision just to feel relief.
The best part of this one is the decision framework. Instead of asking, “Should I quit or stay?” it gives you a more useful set of questions: What exactly is not working? Can it be fixed inside your current role? Do you need a smaller adjustment first? Or is the career itself no longer aligned?
Maybe you are very clear on one thing: this current path is not it.
But when someone asks, “So what do you want to do instead?” your brain goes completely blank.
That does not mean you are doomed. It means you are in the messy middle, where clarity has to be built through clues, experiments, and small next steps.
Helps you move without needing the full answer yet.
Gives you a way to collect career clues instead of forcing one big decision.
Great for people who know what they do not want, but not what they want next.
What feels especially validating here is that uncertainty is treated as part of the process, not a personal flaw. You do not need to have a perfect five-year plan before you start exploring. You just need a smarter way to test possibilities without gambling your whole life on a guess.
A lot of career stress gets shoved into one dramatic question: “Should I leave?”
But that question can be too big too soon.
Sometimes the better question is, “What exactly am I trying to get away from?” Maybe you are trying to escape exhaustion. Maybe you are craving more challenge. Maybe you are tired of performing a version of yourself that no longer feels true. Maybe the job is fine, but the future it leads to feels wrong.
That difference matters.
Because burnout may need recovery and boundaries. Boredom may need growth, responsibility, or a new environment. Misfit may need a bigger transition. And if you lump all three together, you can end up solving the wrong problem with a very expensive move.
A Career Change Gets Easier When You Stop Treating It Like One Giant Leap
The scary part of changing careers is usually not the work itself. It is the feeling that one decision has to determine everything.
But a better career change usually happens in smaller pieces.
You notice what is not working. You test a few possibilities. You talk to people. You name your non-negotiables. You update your materials. You build a financial runway. You make the next step less mysterious before you take it.
That is why the mix of articles here works well together. Some help you understand the signal. Some help you choose support. Some help you build a safer plan. And some help you move forward even when your confidence is not fully caught up yet.
Next Steps
Pick the article that matches the question you are actually asking right now.
If you are still deciding whether the problem is serious, start with the signs or decision framework. If you already know you want out, go to the checklist. If you feel lost and cannot name what comes next, choose the unclear-next-step article.
You do not have to figure out your entire future today. Just choose the next useful question.
Tracking sounds great until it starts feeling like a second job.
You set up the habit tracker, make the pretty system, promise yourself this is the one that will finally stick… and then three days later, the tracker itself becomes another thing to avoid. Not because you are lazy. Not because you do not care. Usually because the system is asking for too much attention before it has earned its place in your real life.
That is where simple tracking gets interesting. The right method does not make you monitor every tiny move. It helps you notice what matters, see progress sooner, and adjust before the whole plan quietly falls apart.
These reads are for anyone who wants structure without turning their life into a dashboard.
Big tasks have a sneaky way of making even capable people feel frozen. The problem is not always the task itself. It is the fog around it. When a goal feels too large, your brain has no obvious place to begin, so procrastination starts looking weirdly reasonable.
Helpful when a project feels too big to touch
Great for perfectionists who keep waiting for the “right” start
Makes progress feel visible before the finish line is anywhere close
What feels refreshing here is how practical the method is. Instead of telling you to “just start,” it gives your brain a smaller door into the work. That tiny shift can make the difference between staring at a goal and actually moving through it.
Focus can feel like a personality trait, as if some people were born with it and everyone else just gets to live in tab chaos forever. This guide is useful because it treats focus like something you can design around, not something you either magically have or do not.
Helps turn mental clutter into a clearer weekly plan
Makes priorities easier to see instead of just louder
Adds structure without pretending distractions do not exist
The best part is the way the system connects focus to rhythm. Time blocks, priority sorting, timers, breaks, progress checks. None of it feels flashy, but together it creates a container for your attention, which is usually what scattered days are missing.
A to-do list can be weirdly rude. It keeps pointing at what is still unfinished, even on days when you quietly handled a lot. The Done List flips that whole feeling by tracking what actually got completed.
Perfect for days when effort feels invisible
Helps small wins count instead of disappearing
Gives motivation something real to build on
This one is especially validating because it does not shame you for unfinished tasks. It helps you notice the work that happened in the margins: the email answered, the decision made, the small step taken when you did not have much energy to spare.
Some goals do not fail because the plan is terrible. They fail because there is no simple way to tell what is working until you are already frustrated. The Simple Scoreboard gives progress a place to show up.
Focuses on only 1 to 3 meaningful metrics
Helps separate real progress from vague feelings
Makes weekly adjustments easier and less dramatic
What makes this useful is the restraint. You are not tracking your entire personality. You are choosing a few signals that tell the truth about whether the goal is moving. That makes the weekly review feel more like a quick reset than a personal trial.
Some goals are not hard because they are complicated. They are hard because they are boring. Gamification gives your brain more reasons to stay interested before the big result finally shows up.
Turns progress into points, streaks, and rewards
Makes repeated action feel more satisfying
Helps motivation come from feedback, not pressure
The fun part is that this method does not ask you to become a different kind of person. It uses the brain’s love of visible progress and tiny wins to make the next action more appealing. Very useful if you lose interest when results take too long.
Starting gets all the attention, but finishing is often the real sticking point. Half-finished projects pile up when the brain never gets a clear reward for completion. This reward system makes the finish line feel worth reaching.
Rewards finished tasks, not perfect ones
Helps build momentum through small completion wins
Useful when you keep abandoning things near the end
The most helpful reframe here is that follow-through is not just about discipline. Sometimes your workflow has no emotional payoff built into it. Add a small reward to a clear finish line, and suddenly completion starts feeling more repeatable.
Daily habit trackers sound helpful until they turn into one more daily obligation. The 3-Number Weekly Review is for people who want insight without babysitting a spreadsheet every night.
Tracks effort, outcome, and friction once a week
Helps spot what made the routine harder than expected
Keeps the review honest without making it heavy
This is one of the most practical options for people who hate tracking because it respects the fact that life gets messy. Instead of asking for perfect daily logging, it gives you just enough information to make next week easier.
Low motivation gets blamed for almost everything, but sometimes the real issue is timing, energy, friction, or a plan that does not match your actual capacity. This tiny log helps you see the difference.
Tracks energy, effort, timing, and one quick note
Helps explain why consistency breaks down
Turns “What is wrong with me?” into “What needs adjusting?”
That last part is what makes this one feel so useful. The Energy-and-Effort Log is not about proving you tried hard enough. It is about collecting small clues so your routine can become more realistic, which is often where consistency finally starts.
Big tracking systems often fail for the same reason big goals do: they demand too much too soon. They ask for daily attention, perfect memory, constant updates, and a level of consistency that the actual goal has not even earned yet.
Smaller tracking works because it gives you a useful signal without taking over the whole process. A Done List shows effort. A Simple Scoreboard shows movement. A 3-Number Review shows what needs adjusting. An Energy-and-Effort Log shows where the hidden friction lives.
None of that requires becoming a productivity robot. It just gives you a clearer read on yourself, which is usually more helpful than another app, another planner, or another promise to “be more disciplined.”
The Best Tracking Method Is the One You Will Actually Use
There is no prize for choosing the most impressive system. The best tracking method is the one that still feels doable on a normal Tuesday, when energy is average, the day got weird, and you forgot half the plan by lunch.
That is why these methods work so well together as a menu. Need motivation? Try a Done List. Need focus? Use time blocks and a timer. Need consistency? Review three numbers. Need momentum? Add rewards or gamify the next step.
The point is not to track more. The point is to notice enough.
Next Steps
Pick the article that matches the problem you are actually having right now. Not the one that sounds most productive. The one that makes you think, “Oh, that is exactly where I keep getting stuck.”
Start there. Keep it small. Let the tracking help instead of becoming another thing to maintain.
A practical roundup of low-energy, high-impact networking tactics with exact scripts and templates for follow-up.
Networking gets a bad reputation because people picture the worst version of it: crowded rooms, forced smiles, stiff introductions, and the quiet pressure to somehow be memorable on command.
But the better version of networking is much smaller than that. It can be one useful question. One thoughtful follow-up. One LinkedIn message that does not feel like a pitch. One coffee chat where the conversation finally has somewhere real to go.
These reads are for the person who wants professional connections without turning into a different person to get them. Some are mindset-shifting. Some are script-heavy. Some are especially good for job seekers, graduates, introverts, overthinkers, and busy people who do not have the energy to “network more” in some vague, exhausting way.
Networking feels a lot less intimidating when it stops being about proving yourself and starts being about building real relationships over time. This read is especially helpful if networking makes you feel like you have to sell yourself before anyone even knows you.
A softer reframe for people who hate transactional networking
A reminder that listening can be more powerful than performing
A useful nudge to think long-term, not one-conversation-at-a-time
What feels refreshing here is the idea that networking does not have to be loud, fast, or self-promotional to work. A genuine “how can I be useful?” mindset can make the whole process feel less awkward and more human.
Finishing a degree and still feeling invisible in the job market can be deeply frustrating. This one speaks to that strange post-grad gap where credentials exist, but direction, confidence, and visibility still need to be built.
Good for graduates who feel underprepared after college
Helps connect job search basics with personal branding
Pushes beyond “send more resumes” into career presence
The most useful part is the way personal branding gets treated as practical, not fake. Your resume, LinkedIn, network, social presence, and confidence all tell a story before an interview ever happens.
Job boards can make the whole search feel like a numbers game you are somehow losing. This read pulls back the curtain on why so many opportunities never show up in public listings at all.
A helpful reality check for frustrated job seekers
Makes networking feel more strategic, not random
Shows why recruiters and resume visibility still matter
What makes this one click-worthy is the hidden-market angle. If you have been applying online and hearing nothing, the problem may not be your potential. You may simply be looking where everyone else is looking.
A scattered job search drains confidence fast. This roundup of job coaching tips is useful because it brings the big moving pieces together: strengths, resumes, interviews, networking, goals, time, mindset, and skill-building.
Strong for anyone who needs a clearer job search plan
Blends practical tactics with confidence-building
Helps turn career advice into smaller next moves
The value here is structure. Instead of treating every rejection like a personal failure, this gives you more places to adjust: your targeting, materials, interview practice, network, or weekly search habits.
Coffee chats can sound simple until you are actually sitting there wondering what to ask next. This one is great for introverts because it does not rely on charm, quick wit, or pretending to love small talk.
Gives you better questions before the awkward pause hits
Helps make career conversations feel useful, not performative
Includes prompts for openings, follow-ups, advice, and wrap-ups
The best part is how much pressure this takes off the conversation. Better questions can quietly carry the chat, which means you do not have to carry the whole room with your personality.
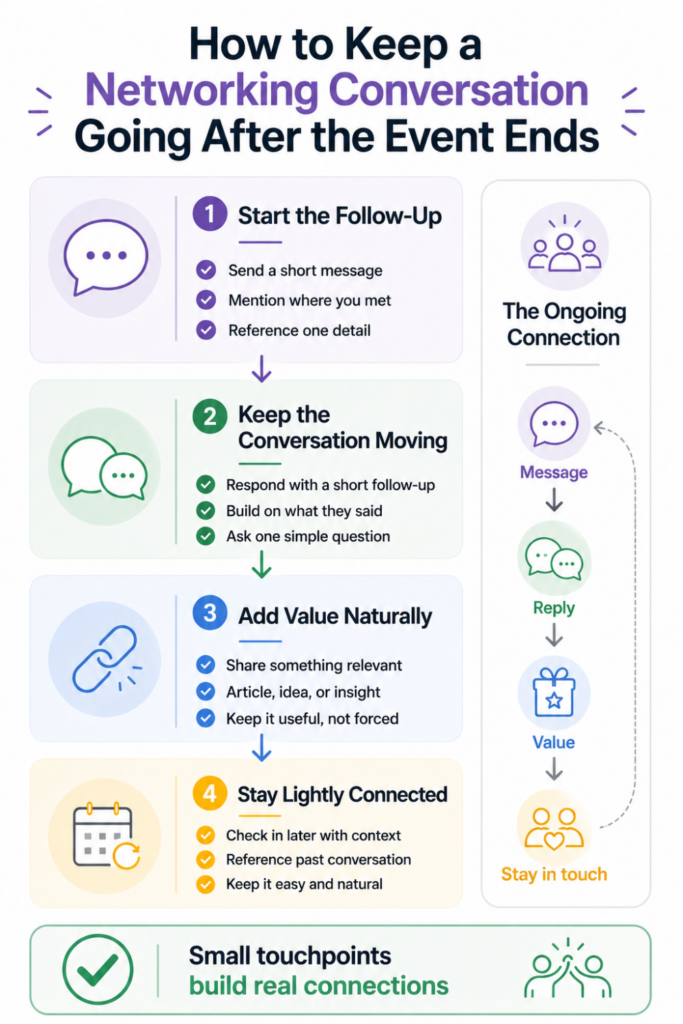
Following up is where a lot of good conversations quietly disappear. This system is made for people who mean well, get busy, and then realize two weeks later that they never sent the message.
A simple process that does not require a complicated CRM
Good for busy people who need consistency more than perfection
Turns follow-up into a tiny habit instead of a looming task
What feels especially useful is the three-line structure and weekly 10-minute check-in. It makes staying in touch feel doable, even when your schedule is already packed.
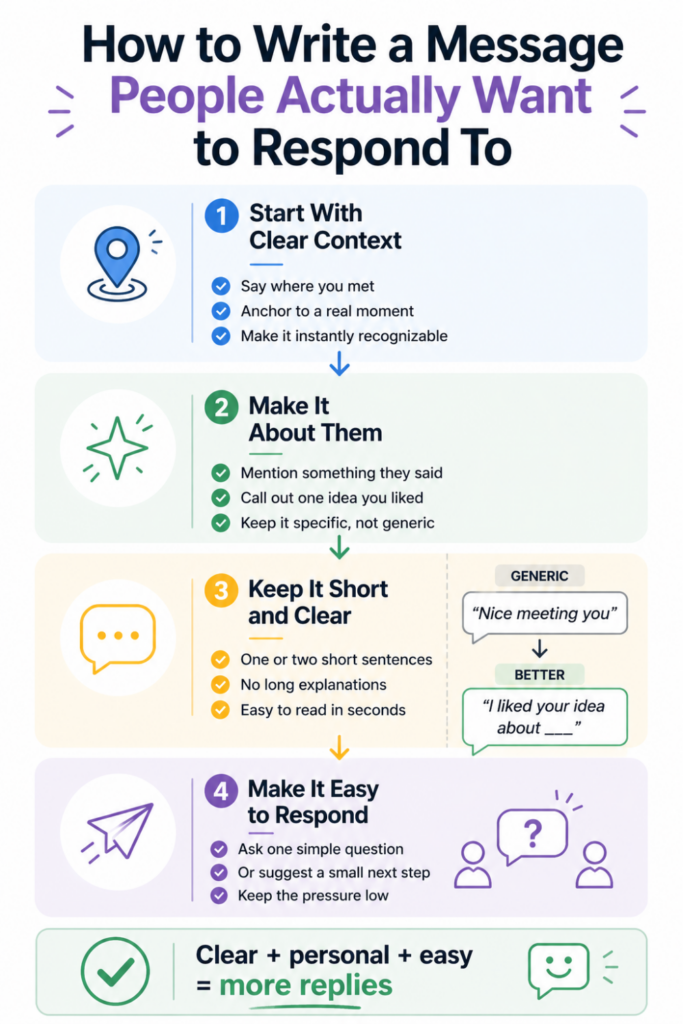
The event is not really the finish line. Often, the follow-up message is where the connection either becomes real or fades into “nice meeting you” territory forever.
Helps you write messages that feel specific and easy to answer
Covers different contacts, from recruiters to peers to weak ties
Calls out the small mistakes that make follow-ups feel stiff
This one is especially good if you tend to over-formalize everything after an event. A warmer, shorter, more memorable message can often do more than a perfectly polished paragraph.
LinkedIn can feel weirdly cold when every message sounds like a pitch. This read is for people who want to use the platform without becoming pushy, fake, or overly polished.
Makes LinkedIn feel more like conversation than self-promotion
Helps you choose easier people to contact first
Gives a low-pressure path from connection request to real chat
The most validating part is the reminder that LinkedIn networking does not need to be a big performance. Warm, specific, curious messages are often more effective than trying to sound impressive.
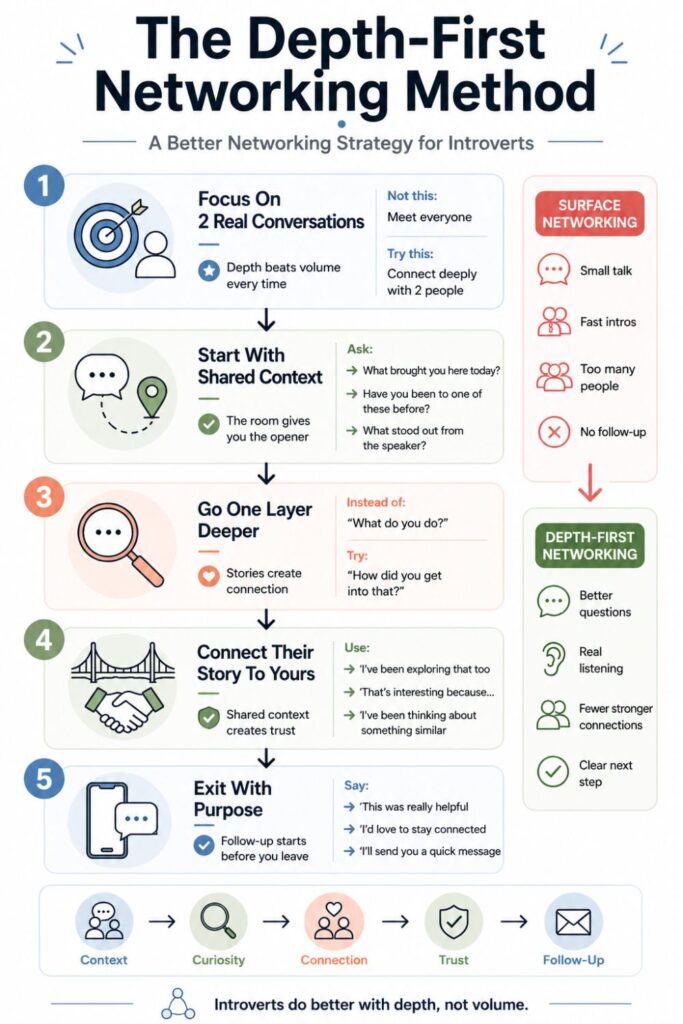
Some people do not hate people. They hate the shallow, floaty part of networking where everyone circles the room saying the same three things. This read gives that person a better way in.
Built around depth-first networking instead of working the room
Helpful for introverts, overthinkers, and career changers
Focuses on better questions, shared context, and meaningful follow-up
What makes this piece stand out is that it does not try to force small talk into being fun. It shows how to move toward more useful conversations without skipping the social steps that make people comfortable.
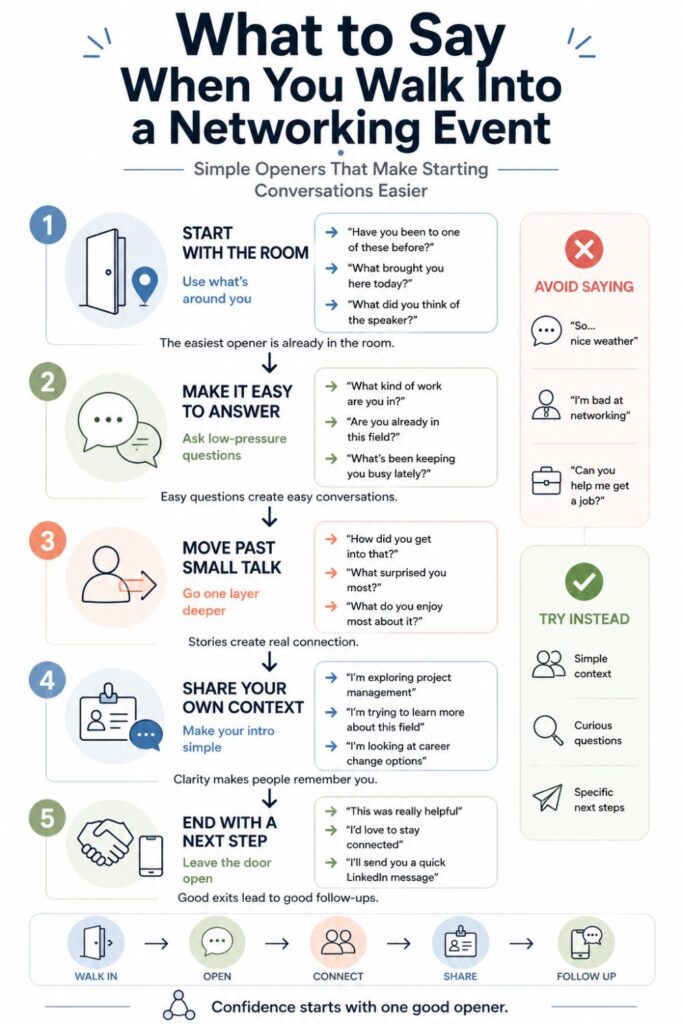
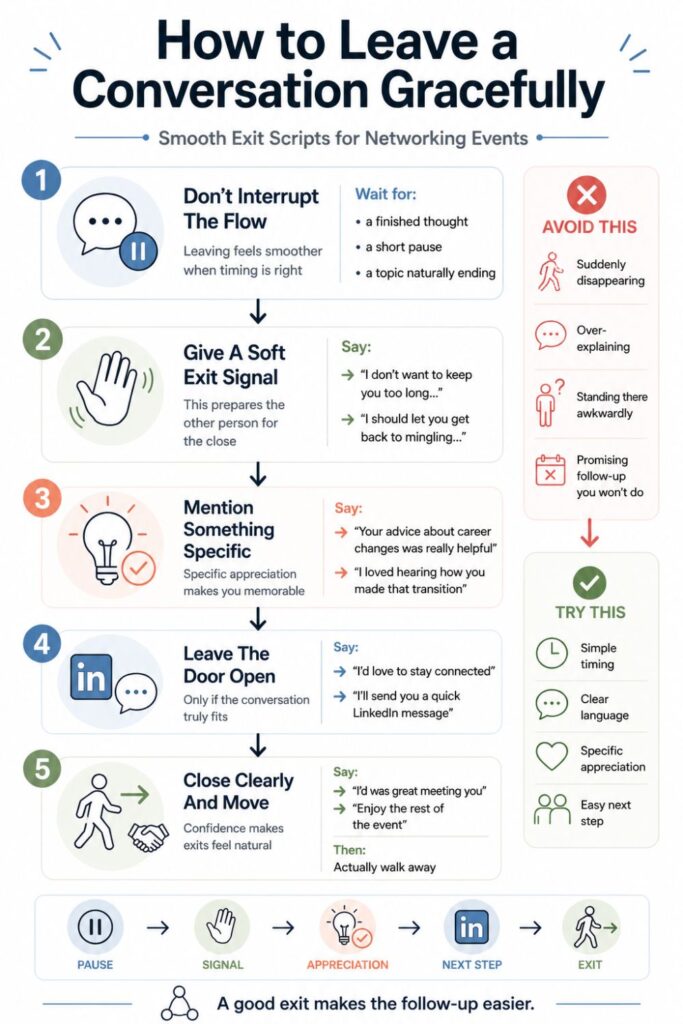
Networking events are full of tiny moments that feel harder than they look: walking in, joining a circle, introducing yourself, escaping politely, and figuring out whether to ask for contact info. This one gives you actual words for those moments.
Line-by-line help for the parts most people awkwardly improvise
Great for anyone who wants a plan before entering the room
Includes scripts for joining, staying, connecting, and leaving
The real appeal here is relief. Instead of vague advice like “be confident,” you get small phrases and simple moves that make the event feel less like a social test.
The strongest theme across these reads is that networking gets easier when it becomes smaller and more repeatable.
You do not need to become the most outgoing person in the room. You need a few reliable questions. A follow-up message you can send without rewriting it five times. A way to notice useful contacts. A reason to reconnect that does not feel random. A simple enough system that you will still use it when life is busy.
That is why scripts and templates are not a crutch. They are often what make natural conversation possible, especially when nerves, pressure, or decision fatigue get in the way.
How to Choose the Best Read for Right Now
Start with the part of networking that currently creates the most friction.
If showing up is the hard part, the anxiety and event-script pieces will probably help most. If conversations stall, the coffee chat and small talk reads are stronger starting points. If the real problem is letting contacts fade afterward, go straight to the follow-up system or post-event message templates.
For job seekers, the hidden jobs, personal branding, and career coaching reads add a wider strategy layer. They help connect networking to actual opportunity, not just vague “relationship building.”
Next Steps
Pick one article that matches the moment you keep avoiding. One script, one message, or one question can be enough to make the next conversation feel less awkward and more useful.
Networking can feel like one long performance when you hate small talk.
You walk into a room, everyone seems to already know what to say, and suddenly the most basic questions feel impossible. “What do you do?” sounds too stiff. “How’s it going?” sounds too empty. “Have you been to one of these before?” sounds like something you are saying only because you cannot think of anything else.
If that sounds familiar, the problem may not be that you are bad at networking. It may be that the usual version of networking is not built for the way you connect.
Some people enjoy floating from person to person, keeping conversations light and quick. But if you are more depth-first, that can feel draining. You may do better when a conversation has a point, a thread, or a real reason to continue.
This is where a different networking style helps.
Instead of trying to become a more polished small talker, you can learn how to guide conversations toward something more useful. You can prepare better questions, listen for meaningful details, explain what you are looking for clearly, and exit conversations without feeling awkward.
The goal is not to meet everyone in the room. It is to make a few conversations count.
A depth-first networking style works especially well if you:
Hate forced chatter
Overthink what to say
Prefer one-on-one conversations
Want career connections but dislike “selling yourself”
Feel awkward asking for help
Want a more natural way to follow up
This approach gives you structure without making you sound scripted. It helps you stop relying on charm and start relying on curiosity, clarity, and simple next steps.
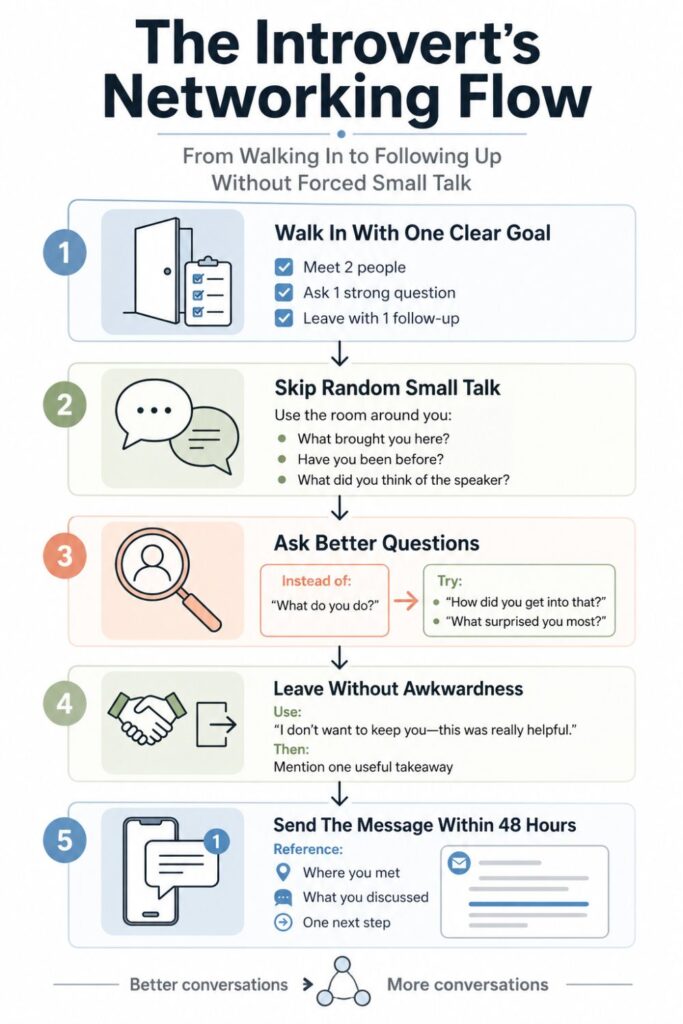
Stop aiming to “work the room”: Choose one specific outcome before you show up, such as meeting two people in your field, learning how someone entered a role, finding one useful resource, or reconnecting with one person you already know.
A lot of networking advice makes the whole thing sound like a numbers game. Meet as many people as possible. Hand out cards. Add everyone on LinkedIn. Keep moving.
That is exactly why it feels awful for people who dislike small talk.
If your brain works better in deeper conversations, “working the room” is the wrong goal. It encourages shallow interactions, rushed introductions, and that uncomfortable feeling that you are always supposed to be looking past the person in front of you.
A better goal is to define what would make the experience useful.
For example, before an event, you might decide:
“I want to learn how people move into this industry.”
“I want to meet one person who works in product marketing.”
“I want to practice explaining my career change clearly.”
“I want to reconnect with someone I already know.”
“I want to ask one person what skill helped them most.”
This gives your networking a purpose. You are not wandering around hoping something useful happens. You are entering the room with a small mission.
Trade quantity for quality: Give yourself permission to have fewer conversations that go deeper instead of trying to collect as many names, cards, or LinkedIn connections as possible.
This is where depth-first networking starts to feel different.
You might only have two good conversations at an event. That can still be a win. In fact, two thoughtful conversations are often more valuable than twelve forgettable introductions.
A good networking conversation should help at least one of these things happen:
You understand someone’s work better.
They understand what you are exploring.
You learn a practical next step.
You discover a shared interest or goal.
You leave with a reason to follow up.
Use a connection-first mindset: Treat networking as a way to understand people’s work, problems, goals, and ideas, not as a test of how socially impressive you can be.
You do not have to impress everyone. You do not have to sound fascinating in the first five seconds.
You only need to be clear, curious, and present enough to create a real exchange.
That mindset shift takes some pressure off. Networking becomes less about proving yourself and more about finding useful overlap.
Set a realistic success marker: Decide what would make the interaction “worth it” before you begin, so you are not measuring yourself against an extrovert’s version of a good networking night.
For someone who hates small talk, success might look like staying for one hour, starting three conversations, or sending one follow-up message afterward.
That counts. That is networking.
2. Prepare a Simple Conversation Goal Before You Go
Pick your main curiosity lane: Decide what you genuinely want to learn from people, such as how they got into their role, what skills helped them grow, what they wish they knew earlier, or what trends they are noticing.
The hardest part of networking is often not the event itself. It is the blank-mind moment right before you have to speak.
You see someone standing nearby, you know you should say something, and suddenly every possible opener feels weird. This is where preparation helps.
Not over-preparation. Just enough structure that you are not inventing the entire conversation from scratch.
A “curiosity lane” is the category of information you actually care about. It gives your questions a direction.
For example, your curiosity lane might be:
Career paths
Industry trends
Skill-building
Career changes
Leadership lessons
Job search advice
Freelance or business growth
Company culture
Tools and systems people use
Once you choose a lane, your questions get easier because they are connected to something real.
Write three anchor questions: Prepare a few questions that can work in almost any setting, so you are not trying to invent something clever while already feeling awkward.
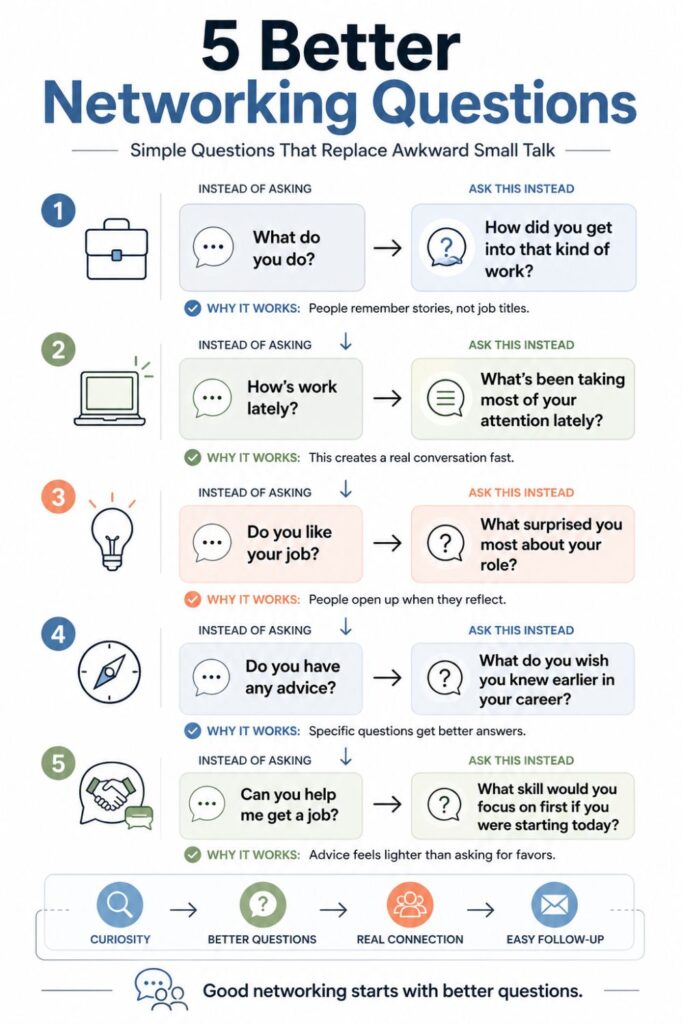
Your anchor questions should be simple, flexible, and easy for someone else to answer.
Good examples include:
“How did you get into the work you do now?”
“What surprised you most about this field?”
“What skill has helped you the most in your role?”
“What do you wish you knew earlier in your career?”
“What brought you to this event?”
“What kind of projects are taking most of your attention lately?”
These are not flashy questions. That is the point.
You want questions that feel natural, not like you memorized a list from a networking handbook.
Match questions to the room: For a career event, use work-focused questions; for a casual meetup, use interest-focused questions; for LinkedIn networking, use questions that connect to the person’s actual experience.
The same question does not fit every setting.
At a conference, it makes sense to ask about someone’s work, session takeaways, or industry perspective. At a casual community meetup, it may feel better to ask what brought them there or how they first got interested in the topic.
Online, you can be more specific because you have more context. If you are messaging someone on LinkedIn, reference their role, post, company, or career path.
For example:
“I noticed you moved from teaching into UX research. I’m exploring a similar transition and would love to ask what helped you make that shift.”
“Your post about client onboarding stood out to me. I’m curious what made the biggest difference in your process.”
“I saw you’ve worked in both nonprofit and tech roles. How did those experiences compare?”
Give yourself a fallback prompt: Keep one easy question ready for moments when your mind goes blank, such as “What brought you to this event?” or “What kind of work has been taking most of your attention lately?”
You do not need ten perfect questions.
You need one question that can save you when your brain freezes.
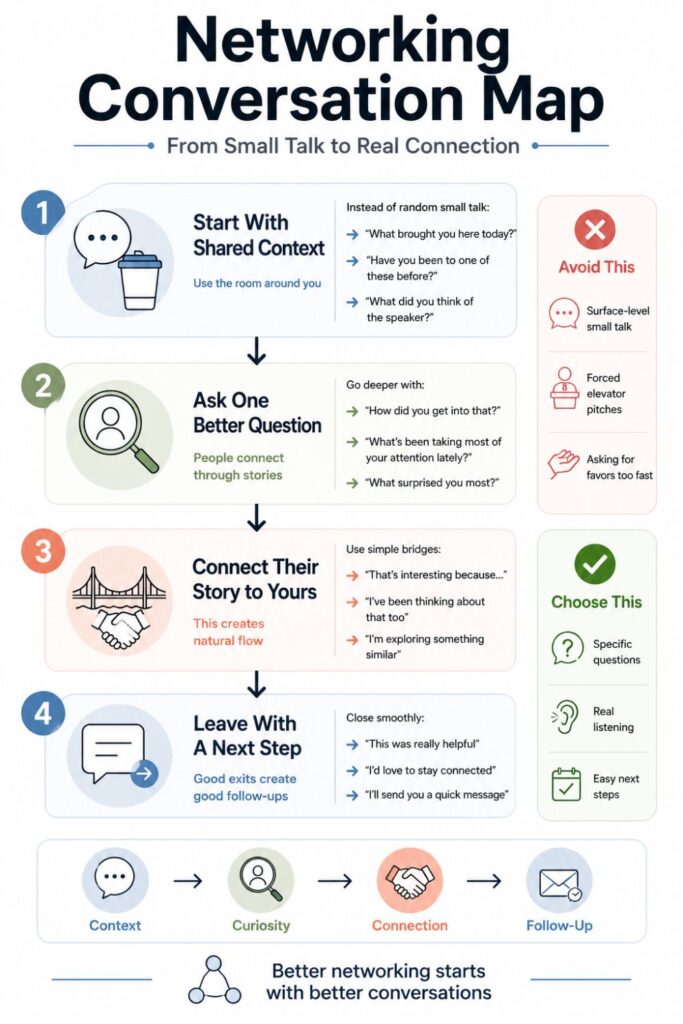
3. Start With Context Instead Of Random Chatter
Use the shared setting as your opener: Begin with something you both already have in common, such as the event topic, speaker, workshop, industry, company, or reason people are gathered there.
Small talk often feels painful because it seems random. You are trying to create a conversation out of nothing.
Context makes that easier.
If you are at the same event, webinar, workshop, conference, coffee meetup, or online community, you already have a shared starting point. Use it.
You do not need a clever opener. You need an obvious one that gets the conversation moving.
For example:
“Have you been to this event before?”
“What did you think of the speaker?”
“Are you working in this field already, or exploring it?”
“What made you decide to come today?”
“I’m new to this group. Have you been part of it long?”
These questions work because they are connected to the moment you are both in. They do not feel forced, and they give the other person an easy way to respond.
Make the first question easy to answer: Avoid opening with something too intense or personal; start with a low-pressure question that lets the other person choose how much they want to share.
Depth-first networking does not mean you start with deep questions immediately.
That can feel too abrupt.
The first question should open the door. The deeper question comes after there is a little trust, context, or momentum.
For example, instead of starting with:
“What is your biggest career struggle right now?”
Start with:
“What kind of work do you do?”
“How did you get into that?”
“What has that been like lately?”
The third question is where depth begins. You ease into it.
Add a small reason for asking: Make the question feel natural by attaching it to your own context, such as “I’m trying to learn more about this field, so I was curious…”
This is one of the easiest ways to make a question feel less awkward.
A reason gives the other person context. It also makes you sound more intentional.
For example:
“I’m exploring a career change, so I’m always curious how people found their way into this field.”
“I’m trying to get better at understanding different roles in this industry. What does your day-to-day look like?”
“I’m new to these events, so I’m curious what usually brings people here.”
That little explanation reduces the pressure. It tells the other person why you are asking and gives them a clearer way to respond.
Move past the opener quickly: Once the conversation starts, do not stay stuck on the weather, traffic, or room logistics; use the opener as a bridge into something more useful.
The opener is only the beginning. Do not judge the whole conversation by those first few seconds.
Your job is not to make small talk magical. Your job is to use it as a doorway.
4. Use Better Questions To Go Depth-First
Ask for the story behind the role: Instead of only asking what someone does, ask how they ended up doing it, what surprised them about it, or what made them choose that direction.
“What do you do?” is not a bad question. It is just incomplete.
The answer usually gives you a job title, not a conversation. Someone says, “I’m a project manager,” or “I work in marketing,” and then you have to figure out where to go next.
The better move is to ask for the story behind it.
For example:
“How did you end up in that kind of work?”
“Was that always the plan, or did you find your way into it?”
“What made you choose that direction?”
“What surprised you about the role once you were actually in it?”
These questions work because most careers are not perfectly linear. People usually have a story. They made a decision, took a chance, changed direction, learned something the hard way, or followed an opportunity they did not expect.
That gives the conversation more texture.
Look for lessons, not just facts: Questions like “What do you wish you knew earlier?” or “What helped you the most when you were starting?” invite more useful answers than simple status updates.
If you only ask factual questions, the conversation can stay flat.
For example:
“How long have you worked there?”
“How many people are on your team?”
“What software do you use?”
These can be useful, but they rarely create much connection on their own.
Lesson-based questions are better because they invite reflection.
Try questions like:
“What do you wish more people understood about your work?”
“What advice would you give someone starting in this area?”
“What mistake do you see people make when they try to break into this field?”
“What helped you get more confident in that role?”
“What skill made the biggest difference for you?”
These questions are still professional, but they go deeper. They let the other person share experience, not just information.
Follow the energy in their answer: Notice which part they say with more detail, humor, frustration, or interest, then ask a follow-up about that part.
This is where active listening starts to matter.
If someone gives a short answer to one part but lights up about another, follow the energy. That is where the real conversation is.
For example, if someone says, “I started in sales, then moved into operations, which was a huge learning curve,” you might ask:
“What made the operations shift such a learning curve?”
“What helped you adjust?”
“Did you know you wanted to move that direction?”
You are not forcing a new topic. You are picking up the thread they already handed you.
Avoid turning the conversation into an interview: Balance your questions with small pieces of your own context, so the exchange feels mutual instead of like you are collecting information.
After they answer, add a small bridge.
For example:
“That makes sense. I’ve been trying to understand whether I’d enjoy that kind of work, so that’s helpful.”
“I relate to that. I’m in a role now where I’m realizing communication matters more than I expected.”
“That’s interesting because I’ve been thinking about making a similar shift.”
Depth-first networking is not interrogation. It is a thoughtful exchange.
5. Make Active Listening Do Most Of The Work
Reflect back the useful part: Repeat or lightly summarize what you heard, such as “So it sounds like the hardest part was getting that first client” or “It seems like the transition was more strategic than accidental.”
If you hate small talk, active listening is one of your biggest advantages.
You do not have to be the funniest person in the room. You do not have to carry the conversation with endless stories. You can become good at noticing what matters and helping the other person feel understood.
That alone makes you more memorable.
A simple reflection shows that you are not just waiting for your turn to talk.
For example:
“So the biggest shift was learning how to manage stakeholders, not just the project plan.”
“It sounds like the role became easier once you understood the company culture.”
“So the hard part was not getting started, but knowing which opportunities to say yes to.”
This kind of response does two things. It proves you listened, and it gives the other person a chance to clarify or go deeper.
Ask one layer deeper: Use their answer to guide the next question instead of jumping to a new topic, which helps the conversation feel thoughtful and grounded.
Most people jump too quickly.
They ask what someone does, then where they live, then whether they liked the speaker, then what they do on weekends. The conversation keeps resetting.
Depth-first networking works better when you stay with one thread a little longer.
For example:
Person: “I moved into this field after realizing I wanted more creative work.”
You: “What helped you figure out that creativity was the missing piece?”
That is one layer deeper.
Person: “Honestly, I kept feeling drained in roles where I was only executing other people’s plans.”
You: “That makes sense. Did you look for a role that was more strategic, or did you find that by accident?”
Now you have a real conversation.
Notice practical clues: Pay attention to names, tools, roles, companies, books, communities, or habits they mention, because these can become follow-up points later.
Useful networking details often show up casually.
Someone might mention:
A book that helped them
A certification they recommend
A community they joined
A person who influenced them
A tool their team uses
A mistake they would avoid
A company that hires beginners
A skill they wish they had learned sooner
These are gold for follow-up.
You can later say, “You mentioned that community for new UX researchers. I looked it up and it was exactly the kind of thing I needed. Thank you.”
That is much stronger than, “Nice meeting you.”
Let pauses breathe: You do not have to fill every quiet second; a short pause can make the conversation feel more intentional and gives the other person space to say something more real.
A pause is not always a problem.
Sometimes it means someone is thinking. Sometimes it means the conversation is shifting from automatic answers to more thoughtful ones.
Let that happen.
6. Explain Yourself Clearly Without Oversharing
Create a one-sentence professional snapshot: Prepare a simple line that says who you are, what you are exploring, and why you are there, without launching into your full career history.
One reason networking feels stressful is that you know people will eventually ask about you.
“What do you do?” can feel simple until your answer is complicated. Maybe you are changing careers. Maybe you are between roles. Maybe your job title does not match what you want next. Maybe you are still figuring it out.
That is why a professional snapshot helps.
It gives you a short, clear answer you can use without rambling.
A good snapshot might sound like:
“I’m currently in customer support, and I’m exploring project management roles because I like organizing people, timelines, and moving pieces.”
“I work in education, but I’m starting to learn more about instructional design and corporate training.”
“I’m a marketing coordinator, and I’m trying to grow into more strategy-focused work.”
“I’m between roles right now and using this time to learn more about companies doing work in this space.”
The goal is not to explain everything. It is to give the other person a clear starting point.
Keep your goal understandable: If you are networking for a job, pivot, mentor, collaboration, or industry insight, say it plainly enough that the other person knows how to place you.
People cannot help you if they cannot understand what you are looking for.
This does not mean you need to ask for a job immediately. In fact, you usually should not. But you can make your direction clear.
Instead of:
“I’m just trying to see what’s out there.”
Try:
“I’m trying to understand what entry points make sense for someone moving from operations into customer success.”
Instead of:
“I’m kind of interested in marketing.”
Try:
“I’m exploring content marketing roles, especially ones where writing and strategy overlap.”
Specificity gives people something to respond to.
Use specifics instead of vague ambition: Replace “I’m just trying to figure things out” with something clearer, such as “I’m exploring project management roles in healthcare and trying to understand what skills matter most.”
You do not need to sound certain when you are not. You can be honest and still be clear.
Try phrases like:
“I’m still narrowing it down, but I know I’m interested in…”
“I’m exploring a few paths, especially…”
“I’m trying to learn more before I make a move.”
“I’m not ready to apply yet, but I’m trying to understand what the role actually looks like.”
That kind of language feels grounded. It also invites advice.
Make your ask light and appropriate: Ask for advice, direction, or a resource before asking for a referral, introduction, or favor, especially in a first conversation.
A light ask might be:
“Is there a resource you recommend for someone learning about this?”
“Is there a skill you would focus on first?”
“Would it be okay if I connected with you on LinkedIn?”
“Would you mind if I followed up with one question later?”
Small asks are easier to say yes to.
They also build trust before you ask for anything bigger.
7. Transition Without Feeling Awkward
Signal the close before you leave: Use a simple transition line like “I don’t want to keep you from the rest of the event, but I really appreciated hearing about this.”
Ending a conversation can be harder than starting one.
You may worry that leaving sounds rude. So you stay too long, the conversation fades, and then the ending feels even more awkward.
The fix is to close while the conversation still has energy.
A transition line gives both people an easy exit.
Try:
“I don’t want to take up your whole evening, but this was really helpful.”
“I’m going to grab some water, but I’m glad we got to talk.”
“I should say hello to a few more people, but I really appreciated this conversation.”
“I’ll let you keep mingling, but thank you for sharing that.”
“I’m going to step over to the next session, but I’d love to stay connected.”
These lines are polite, clear, and normal. You are not abandoning the person. You are simply closing the loop.
Name the useful takeaway: Mention one specific thing you enjoyed or learned, which makes the ending feel warm instead of abrupt.
Specificity makes an exit feel intentional.
For example:
“Your point about building relationships before you need them was really helpful.”
“I appreciated what you said about learning stakeholder management early.”
“That recommendation for the community is exactly what I was looking for.”
“It was useful to hear how you made that transition from sales into operations.”
This turns the ending into a moment of appreciation.
It also makes you easier to remember.
Ask for the next step only if it fits: If the conversation was genuinely useful, ask whether it would be okay to connect on LinkedIn or follow up with one question later.
Not every conversation needs a follow-up. That is important.
Sometimes a conversation is pleasant, but there is no real reason to continue. Let it be enough.
But if there is a clear connection, ask simply:
“Would it be okay if I added you on LinkedIn?”
“Could I follow up later about the resource you mentioned?”
“Would you mind if I sent you one question after I look into that program?”
“I’d love to stay connected if you’re open to it.”
Do not make it too heavy. You are opening a door, not asking for a commitment.
Have an exit script ready: Prepare a few polite lines in advance so you are not trapped in conversations because you cannot think of a graceful way to leave.
This is especially useful if you overthink.
You can keep two or three exit lines in your back pocket and use them whenever you need to move on.
A graceful exit is part of networking. It is not a failure.
8. Follow Up With Something Specific
Send the follow-up while the conversation is fresh: Reach out within a day or two, before the details fade and the connection goes cold.
The follow-up is where a lot of networking quietly falls apart.
You have a good conversation. You feel proud of yourself. You exchange names or connect online. Then nothing happens.
A week passes. Then two. Suddenly it feels too late, so you do nothing.
That is why it helps to follow up quickly.
You do not need to write a perfect message. You only need to send something clear while the conversation is still easy to remember.
For example:
“Hi Maya, it was great meeting you at the career panel yesterday. I really appreciated what you shared about moving from nonprofit work into program management. Your point about learning to manage timelines before managing people gave me a lot to think about.”
That is enough to reopen the connection.
Reference the exact conversation: Mention the topic, resource, advice, or story you discussed so the message does not feel generic.
A weak follow-up says:
“Great meeting you. Let’s stay in touch.”
That is fine, but forgettable.
A stronger follow-up says:
“Great meeting you at the product meetup. I appreciated your advice about building a portfolio around real business problems instead of fake case studies.”
That reminds them who you are and why the conversation mattered.
Specificity does the work.
You can reference:
The event where you met
A piece of advice they gave
A role or career path they described
A resource they mentioned
A shared interest
A question you discussed
A next step you said you would take
Keep the message short: A good follow-up does not need to be impressive; it just needs to be clear, appreciative, and easy to respond to.
Do not write a giant paragraph. That can make the other person feel like they need to give an equally long reply.
Use a simple structure:
Greeting
Where you met
Specific thing you appreciated
Light next step
For example:
“Hi Daniel, I enjoyed meeting you at the networking breakfast today. Your advice about talking to people in customer success before applying was really helpful. I’m going to start there this week. I’d be glad to stay connected.”
That is warm, clear, and low-pressure.
Offer a natural next step: Depending on the connection, ask a small follow-up question, suggest a brief coffee chat, or simply say you enjoyed the conversation and would like to stay connected.
A next step might be:
“Would it be okay if I sent one question after I look into that certification?”
“Would you be open to a 15-minute coffee chat sometime this month?”
“I’ll check out the book you mentioned and report back.”
“I’d love to stay connected as I explore this field.”
The smaller and more specific the next step, the easier it is for the person to say yes.
9. Build A Repeatable Networking System
Create a simple contact tracker: Keep a basic list of who you met, where you met them, what you discussed, and any follow-up action you promised.
Networking becomes much easier when you stop relying on memory.
You do not need a complicated CRM. You just need a place to record the basics before you forget them.
This could be a spreadsheet, notes app, Notion page, paper notebook, or task manager.
Track simple details like:
Name
Role or company
Where you met
What you talked about
Resource they mentioned
Follow-up needed
Date of last contact
Possible next step
This helps you avoid that frustrating feeling of remembering someone was helpful but forgetting what they actually said.
Sort contacts by next action: Separate people into categories like follow up now, reconnect later, ask for advice, potential collaborator, or useful resource.
Not every contact needs the same treatment.
Some people are immediate follow-ups. Others are people you may reconnect with later. Some are simply useful to remember because they mentioned a resource, company, or path you want to research.
You might use categories like:
Follow Up This Week
Reconnect Later
Possible Mentor
Industry Insight
Job Search Lead
Collaboration Potential
Resource Mentioned
This gives your networking structure. Instead of staring at a list of names, you know what to do next.
Schedule small networking blocks: Set aside short, recurring time for follow-ups, LinkedIn messages, coffee chat requests, and relationship maintenance.
Networking does not have to be a huge event.
In fact, it works better when it becomes a small habit.
You might schedule:
20 minutes every Friday to send follow-ups
One LinkedIn message per week
One coffee chat per month
One event per quarter
A monthly check-in with former coworkers
Small, consistent actions are less overwhelming than trying to suddenly network intensely when you need a job.
Review what is working: After each event or outreach session, note which questions felt natural, which openers worked, and where you got stuck.
This is how you improve.
After a networking experience, ask yourself:
Which question got the best response?
Where did I feel most awkward?
What did I learn?
Who should I follow up with?
What would I do differently next time?
Do not use this as a way to criticize yourself. Use it as feedback.
You are building a skill.
10. How A Career Coach Can Help You Network With More Direction
Clarify your networking goal: A career coach can help you figure out whether you are networking for job leads, career clarity, industry research, confidence, referrals, or long-term relationship building.
Networking feels harder when your goal is vague.
If you are telling yourself, “I should network,” that is not specific enough to act on. It creates pressure, but no clear next step.
A coach can help you turn that vague pressure into a focused plan.
For example, you may realize you are not actually ready to ask for referrals yet. What you need first is industry research. Or you may discover that you are not lacking connections, but you are unclear about how to explain your career direction.
A coach can help you name the real issue.
That might be:
You do not know who to reach out to.
You are not sure what to say.
You are afraid of seeming needy.
You struggle to explain your value.
You overthink follow-ups.
You avoid networking until things feel urgent.
Once you know the actual problem, you can solve it more directly.
Practice your conversation scripts: A coach can help you refine your self-introduction, follow-up messages, and transition lines so they sound natural instead of stiff.
Scripts can be helpful, but only if they sound like you.
A coach can help you create language for:
Introducing yourself
Explaining a career pivot
Asking for advice
Requesting an informational chat
Following up after an event
Reconnecting with an old contact
Ending conversations politely
The point is not to memorize every word. The point is to have a structure you trust.
That way, when nerves hit, you are not starting from zero.
Identify your overthinking patterns: If you tend to spiral before reaching out, second-guess what to say, or avoid events entirely, a coach can help turn vague fear into specific actions.
Overthinking often sounds like:
“What if they think I’m annoying?”
“What if I ask a stupid question?”
“What if I have nothing to offer?”
“What if they do not reply?”
“What if I sound desperate?”
A coach can help you separate real strategy from fear.
For example, “I need to make a clear ask” is strategy. “Everyone will judge me” is fear.
That difference matters.
Create accountability after the event: Instead of leaving networking to mood or motivation, a coach can help you build a realistic follow-up plan and actually use it.
Many people do the hardest part, then lose the value afterward.
They attend the event, meet people, have good conversations, then never follow up.
A coach can help you turn the experience into momentum.
11. Common Mistakes That Make Networking Feel Worse
Trying to sound more impressive than you feel: Over-polishing your introduction can make you more nervous and less relatable, so aim for clear and human instead.
When you feel insecure, it is tempting to compensate by sounding more impressive.
You may over-explain your experience, use jargon, list every project you have touched, or try to make your career path sound more intentional than it was.
But that can create more pressure.
The other person does not need your full resume. They need enough context to understand who you are and what kind of conversation would be useful.
Clear usually beats impressive.
For example, this is stronger:
“I’m in operations now, and I’m exploring project management because I enjoy building systems and keeping teams organized.”
Than this:
“I have a cross-functional background with exposure to operations, communication, stakeholder alignment, process improvement, and strategic execution.”
The second one may sound polished, but the first one is easier to connect with.
Asking questions you do not care about: Generic questions lead to generic answers; choose questions that you would actually want to hear the answer to.
People can feel when a question is just filler.
If you do not care about the answer, it will be hard to follow up naturally. This is how conversations become stiff.
Choose questions that genuinely interest you.
If you are curious about career changes, ask about transitions. If you are curious about confidence, ask what helped someone feel more capable. If you are curious about leadership, ask what changed when they first started managing people.
Better questions make you a better listener.
Waiting until you need something: Networking feels more pressured when you only do it during a job search, career crisis, or urgent transition.
This is one of the biggest reasons networking feels uncomfortable.
If you only reach out when you need a referral, job lead, client, or favor, every message feels loaded.
The better approach is to build relationships before you urgently need them.
That could mean:
Congratulating someone on a new role
Commenting thoughtfully on a post
Sharing a useful resource
Checking in with a former coworker
Asking for perspective before you apply
Staying lightly connected over time
This makes networking feel more human and less transactional.
Treating silence as failure: Some conversations will be short, flat, or forgettable, and that does not mean you are bad at networking.
Not every interaction will turn into something.
Some people will be distracted. Some will not click with you. Some will forget to reply. Some conversations will simply end.
That is normal.
Your job is not to make every conversation meaningful. Your job is to practice creating the conditions where meaningful conversations can happen.
A Better Way To Think About Networking
You do not have to become the person who loves small talk.
You do not have to float around the room with perfect confidence. You do not have to charm strangers instantly. You do not have to collect as many contacts as possible or pretend every conversation feels natural.
You can network in a way that fits how you actually connect.
Depth-first networking is built around a different idea: better conversations beat more conversations.
Instead of forcing yourself through endless surface-level chatter, you prepare a few thoughtful questions. You listen carefully. You explain your direction clearly. You ask for small next steps when they make sense. Then you follow up in a way that feels specific and human.
That is a real networking skill.
It may not look loud from the outside. It may not look like the classic image of someone confidently shaking hands with everyone in the room. But it works because it is based on attention, clarity, and follow-through.
If networking has always made you uncomfortable, start smaller.
Choose one event. One person. One question. One follow-up.
Let that count.
Then build from there.
The goal is not to become someone else. The goal is to make career connection feel less like performance and more like a skill you can practice, repeat, and trust.
Going to a networking event is the part people think will be hard. Then the event ends, you get home, and a different problem shows up. You are staring at your screen wondering what to say, how soon to say it, and whether sending anything at all will make you sound awkward.
That is where most good opportunities quietly die. Not because the conversation went badly, but because there was no follow-up while the interaction was still fresh. A decent conversation at an event can turn into a recruiter reply, a peer connection, a future introduction, or a useful professional relationship. But only if you make the next move.
The good news is that follow-up does not need to be creative or complicated. It just needs to be clear, personal enough to feel real, and easy for the other person to respond to. Most people are not ignoring follow-ups because they hate networking. They are ignoring them because the message feels vague, generic, or like it is immediately leading to a favor.
This article is built to make that easier. Instead of giving abstract advice like “be authentic” or “add value,” it will walk you through what to send after a networking event depending on who you met and what kind of connection you want to build.
You will learn how to:
follow up while the conversation still feels current
write different messages for recruiters, peers, and weak ties
make your messages sound warm without sounding overly familiar
give people an easy reason to respond
avoid the common mistakes that make messages feel stiff or transactional
If networking often leaves you with a handful of names and no idea what to do next, this is the part that matters most. The event opened the door. The follow-up is what decides whether anything actually happens after that.
Send your message while the interaction is still fresh
Timing matters more than people think. A strong follow-up sent within a day or two feels thoughtful and natural. A message sent two weeks later often feels like you either forgot, got around to it reluctantly, or are only reaching out now because you want something.
That does not mean you need to message people the second you get into your car. It means you should aim to follow up while the event is still easy for both of you to remember. In most cases, that sweet spot is later the same day, the next morning, or within 48 hours.
The goal of your first message is simple. You want the other person to remember who you are and feel glad you reached out. That is why the best follow-ups usually start with a quick memory trigger instead of a big introduction.
Good memory triggers include:
where you met
what you talked about
a detail they shared
a moment from the event that stood out
For example, instead of saying, “Hi, it was nice meeting you,” you could say, “Hi Maya, it was great meeting you at Thursday’s marketing panel. I really liked your point about making career pivots without waiting for perfect timing.”
That one extra sentence does a lot of work. It proves the message is not copied and pasted. It helps them place you faster. It also gives the message a warmer tone without adding extra fluff.
A simple structure works well for almost every first follow-up:
greeting with their name
reminder of where you met
one specific reference from the conversation
brief appreciation or interest
a light next step, if appropriate
Keep the message short. Four to six sentences is plenty. Most people do not need your full background in the first follow-up. They just need enough context to remember you and enough warmth to want to continue the connection.
If you only remember one thing from this section, make it this: send the message while the conversation still has energy. You are not trying to be memorable weeks later. You are trying to keep good momentum from going cold.
Match the message to the type of contact
Not every networking follow-up should sound the same. The message you send to a recruiter should feel different from the one you send to a peer. A weak tie, such as someone you spoke to briefly or someone you know through a mutual connection, also needs a different tone.
This is where many people get stuck. They find one networking template online and try to use it for everyone. The result is usually a message that feels too formal for a peer, too casual for a recruiter, or too intense for someone they barely know.
Start by asking one question: what kind of relationship is this? Once you know that, the tone gets easier.
A recruiter follow-up should usually feel:
clear
professional
concise
interested, but not pushy
A peer follow-up can be a little more relaxed. You are often reinforcing shared interests, industry common ground, or a conversation that could lead to mutual support later. The tone can sound warmer and more conversational because the relationship is more equal.
A weak-tie follow-up should stay light. Do not write as though you are continuing a deep conversation if you only spoke for three minutes. The safest approach is to acknowledge the brief interaction, mention the point of connection, and open the door without forcing it.
Think about the difference here:
Recruiter message: “I enjoyed hearing more about your team’s hiring priorities and would love to stay in touch regarding future roles.”
Peer message: “I liked talking with you about how your team handles cross-functional projects. Would be great to stay connected.”
Weak tie message: “We only chatted briefly after the panel, but I appreciated your advice about transitioning into product work.”
The purpose also shifts depending on the contact. With recruiters, you may want to reinforce fit and interest. With peers, you may want to build a professional relationship. With weak ties, you may simply want to keep the connection alive long enough for it to become more useful later.
This is why “nice meeting you” is not enough by itself. It does not tell the reader why you are following up or what kind of connection you are trying to build.
When you match the message to the relationship, your outreach feels more natural. It also makes people more likely to reply because the message sounds like it belongs to the actual interaction you had, not to some generic networking script pulled from a blog post.
Use copy-ready templates that sound human
Templates are useful because they remove hesitation. They become a problem when they sound so polished and predictable that the other person can practically hear the copy and paste. The solution is not to avoid templates. It is to use short, flexible ones that leave room for a real detail.
Here are three practical templates you can adapt after a networking event.
Recruiter follow-up template: Hi [Name], it was great meeting you at [event]. I enjoyed hearing about [specific detail about their team, role, or company]. Our conversation made me even more interested in [relevant role area or field], and I would love to stay in touch. Thanks again for taking the time to chat.
Why it works: it is direct, professional, and specific. It shows interest without rushing into a request.
Peer follow-up template: Hi [Name], it was great meeting you at [event]. I really liked our conversation about [shared topic]. It is always refreshing to meet someone thinking about [topic] in such a practical way. Would be great to stay connected and keep in touch.
Why it works: it sounds human and collegial. It leaves the door open without turning the message into a pitch.
Weak-tie follow-up template: Hi [Name], we spoke briefly at [event] after [panel, talk, session, etc.], and I wanted to say I appreciated your point about [specific detail]. It gave me a lot to think about. Glad we crossed paths, and I hope we can stay connected.
Why it works: it does not pretend the relationship is deeper than it is. It uses a brief connection well.
When you customize a template, focus on these pieces first:
where you met
one specific thing they said
what made the conversation useful or interesting
a small, natural next step
You do not need dramatic personalization. One good detail is usually enough.
You can also swap the closing based on your goal:
“Would love to stay in touch.”
“Glad to connect.”
“Would be great to keep in touch.”
“I hope our paths cross again.”
“Thanks again for the conversation.”
The biggest mistake with templates is overloading them. A short message with one specific detail feels far more personal than a long message stuffed with formal language. The right template should not make you sound impressive. It should make it easy for someone to remember you and respond.
Make it easy for the other person to reply
A good follow-up message does not just sound polite. It makes replying feel easy. This is one of the biggest differences between outreach that gets ignored and outreach that starts a conversation.
People are much more likely to reply when they know what to do with your message. If your note ends in a vague, floating line like “Let’s connect sometime,” the other person has to decide what that means. Should they offer a meeting? Accept the sentiment? Ignore it unless they want something specific? That uncertainty creates friction.
A better approach is to end with a light, clear next step. Not a huge ask. Just something that gives the conversation shape.
Low-pressure closers include:
“Would be great to stay connected.”
“If it is helpful, I would be glad to send over that article I mentioned.”
“I would love to hear how your team is thinking about this space over the coming months.”
“Hope we can keep in touch.”
“If you are open to it, I would love to continue the conversation sometime.”
These work because they are specific enough to guide a response, but not so heavy that the other person feels cornered.
When people go wrong here, they often jump too quickly. They meet someone once and immediately ask for a referral, a coffee chat, a job lead, or an introduction to someone else. That can work in rare cases, but only when the conversation was unusually strong and the context clearly supports it.
Most of the time, your first goal is not to secure something big. It is to build enough comfort that a second interaction feels normal.
Ask yourself before sending a message:
Is the next step clear?
Is it easy to say yes to?
Does it match how well we actually know each other?
Does it sound like a conversation, not a demand?
You can also make replies easier by keeping your message visually light. A short message gets read faster. A short message also feels easier to answer. Busy professionals are not usually rejecting people. They are often just responding to what feels simple in the moment.
That is why a short, thoughtful message beats a long, impressive one. If the person can understand who you are, why you are reaching out, and what kind of reply makes sense within a few seconds, you have done your job well.
The easier you make it to respond, the less likely your message is to become one more thing they intend to answer later and never do.
Avoid the mistakes that make people ignore networking follow-ups
Most ignored follow-up messages are not offensive. They are just forgettable, confusing, or slightly uncomfortable. That is why it helps to know the common mistakes before you hit send.
One of the biggest mistakes is sounding generic. If your message could be sent to any person from any event, it probably will not stand out. People can tell when a note was written for “someone” rather than for them.
Generic lines often sound like this:
“It was great connecting.”
“I enjoyed learning about your journey.”
“Would love to keep in touch.”
“Looking forward to future opportunities together.”
None of those are terrible. They are just weak when there is no specific detail around them.
Another common mistake is writing too much. People often think that a longer message sounds more thoughtful. In reality, it usually creates more work for the reader. A wall of text can make even a friendly message feel like an obligation.
You also want to avoid overfamiliarity. This happens when the message acts as though you built a close bond after one short conversation. Phrases that are too warm, too intimate, or too enthusiastic can feel off if the connection is new.
Watch out for things like:
excessive flattery
language that suggests instant closeness
emotional oversharing
acting as though a brief chat was deeply transformative
Another mistake is leading too quickly with need. If the first follow-up immediately asks for a referral, favor, or meeting, it can make the interaction feel transactional. Even if you do want help eventually, the first message usually works better when it focuses on the connection first.
Before sending, check for these red flags:
no specific reference to the conversation
message is too long
tone is too stiff or too familiar
ask is too big for the stage of the relationship
message sounds copied and pasted
A useful test is to read the message out loud. If it sounds like a person you know would actually say it, you are probably in good shape. If it sounds like a networking robot trying to seem professional, revise it.
Good follow-up does not require perfect wording. It just requires enough clarity, warmth, and relevance that the other person feels like replying would be easy and worthwhile.
Turn one message into an ongoing professional relationship
The first follow-up matters, but it is not the whole story. A lot of networking advice makes it sound like everything depends on one perfect message. In reality, relationships are usually built through a few small interactions over time, not one excellent note sent after an event.
That is good news because it takes pressure off. Your first message does not need to secure a job lead, book a call, or create instant rapport. It just needs to keep the connection alive long enough for a second touchpoint to make sense.
This is where many people stop too soon. They send one message, maybe get a polite reply, and then do nothing else. The conversation fades, and a potentially useful contact becomes another name sitting in LinkedIn or your inbox.
A better approach is to think in gentle follow-up layers.
After the first message, a second touchpoint might be:
replying thoughtfully if they respond
sending a useful article related to your conversation
congratulating them on a role change or achievement
reaching out later when something relevant comes up
checking in after a few weeks with context
For example, if you talked about career pivots at an event and later see an article on that topic, you could send a short note: “This made me think of our conversation at last month’s event. Thought you might find it interesting.”
That kind of message works well because it feels natural. It builds familiarity without forcing anything. It also shows that your follow-up is not only about immediate gain.
Consistency matters more than intensity here. One occasional, thoughtful touchpoint is far more effective than an overly eager burst of messages right after the event. You want to create the feeling that staying connected with you is easy and useful, not draining.
Keep your expectations realistic. Not every contact will turn into something meaningful. Some replies will be brief. Some people will not respond at all. That does not mean your follow-up failed. It just means not every connection is meant to develop.
The goal is not to turn every event into a dozen relationships. The goal is to identify the few conversations worth building on and stay present enough that those connections have room to grow. Networking gets much easier when you stop treating follow-up as a single task and start treating it as the beginning of a professional rhythm.
Use a simple tracking system so good contacts do not disappear
A lot of networking problems are really organization problems. People think they are bad at follow-up when the real issue is that they do not have a simple way to remember who they met, what they talked about, or when to reach out again.
You do not need a fancy CRM for this. A spreadsheet, notes app, or simple document is enough. What matters is that you capture useful information quickly, before it fades.
Right after an event, try writing down:
the person’s name
where you met
their role or company
what you talked about
any specific detail that stood out
whether you followed up yet
a possible next touchpoint
This only takes a few minutes, but it changes everything. Instead of relying on memory, you are creating a small system that makes future follow-up much easier.
You can also group contacts by type. That helps you decide what kind of next step makes sense.
Simple categories might include:
recruiters
peers in your field
mentors or senior professionals
weak ties worth keeping warm
people to reconnect with later
This matters because not every contact needs the same amount of attention. Some people deserve a quick thank-you and a connection request. Others are worth a longer-term effort because the conversation had real relevance.
Setting a reminder also helps. If someone replies warmly but there is no immediate next step, make a note to reach out again in a month or two when you have context. That is often enough to keep momentum going without making the relationship feel forced.
A good tracking system should feel light, not like homework. If it is too complicated, you will stop using it. Keep it simple enough that you can update it after every event in under ten minutes.
This also gives you an advantage over most people. Many attendees leave a networking event with business cards, LinkedIn requests, and vague intentions. Very few have a reliable way to turn those into real follow-up. When you track the basics, you make it much more likely that the right people stay visible long enough for the connection to matter.
A career coach can help you sound confident without sounding fake
Networking advice often assumes that the only problem is information. As if once you know the right template, everything else becomes easy. But for many people, the real challenge is not a lack of information. It is hesitation, second-guessing, and the fear of sounding awkward.
That is where a career coach can help. Not because they will hand you a magical script, but because they can help you build a follow-up style that feels natural for you. That matters more than people realize. Messages get easier when you stop trying to sound like an ideal version of a polished networker and start sounding like a clear, grounded professional.
A coach can help in a few practical ways.
They can help you:
figure out what kind of networking conversations are actually worth pursuing
refine your message tone so it feels warm but professional
practice common follow-up situations out loud
create a repeatable post-event routine
connect your networking efforts to bigger career goals
That last part matters. A lot of people approach networking as random outreach. They go to events, meet people, collect names, and hope something useful happens. A coach can help you become more intentional about it.
For example, they might help you ask:
Am I trying to build visibility in a new field?
Am I looking for recruiter relationships?
Do I need stronger peer connections in my industry?
Am I following up with the right people, or just anyone I met?
They can also help with accountability. Follow-up is one of those tasks people mean to do, then quietly avoid. Having someone help you create a simple system can make it easier to act while the interaction is still fresh.
This does not mean you need coaching to network well. Plenty of people build strong professional relationships on their own. But if networking repeatedly stalls at the same point, especially after the event when you are left staring at a blank message box, support can make the process feel far less draining.
Sometimes confidence comes less from having the perfect words and more from having a repeatable process. A coach can help you build that process so follow-up stops feeling like a social test and starts feeling like a skill you know how to use.
Start with one message, not a perfect strategy
A good networking follow-up is not about saying something brilliant. It is about making the next step easy. You are reminding the other person where you met, giving them one real detail to hold onto, and opening the door in a way that feels natural.
That is why simple usually wins. A short message with a specific reference will outperform a long, polished message that tries too hard to impress. People respond to relevance, clarity, and ease.
If you want to make follow-up easier from now on, keep these ideas in mind:
send the message while the event is still fresh
match the tone to the kind of contact
use templates, but personalize one part well
make the reply feel easy
avoid sounding generic or transactional
treat networking as a series of small touchpoints, not one big moment
keep a simple system so promising contacts do not vanish
You do not need to use every tactic at once. You do not need a perfect spreadsheet, a flawless template library, or a fully developed networking system by tonight. You just need one useful next move.
Think about the last event you attended. There is probably at least one person you meant to message but never did. Start there. Pull up their name, write one line that reminds them where you met, add one specific detail from your conversation, and send a short note.
That one message is often the difference between “I should follow up sometime” and an actual professional connection.
Networking events create possibilities. Follow-up is what turns those possibilities into something real.
Some forms of overwhelm are loud. Others are sneakier. You stare at the list, bounce between tabs, think about starting five different things, and somehow end the day feeling busy and behind. Not because you are lazy or incapable. Usually because nothing feels clear enough to begin.
That is what makes these reads worth your time. Each one tackles a slightly different version of stuck: too many options, too much pressure, too much noise, too much thinking, not enough traction. And instead of piling on more theory, they offer something better: a way to make progress feel lighter, simpler, and more obvious again.
When everything feels equally important, even small choices start to feel weirdly heavy. This piece gets right to that problem. Not in a dramatic way, just in the very real way life starts to feel muddy when your thoughts are too crowded to trust.
Refreshing because it treats clarity like something you can create, not wait for
Especially useful when too many options are making you stall
What stands out here is the reminder that confusion is not always a sign that life is impossible. Sometimes it is just a sign that too much noise is getting equal airtime. This one helps you sort what actually matters from what is just taking up room.
Sometimes what keeps you stuck is not a lack of effort. It is the feeling that real change belongs to other people, not you. This one is a warmer, more personal read, and that is exactly why it lands.
Interesting because it shows coaching as partnership, not someone lecturing you
Gives the whole idea of change a more human, less intimidating shape
There is something grounding about an article that does not pretend personal growth happens in a vacuum. Family dynamics, identity, support, self-belief, all of that shows up. This read makes change feel less like a fantasy and more like something you can actually participate in.
A lot of goal advice sounds great until you try to use it on a normal Tuesday. This one is much better about turning ambition into something you can actually work with without making the whole process feel stiff or performative.
Good for anyone tired of vague goals that sound nice but go nowhere
Useful because it makes progress feel trackable instead of abstract
What makes this worth clicking is how it closes the gap between wanting something and building the structure to follow through. Not glamorous, but honestly, that is the part that changes things.
Big tasks love to play mind games. They look important, urgent, impressive, and impossible all at once. This article takes that familiar freeze response and cuts it down to size in a way that feels immediately usable.
This is one of those reads that can change your afternoon, not just your mindset. The strength is in how practical it feels. You can picture yourself using it right away, which is often the difference between advice that sounds good and advice that helps.
Some days the problem is not workload. It is that your brain keeps trying to solve the whole week before it will let you send one email. This piece is for that exact kind of paralysis.
Useful because it replaces “figure everything out” with one clear move
Feels surprisingly calming without being soft or vague about action
The best thing here is the simplicity. Not simplistic, just clean. When you are stuck, “next obvious step” is often a much better question than “best possible plan.” That shift alone makes this one click-worthy.
Blank-page resistance is rarely just about writing. It is pressure, perfectionism, hesitation, and that annoying feeling that every sentence has to prove something. This article gets that, and handles it in a very low-pressure way.
What makes this one appealing is how doable it sounds. No grand ritual. No waiting for inspiration. Just a small entry point that helps the words start moving before your inner critic wakes up fully.
There is a reason so many plans feel crowded before the week even starts. Most people keep asking what to add. This one asks a much smarter question: what needs to go?
This read has a clean, almost immediate appeal. A stop list sounds simple, but it gets at something deeper: your time is not just shaped by priorities. It is shaped by what you keep letting in. That is a powerful lens.
Helpful if your list keeps turning into one flat wall of obligation
Appealing because it creates instant order without a complicated system
Gives you a clearer sense of timing, not just priority
What is nice here is that it does not ask you to become a new person. It just gives your tasks better lanes. That tiny bit of structure can make a huge difference when everything has started to blur together.
This one is for the days when even “just get started” sounds annoying. Because honestly, sometimes the problem is that starting still feels too big. This method shrinks the commitment until it stops triggering resistance.
The appeal here is not just that it is small. It is that it respects reality. Some days you are not ready for a huge push. This gives you a way to move anyway, without turning that into failure.
When your thoughts are piling up faster than you can sort them, even easy tasks start to feel slippery. This article is built for that exact state. Not just busy, but mentally jammed.
Especially useful when your head feels louder than your actual workload
Satisfying because it separates thinking from deciding from doing
Makes action feel possible again without requiring a giant reset
This is one of the more immediately attractive reads in the bunch because the method is so clear. Brain dump. Sort. Pick one. That sequence alone has a kind of relief built into it. You can feel the mental pressure coming down just reading it.
A lot of stuckness gets mislabeled as laziness, lack of discipline, or not wanting it badly enough. Usually that is not the real issue. More often, the problem is friction. The task is too vague. The choices are too many. The plan is too big. The mental clutter is too loud. These articles are useful because they work on that level. They lower resistance, sharpen focus, and make movement easier to access.
That is also why they feel more encouraging than a generic productivity pep talk. They do not ask you to become more intense. They help you become more clear. And clarity is often what gets things moving again.
The Real Shift Is Smaller Than It Looks
There is a nice thread running through all ten pieces: progress usually returns the moment the next step gets smaller, cleaner, or easier to see. Not when life becomes perfectly organized. Not when you finally feel ready. Just when the fog lifts enough for one action to feel obvious.
That matters because overwhelm loves to convince you that the answer has to be big. A total reset. A better routine. A more impressive plan. But a lot of the time, what actually helps is much less dramatic than that. A category. A stop list. A tiny promise. One decision. One visible step. That is often where momentum comes back.
Next Steps
Pick the one article that matches the kind of stuck you are in right now. Mental clutter, overthinking, giant task, blank page, impossible list, whatever it is. Start there. You do not need the perfect system all at once. You just need the next thing that makes moving easier.
These micro-moves work because they reduce friction. Instead of pushing yourself into big productivity bursts, you focus on small actions that are easy to begin and easy to repeat.
Below are seven simple frameworks that make it easier to get moving again.
By shrinking your expectations to the smallest possible actions, you avoid the common pattern of quitting routines when life gets busy or exhausting. Even small wins help maintain momentum and protect long-term consistency.
Starting is often the hardest part of any task. The 2-Minute Start removes that resistance by shrinking the beginning of a task to something you can do in just two minutes.
Once movement begins, momentum tends to build naturally. Many people find that a tiny start turns hesitation into real progress.
Traditional to-do lists highlight everything left undone. A Done List flips that focus by tracking what you actually complete during the day.
Recording finished actions creates visible proof of progress. Even small tasks start to build motivation because you can see forward movement happening in real time.
Many people lose focus because tasks blend together during the day. The Two-Minute Reset creates a short pause between activities so you can clear mental clutter and refocus.
In just a couple of minutes you tidy one small thing, reset your attention, and choose the next step intentionally.
If you need consistency, the Minimum Viable Day works well. If the problem is starting tasks, the 2-Minute Start or One-Tiny-Task Promise can help. When motivation dips, tracking progress with a Done List often brings it back.
Most closets are organized by clothing type: all jeans together, all dresses together, all sweaters stacked in one section.
It looks neat. But it rarely works in real life.
A more effective system is organizing by how often you actually wear things. Splitting the closet into Daily Wear and Occasion Wear zones reduces visual clutter and speeds up decisions each morning.
When everyday clothes sit in the most visible area, the closet feels more spacious and easier to navigate.
Want more ideas about organizing a small closet by category? → Read the whole guide
Kids’ closets often become messy quickly, but the real problem is usually the design.
Most closets are built for adults, not for children’s height or daily routines.
Lower rods, labeled bins, and simple activity-based clothing sections make it much easier for kids or teens to put their own clothes away. Adjustable hardware also allows the closet to grow with them instead of needing a full redesign later.
When the structure matches how kids actually use the space, clutter decreases almost immediately.
Want more ideas about organizing a kid’s or teen’s small closet? → Read the whole guide
Most wall closets waste their most valuable storage resource: vertical height.
Standard rod placement leaves large sections of unused air above and below clothing.
By raising rods, adding layered hanging sections, defining the top shelf, and stabilizing tall stacks with dividers and risers, you can dramatically increase storage capacity without expanding the closet footprint.
A floor-to-ceiling layout strategy turns unused vertical space into functional storage.
Even a walk-in closet can feel cramped when lighting, color, and spacing work against the room.
Dark paint, shadowy corners, packed rods, and cluttered floors shrink the space visually.
Simple design adjustments can change that quickly.
Brighter lighting, lighter wall colors, intentional spacing between garments, and defined floor zones help the room feel open and breathable without changing its footprint.
The closet doesn’t get bigger — the design simply stops making it feel smaller.
Shared closets often feel unfair, even when both people have similar wardrobes.
The real problem is unclear boundaries.
This system divides the closet using three simple principles: inventory first, equal zones, and storage parity. Instead of guessing, you measure each wardrobe and divide rods, shelves, and floor space intentionally.
When each person has clearly defined sections and equal usability, the closet becomes far easier to maintain.
Tiny closets often feel like they need expensive renovations.
But most problems can be solved with temporary structure.
Tension rods, stackable bins, shelf risers, and slim hangers can double storage capacity without drilling into walls. These removable upgrades create vertical layers and clear containment so the closet feels organized instead of cramped.
It’s a practical solution for renters or anyone who wants quick improvements without construction.
Want more ideas for upgrading a very small closet without renovation? → Read the whole guide
How to Keep a Small Closet From Getting Cluttered Again
Even the best closet layout can slowly lose structure if the volume keeps growing.
Small spaces work best when the wardrobe stays within the closet’s limits.
One helpful rule is one-in, one-out. When a new item enters the closet, remove something you no longer wear.
A quick five-minute weekly reset also prevents clutter from building up. Rehang misplaced clothing, straighten shelves, and return items to their zones.
Small habits keep the system intact.
The Real Secret to Small Closet Organization
The biggest difference between a cramped closet and a functional one usually isn’t storage products.
It’s logic.
When clothing is grouped by how it’s used, vertical space is layered intentionally, and categories are clear, the closet naturally feels bigger.
Structure reduces visual noise and makes decisions easier.
And in a small closet, that clarity makes all the difference.
If you have two closets in one room and it still feels crowded, the problem isn’t space.
It’s overlap.
This guide shows how to split by season, by person, or by clothing type so each closet has one clear job. It also covers a quick 30-minute reset and how to visually reinforce each side so it stays structured.
This method walks you through counting hangers, measuring rod width, setting a firm hanger cap, and rebuilding your wardrobe to match physical capacity. You’ll also learn how to create a strict overflow zone and rotate seasonally without expanding your hanger count.
If you see empty air above your clothes, you’re wasting vertical height.
This guide explains exactly how to measure usable space, assess clothing length, mark proper rod spacing, and install a second hanging level without cramming. It also covers when partial double-hang layouts make more sense than full symmetry.
Double doors reveal everything at once — including imbalance.
This article shows how to create a defined center line, mirror both sides, match upper storage, and use both doors intentionally so the closet feels finished instead of accidental. It also addresses off-center rods and simple lighting upgrades.
The back of your closet door is unused vertical real estate.
Instead of rearranging shelves, this guide shows how to evaluate door weight limits and add hooks, slim racks, pocket organizers, or mirror storage without creating hinge strain. It also explains what not to store so the door stays functional long-term.
Hidden space expands capacity without touching the floor.
Floor piles are what make small closets feel chaotic.
This guide focuses on flat containment systems — slim bins under the rod, vertical dividers for upright bags, shallow shoe trays, and low shelf risers. It also explains how to maintain boundaries and relocate overflow before piles return.
When everything competes for the same few inches, chaos wins.
The Zone Method divides your closet into four clear areas — Hanging, Shelf, Floor, and Door — so each item has one permanent home. It’s a layout system, not a product list.
If your shelves look full but feel inefficient, you’re probably wasting vertical air.
This article shows how to build or stack shelf risers safely so you create a second usable level without installing new shelving. You’ll learn how to evaluate shelf strength, choose the right riser style, and prevent bowing over time.
Bifold closets aren’t the problem. The interior layout is.
This guide helps you decide whether to remove the doors for an open look or keep them and optimize inside. Either way, the focus is on structure, vertical layering, and clear zoning so the space works with you.
A walk-in can still feel cramped if the flow is wrong.
This makeover shows how to clear the center walkway, redistribute storage across walls, and use corners strategically. The L-shaped reconfiguration changes everything without adding more products.
Corner closets waste space when rods fight the angle and shelves disappear into shadow.
This guide shows how to install angled rods, add triangular shelving, and layer storage vertically so the back corner becomes usable instead of forgotten.
Buying more bins feels productive. It rarely fixes the root issue.
Most small closets fail because structure wasn’t planned first. When rods, shelves, and floors aren’t assigned clear roles, products just stack on top of the same layout problem.
The difference between cramped and functional is rarely quantity. It’s alignment.
DIY Shelf Risers That Double Your Small Closet Storage
Are you all about style, decor and organization? Download a copy of our Decluttering Workbook. *****
Corner closets look spacious on paper — but in real life, they often feel awkward and underused. Straight rods collide, deep back corners swallow items, and shelves either block access or leave empty triangular gaps.
The issue isn’t the square footage. It’s that most storage systems are designed for flat walls, not angled corners.
When you adjust rods and shelves to follow the shape of the space, a corner closet becomes surprisingly efficient. Below is a step-by-step guide to organizing a small corner closet without letting dead space take over.
In our original roundup of small closet layout upgrades, we featured shelf risers as one of the simplest space-doubling tricks, and now we’re walking you through how to build or stack them safely for maximum vertical impact.
In our original roundup of small closet layout upgrades, we featured shelf risers as one of the simplest space-doubling tricks, and now we’re walking you through how to build or stack them safely for maximum vertical impact.
Step 1: Measure the Corner Geometry Before Installing Anything
Corner closets require precision. If you skip measuring, rods and shelves can overlap or block each other.
Start by mapping the shape from above.
Measure both adjoining walls and the corner depth: Record the length of each wall that meets at the corner and the distance from the doorway to the back point so you understand how much usable hanging and shelving space exists.
Mark door clearance and walking space: Open the door fully and note where it swings so new rods or shelves don’t interfere with access or create tight pinch points.
A clear overhead plan prevents rods from colliding and ensures you’re building with the angle — not against it.
Step 2: Replace Straight Rods with Angled Hanging Rods
Traditional straight rods often stop short of the corner or create overlapping hangers. Angled rods solve that problem by following the geometry of the space.
This is one of the most impactful layout upgrades.
Install a 45-degree corner rod connector: Use a corner bracket or angled rod adapter that allows two rods to meet cleanly without crowding hangers into a tight cluster.
Run rods along both walls into the corner evenly: Keep spacing consistent so hangers glide smoothly across the angle rather than bunching up where the rods connect.
When rods align with the corner instead of fighting it, you unlock usable inches that were previously wasted.
Step 3: Add Triangular or Corner Shelves Instead of Deep Rectangles
Deep rectangular shelves in corners create hidden black holes. Items pushed to the back become invisible and forgotten.
Install triangular or angled corner shelves: Cut custom triangular wood shelves or use stackable corner units that fit snugly into the angle without extending too far into the walkway.
Keep shelf depth shallow for visibility: Limit depth so folded clothing or bags remain visible from the front rather than disappearing into shadow.
The goal is reachability. If you can’t see it easily, the space isn’t working.
Step 4: Layer Storage Vertically Within the Corner
Once rods and shelves align with the corner, vertical layering maximizes capacity without crowding.
Think up instead of outward.
Add a second rod for short garments: Install double-hang rods along one wall so shirts and blouses use vertical space efficiently while longer items stay on the opposite wall.
Stack corner shelves vertically instead of deepening them: Place two or three shallow triangular shelves above each other rather than one oversized unit that blocks access.
Install motion-activated LED strip lighting along the rods: Position lights where they illuminate the angled rod connection and corner shelves directly.
Use bright, neutral light tones: Choose daylight-style bulbs that eliminate shadows so items in the back corner remain clearly visible.
Lighting ensures your newly activated corner doesn’t slip back into obscurity.
How to Maintain a Corner Closet Long Term
Corner spaces are prone to becoming “just for now” storage areas. Preventing that requires simple maintenance habits.
Small resets protect the layout.
Perform a monthly corner check: Remove items that have drifted into the back angle without a designated shelf or rod space.
Avoid deep stacking in the corner zone: If items start piling behind others, reduce volume rather than compressing the space further.
A small corner closet doesn’t have to waste space. When rods follow the angle, shelves fit the geometry, and zones stay intentional, the so-called “dead space” becomes one of the most useful areas in the room.
The difference isn’t more storage. It’s smarter alignment with the shape you already have.
Are you all about style, decor and organization? Download a copy of our Decluttering Workbook. *****
You’ll hear it in every motivational clip, see it in every quote post, and read it in every “how to succeed” book. But if we’re being real, most of that advice is surface level. It sounds good. It feels good. But it doesn’t actually show you how.
And just like any muscle, it only grows when it’s under tension long enough to adapt and get stronger. The problem is most people train it the wrong way. They think doing one intense thing for an hour is the same as being disciplined. But real discipline isn’t built in that single hour. It’s built in the hours between the moments of intensity. It’s built in silence. In resistance. In those little micro-decisions you make when no one is watching.
I’ve been on this journey for a long time, fifteen years of chasing success, failing forward, figuring out what actually works. And if there’s one thing I’ve learned, it’s this: discipline isn’t about trying harder. It’s about training smarter. It’s about learning how to create the conditions that make discipline automatic instead of something you have to hype yourself up for.
That’s what this article is about. I’m going to walk you through how to actually build discipline in a way that sticks, not a quick burst, not a motivational high, but real, unshakable discipline that stays with you.
Why the Way Most People Build Discipline Doesn’t Work
Most of the advice out there glorifies intensity. Go harder. Push longer. Grind. The problem is, doing hard things typically only lasts 15 minutes to maybe 2 hours. That’s not enough time under tension to create real, lasting discipline.
And here’s the other trap: doing hard things can still give you a dopamine rush. You’re still chasing a reward. You might feel proud after the workout or focused during the hustle, but that’s not discipline, that’s dopamine doing its job. True discipline lives in the gap between what you want to do and what you choose to do.
Real Discipline Comes From Not Doing the Easy Thing
Write down five things you “can’t live without.” I’m talking sugar, alcohol, endless scrolling, TV, gaming, whatever your personal vices are.
Look at that list and circle the one thing that feels impossible to give up. The one thing that’s got a chokehold on your willpower.
Now eliminate that one thing for 30 to 90 days.
This is where the real magic happens. You’re not just resisting for a few minutes or a couple of hours. You’re putting your discipline muscle under tension all day, every day. Every hour you don’t give in, that muscle grows stronger. And when you conquer the thing that once controlled you, everything else gets easier.
Once you can walk past your biggest craving without blinking, doing hard things becomes light work.
Discipline Is Built Like Milo of Croton Built Strength
There’s a story about Milo of Croton, a Greek wrestler who got strong by carrying a baby calf every day. As the calf grew, his strength grew too. One day, he was carrying a full-grown cow.
That’s discipline. You don’t start by carrying the cow. You start by picking up the calf.
The same applies to your discipline. You don’t start with 16-hour workdays. You start with what I call your crappy minimum. That might mean focusing for 30 minutes a day, working out for 5 minutes, or cutting one bad habit out of your week.
Then you build. Week by week, you add more weight. You push your threshold a little further. Over time, what used to feel hard becomes second nature.
Your Willpower Is a Battery, Train It
Every single one of us has a willpower battery. Some people have a bigger one because they’ve trained it longer. Others have a smaller one because they’ve never used it. Either way, it’s real, and it drains throughout the day.
There’s a famous study referenced in Thinking, Fast and Slow about people who had to resist eating cookies. After resisting temptation, those people performed worse on self-control tasks that followed. Their willpower was depleted.
That’s how discipline works. The more you train it, the bigger your battery gets. The less you use it, the weaker it becomes. The goal isn’t to never run out of energy. The goal is to build capacity.
Resistance Training for Your Mind
We respect resistance training for the body. We accept that building muscle takes time, pain, and patience. But when it comes to the mind, most people run from resistance.
Discipline is mental resistance training. It’s not punishment. It’s not about living like a monk. It’s about being able to say “no” to yourself and mean it.
And here’s the real kicker, doing hard things can still give you dopamine. But discipline is what happens when dopamine isn’t present. When there’s no rush. No hype. Just quiet resistance.
A Simple Framework to Build Discipline That Lasts
List your five can’t-live-withouts.
Pick the hardest one.
Cut it out for 30–90 days.
Start with your crappy minimum and build from there.
Train your willpower battery, don’t overload it all at once.
Expect discomfort. That’s the point.
Focus on consistency, not perfection.
Sometimes it can be helpful to have someone guide you through this process, consider hiring a life coach.
Discipline Isn’t Loud
Real discipline isn’t about being intense. It’s quiet. It’s not about crushing it every day. It’s about showing up, saying no to your impulses, and stacking wins over time.
When you master denying yourself the thing you crave most, everything else in your life gets easier. The hard stuff becomes easy. The distractions lose their grip.
Discipline isn’t just about what you do. It’s about what you don’t do.
And once you get that, discipline stops being something you chase. It becomes part of who you are.
A weak mind can be trained to be strong just like a weak muscle can.
People who are mentally tough didn’t get there because they were born that way. They hardened themselves through the life they lived, sometimes knowingly and sometimes without even realizing it. Some people let tough situations harden them. Some let those same situations break them. And some have lived such comfortable lives that every minor inconvenience feels like the end of the world to them.
Mental toughness isn’t reserved for fighters, athletes, or some chosen group. It applies to anyone trying to live a real life. And it’s something you can develop on purpose.
Below are the key ways to build it, especially if you don’t have someone like a life coach to hold you accountable.
BREAK YOUR LIMITS CONSTANTLY
The first thing you need to do to develop mental toughness is to break your limits constantly. Whatever goals you set for the day, break them.
If you tell yourself you’re going to do a certain amount of work, do more. If you plan to run three miles, run four. When you reach the point where you’d normally stop, don’t. Push further. Push past the barrier.
Most people quit as soon as they feel discomfort. They think hitting the bare minimum counts as effort. It doesn’t. The difference between average and exceptional happens the moment you feel tired and you keep going anyway. That’s where you build grit. That’s where you build confidence. That’s where you learn what’s actually in you.
If you can train yourself to always go beyond what you expected of yourself, you create a pattern:
I don’t stop at my limit. I break it.
That mindset alone separates the mentally strong from the mentally weak.
TAKE THE HARD WAY OUT
The next rule is simple: take the hard way out.
Most people constantly look for shortcuts. They look for convenience. They look for comfort. And then they wonder why they feel mentally weak.
If you want to build toughness, you have to make the conscious decision to choose difficulty.
That means taking stairs instead of elevators, carrying heavy things instead of asking for help when you know you can do it yourself, walking instead of sitting, grabbing the thing off the ground instead of ignoring it. These seem like small choices, but they’re not. They are daily training reps for your mentality.
Every time you choose the hard way, you’re casting a vote for the kind of person you become. And those votes add up.
This applies to every part of life:
Stop trying to make things easier for yourself. Make them harder. You want the grind. You want the grit. You want resistance. Because resistance is what builds strength, physically and mentally.
DENY YOURSELF COMFORT AND PLEASURE
Another way to develop mental toughness is to deny yourself comfort and pleasure, intentionally.
Most people are controlled by their urges. If they crave something, they indulge. If they feel tired, they rest. If they want gratification, they get it. That lack of control weakens them.
You need to teach yourself that you can say no.
Deny yourself things like:
Comfort foods
Hot showers
Excessive relaxation
Sexual gratification
Dopamine-heavy entertainment
You don’t have to eliminate these forever. The point is to prove that you are in charge of you.
If you can deny yourself basic worldly pleasures, even for short periods of time, you build discipline. You build willpower. You build self-control. If you can control the urges that most people can’t control, there’s nothing else in life you won’t be able to control.
When you learn to say no to your body, you gain freedom over your mind.
Most people tear themselves down without even noticing. They fail at something and immediately start telling themselves how bad they are. They think self-degradation is honesty. It isn’t. It’s self-sabotage.
What’s funny is people talk to themselves in ways they would never talk to someone they love. You would never tell your best friend they suck. You would never tell someone you care about that they should quit. But people say it to themselves all day long.
You need to flip that habit.
Treat yourself like someone you are responsible for supporting. Build yourself up. Be honest about where you need improvement, but don’t attack yourself in the process.
Instead of saying, “I suck,” say, “I can get better and I will.” Instead of saying, “I never stick to anything,” say, “I’m prioritizing my goals now.”
This requires awareness. You have to catch the self-talk in real time and flip it. At first it feels forced, but eventually it becomes your default, and that changes everything.
BUILD AWARENESS THROUGH STILLNESS
To control your mind, you need awareness. And awareness comes from stillness.
Most people never spend time alone in silence. They drown their thoughts in distraction. Then they wonder why they feel anxious or chaotic.
Sit quietly. Pay attention. Watch your thoughts. Let them run. See what arises. You don’t need to become a monk. You just need consistency.
Meditation, even fifteen minutes a day, develops mental self-awareness faster than almost anything else. When you can see your thoughts, you can control them. When you can control them, you become mentally strong.
REFRAME FAILURE
A major place where mental toughness cracks is failure.
Most people look at failure as proof that they’re not capable. They see a loss as evidence of a lack of potential. That’s the wrong view.
A loss is actually information. It shows you exactly where you’re weak. And once you can see weakness, you can fix it.
If you can get back up, if you can keep moving, it wasn’t a loss. It was an opportunity.
The mentally tough treat setbacks like training. They get excited because they’re no longer flying blind. They now know exactly what needs improvement.
When you’ve faced what you thought was the worst-case scenario and survived it, everything else becomes lighter. You stop being afraid of life because you’ve already seen the bottom and made it out.
That’s mental toughness.
UNDERSTAND THAT WORK IS THE CURE
No matter what’s eating at your mind, fear, anxiety, doubt, insecurity, the cure is always the same:
Work.
Not thinking about work. Not planning work. Actual work.
Work works when nothing else works.
Action kills doubt. Action kills fear. Action kills procrastination. Not short bursts of effort, but consistent, boring, unexciting work over long periods of time.
Anything meaningful that happens in your life will come from what you do repeatedly.
Most people already know what they need to do. The problem isn’t knowledge. The problem is action. The monkey in your brain tries to convince you to rest every time you want to be productive. You don’t negotiate with that voice. You go around it and do the work anyway.
If you do what you’re supposed to do, no matter how you feel, you will win.
DISCIPLINE BUILDS CONFIDENCE
Confidence doesn’t come from hype or positive thinking. It comes from evidence.
When you consistently do the things you said you would do, especially when you don’t feel like doing them, you gain respect for yourself. You trust yourself. You stop feeling like a fraud. You become someone reliable in your own eyes.
Even if you’re not where you want to be yet, you’ll never feel bad knowing you gave 100%. You’ll never regret effort. You’ll only regret avoiding effort.
If you only work on days you feel good, you’ll never get anywhere. You have to work on the tired days, the bad days, the irritated days, the anxious days, the low-energy days. Anyone can work when they feel great. Mental toughness is built when you don’t.
THE MIND IS A MUSCLE
Finally, understand that the mind is like a muscle. It only gets stronger through resistance and tearing it down.
If you don’t push your muscles, they don’t grow. If you don’t push your mind, it doesn’t grow. If you avoid discomfort, you stay mentally weak. If you chase convenience, you stay mentally soft.
There’s no shortcut. There’s no hack. There’s no motivational trick. You get there by being willing to do the things your mind doesn’t want you to do.
Nothing great has ever been done by someone mentally weak. If you want to leave your mark, inspire people, achieve the things you dream about, or do anything that most people can’t do, you will not get there with a weak mind.
You have to build mental strength. You have to develop toughness. And nobody is going to do it for you.
Life isn’t waiting. Life is happening right now. There will never be a better time to start than this moment.
Do the work.
10 Surprisingly Easy DIY Valentine’s Gifts for Your Boyfriend (That Actually Mean Something)
DIY Valentine’s gifts get a bad reputation because many of them focus on aesthetics instead of meaning. Overly crafty projects, generic love quotes, or gifts that feel like they were made because it’s Valentine’s Day rather than because they reflect a real relationship often miss the mark—especially for boyfriends who don’t love performative romance.
The gift ideas in this list are different. Each one is a specific, tangible gift you can actually make, even if you’re not creative or short on time. They’re designed to feel personal, emotionally grounded, and relevant to real relationships—not just the holiday.
Each section below outlines exactly what the gift is, why it works, and how to make it, with the option to explore a deeper guide if you want more detail.
A “Why I Choose You” letter set is a collection of short letters or notes, each focused on one specific reason you continue choosing your boyfriend and your relationship. Unlike a single long love letter, this format feels lighter and more approachable. It allows him to absorb your thoughts one piece at a time, without the pressure of reacting to a highly emotional message all at once.
An “Open When” letter kit is a DIY Valentine’s gift designed to support your boyfriend beyond the holiday itself. Instead of dramatic scenarios, this version focuses on moments he’s actually likely to experience, making the gift feel practical rather than cheesy.
The strength of this gift is that it offers reassurance without demanding attention. He can open each letter privately, on his own time.
How to make it:
Choose 5–7 realistic situations, such as “Open when you’re stressed,” “Open when you miss me,” or “Open when you need motivation”
Write a short note for each situation, keeping the tone calm and supportive
Avoid trying to fix problems—focus on encouragement and presence
Label each envelope clearly on the front
Keep the notes concise so they’re easy to read in the moment
Store all envelopes together in a simple folder, box, or tied bundle
Add a short introductory note explaining how the kit is meant to be used
This gift works because it acknowledges real emotional needs without overwhelming him. It’s thoughtful, discreet, and useful—qualities many boyfriends genuinely appreciate.
A relationship timeline mini book is a small, physical booklet that walks through the key moments of your relationship in order. This isn’t meant to document everything or feel like a scrapbook. Instead, it highlights a handful of moments that shaped how you became you together. The result feels reflective and grounded rather than sentimental for sentimentality’s sake.
This gift works especially well for longer-term relationships or couples who’ve been through changes together—moves, challenges, growth, or simply time.
How to Make It
Choose 5–8 meaningful milestones (meeting, a first trip, a hard season, a turning point)
Write 2–4 sentences per moment, focusing on what changed or what you learned
Keep the tone honest and calm, not overly emotional
Arrange the entries in chronological order
Format them into a small booklet (folded pages, stapled, or bound simply)
Use a clean layout with plenty of white space
Add a short introduction explaining why you chose these moments
This gift feels meaningful because it shows perspective. You’re not just celebrating romance—you’re acknowledging the shared history that created trust and connection. It’s something he can reread years later and still recognize as true.
Instead of focusing only on traits or big romantic feelings, this DIY Valentine’s gift celebrates the everyday life you share. It highlights routines, habits, and small moments that define your relationship when no one else is watching.
This makes it especially meaningful for boyfriends who value stability and companionship over grand gestures.
How to Make It
Write a list of 10–20 specific things about your shared life
Focus on ordinary details (mornings, shared meals, inside jokes, routines)
Avoid vague statements—be concrete and specific
Keep the language natural and conversational
Format the list as a single printed page or folded card
Use a simple font and clean layout
Present it in an envelope or simple frame
This gift works because it validates the life you’re actually living together. It says, “I notice and appreciate the real version of us,” which often means more than romantic declarations.
A minimalist memory jar is a collection of short, intentional notes placed in a clean, simple container. Unlike overly decorative versions, this gift is designed to feel calm and uncluttered, making it easier to engage with over time.
The value of this gift isn’t in volume—it’s in specificity.
How to Make It
Write 20–30 short notes, each one to two sentences long
Focus on specific memories or moments, not generic compliments
Use uniform paper to keep the presentation clean
Fold each note the same way
Place them in a simple jar or small box
Add one short explanation note describing how and when to use the jar
This gift works because it’s interactive without being overwhelming. He can open one note at a time, whenever he wants, rather than feeling pressure to consume it all at once.
This DIY Valentine’s gift captures one ordinary day you share—nothing performative, nothing staged. It’s a single-page “snapshot” that describes what your time together actually feels like: the routines, small habits, and quiet moments that make your relationship real. For many boyfriends, that kind of grounded appreciation lands harder than a dramatic love note, because it’s specific and believable.
The goal is to make him feel seen in the everyday: the way he makes coffee, the way you default to certain jokes, the way your nervous system settles around him. It’s a sentimental gift, but it doesn’t lean on clichés. It’s essentially: “This is our life, and I love it.”
How to Make It
Pick one representative day (a weekend together, a typical date day, or a cozy night-in)
Write the day in simple “beats,” from morning to night (8–12 beats is plenty)
Include specific details: a phrase he says, the show you always pick, the food you ordered, the song in the car
Add 2–4 “micro-notes” in parentheses about why those moments matter to you
Keep the tone observational and calm, not overly romantic or poetic
Format it as a clean one-page layout (title, date/location if you want, then the beats)
Print it on nice paper or slide it into a simple folder or envelope
Optional: add one small photo at the bottom (or none—words can carry this)
This gift works because it’s re-readable. He can glance at it and instantly remember what being with you feels like—without pressure, without performance.
A playlist is easy. A playlist with liner notes becomes a real gift. This DIY Valentine’s idea is a modern mixtape: you curate songs, but you also explain why each one is there. The “why” turns music into memory, and memory into meaning.
This is a great boyfriend Valentine’s Day gift if he loves music, commutes a lot, works out, or just doesn’t want a physical object. The final gift is two parts: (1) the playlist link and (2) a small set of notes—printed or written—so he can understand the emotional context.
How to Make It
Choose a theme so the playlist has a spine (first months together, long-distance, “how you feel like home,” etc.)
Pick 10–15 songs that match the theme (don’t overstuff it)
For each song, write 2–4 sentences:
what it reminds you of (moment/place)
what it represents (feeling/season)
why you chose it for him
Avoid generic lines like “this is our song”; name a detail only you two would know
Create the playlist on his preferred platform and give it a clear title
Present the liner notes in one of these simple formats:
a single printed page with numbered tracks
a small folded card stack
a note in your phone shared as a screenshot/PDF
Add a one-paragraph cover note: “Play this when you want to feel close to me.”
It’s meaningful because he can return to it. It travels with him, and the notes make it personal—not just curated.
Compliments are nice. Admiration hits deeper. This DIY Valentine’s gift is a small series of cards, each naming one thing you genuinely respect about your boyfriend—his character, how he handles pressure, how he treats people, how he keeps going, what he values. It’s not flattery and it’s not performative romance. It’s recognition.
This works well for boyfriends who don’t like gushy gifts but do appreciate being understood. The cards are short and specific, so they’re easy to read and easy to keep. It becomes a quiet confidence boost he can revisit.
How to Make It
Choose 6–8 traits you truly admire (not “nice eyes,” but meaningful qualities)
Make one card per trait; keep them uniform in size and style
Use this simple structure on each card:
Trait (1 line)
Proof (1–2 specific examples)
Impact (1 line: what it changes for you/your relationship)
Keep the tone calm and real—write like you talk
Avoid backhanded compliments (“even when you…”); keep it clean and affirming
Assemble the cards into a small envelope, box, or tied stack
Add a short cover note: “I want you to know what I genuinely respect about you.”
This is a future-focused DIY Valentine’s gift that stays low-pressure. It’s one page of small, realistic things you’re excited to experience together—nothing that sounds like an ultimatum, timeline, or promise. Think: weekend plans, places you’d like to go, things you want to cook together, shows to start, traditions to build.
It’s meaningful because it signals commitment without forcing a conversation. It says: “I want more life with you,” in a way that feels warm, not heavy.
How to Make It
Title the page with something simple: “Things I’m Excited To Do With You”
List 12–20 ideas; keep them specific and doable
Mix categories so it feels balanced:
tiny (coffee shop crawl)
seasonal (summer night drive)
meaningful (take a class together)
cozy (make a signature Sunday dinner)
Add a short “why” line under 3–5 items (one sentence each)
Avoid language that implies obligation (“we will”); use open phrasing (“I’d love to…”)
Format it as a clean single page and print it
Optional: include 3 checkboxes next to the first items you want to do soon
Present it in an envelope with a brief note: “Pick one and let’s make it real.”
This gift works because it creates momentum. It turns Valentine’s Day into a starting point, not a performance. And it’s the kind of sentimental gift that still feels practical.
Sometimes the most sentimental DIY Valentine’s gift is the simplest: one meaningful item, preserved with context. This is a “keepsake envelope” that holds a single object from your relationship—like a ticket stub, a photo booth strip, a handwritten receipt from your first date, a pressed flower, a map snippet, or a note you once left each other—paired with a short written explanation of why it matters.
The difference between “random sentimental clutter” and a true keepsake is context. The note turns the object into a story.
How to Make It
Choose one item that carries real meaning (not just something old)
Pick a clean envelope or folder that fits it without folding (or fold neatly if needed)
Write a one-page note with this structure:
What this is (name the object)
When it’s from (date/season is enough)
Why it mattered (the moment + what you felt)
Why you’re keeping it (what it represents now)
Keep the tone simple and sincere; avoid overexplaining
Place the item and note inside the envelope
Label the envelope on the front (example: “The Night We Stayed Up Talking”)
Optional: seal it with a small sticker or wax seal, but keep it understated
This gift works because it’s intimate and durable. It doesn’t require display. It becomes something he can keep in a drawer and rediscover years later—still meaningful because you captured the why.
7 Super Easy DIY Rustic Outdoor Christmas Porch Decor Ideas
Are you all about style, decor and organization? Download a copy of our Decluttering Workbook. ****
Rustic Christmas porch decor has a charm that feels welcoming, warm, and handmade in all the best ways. These ideas use wood boards, logs, paint, and simple outdoor decor items you can easily source at any home center, craft store, or even your backyard.
Whether you like whimsical characters, traditional Christmas scenes, or farmhouse-style pieces, you can build these displays with approachable tools and beginner-friendly materials. This list walks you through real DIY concepts you can recreate using plywood sheets, tree slices, outdoor lights, and greenery.
Wooden porch characters are one of the easiest ways to bring whimsical holiday charm into your outdoor space. Using plywood boards, a jigsaw, outdoor paint, and stakes, these characters can be created in just a weekend.
Gnome cutouts work especially well because their simple shapes are forgiving for beginners. Add felt scraps, ribbon, or outdoor-safe decals to build depth without using advanced painting techniques.
Elves and Santa figures look charming flanking a porch tree or positioned beside your steps. To make them stand out at night, pair them with ground floodlights, battery-powered spotlights, or twinkle lights wrapped around nearby bushes.
You can also incorporate small props like faux gift boxes, weatherproof lanterns, or metal buckets filled with pine branches. These additions give your characters dimension and help anchor them visually to the porch so they feel like part of a larger display.
This type of decor is perfect for homeowners who love color and playful details but still want materials that hold up well outdoors. Because almost everything is made from wood, these pieces store easily and can be refreshed year after year with a light coat of paint.
Rustic Wooden Christmas Signs & Direction Posts
A rustic Christmas sign made from reclaimed boards is one of the most versatile porch decorations you can create. Directional signposts shaped like Christmas trees are especially fun because each board can point toward a different holiday destination.
Use old fence boards, pallet wood, or inexpensive craft boards to get the natural weathered look that makes this style feel authentic. Exterior-grade paint or chalk paint gives you bold, readable text without overwhelming the rustic finish.
Place your sign next to your walkway, near a large planter, or centered at the porch entry. To enhance the effect, add solar stake lights or string lights along the signpost so it glows at night.
Signs also pair beautifully with oversized wreaths, farmhouse-style lanterns, and galvanized buckets filled with evergreen clippings. These products add depth and texture, helping your sign feel more like part of a curated outdoor vignette.
A wooden Christmas sign works well for small porches because it adds height without taking up floor space. With just a few boards and basic outdoor screws, this is an approachable project that delivers a big holiday impression.
Snowman-Themed Rustic Porch Decor
Snowman decor is a classic rustic porch staple because it mixes playfulness with the warmth of handmade craftsmanship. Wooden snowmen made from large cutouts or stacked circular boards are simple to build and easy to customize for your home.
Paint them white with contrasting scarves, buttons, and hats to give each character personality. Add fabric scraps, rope, or twigs for accessories that add texture and keep the look authentically homemade.
Hanging snowman garlands made from thin wood slices are perfect under porch overhangs. They sway gently in the wind and create movement, which naturally draws attention from the street.
Log-slice snowmen also work beautifully for rustic themes because their natural wood grain becomes part of the design. Pair them with pine sprigs, wrapped burlap, or seasonal ribbon to soften the overall display.
To enhance visibility in low light, consider placing LED candles, solar walkway lights, or small lanterns around the snowmen. Snowman decor is especially effective for family-friendly porches where you want a cheerful winter look that lasts all season.
Rustic Log Animals & Wood-Slice Critters
Log animals add a charming woodland touch to any outdoor Christmas porch. Reindeer made from small logs, sticks, and round wood slices are beginner-friendly and surprisingly sturdy.
Their bodies can be crafted from firewood pieces, while branches make perfect legs and antlers. A small round slice forms the face, which you can detail with paint, buttons, or leftover craft items.
These rustic critters look best when grouped together to create a small “forest” scene. Position them near planters, beside a porch tree, or around a wooden sleigh to give the display more storytelling.
Wood-slice reindeer are also easy to personalize depending on your style. Add a scarf made from fabric scraps, wrap them with fairy lights, or place them in straw or evergreen-filled baskets for extra charm.
You can incorporate other rustic porch items like wooden crates, twig wreaths, or galvanized tubs for a complete woodland layout. These elements pair well with natural textures and help the log animals stand out without overwhelming the design.
Wooden Nativity or Storybook Scenes
A wooden nativity scene instantly transforms your porch into a warm, traditional Christmas display. Using plywood or MDF boards, you can cut simple silhouettes of Mary, Joseph, and the manger to create an impactful centerpiece.
Painted details can remain minimal for a clean, rustic feel, or you can add shading for a more decorative appearance. Position the nativity near shrubs or against the porch wall for stability and a natural backdrop.
Storybook character scenes also create a cheerful, family-friendly porch theme. These cutouts require only basic shapes, so even those with limited painting experience can bring them to life.
Add hay bales, wooden crates, or lanterns to build depth and frame the display. Outdoor spotlights help illuminate the scene at night, making it visible from down the street.
Both nativity and storybook displays pair well with additional porch accents like evergreen garlands, doormats with seasonal patterns, and planters filled with winter greenery. These supporting items give the display a warm, fully decorated look without adding complexity.
Rustic Christmas Porch Trains & Outdoor Displays
A wooden Christmas train is a show-stopping porch decoration that adds color, nostalgia, and movement to your outdoor space. The base can be built from wooden boxes, cutout panels, or stacked crates painted in classic holiday tones.
Position the train along your front walkway or directly across the porch width. Fill the train cars with wrapped faux gifts, pine branches, or painted wooden figures to make the scene feel complete.
A smaller “logging train” made from wood rounds and logs adds a charming rustic twist. The natural textures blend beautifully with traditional farmhouse or cabin-style homes.
Enhance the display using string lights, lanterns, or battery-powered candles placed inside or around the train. These lighting elements help highlight the shape and details after dark.
Trains pair well with oversized wreaths, porch trees, and wooden signs to create a cohesive layout. This type of decor is perfect for homeowners who want a statement piece without relying on inflatable or plastic decorations.
Tree-Themed Wooden Yard Decor
Wooden Christmas tree cutouts are one of the easiest and most impactful pieces to add to a rustic porch. Whether painted in solid colors or decorated with smaller wooden ornaments, these trees create a bold visual anchor for your outdoor setup.
Use multiple sizes—tall pieces for the yard and smaller ones for steps or planters—to build depth and balance. The layered effect looks especially beautiful when paired with outdoor string lights or solar-powered spotlighting.
You can also attach cutout snowmen, elves, or penguins to your wooden trees to create a full character scene. This turns a simple decor piece into a playful holiday feature that kids love.
To style the base, add planters filled with winter greenery, wrapped gift boxes, or wooden crates. These grounding items help the trees feel intentional rather than leaning or floating visually.
Because these decor pieces are flat and lightweight, they store easily and can be repainted in different color themes each year. A wooden tree display is a great solution for porches that need a simple, tall centerpiece that’s weather-resistant and easy to assemble.
Rustic outdoor Christmas porch decor doesn’t need to be complicated to make a big seasonal impact. With simple materials like wood boards, logs, paint, greenery, and basic lighting, you can create displays that feel handmade, warm, and one-of-a-kind.
More Christmas Decor Ideas You’ll Love
If you’re looking for even more inspiration after creating your rustic outdoor porch decor, these Christmas guides offer fun themes, trending color palettes, and designer-approved ideas you can recreate quickly. Explore these reader favorites to spark new DIY projects for every corner of your home.
Are you all about style, decor and organization? Download a copy of our Decluttering Workbook.
10 Crazy Simple DIY Christmas Décor Ideas That Look Luxe
Creating a beautiful Christmas home doesn’t have to be expensive, overwhelming, or time-consuming. With a few clever techniques and simple materials, you can achieve a high-end, designer look without spending more than you want to. The secret is choosing projects that deliver big visual impact with very little effort, and that’s exactly what this list is designed to help you do.
Each idea in this guide focuses on something “crazy simple” — quick wins that immediately elevate your space. You don’t need advanced DIY experience or specialty tools to pull these off. Most can be done with items you already have at home, budget supplies from craft stores, or grocery-store greenery that you can style like a pro.
What makes these ideas especially effective is how effortlessly they create a luxe appearance. Whether you love a cozy holiday feel, a modern winter look, or full glam Christmas vibes, you’ll find a project here that helps your home look thoughtfully decorated and beautifully curated.
Every section includes practical tips, creative variations, and suggestions for pairing each project with your overall holiday decor. And if you want to go deeper into any of these ideas, each section ends with a link to a more detailed guide where you can learn the full step-by-step instructions.
Let’s jump into the first project and start turning simple materials into stunning Christmas decor that looks high-end, custom, and totally unique to your home.
DIY Christmas tree ornaments are one of the easiest ways to instantly upgrade your holiday decor without spending much money. They let you tailor your tree to your exact style, whether you prefer classic red and gold, soft neutrals, or a full glam metallic theme.
A simple starting point is clear fillable ornaments. You can fill them with faux snow, greenery sprigs, ribbon curls, or glitter for a high-end look in seconds. This method creates ornaments that feel cohesive and expensive, especially when you stick to a limited color palette.
Painting ornaments is another effortless way to make budget decor look luxe. Metallic paints like champagne, pewter, or rose gold elevate even the cheapest plastic ornaments. Soft matte spray paints are perfect if you prefer a Scandinavian or minimalist aesthetic.
For a trending high-end look, velvet ornaments are a beautiful option. Wrapping ornaments in velvet fabric or using velvet ribbon to create wide stripes adds a rich, luxurious texture. Adding a brushed-gold cap or ribbon enhances the designer feel.
If you’re going for a rustic or cozy look, twine-wrapped ornaments or yarn-wrapped spheres are incredibly simple and charming. Pair these with wood beads or natural greenery for a warm, organic style that works well on farmhouse or cottage-inspired trees.
Clustered ornament groupings are another designer trick. Hanging two or three ornaments together on one hook adds volume and dimension, making your tree appear fuller and more styled. This is often seen in professional tree setups and is surprisingly easy to recreate.
To make your ornaments feel cohesive, choose one or two finishes—such as matte, metallic, or textured—and repeat them throughout the tree. This helps everything feel intentional without requiring every ornament to match.
Whether you’re upgrading old ornaments or making brand-new ones, these DIY techniques help you achieve a polished, high-end tree without the designer price tag. They’re fast, beginner-friendly, and endlessly customizable.
For a complete step-by-step breakdown of painting, filling, and wrapping ornaments, visit the extended guide here: Read the full DIY ornament tutorial.
Make Instant “Designer” Candle Hurricanes Using Glass Vases
Candle hurricanes are one of the simplest ways to make your holiday decor feel elegant and warm. Even better, you don’t need expensive versions from high-end stores—you can create your own using basic glass vases and a few affordable materials.
Start with clear glass cylinder vases, which are widely available at craft stores, home improvement stores, and even dollar stores. Their tall shape instantly gives candles a more elevated, styled look. Add LED pillar candles or battery-operated timers so they glow consistently each evening.
Enhance the base of each vase by adding faux snow, Epsom salt, or greenery rings. These small touches create depth and seasonal detail that looks polished. Layering pine, cedar, or eucalyptus around the vase gives it a designer feel that works beautifully on mantels and tabletops.
If you want a more sophisticated look, use rub-and-buff in gold, brass, or champagne tones to add a subtle metallic band around the bottom of the vase. This is a small DIY step with big visual payoff, creating a finish similar to luxury candle brands.
You can also cluster hurricanes in varying heights for a professional, styled appearance. Grouping them in odd numbers—such as three or five—creates a balanced, intentional arrangement. This works especially well as a dining table centerpiece or on entryway consoles.
To create even more texture, tuck small ornament clusters, pinecones, or berry stems around the bases. These elements elevate the arrangement without overpowering the clean simplicity of the glass vases.
The beauty of DIY hurricane vases is how versatile they are. You can change the fillers, greenery, and colors year after year without buying new decor. It’s one of the most flexible and stylish holiday projects you can do.
Create a Luxe Garland Using Grocery-Store Greenery
You don’t need a florist’s budget to create a stunning Christmas garland. Grocery-store greenery—like eucalyptus, pine, and cedar—can easily be transformed into a rich, layered garland that looks straight out of a designer home catalog.
Start by choosing two or three types of greenery to layer. Mixing textures creates a full, dimensional look. Cedar adds softness, pine adds structure, and eucalyptus brings a fresh, modern feel. Combining them makes your garland appear lush and intentional.
Lay the greenery strands out flat and overlap them in one consistent direction. This creates a natural flow and makes the garland look professionally assembled. Use floral wire to secure each piece gently, maintaining a loose, organic shape.
If you want a fuller look, add additional sprigs between the main branches. This technique is especially effective on mantels where you want depth and draping. Adding more greenery in high-visibility areas creates a high-end effect without much effort.
To elevate your garland even further, weave ribbon through the branches. Wired velvet ribbon is an excellent choice for a luxurious finish. You can also tie small bows or add long, cascading ends for a dramatic touch.
Ornament clusters, berry stems, or pinecones add extra detail and dimension. Use them sparingly for a cohesive, minimalist look, or add more for a fuller, festive style. Gold, champagne, and matte ornaments create a soft, elegant glow.
For longer areas—like stairways or doorframes—connect multiple smaller garlands rather than trying to build one massive piece. This makes it easier to manage and prevents sagging. Simply overlap the ends and secure with wire for a seamless look.
The best part is that grocery-store greenery is affordable and easy to refresh. If a few sprigs dry out, replace them without redoing the entire garland. This flexibility helps your decor look fresh throughout the season.
Upgrading plain Christmas stockings is an easy way to make your mantel look custom and high-end without buying new ones. Faux fur cuffs add instant luxury and warmth, transforming even budget stockings into stylish decor pieces.
Start with simple stockings in a fabric you like—felt, knit, or linen all work well. Neutral colors such as cream, gray, or deep red pair beautifully with faux fur trims. This allows the cuffs to stand out while keeping the overall look cohesive.
Choose faux fur in a texture that complements your style. Long-hair faux fur offers a glamorous feel, while shorter faux fur creates a clean, modern look. White faux fur is classic, but taupe, brown, or gray can add a cozy winter lodge vibe.
Cut a strip of faux fur wide enough to wrap around the top of the stocking. Hot glue is typically strong enough to secure it, but fabric glue works well for a more flexible finish. Make sure the seam is positioned discreetly toward the back for a polished appearance.
Adding embellishments can take your stockings to the next level. Consider attaching gold initials, wooden name tags, or small jingle bells. These little details help personalize each stocking while maintaining that boutique, designer look.D
If your stockings feel too flat, lightly stuffing them with tissue paper gives them structure. This small step makes them appear more luxurious when displayed on the mantel. It also helps them hold their shape when layered with garlands or beads.
Styling your stockings thoughtfully enhances the overall holiday display. Stagger them slightly, vary their angles, or layer greenery behind them for depth. Velvet ribbons, beaded garlands, or fairy lights can add additional texture and sparkle.
This upgrade is surprisingly quick, making it perfect for busy decorators who want high impact with minimal time investment. Whether your theme is rustic, glamorous, or Scandinavian, faux fur cuffs adapt beautifully.
Nothing personalizes your holiday decor like homemade Christmas decorations. These simple, high-impact ideas give your home a warm, custom feel while still looking elevated and professionally styled.
One of the most dramatic homemade decorations is ribbon waterfall streamers for the Christmas tree. These long cascades of wired ribbon instantly add movement, texture, and a luxe designer flair. Using 2–3 coordinating ribbons creates depth and visual richness.
Ornament clusters are another easy homemade decoration that look surprisingly high-end. Creating small bundles of ornaments and hanging them together adds fullness to your tree or garland. It’s an effortless way to upgrade budget ornaments into something impressive.
Tree picks made from wired stems, faux florals, or glittery branches add instant dimension. These are often used by professional tree designers because they fill gaps, catch light beautifully, and tie together your color scheme. Making your own picks is far cheaper than buying pre-made ones.
DIY bows can elevate nearly any space. Large velvet or satin bows add drama to wreaths, mantels, and stair rails. Smaller bows can be added to ornaments, cabinet wreaths, or gift boxes for a unified and elegant theme.
For cozy, rustic charm, consider using natural materials like dried oranges, cinnamon sticks, pinecones, and wooden beads. These elements add warmth and texture and create a timeless holiday look. They also smell wonderful, adding an extra sensory layer to your decor.
Paper-based decorations are another simple homemade option. Folding, cutting, or layering kraft paper or cardstock can create Scandinavian-inspired stars, snowflakes, or 3D ornaments. These minimalist designs have become incredibly popular for modern homes.
With homemade decorations, the key is staying consistent with your overall color palette and textures. Repeating a few materials—like velvet ribbon, matte ornaments, or gold accents—helps all your DIY pieces feel coordinated and intentional.
A Christmas tray is one of the easiest ways to create a polished, designer-looking centerpiece with minimal effort. With just five thoughtfully chosen items, you can make an arrangement that looks sophisticated and festive.
Start with a tray that fits your style—wood, metal, ceramic, or mirrored surfaces each create a different mood. Neutral trays are the most versatile and blend well with both traditional and modern holiday themes.
The first key item is a candle. Whether you choose a pillar candle, a jar candle, or a cluster of votives, the soft glow instantly adds warmth and ambiance. LED candles also work beautifully and are safer around kids and pets.
Next, incorporate greenery. Faux or fresh branches of cedar, pine, or eucalyptus add fullness and a natural element. Tuck them loosely around the candle to create depth and texture without overwhelming the tray.
The third item is an ornament cluster. Choose ornaments that match your color scheme and secure two or three together with ribbon or wire. This gives your tray a festive, upscale touch that feels cohesive with the rest of your decor.
Your fourth item should be decorative beads or garland. Wooden beads add warmth, while metallic beads add shine and sophistication. Loosely draping them around the other elements brings a relaxed yet elegant look.
Finally, add a small decorative bowl or dish. This could hold matches, extra ornaments, bells, or faux snow. The bowl creates a finishing touch and adds balance to the layout.
When styling the tray, aim for natural asymmetry. Place the candle on one side and offset it with the bowl on the other. Layer the greenery, beads, and ornaments in a way that feels effortless but intentional.
This simple 5-item formula works on coffee tables, kitchen islands, nightstands, and entryway consoles. It’s flexible, easy to refresh, and delivers big visual impact with very little effort.
Faux snow-dipped branches create a magical, wintery effect that looks like something from a boutique florist. Surprisingly, they’re incredibly easy to make using just glue and Epsom salt.
Start by gathering branches from your yard or using faux branches from a craft store. Natural branches provide interesting shapes and textures, while faux branches offer flexibility and durability. Both options work well for this project.
Mix school glue or Mod Podge with a small amount of water to create a brushable consistency. Apply the glue generously to the tips and edges of the branches. Don’t worry about being precise—slight variations add to the natural snowy effect.
While the glue is still wet, sprinkle Epsom salt over the branches. The salt crystals reflect light beautifully, creating a sparkling snow-like finish. Rotate the branches as you sprinkle to ensure even coverage.
For a frostier look, add a second layer of glue and Epsom salt once the first layer dries. This builds up texture and makes the branches appear heavier with snow, similar to designer winter decor.
Once dry, the branches can be displayed in vases, tucked into garlands, added to wreaths, or used as tabletop centerpieces. They catch light in a stunning way, especially when placed near fairy lights or candles.
You can also customize the branches further by adding glitter, metallic paint, or small faux berries. These accents create even more dimension and allow the branches to blend seamlessly with your holiday color scheme.
The beauty of these snow-dipped branches is how versatile they are. They work beautifully in rustic, modern, minimalist, and glam holiday styles. Plus, they cost almost nothing to make.
Designer-wrapped gifts are a smart way to elevate your holiday decor while keeping costs low. With just a few affordable materials, you can create gift boxes that look like they came from a luxury boutique.
Start with simple kraft paper, which provides a clean, matte base. It’s easy to work with and pairs beautifully with almost any ribbon color. You can also use white or black wrapping paper for a more modern edge.
Velvet ribbon is the star of this project. Its rich texture instantly creates a high-end feel. Wide velvet ribbon looks especially luxurious, but narrow ribbon can be layered for a delicate, styled effect.
To add dimension, incorporate small decorative pieces like bells, mini wreaths, fresh greenery, or wax seals. These elements bring character and help your gifts look intentionally designed rather than simply wrapped.
For a cohesive display, stick to one or two color palettes. Champagne and ivory look elegant, while forest green and gold create cozy, classic holiday vibes. Repeating colors across multiple boxes ties the whole scene together.
If you want to elevate the look further, fold the paper edges cleanly and secure them with double-sided tape for invisible seams. Crisp folds make the wrapping look professional and polished.
To create height variations, use boxes of different sizes and stack them strategically. Placing a cluster of designer-wrapped gifts near the tree, on bookshelves, or beside the fireplace adds a sophisticated touch to your holiday styling.
These decorative gifts can be repurposed year after year. Simply store the boxes carefully so your beautiful wrapping stays intact for future seasons.
Craft a Cozy Glow With a Simple Mason-Jar Candle Cluster
A mason-jar candle cluster is one of the easiest ways to add warmth and charm to your holiday decor. It creates a cozy glow that works beautifully in any room.
Start with mason jars in various sizes. The mix of heights adds visual interest and creates a layered glow. Remove any labels and clean the jars for the best clarity.
Add faux snow or Epsom salt to the bottom of each jar. This provides a soft base and elevates the candles so the light reflects beautifully. You can add more or less filler depending on how high you want the candle to sit.
LED candles work best because they’re safe and flicker realistically. Tuck one candle inside each jar, making sure it’s centered for an even glow. Matching the candle color to your holiday palette keeps the look cohesive.
Grouping the jars together on a tray or wood slice creates a unified centerpiece. Clusters of three, five, or seven jars tend to look the most balanced. Position taller jars in the back and shorter ones in front.
To add more texture, tuck small greenery sprigs, pinecones, or ornament clusters around the jars. These accents create a fuller, more festive arrangement without distracting from the soft candlelight.
This project adapts easily to different styles. For a rustic look, use twine around the rims of the jars. For a glam version, add a bit of gold rub-and-buff to the bottom half of each jar for a dipped metallic effect.
Mason-jar candle clusters are perfect for coffee tables, kitchen islands, bedside tables, and even bathrooms. Their gentle glow creates instant holiday ambiance wherever you place them.
DIY Christmas wreaths are one of the most rewarding holiday projects because they make a big impact with surprisingly simple steps. Whether you prefer a classic evergreen look or a modern minimal wreath, the process is easy and endlessly customizable.
Start with a wreath form—grapevine, wire, foam, or hoop styles all work well. Grapevine wreaths are great for rustic looks, while metal hoops are perfect for sleek, modern designs.
If you’re working with fresh greenery, layer cedar, pine, and eucalyptus for a lush, full wreath. Attach the greenery with floral wire, overlapping each piece so the stems are hidden. This creates a seamless, natural flow.
For a more minimal, contemporary design, use a metal hoop and decorate just a portion of it. Asymmetrical wreaths with a cluster of greenery on one side are stylish, simple, and easy to assemble.
Adding ribbon can take your wreath from pretty to stunning. Velvet ribbon adds luxury, burlap creates rustic charm, and satin ribbon adds elegance. Long trailing ribbons add movement and sophistication.
To introduce more texture, incorporate pinecones, berries, bells, or ornament clusters. These accents help tie the wreath into your overall holiday theme, whether that’s glam, rustic, modern, or traditional.
If you prefer a non-greenery wreath, consider alternatives like yarn-wrapped forms, dried florals, or even ornaments-only wreaths. These unique designs often become standout pieces in your holiday decor.
DIY wreaths work beautifully on front doors, interior walls, kitchen cabinets, chairs, and even windows. Their versatility makes them perfect for creating a cohesive holiday look throughout your home.
CONCLUSION: Bring Your Luxe Christmas Vision to Life
Creating a beautiful, high-end Christmas home doesn’t require expensive decor or elaborate projects. With simple materials and a few clever techniques, you can transform every corner of your home into a warm, inviting, magazine-worthy space. Each idea in this guide was designed to give you maximum impact with minimal effort, making your holiday season both beautiful and stress-free.
No matter your style or skill level, your home can look magical this Christmas. And now, you have all the ideas you need to make it happen with ease, joy, and a beautiful luxe finish.
8 Gorgeous Holiday Color Schemes That Reveal Your Style (Which One Are You?)
Are you all about style, decor and organization? Download a copy of our Decluttering Workbook.
****
Holiday décor goes far beyond what looks pretty. It’s also one of the easiest ways to express your personality without saying a word.
Every color palette holds a story. And the one you choose reveals something about how you want your home to feel this season—calm, joyful, glamorous, or a little magical.
Below, discover the eight most popular holiday color schemes and the identity each one reflects. As you read, pay attention to which palette feels like home in your body, not just your eyes.
A white Christmas palette is all about serenity. It’s calm, clean, peaceful, and feels like stepping into quiet snowfall.
People who feel drawn to white décor are often craving stillness at the end of a long year. White feels like a reset button—softening the noise, decluttering the mind, and creating room to breathe.
This palette shines through textures more than color. Think white faux fur, knitted stockings, snowy garlands, frosted ornaments, and warm white lights.
Instead of loud color, the beauty comes from tone-on-tone layering. It’s simple yet luxurious in a quiet, understated way.
The vibe here is cozy minimalism. Everything feels intentional, uncluttered, and soothing.
A white Christmas tree with soft lights becomes the centerpiece. It reflects purity, peace, and a gentle glow that grounds the entire space.
Adding clear glass ornaments, white candles, and white-washed wood keeps things airy. Metallics like silver or champagne can add depth without overpowering the quiet elegance.
If you’re craving a holiday season that feels like rest instead of chaos, this palette speaks your language. It’s perfect for women who want calm after a long year of carrying everything on their shoulders.
A white palette doesn’t shout for attention—it whispers. And that whisper says, “You deserve ease.”
A blue Christmas palette feels elegant, steady, and emotionally grounding. It’s the color scheme for the woman who wants her home to feel peaceful but elevated.
Blue carries a sense of winter magic without the heaviness of traditional red. It feels intentional, polished, and deeply calming.
This palette looks stunning with navy, sapphire, icy blue, or even rich indigo. Silver or white accents add brightness and reinforce the cool, wintry mood.
If red décor feels overwhelming or too loud, blue often feels like the perfect balance. It brings personality without demanding attention.
A blue tablescape creates a serene, wintry moment. Think navy napkins, silver chargers, and frosted greenery running down the center.
People who love blue tend to value emotional steadiness. They like their holidays quiet, intentional, and less performative.
Blue reveals a style identity that’s refined but not fussy. You prefer calm beauty over crowded décor, and consistency matters more than trends.
This palette also feels incredibly mature. It’s perfect for someone stepping into a new era of confidence or independence.
If you’re craving a holiday feeling that is cozy yet composed, blue might be your match. It supports a sense of inner peace during a season that often pulls women in every direction.
For a full breakdown of complementary textures, specific ornament types, and room-by-room styling ideas, browse the deeper guide.
3. Traditional Red Christmas — The Festive Classic
Red is the heartbeat of holiday tradition. It’s warm, nostalgic, joyful, and instantly makes a home feel alive.
People drawn to red often love creating a home that feels welcoming. It’s a palette that says: “Come in, get cozy, stay awhile.”
Red décor triggers comforting memories—family gatherings, fireplaces, childhood excitement. It’s a color that reconnects adults to simpler, sweeter times.
If you want a décor palette that radiates warmth and carries the heart of Christmas, red will always deliver. It’s classic for a reason—it simply feels like home.
A red-and-white palette is cheerful, crisp, and delightfully fun. It creates a festive look without feeling overwhelming.
This combination feels like candy canes, cozy sweaters, and childhood magic. It brings playfulness while still looking clean and polished.
People drawn to this palette love a little whimsy but want their home to stay visually tidy. The balance of bold red and pure white creates a perfect contrast.
A red-and-white tree feels bright and joyful. Candy-cane ribbons, striped ornaments, and white lights make it pop.
This palette works beautifully with Scandinavian-inspired décor. Clean lines, simple greenery, and pops of red keep everything fresh.
Red-and-white stockings instantly brighten a mantle. White garland or faux snow softens the boldness of the red.
People who love this palette often have a youthful spirit. They enjoy fun traditions, playful details, and décor that feels nostalgic but not cluttered.
It reveals a personality that is bubbly, warm, and full of energy. You want your home to feel cheerful the moment someone walks in.
If you want décor that feels festive, clean, and full of charm, this palette is a perfect fit. It brings joy without chaos—a sweet spot in holiday styling.
For more red-and-white inspiration, plus exact ornament combinations and styling tips, explore the in-depth guide.
5. Pastel Christmas — The Soft Romantic
A pastel palette turns Christmas into a dreamy, whimsical experience. It’s delicate, feminine, and quietly magical.
People drawn to pastels often crave softness during the holiday season. This palette feels like opening a frosted fairytale book.
Pastel trees—with ornaments in blush, lavender, mint, and light blue—create a gentle, enchanted look. The effect is calming rather than overstimulating.
Bottlebrush trees in soft tones are signature décor pieces. They add vintage charm and blend beautifully with white textures.
This palette pairs beautifully with iridescent or pearl finishes. They catch the light in a romantic, almost ethereal way.
Pastel stockings or blush-colored gift wrap add subtle warmth. It’s perfect for someone who wants a sweet, elegant holiday look.
People who choose pastels often value emotional softness. They want their home to feel like a sanctuary—not a performance.
The pastel palette reveals a personality that is imaginative, gentle, and expressive. You’re drawn to beauty that feels comforting rather than loud.
If holiday chaos overwhelms you, this palette feels like a soothing escape. It turns your home into a soft place to land.
For deeper styling inspiration, including exact shade combinations and décor layouts, see the extended guide.
6. White & Gold Christmas — The Luxe Minimalist
White and gold create an elevated, luxurious holiday palette. It’s clean, warm, and effortlessly sophisticated.
People who love this combination crave elegance without clutter. They enjoy décor that feels intentional, curated, and serene.
White and gold décor feels bright and uplifting. The gold brings warmth, while the white keeps things airy and calm.
A white-and-gold tree feels refined and timeless. Champagne ornaments, gold ribbon, and white lights create a stunning glow.
Gold accents—like candlesticks, frames, or chargers—add cohesive warmth. They elevate the room without adding visual heaviness.
This palette is perfect for those who love luxury but dislike anything too loud. It’s understated glamour with a peaceful energy.
People drawn to white and gold value clarity and beauty. They want décor that makes the home feel fresh and calm.
This palette reveals a personality that loves quiet luxury. You’re drawn to clean lines, soft warmth, and a sense of order.
If you want your home to feel elegant without feeling busy, this palette is your match. It creates a polished holiday look that feels effortless.
For a deeper dive into white-and-gold styling ideas, room inspiration, and ornament combinations, browse the extended guide.
7. Burgundy Christmas — The Rich Romantic
Burgundy is deep, luxurious, and full of warmth. It’s the color of cozy evenings, rich fabrics, and soft candlelight.
People drawn to burgundy crave richness in their holiday décor. They want depth, warmth, and a moodier atmosphere.
Burgundy ribbons instantly elevate a tree. Paired with brass, gold, or deep greenery, the combination feels expensive and timeless.
Velvet is a perfect texture for this palette. It brings softness and depth that fit the mood beautifully.
A burgundy tablescape feels inviting and intimate. Think deep red napkins, brass accents, and warm candlelight.
This palette reveals a personality that values depth and emotional richness. You want your home to feel full of heart and beautifully grounded.
Burgundy has a romantic energy. It creates a dramatic yet cozy atmosphere.
It’s ideal for those who love a sophisticated, moody holiday look. It feels grown-up, sensual, and deeply comforting.
If you want décor that feels like a warm embrace, burgundy is a perfect choice. It’s bold without being loud, and rich without being overwhelming.
Explore more deep-tone styling ideas, tree themes, and room combinations in the extended guide.
8. Red & Gold Christmas — The Glam Traditionalist
Red and gold together create the ultimate festive palette. It’s bold, glamorous, warm, and unmistakably Christmas.
People drawn to this combination love a bit of drama. They want décor that makes a statement the moment you walk in.
Red brings energy and joy. Gold adds richness and a sense of celebration.
A red-and-gold tree feels opulent and impressive. Glossy ornaments, gold ribbon, and warm lights create a holiday showstopper.
This palette is perfect for someone who loves tradition but wants it dialed up. It’s the glamorous version of classic Christmas.
People who choose red and gold enjoy hosting, gathering, and bringing people together. Their décor is bold, confident, and full of warmth.
Red and gold reveal a personality that embraces joy wholeheartedly. You’re expressive, generous, and love celebrating every moment.
If you want the kind of décor that feels like a holiday movie scene, this is your palette. It fills a home with warmth, sparkle, and undeniable magic.
For full styling techniques, ornament pairings, and luxe layering tips, see the detailed guide.
Conclusion: Finding Your Holiday Style Is Just the Beginning
Choosing a holiday color scheme is more than picking a pretty palette. It’s a way of creating a home that feels like you—comforting, expressive, grounded, or full of magic.
These eight styles offer a starting point, but they’re only one part of your holiday decorating journey. Once you know the mood you want to create, you can build that feeling in every room, every detail, and every moment of your home.
Are you all about style, decor and organization? Download a copy of our Decluttering Workbook.
Most people love the idea of setting goals. There’s something exciting about putting new ambitions on paper, imagining the version of yourself who already has them, and feeling like you’re finally about to change.
But somewhere between January and July, those same goals quietly fade into the background. Life gets busy, energy drops, distractions take over, and we go right back to old habits.
It’s not because you’re lazy or unmotivated. It’s because your goals weren’t built to last.
What I’m going to share with you comes from one of my favorite goal-setting methods, an approach inspired by Brian Tracy, but we’re going to take it a few steps further so you can actually hit what you set this year.
1. Write Down Every Goal You Can Think Of
The first thing you need to do is dump every single goal that’s been bouncing around in your head onto paper. Don’t overthink it. Don’t organize it. Just write everything.
Big goals. Small goals. Random ones. Half-formed ideas. Get it all out of your head.
The act of writing already brings structure to your thoughts. You’ll realize how many things you’re juggling mentally without ever giving them real shape.
Once everything’s on paper, take a step back and look at the list.
Now imagine this: if every single goal on that list could magically be achieved within 24 hours, which one would make the biggest positive impact on your life right now?
Which one would make all the other goals easier, or maybe even unnecessary?
That’s the one you pick. That becomes your primary goal for the year.
Everything else will either support it, or wait.
Most people spread themselves too thin and get nowhere. The secret is to focus on one big domino that knocks down the rest. That’s your job right now, find your domino.
2. Make That Goal Concrete
Once you’ve picked your main goal, the next step is to make it real.
Vague goals create vague results.
“Make more money” isn’t a goal, it’s a wish. “Get in shape” isn’t a goal, it’s an idea.
Your brain doesn’t know what to do with those. There’s no finish line. No measurement. No target.
You need clarity. You need something you can visualize and quantify.
For example, instead of “make more money,” say:
“I want to earn $250,000 in annual income, after taxes, and have at least $100,000 in savings.”
Now that’s a goal. It’s specific, measurable, and clear enough for you to reverse-engineer.
If your goal is fitness, make it just as concrete:
“I want to weigh 155 pounds, have visible abs and defined muscle tone at around 10% body fat, with the strength to bench my body weight and the stamina to run two miles without stopping.”
That’s a real goal. It paints a picture. You can measure it. You’ll know exactly when you’ve achieved it.
Every goal demands a price. The question isn’t whether you can have it, it’s what you’re willing to give to get it.
If you want to double your income, you can’t keep doing the same things that got you where you are. You’ll have to grow your skills, improve your focus, and work on projects that stretch you.
Write down what that looks like in your daily life.
Now that you know your goal, what you’re giving, and what you’re giving up, it’s time to track it.
Create a simple daily tracking sheet. Write your main goal at the top and your key actions underneath it. Each day, check off the habits you complete.
This might sound small, but it’s powerful. When you track something, you automatically pay more attention to it. You can’t fix what you don’t measure.
Seeing those boxes fill up, day after day, creates momentum. It gives you proof that you’re following through. And when you start slipping, the empty boxes remind you.
If you can get someone else involved, a friend, coach, or accountability partner, even better. The truth is, we’re all more consistent when someone’s watching.
Tracking builds awareness. Accountability builds consistency. Together, they make progress inevitable.
Why This Works
This process forces you to do something most people avoid: focus.
It removes the noise. It removes the fantasy. It turns vague dreams into a clear execution plan.
And that’s when the results start showing up.
Because the truth is, most people don’t fail because they can’t hit their goals. They fail because they never created a system that makes hitting them possible.
This method fixes that. It gives you something simple, practical, and repeatable, a structure you can use for the rest of your life, no matter what the goal is.
A Final Word on Discipline and Follow-Through
Setting goals is easy. Sticking to them is where most people fall apart.
The reason this system works isn’t because it’s complicated. It works because it creates clarity. You know exactly what to do, what not to do, and what progress looks like.
But clarity only matters if you take action.
When the excitement fades, and it will, you’ll be left with your structure. The tracking sheet. The daily actions. The reminders of what you’re giving and what you’ve given up.
That’s what keeps you grounded when motivation disappears.
Think about it like building muscle. The gym only works if you show up. The weights don’t care about your mood, they respond to consistency.
Your goals work the same way. They grow stronger every time you show up and put in the work, no matter how small.
You don’t need to be perfect. You just need to keep showing up, even if all you can manage on your worst day is your crappy minimum.
If you can keep doing that, if you can stay consistent when it’s boring, inconvenient, or uncomfortable, you’ll hit every goal you set and keep raising the bar every year.
Closing Thoughts
This year, don’t overwhelm yourself with twenty different goals. Don’t chase everything. Don’t fill your list with vague ideas like “get better at X” or “improve Y.”
Pick one thing that truly matters.
Make it specific.
Decide what you’ll give.
Decide what you’ll give up.
Track it daily.
Hold yourself accountable.
That’s how you turn goals into reality.
Because success isn’t about luck, timing, or even talent, it’s about discipline, clarity, and consistency over time.
You can have anything you want this year, as long as you’re willing to do two things: focus on one thing, and never stop showing up for it.
Every year, millions of people start the new year fired up with resolutions, gym memberships, notebooks full of goals, and a “new year, new me” attitude.
By February? Most are already back to old habits.
Not because they’re lazy or unmotivated, but because motivation fades, and systems weren’t built to take its place.
Discipline, not motivation, is what keeps you going when the excitement dies down. But discipline doesn’t show up by accident. It’s built through structure, planning, and repetition.
So if you’re serious about keeping your New Year’s resolution this time, not just for January, but all the way through 2026, this is your roadmap.
1. Set Realistic Goals
Let’s start with something simple: be realistic.
Most people set five or ten huge goals at once, and then wonder why they burn out. You can want to get fit, start a business, eat better, learn a new language, read more books, and spend more time with family, but if you treat all of them like your #1 priority, you’re setting yourself up to fail.
Here’s what you should do instead: write down your top five goals.
Then, pick one to focus on this year. That’s your key resolution, the one that gets your primary energy. The rest still matter, but they’ll live in the background through small habits and systems you maintain passively.
Think of it like this: you can either go an inch in ten directions, or a mile in one.
2. Break It Down Into Daily Actions
Once you have your main goal, write out the smallest possible daily actions that lead to it.
If your goal is to get in shape, that means exercise, hydration, and decent nutrition. If your goal is to change careers, that means learning, networking, and applying consistently.
Don’t get caught up in perfection, focus on what actually moves the needle daily. Most goals fail because people treat them like one-time events instead of everyday processes.
Write these small actions down. Make them part of your routine until they’re as normal as brushing your teeth.
3. Create “Crappy Minimums”
Here’s where most people mess up. They build plans that only work on their best days.
Anyone can hit the gym when life’s good, when you’re rested, when your day’s going smooth. But what about when you’re sick, stressed, or exhausted?
That’s where the “crappy minimum” comes in.
A crappy minimum is the bare minimum version of your habit that you can do even on your worst day. The kind of day where you’re fighting with your partner, you caught a cold, or everything at work went sideways.
If your goal is fitness, maybe your crappy minimum is 15 push-ups or a 10-minute walk. If your goal is learning, maybe it’s reading one page of a book or watching a 5-minute video.
The point is to keep your streak alive, because momentum matters more than perfection.
Discipline isn’t about doing everything. It’s about doing something, no matter what.
If you’re serious about keeping your resolution, create a simple tracking sheet, Google Sheets, a notebook, whatever works for you.
List your goal at the top and track your daily actions with checkboxes. Every day you do your habit, check it off. Every day you miss it, leave it blank.
That visual feedback is powerful. It keeps your goal at the front of your mind and builds a streak that your brain won’t want to break.
If you want to take it up a notch, color-code it, green for success, yellow for “crappy minimum,” red for missed. Over time, those colors will tell you the truth about your consistency.
5. Time-Block Your Week
You can’t hit your goals if your schedule doesn’t reflect your priorities.
Every Sunday, take time to brain dump all your tasks for the week, work, errands, appointments, personal goals, everything. Then, block your calendar in hourly segments and assign specific time slots for your key resolution.
If your resolution really matters, it needs to live in your calendar, not just in your head.
The goal here isn’t to be rigid, it’s to be intentional. You’ll never “find time” for your resolution. You have to make time for it.
6. Schedule Rest (And Protect It)
This one’s non-negotiable.
Rest isn’t a reward for discipline, it’s part of discipline. Without rest, you burn out. And when you burn out, your habits collapse.
So schedule your rest in advance. Literally block it off on your calendar. That means downtime, family time, Sabbath, whatever recharges you.
And here’s the rule: once it’s scheduled, it’s sacred. Don’t move it. Don’t say, “I’ll rest later.” If you don’t protect your rest, procrastination will always catch up and disguise itself as exhaustion.
7. Keep Weekly and Monthly Data
If you’re not tracking your progress, your brain will trick you into thinking you’re failing, or worse, it’ll forget you’re even trying.
Every week, spend 10 minutes reviewing how you did. What went well? What fell apart? Why?
Then, once a month, zoom out. Look at the bigger pattern. Is your system working? Are you getting closer to the result, or just staying busy?
Schedule these reflections in advance so they actually happen. Treat them like business meetings with yourself. You’d never skip a meeting with your boss, don’t skip the one that decides your future.
8. Acknowledge Failure (and Move On Fast)
Here’s a hard truth: you’re going to fail sometimes.
You’re going to miss a day, or a week, or fall off completely for a month. Life happens. The point isn’t to avoid failure, it’s to never let failure become permanent.
That’s why you have systems. When you miss, the system catches you. The tracking sheet reminds you. The reflection session resets you. The crappy minimum gets you back in motion.
Even Franz Kafka wrote in his diary about his constant self-loathing and how he couldn’t stick to his routines. But he kept writing anyway. That’s what matters.
You don’t have to be perfect, you just have to be relentless about restarting.
One day off won’t ruin you. Quitting will.
9. Adjust as You Go
Your first version of a plan is never the perfect version.
If you find your daily actions too easy, level them up. If they’re too hard and you keep missing, scale them down. The goal is consistency, not ego.
You want to create a plan that fits into your real life, not the fantasy version of your life where everything goes smoothly.
Discipline grows through iteration. You build it the same way Milo of Croton built strength: by gradually increasing the load, not by killing yourself on day one.
10. Little Hinges Swing Big Doors
Big transformations don’t happen overnight. They happen from small, consistent actions done over and over again.
If you follow this process, set one clear resolution, break it into daily actions, stick to your crappy minimums, track everything, review weekly, and adjust as needed, you won’t just keep your resolution. You’ll become the kind of person who doesn’t need resolutions anymore.
By the time 2027 rolls around, you’ll look back and realize the resolution you once struggled to maintain is now part of who you are. And the discipline you built chasing one goal will spill over into every other part of your life.
Don’t Chase Motivation, Build Momentum
The first week of January is easy. Everyone’s inspired. The energy is high. The dopamine’s flowing.
But real growth starts the day that excitement fades. That’s when discipline takes over.
The truth is, most people lose their resolution because they try to change their entire life at once. The secret is to simplify. Focus on one thing. Build a structure around it. Commit to showing up daily, even when it’s messy, even when you don’t feel like it.
That’s how you win long-term.
By this time next year, you won’t need another list of goals, you’ll just keep building on the foundation you already created.
You’ll realize that discipline isn’t a personality trait, it’s a skill. And once you master it, you can apply it to anything: health, business, relationships, or purpose.
So don’t start 2026 trying to be a new person. Start by proving to yourself that you can keep one promise. And once you do that, everything else follows.
Rustic, Modern, Farmhouse or Minimalist? What’s Your Christmas Mantle Style
Are you all about style, decor and organization? Download a copy of our Decluttering Workbook.
****
The mantle is the fastest way to make a room feel like Christmas without hauling ten bins from the attic. It sets the mood in a single glance and quietly guides the rest of your décor.
In this guide, you’ll get a quick style quiz, four clear formulas, and a 60-minute plan that actually fits a busy day. You’ll also find budget swaps and simple storage ideas you’ll thank yourself for in January.
Each style includes a “with a TV” note so your setup works for real life. You’ll also see how to blend looks if you’re a little bit rustic and a little bit modern.
I designed this for décor-loving, time-strapped parents who want cozy wins over perfection. Think “wow” in an hour, not a weekend marathon.
Grab a warm drink and a measuring tape. By the end, you’ll know your vibe and exactly what to place where.
And if your mantle is a shelf, console, or faux ledge, the rules still translate. Focus on scale, balance, and one strong focal point.
Jot down A, B, C, or D for each question and tally at the end. Go with your first instinct, not the “should.”
Your ideal holiday night: A) Cabin, fire, pine scent. B) Gallery opening, sleek candles. C) Cookies, carols, a full house. D) Quiet glow, one perfect branch.
Favorite textures: A) Wood and wool. B) Matte ceramics and glass. C) Knit, wicker, galvanized metal. D) Linen, frosted glass, blonde wood.
Color comfort zone: A) Forest green and warm white. B) Black, white, and metallics. C) Cream, sage, muted red. D) White, gray, and a soft accent.
Ornament style: A) Dried oranges and bells. B) Sculptural shapes and paper trees. C) Mini houses and vintage tags. D) Salt-dough disks and velvet ribbon.
Stockings: A) Chunky knit with leather loops. B) Solid neutral wool. C) Grain-sack stripes or cable knit. D) Linen with narrow ribbon ties.
Mostly A = Rustic. Mostly B = Modern. Mostly C = Farmhouse. Mostly D = Minimalist.
Not a landslide result is normal. Your top two letters become your blend, with the first letter leading.
Keep your tally nearby as you read the style sections. You’ll spot your must-haves quickly.
Style 1: Rustic Christmas Mantle
Rustic is warm woods, foraged greens, and quiet candlelight. It feels like a cabin evening, even in a city living room.
Palette: forest green, cedar, warm whites, and touches of brass. Materials: reclaimed wood, stone, burlap, iron, and beeswax.
Choose a chunky wood mirror or vintage frame as your anchor. Flank it with lanterns, pinecones, and a low bowl of walnuts or cloves.
Garland should look gathered, not manicured. Mix cedar, pine, and juniper, then weave in dried oranges and bell ties.
Stockings love texture here. Go for cable-knit or wool with leather loops or wooden name tags.
Use the layering formula: big mirror, two lanterns, and a trio of small naturals like pinecones. Add tapers on one side for a soft, asymmetrical lift.
With a TV, keep the garland low and tuck lanterns to one side. Slide a narrow wooden riser under a bowl to add subtle height without blocking the screen.
After December, remove red and citrus but keep greens, brass, and creams. Swap bells for ribbon in taupe and you have a peaceful winter mantle.
Modern is clean lines, airy space, and one sculptural moment. It relies on restraint that reads as confidence.
Palette: black, white, stone, and a single metallic like chrome or brushed brass. Materials: concrete, matte ceramics, smoked glass, and paper.
Anchor with a large abstract print or a linear mirror. Let one hero object shine, like a sculptural vase or geometric tree.
Keep greenery intentional, not fluffy. Try an asymmetrical eucalyptus sweep or a thin olive branch garland clipped beneath the ledge.
Stockings should be simple wool in solid neutrals. Magnetic or under-ledge hooks keep the silhouette clean and quiet.
Use the one-two-three formula: one hero, two supportive shapes, and three tiny accents. Negative space is part of the design, so don’t fill every inch.
For a TV, run a hairline garland just along the ledge. Offset a low sculptural bowl or pair of matte tea-lights on one side.
Lighting: two to three slim tapers or tealights (neutral)
Stockings: linen with narrow velvet ribbon (sage, taupe, or champagne)
Paper: neutral paper stars/circles on invisible thread
Hardware: hidden hooks or low-profile holders
Accents: one small metal detail (brushed brass or nickel)
Bonus: TV Mantle Layouts (diagrams)
Centered TV layout works best with a slim garland and low accents. Tuck one grouped cluster to the left or right to avoid a “soldier line” of identical objects.
Off-center TV gives you a natural place for height. Use a medium-tall vase or stacked books on the open side and keep the TV side minimal.
For a mantle nook or alcove, respect the architecture and echo its lines. A vertical branch or tall taper pair matches the rhythm and looks intentional.
Mind the lower bezel of the screen and stay below it. Anything that creeps up risks reflections and visual clutter.
Hide cords with adhesive clips running down the back leg of the mantle. A short ribbon tail over the clip makes it disappear in photos.
If your soundbar lives on the ledge, treat it like a design element. Repeat its color in one other object so it belongs.
Use flameless tapers if the TV runs hot or sits low. You still get ambiance without worrying about heat clearance.
Photograph at a slight angle to reduce glare. A quick screen saver with a winter image looks great for styled shots.
Bonus: After-Christmas Winter Mantle Reset
Begin by removing obviously holiday-specific items like ornaments and red ribbons. Keep neutrals, greenery, and warm metallics that still feel seasonal.
Rustic can keep brass, pinecones, and cedar while losing citrus and bells. Swap in taupe or oatmeal ribbon and a wool throw nearby to echo texture.
Modern can strip to eucalyptus, paper shapes, and matte candles. One dark bowl and a glass cylinder keep the composition gallery-calm.
Farmhouse keeps the village houses, bottle-brush trees in whites, and creamy knits. Replace red with sage or soft plaid and add a woven basket on the hearth.
Minimalist stays almost the same, just quieter. The branch, two tapers, and a linen ribbon in taupe whisper “January.”
Refresh palettes with small moves instead of new buys. Change ribbon color, remove sparkle, and add one cozy texture like a knit or wood.
Adjust heights for winter’s lower light. Raise a candle on a book stack or swap to taller tapers for evening glow.
Take a photo after each tweak. You’ll see when the mantle crosses from festive to peaceful winter.
Mix-and-Match Guide (1 chart)
Blending styles works when one leads and one accents. Let your quiz winner be the base and the runner-up appear in two small details.
Rustic + Farmhouse loves warm woods and knit textures. Keep shapes simple and add one nostalgic print to nod farmhouse.
Modern + Minimalist pairs clean lines with quiet space. Limit color to one metallic and one accent so the blend reads intentional.
Rustic + Modern needs contrast management. Use modern silhouettes in rustic materials, like matte black lanterns and raw wood.
Farmhouse + Minimalist means editing the cute. Keep one village house and one tree, then let the rest be air and linen.
Use a crossover element for cohesion. Repeating one ribbon, one metal, or one greenery type ties the look together.
When two metals appear, repeat each at least twice. Your eye reads “set” instead of “random.”
If it feels busy, remove one medium object, not a small. The rhythm returns without losing charm.
60-Minute Styling Plan (for busy days)
Minute 0–5: Clear the mantle and wipe it down. Pull potential pieces onto a nearby table so choices are within reach.
Minute 5–15: Place your anchor, whether mirror, art, or TV reality. Center or intentionally offset it based on the room’s sightlines.
Minute 15–30: Add garland or greenery base. Use under-ledge hooks or clips so the surface stays clean and safe.
Minute 30–40: Bring in height with candles, trees, or a vase. Build one higher side and one gentler side for a soft slope.
Minute 40–50: Hang stockings and tie ribbon. Keep loops consistent so the line looks tidy in photos.
Minute 50–55: Add small naturals like pinecones, bells, or paper shapes. Group in odd numbers and avoid a straight line.
Minute 55–60: Phone photo test, then micro-adjust. Remove one thing if it looks crowded and call it done.
Set a timer for each chunk so you don’t overthink. Finished beats perfect every single time.
Budget & Storage Tips
Thrift frames, candlesticks, and bowls, then unify finishes with paint. One can of matte black or brushed brass spray works miracles.
Buy greenery once and bulk it up with foraged clippings. Dried oranges and paper stars cost pennies and store flat.
Use one ribbon across stockings, garland ties, and a vase neck. Repetition is free design.
Create a “mantle capsule” in a shallow under-bed bin. Flat-pack garlands in tissue and nest fragile pieces in microfiber cloths.
Label small zip bags for hooks, cord clips, and tags. Next year you’ll set up in half the time.
Choose items that work beyond December so they earn their keep. Neutral candles, glass cylinders, and linen ribbon bend to any season.
If storage is tight, prioritize scale pieces and multi-use accents. A great mirror and two versatile vases outwork ten tiny trinkets.
Snap a “final” photo and tuck it in the bin. Future-you will rebuild the look in minutes without guesswork.
Your Mantle Style Is Just the Beginning
Once you know your Christmas mantle style—whether rustic, modern, farmhouse, or minimalist—you can use it as a foundation to shape the rest of your holiday home. A mantle sets the emotional tone of a room, and when that tone is clear, everything else becomes easier to choose: greenery, accents, textures, colors, even how much (or how little) décor you want to display.
Are you all about style, decor and organization? Download a copy of our Decluttering Workbook.
If you loved defining your mantle style, you’ll probably enjoy exploring the rest of your holiday look too. Here are more ideas to help you create a home that feels warm, thoughtful, and beautifully you:
Use your mantle as your starting point, then build the rest of your décor with confidence—one thoughtful detail at a time. Your style is already there; these guides just help it shine.
Unique Handmade Christmas Gifts for Boyfriends Who Have Everything
Every Christmas, the same thought crosses your mind: what do you get for the guy who already has everything? The one who insists he doesn’t need anything, but still deserves something thoughtful — something that makes him feel seen.
That’s where handmade gifts come in. They aren’t about price tags or perfection; they’re about connection. A small jar filled with notes, a candle scented like home, or a hand-stitched ornament can hold more meaning than any store-bought gadget.
This guide is filled with cozy, creative ideas you can make yourself — each one designed to feel personal, heartfelt, and unforgettable. Because when your gift comes from the heart, even the simplest thing becomes extraordinary.
1. The Struggle of Shopping for the Guy Who Has Everything
Every year, you promise yourself this Christmas will be different — you’ll finally find something that surprises him. But when your boyfriend already seems to have it all, even the best-intentioned gifts can fall flat.
That’s why handmade gifts hit differently. They say I thought of you instead of I bought for you.
When you make something by hand, you’re not just giving an object — you’re giving a memory. You’re showing him that love can be creative, thoughtful, and deeply personal.
This season, skip the mall lines and the gift guides that all sound the same. Let’s talk about handmade Christmas gifts that feel original, romantic, and one-of-a-kind — just like him.
2. Why Handmade Gifts Hit Different
Store-bought gifts can be impressive, but handmade gifts feel intimate. They carry your time, your touch, and a little piece of your heart.
It’s not about perfection — it’s about intention. Every uneven edge and brushstroke tells a story of care.
For a boyfriend who already owns the latest gadgets and designer jackets, that kind of meaning matters more than anything. Handmade gifts are living proof that thoughtfulness never goes out of style.
When he unwraps something you made, he doesn’t just see the item — he feels seen. And that’s the kind of gift no store can sell.
3. Cozy & Sentimental Gifts He’ll Treasure
Start with the kind of gifts that speak straight to the heart. A Memory Jar filled with tiny love notes or reasons you adore him becomes something he’ll reach for all year long.
If you’re crafty, make a “52 Reasons I Love You” card deck — one reason for every week of the year. It’s simple, meaningful, and surprisingly addictive to flip through.
Or personalize a hand-stitched ornament with your initials and anniversary date. It turns into a keepsake he’ll hang every Christmas — and think of you each time.
A homemade candle with a scent that reminds him of you adds warmth and presence. These cozy, sentimental touches create a kind of connection that lasts long after the holidays are over.
4. DIY Experience Gifts for the Boyfriend Who Has Everything
When he already owns everything he needs, give him something money can’t buy — shared memories. Experience gifts are handmade from the heart and crafted to deepen connection.
Try creating a Date Night Adventure Box with twelve envelopes, each labeled for a month of the year. Inside each one, add tickets, a handwritten clue, or a cozy at-home idea.
“Open When” letters are another timeless DIY gift that speaks straight to emotion. Write a few for moments like when you miss me or when you’ve had a bad day.
If he loves music, print a QR code linking to a custom playlist you made for him and pair it with a handmade card. These creative gestures remind him that your love story is still unfolding — one small, intentional moment at a time.
5. Handmade Comfort & Self-Care Gifts
Not every handmade gift has to be sentimental — some can be soothing and practical. A knitted scarf in his favorite color keeps him warm and carries your care in every stitch.
If he’s into grooming, blend your own DIY beard oil or balm using coconut oil, jojoba, and a drop of sandalwood. Add a simple printed label to make it look boutique.
Create a handmade hot cocoa kit or a cozy “burr basket” with socks, snacks, and a candle for winter nights in. Presentation matters — think simple packaging and cozy textures.
These handmade comfort gifts work especially well for boyfriends who don’t need more stuff, just more peace. It’s your way of saying: I want you to feel cared for too.
6. For the Funny or Quirky Boyfriend
If humor is your love language, lean into it. A mini Survival Kit in a Jar can be filled with pun-themed items like “Snickers for bad moods” or “Paperclips to hold it together.”
Make a personalized comic strip that captures one of your inside jokes or the story of how you met. It’s unexpected, nostalgic, and laugh-out-loud charming.
DIY scratch-off cards are another fun idea — each panel reveals a silly dare or date idea. You can design them on cardstock and coat with a little dish soap and paint mixture.
Quirky handmade gifts remind him that your relationship isn’t just romantic — it’s fun, playful, and alive. For the guy who already has everything, laughter might be the best gift of all.
7. Presentation Tips: Make It Feel Boutique, Not Basic
A handmade gift can feel luxurious when the wrapping matches the heart you put into it. Use kraft paper, jute twine, or simple linen bags for a cozy, artisanal feel.
Add a sprig of pine or a dried orange slice under the ribbon for a natural touch. A handwritten note tucked inside transforms even a simple jar or card into a keepsake.
Stick with a warm Christmas palette — soft beige, forest green, and gold — to create visual calm. You’re aiming for charm, not perfection.
Remember: how you present the gift sets the tone for how it’s received. When it looks like you cared, he’ll feel it before he even opens it.
8. Choosing What Fits Him
At the end of the day, the best handmade gift is the one that fits who he is — not what’s trending. Think about his love language: does he value time, touch, or words most?
If he loves experiences, make something you can do together. If he’s sentimental, write him something he can keep forever.
A handmade gift is really a love letter in disguise — crafted with presence and care. And that’s what makes it priceless.
9. Conclusion: Keep the Handmade Magic Going
Handmade gifts remind us that love isn’t about spending more — it’s about giving meaningfully. Once you see how much joy these bring, you might start making them for everyone on your list.
Keep the cozy, creative momentum going with more DIY and organization ideas that make the holidays brighter:
10 Cozy Burr Basket Ideas Under $30 To Warm You Up on Cold Days
Easy DIY Front Porch Christmas Decorations That Look Straight Out of a Magazine
10 Thoughtful Christmas Baskets for Him: The Secret to Building the Perfect Gift
15 Unique DIY Christmas Gifts Your Coworkers Will Actually Love
How to Transform Your Coffee, Entry, and Dining Tables with DIY Fall Decor
Which Thanksgiving Tablescape Matches Your Personality? Vintage, Modern, Simple, or Elegant
How to Craft a Stylish Fall Porch Using Only 5 Items
Each one is filled with thoughtful touches and simple ideas designed to bring beauty, warmth, and connection into your space — and into your relationships — this holiday season.