


The DIY Christmas Wreaths Formula for Busy Holiday Weekends

Are you all about style, decor and organization? Download a copy of our Decluttering Workbook.
Why We Love a Quick Holiday Project
There’s something magical about creating a Christmas wreath with your own hands. It’s one of those rare projects that looks like it took hours but can actually come together in less than one.
The best part is that a wreath instantly transforms your front door or mantel. It’s the simplest way to say, “Christmas is here,” without pulling out every box of decorations you own.
Need some in depth help with decoration and productivity ? Drop on by our directories choc full of productivity coaches, accountability coaches, goal-setting coaches, time management coaches and even work/life balance coaches to get your life organized! Or click here to have us match you to the best.

If your weekends are already filled with shopping trips, school concerts, and cookie baking, you don’t need another task that drains your energy. You need something that restores it—something cozy, creative, and just easy enough to enjoy.
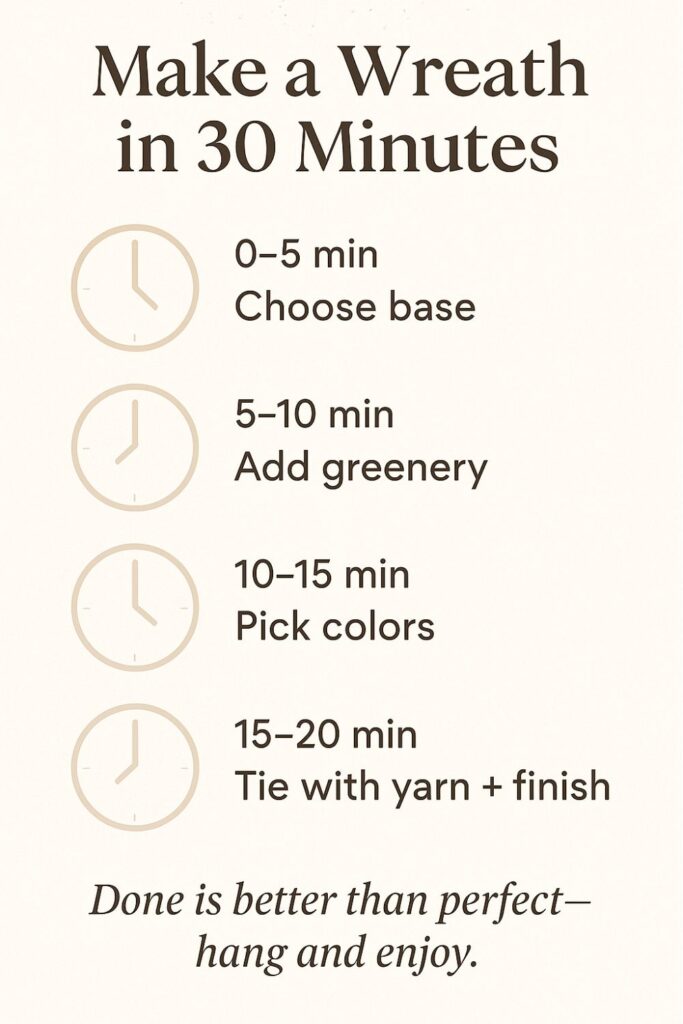
That’s exactly why we’ve built this DIY wreath formula: five simple steps that let you design a festive piece that fits your home and your time. You can do it in one sitting, and even better—it’s fun.
When you’re done, you’ll have a one-of-a-kind wreath that welcomes guests (and your own tired self) with a bit of homemade holiday joy.
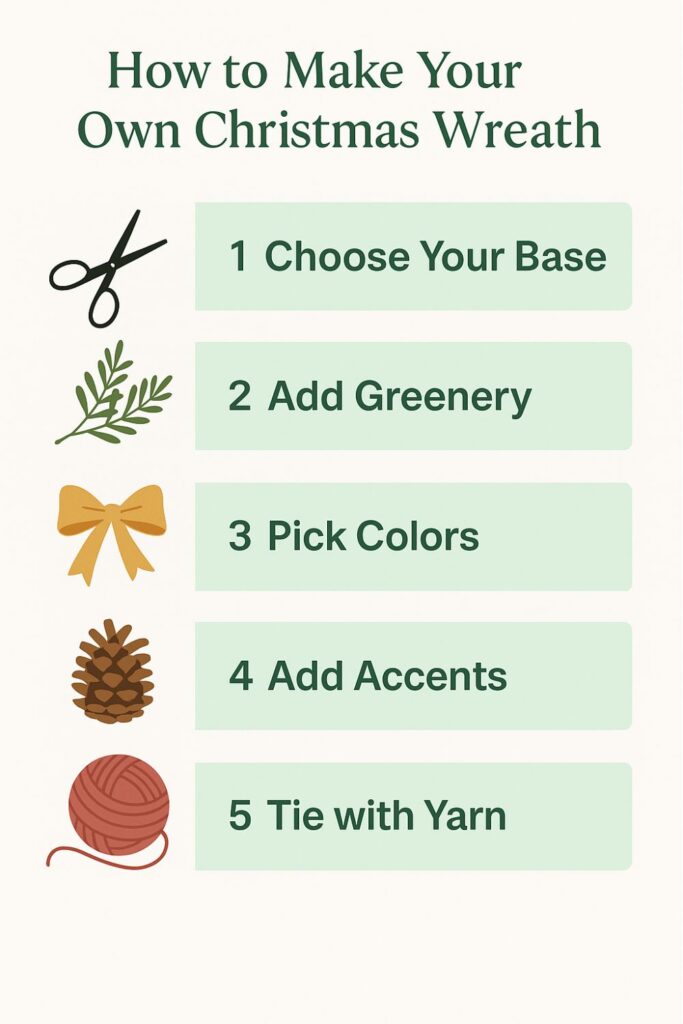
Step 1: Choose Your Base (Fast Foundations)
Every great wreath starts with the right base. Think of it as your canvas—the structure that sets the tone for everything else.
If you want to get more from your life, and are looking for concrete action steps to get you there, check out our Request a Coach page. It’s a “cut the fence-sitting and take action” way to tackle your issues and actually find success. To get off the fence and start to take action, click or tap here.

For a traditional look, an evergreen base brings instant holiday nostalgia. Grapevine wreaths lean rustic and warm, while minimalist metal hoops are perfect if you love clean, modern lines.
If you’re short on time, buy a pre-shaped base from your local craft store. They come ready to decorate and save you from starting completely from scratch. For the truly time-strapped, even a faux greenery base works wonders—you’ll reuse it year after year.

Source: hello.petal.flowers
When picking your base, trust your home’s style. Rustic wood tones love grapevine. Bright doors pop against green. Neutral spaces shine with sleek metal hoops.
This first choice sets the mood, so take a minute to picture how your door will look when it’s all done.
Step 2: Layer Your Greenery (Texture in Minutes)
Once you’ve chosen your base, it’s time to add life. Greenery brings texture, depth, and that lush fullness that makes a wreath feel expensive—even when it’s not.
You can use fresh pine, cedar, or eucalyptus if you want fragrance, or mix in faux greenery for a longer-lasting design. The trick is to layer everything in the same direction, slightly overlapping as you go. This keeps it clean and cohesive.

If you don’t want to buy in bulk, grab a few small bunches from the grocery store floral section. You’d be surprised how far a little greenery can go.
If you want to get more from your life, and are looking for concrete action steps to get you there, check out our Request a Coach page. It’s a “cut the fence-sitting and take action” way to tackle your issues and actually find success. To get off the fence and start to take action, click or tap here.
Don’t overthink placement—wreaths look more natural when they’re a little imperfect. Step back every few minutes, squint, and look for balance instead of symmetry.
For a five-minute version, use a pre-made garland and wrap it loosely around your base. You’ll get the same lush look with half the effort.
Step 3: Pick a Color Theme That Matches Your Mood
This is the fun part—the moment when your wreath starts to tell a story.

If you’re craving a classic holiday feel, you can’t go wrong with red berries, gold ribbon, and pinecones. For something cozier, try cream tones mixed with copper, caramel, or cinnamon. Or lean into a “Winter Wonderland” theme with silvers, whites, and a few icy blues.
Keeping your palette simple makes a huge difference. Three colors (max) will keep it cohesive and calm. Too many, and it can start to look cluttered.
You can even let your door color guide you: green doors love gold or ivory accents; red doors pair beautifully with white and silver.

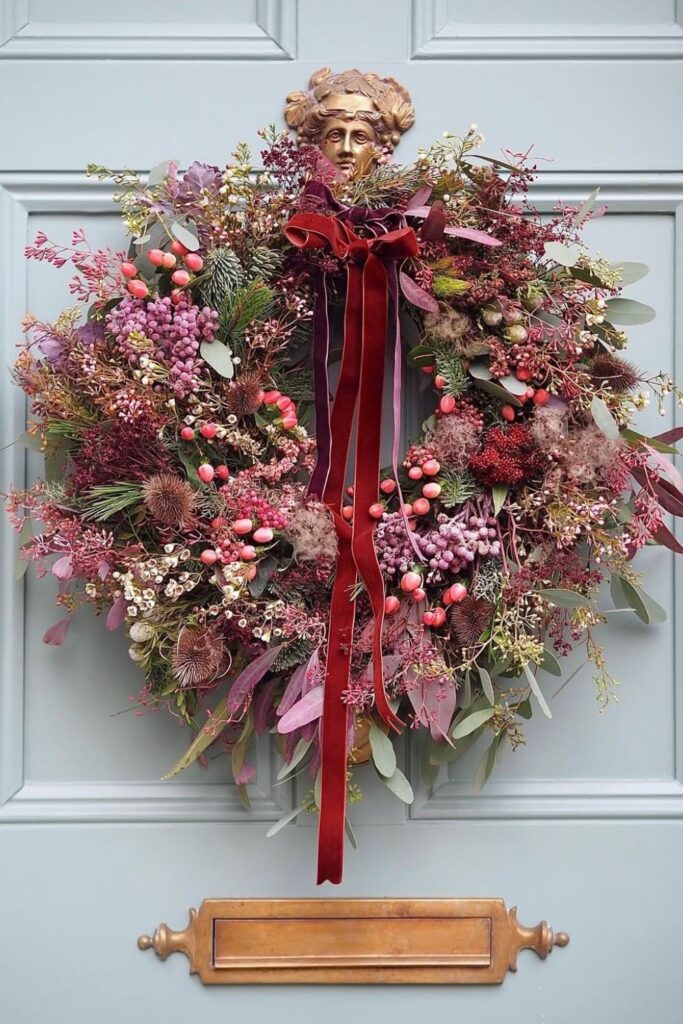
Source: homemadefromhome
And don’t be afraid to add one unexpected element—a velvet ribbon, a sprig of dried orange, a single bow. That’s often the thing that makes people stop and look twice.
If you want to get more from your life, and are looking for concrete action steps to get you there, check out our Request a Coach page. It’s a “cut the fence-sitting and take action” way to tackle your issues and actually find success. To get off the fence and start to take action, click or tap here.
Step 4: Add Accents That Tell a Story
This step is where the magic happens. The accents are what make your wreath yours.
You might add a few ornaments that match your tree, small bells for a soft jingle when the door opens, or dried citrus slices that smell amazing when hung indoors.

Try thinking of it like a memory collage. Each piece—whether it’s a ribbon from last year’s gifts or a pinecone your kids picked up on a walk—adds something personal.
If you’re short on time, group accents in odd numbers (like three or five). It looks balanced without needing perfection. And if you’re decorating with family, let everyone choose one accent to include. It turns the process into a cozy, five-minute tradition instead of another task.
Source: melanielissackinteriors
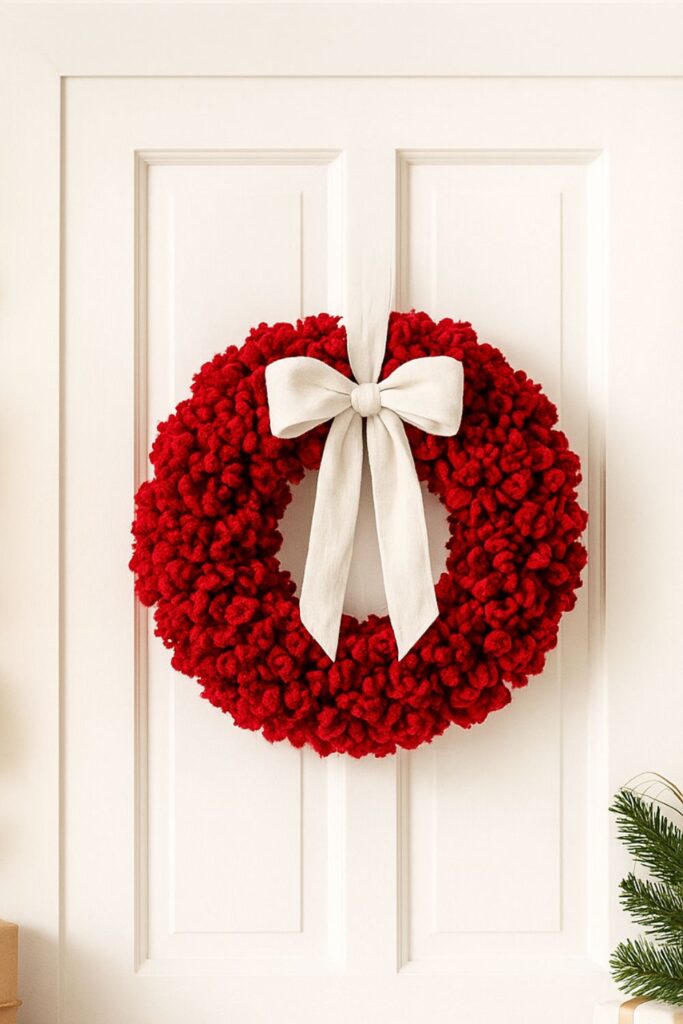
Step 5: The Yarn Trick (Cozy Texture Shortcut)

Yarn might just be the secret weapon of quick wreath-making. It’s soft, affordable, and instantly adds warmth—without the mess of glue or floral wire.
Wrap a chunky yarn around a wire hoop to give it texture and color in one move. Or use yarn instead of string to secure your greenery—it’s gentler and adds a handmade touch.

If you love a playful look, make a few pom-poms or tassels from leftover yarn and attach them around the edge. It’s cozy, creative, and perfect for families crafting together.
If you want to get more from your life, and are looking for concrete action steps to get you there, check out our Request a Coach page. It’s a “cut the fence-sitting and take action” way to tackle your issues and actually find success. To get off the fence and start to take action, click or tap here.
Yarn also comes in endless shades, so you can match any palette—from natural beige to candy-cane red and white. And because it’s reusable, you can unwind it after the holidays and start fresh next year.

This simple step adds that “something special” that makes your wreath look store-bought, even when it took less than an hour.
The Secret to Choosing the Right Yarn

The magic of a yarn wreath really comes down to texture. Chunky yarns create a bold, cozy statement, while thinner yarns feel softer and more refined. Look for options labeled as chenille, wool blend, or bulky knit—these are easy to work with and give your wreath that plush, winter-ready look.
Color is another detail that changes the whole mood. Creams and soft neutrals pair beautifully with greenery for a calm, Scandinavian feel. Classic red or deep forest green adds instant holiday cheer, especially if you’re hanging the wreath on a white door.
And if you want something playful, try two-tone yarns—half white, half gold—or weave in a strand of metallic thread for subtle sparkle.
If you’re crafting with kids or just short on time, use pre-braided or loop-style yarn. It wraps quickly and looks like you spent hours on it. Don’t worry about perfection—the natural unevenness of yarn gives your wreath charm and texture that feels homemade in the best possible way.

When in doubt, make it tactile. The yarn should feel soft and inviting when you touch it, like a cozy winter blanket. That’s what makes people stop and smile when they see it on your door.
Step 6: Finish with a Signature Touch
Every wreath deserves a final flourish. This is the part that gives it presence—the “done” moment.
If you want to get more from your life, and are looking for concrete action steps to get you there, check out our Request a Coach page. It’s a “cut the fence-sitting and take action” way to tackle your issues and actually find success. To get off the fence and start to take action, click or tap here.
You could add a single bow at the bottom, weave in a strand of fairy lights, or tuck in a monogram ornament. One small focal point goes a long way.

If you’re hanging it outdoors, attach a weather-safe ribbon or use a removable hook to protect your door. For interior doors or windows, a small loop of fishing line keeps things invisible and clean.
The key is to stop when it feels finished. Overdecorating can hide the charm you built in every earlier step.
When you step back, you should see something that feels warm, balanced, and completely you.
Wrap-Up: The 30-Minute Wreath Challenge
Now that you’ve got the formula, you can make a custom Christmas wreath in about the time it takes to bake a batch of cookies.
Don’t aim for perfect—aim for personal. The beauty of this process is that every wreath tells its own story.
You might make one for your front door, another for your kitchen window, or a mini version for your kids’ rooms. Once you know the formula, the possibilities multiply.

Source: homemadefromhome
If you want to get more from your life, and are looking for concrete action steps to get you there, check out our Request a Coach page. It’s a “cut the fence-sitting and take action” way to tackle your issues and actually find success. To get off the fence and start to take action, click or tap here.
This holiday, skip the pressure and enjoy a creative win that brings joy every time you walk through the door.
Conclusion: More Front Door Inspiration for Your Holiday Season
If you loved this simple wreath formula, there’s a whole world of Christmas door décor waiting for you. Whether you’re dreaming of timeless elegance or something with a little movie magic, these ideas will keep your creativity flowing:
Are you all about style, decor and organization? Download a copy of our Decluttering Workbook.
Need some help with style or organization? Drop on by our directories choc full of image coaches, organization coaches and minimalist coaches to help make your spaces beautiful. Or click here to have us match you to the best.

- How to Make Your Front Door the Star of Christmas (With the Right Wreath) — Build on your DIY wreath skills with design tips that help your door shine all season.
- 8 Iconic Holiday Movie-Inspired Wreaths to Transform Your Door This Christmas — Recreate the magic of your favorite Christmas classics through fun, cinematic styles.
- 10 Front Door Christmas Decoration Ideas That Make Your Home Feel Magical — Explore easy ways to decorate your entryway without going overboard.
- 4 Christmas Living Room Styles That Reveal Your Holiday Personality — Match your front door décor with the energy inside your home.
- The Secret to a Welcoming Fall Porch (That Looks Straight Out of a Hallmark Movie) — Carry that cozy, seasonal welcome through fall and into winter.
- Rustic, Modern, Farmhouse or Minimalist? What’s Your Christmas Mantle Style — Extend your wreath aesthetic to the heart of your home.
- 4 Vintage Christmas Decorating Styles to Steal This Year — Find a nostalgic look that fits your personality and holiday mood.
Your door is more than just an entry—it’s your home’s first impression. And with a little creativity, it can be the warmest welcome of the season.
If you want to get more from your life, and are looking for concrete action steps to get you there, check out our Request a Coach page. It’s a “cut the fence-sitting and take action” way to tackle your issues and actually find success. To get off the fence and start to take action, click or tap here.
Read this next

Closet Wall Organization Ideas That Use Vertical Space Better
Blank closet walls can do so much more. See the clever vertical storage ideas that make bags, shoes, shelves, and corners finally work.
Read More
Before You Make a 2026 Vision Board, Read This
Before you build your 2026 vision board, learn the simple shifts that make it clearer, calmer, and easier to actually use.
Read More
8 Iconic Holiday Movie-Inspired Wreaths to Transform Your Door This Christmas
Are you all about style, decor and organization? Download a copy of our Decluttering Workbook. **** There’s something about Christmas movies that makes us want to press pause on real […]
Read More