


Talk to a coach about Organizational coaching

Terrie Hein
Certified Life Coach, Certified Insight Coach Practitioner
Coaching to declutter your life, organize your goals, and cook...

Jennifer Loehding
Success Architect | Certified DreamBuilder Coach | Certified NEUROFIT Trainer™ | Certified Keto, Carnivore, PSMF and Supplement Coach
Life, business, health, and wellness coaching for balanced personal and...

Crystal Faulk
ACC
I help overwhelmed women in transition gain clarity, confidence, and...

Mark Gordon
Certified Life Coach (ICF Accredited), Certified Transformation & CBT Life Coach
I empower people in their midlife, who feel stuck, gain...

Michael Muscari
Positive Intelligence Coaching (PQ) | High Flow Coaching | NLP Practitioner | BS Business Management
🔥 Inner Fire Igniter & Transformational Coach | Helping People...

Nikki Babs
The Go-to Career Coach for Executives & Mid-level Professionals, ICF Certified Master Life Coach, MBA, HR
Your rise to Executive Leadership starts here.

Aiden (a.k.a. Sensei Aodhán) Murtagh
Jay Shetty Certified Success & Life Coach
Coach helping high achievers reset, rebuild confidence, and move forward...

Christian Hartley, MSIOP, PCC
Professional Certified Coach
Our partnership will empower you to eliminate fear and doubt...
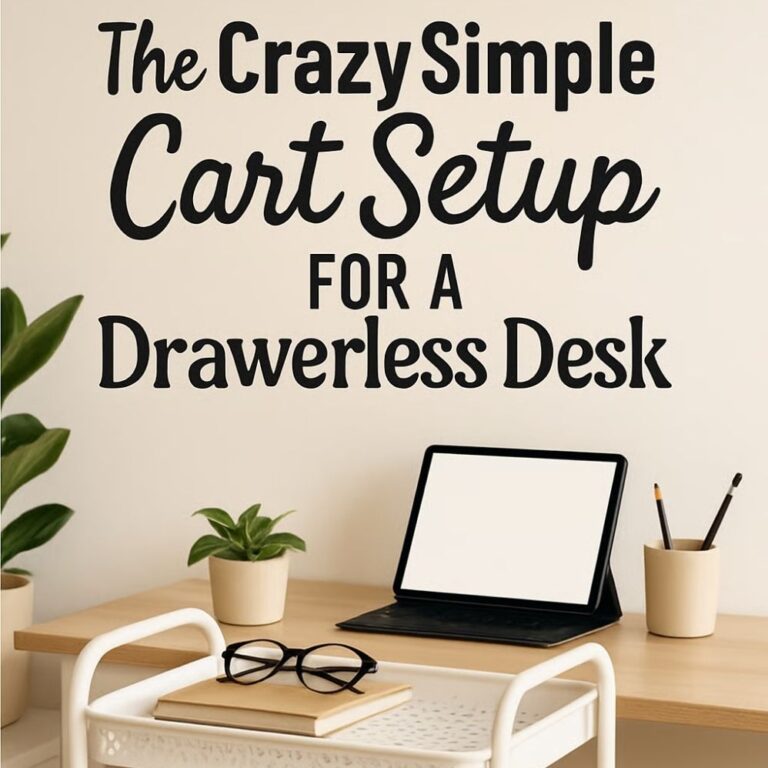
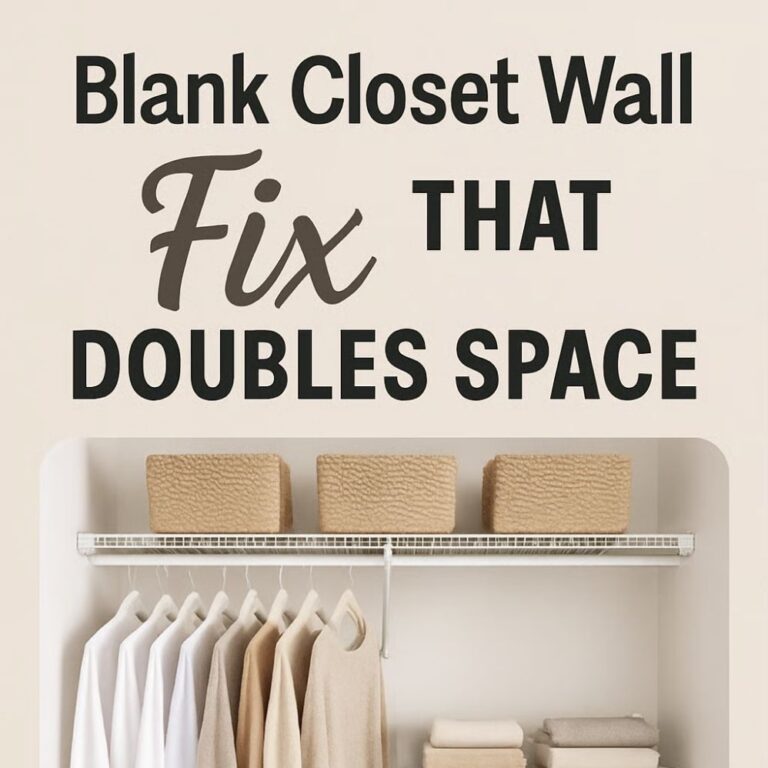


How to Organize a Small Corner Closet Without Wasting Dead Space
Are you all about style, decor and organization? Download a copy of our Decluttering Workbook.
*****
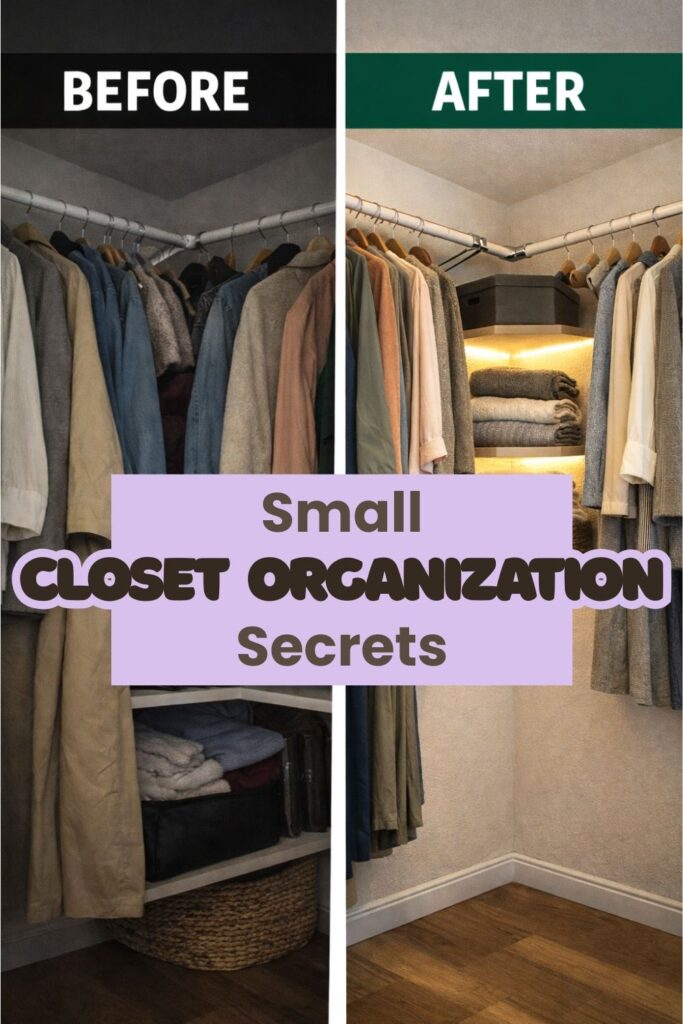
Corner closets look spacious on paper — but in real life, they often feel awkward and underused. Straight rods collide, deep back corners swallow items, and shelves either block access or leave empty triangular gaps.
The issue isn’t the square footage. It’s that most storage systems are designed for flat walls, not angled corners.
When you adjust rods and shelves to follow the shape of the space, a corner closet becomes surprisingly efficient. Below is a step-by-step guide to organizing a small corner closet without letting dead space take over.
In our original roundup of tricky closet layouts, we called out corner closets as the biggest source of wasted space, and now we’re breaking down how angled rods and triangular shelving turn that “dead” corner into usable storage.
Need some in depth help with organization and productivity ? Drop on by our directories choc full of productivity coaches, minimalist coaches, and work/life balance coaches to get your life organized! Or click here to have us match you to the best.
Step 1: Measure the Corner Geometry Before Installing Anything
Corner closets require precision. If you skip measuring, rods and shelves can overlap or block each other.
Start by mapping the shape from above.
If you want to get more from your life, and are looking for concrete action steps to get you there, check out our Request a Coach page. It’s a “cut the fence-sitting and take action” way to tackle your issues and actually find success. To get off the fence and start to take action, click or tap here.
Measure both adjoining walls and the corner depth: Record the length of each wall that meets at the corner and the distance from the doorway to the back point so you understand how much usable hanging and shelving space exists.
Mark door clearance and walking space: Open the door fully and note where it swings so new rods or shelves don’t interfere with access or create tight pinch points.
A clear overhead plan prevents rods from colliding and ensures you’re building with the angle — not against it.
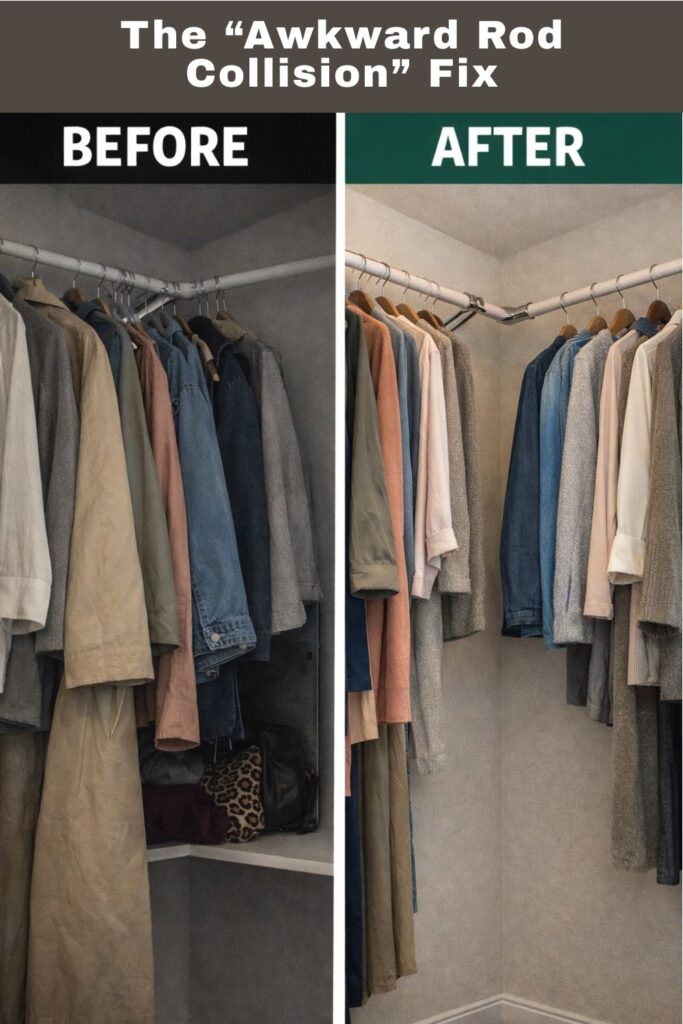
Step 2: Replace Straight Rods with Angled Hanging Rods
Traditional straight rods often stop short of the corner or create overlapping hangers. Angled rods solve that problem by following the geometry of the space.
This is one of the most impactful layout upgrades.
Install a 45-degree corner rod connector: Use a corner bracket or angled rod adapter that allows two rods to meet cleanly without crowding hangers into a tight cluster.
Run rods along both walls into the corner evenly: Keep spacing consistent so hangers glide smoothly across the angle rather than bunching up where the rods connect.
When rods align with the corner instead of fighting it, you unlock usable inches that were previously wasted.
If you want to get more from your life, and are looking for concrete action steps to get you there, check out our Request a Coach page. It’s a “cut the fence-sitting and take action” way to tackle your issues and actually find success. To get off the fence and start to take action, click or tap here.
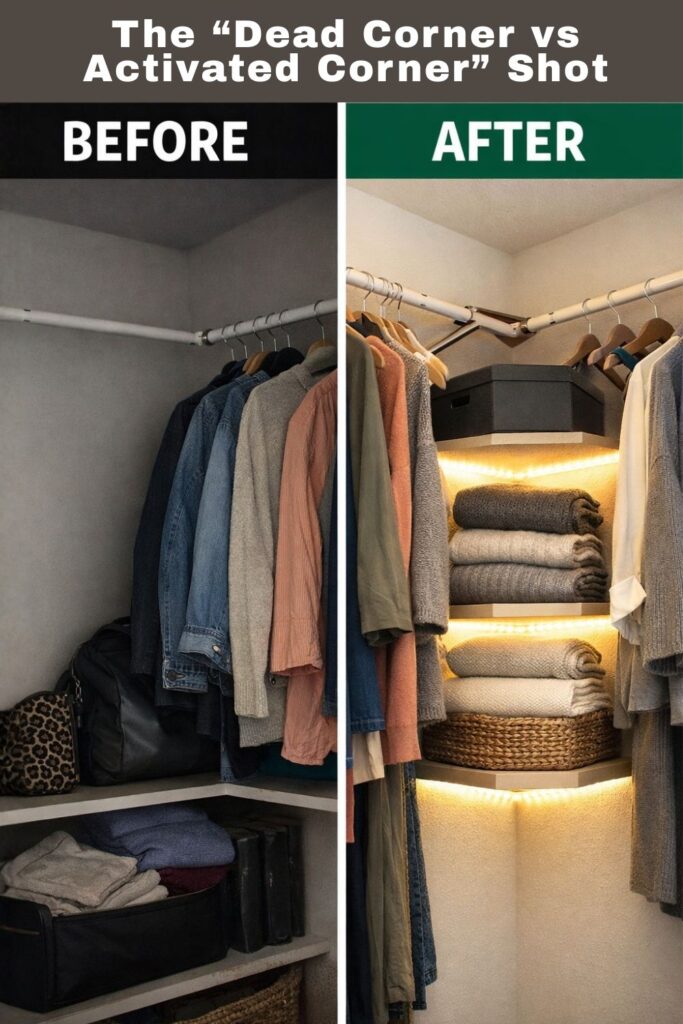
Step 3: Add Triangular or Corner Shelves Instead of Deep Rectangles
Deep rectangular shelves in corners create hidden black holes. Items pushed to the back become invisible and forgotten.
Corner-shaped shelving keeps everything accessible.
Install triangular or angled corner shelves: Cut custom triangular wood shelves or use stackable corner units that fit snugly into the angle without extending too far into the walkway.
Keep shelf depth shallow for visibility: Limit depth so folded clothing or bags remain visible from the front rather than disappearing into shadow.
The goal is reachability. If you can’t see it easily, the space isn’t working.
Step 4: Layer Storage Vertically Within the Corner
Once rods and shelves align with the corner, vertical layering maximizes capacity without crowding.
Think up instead of outward.
Add a second rod for short garments: Install double-hang rods along one wall so shirts and blouses use vertical space efficiently while longer items stay on the opposite wall.
If you want to get more from your life, and are looking for concrete action steps to get you there, check out our Request a Coach page. It’s a “cut the fence-sitting and take action” way to tackle your issues and actually find success. To get off the fence and start to take action, click or tap here.
Stack corner shelves vertically instead of deepening them: Place two or three shallow triangular shelves above each other rather than one oversized unit that blocks access.
Vertical layering keeps the center of the closet open and preserves a comfortable walkway.
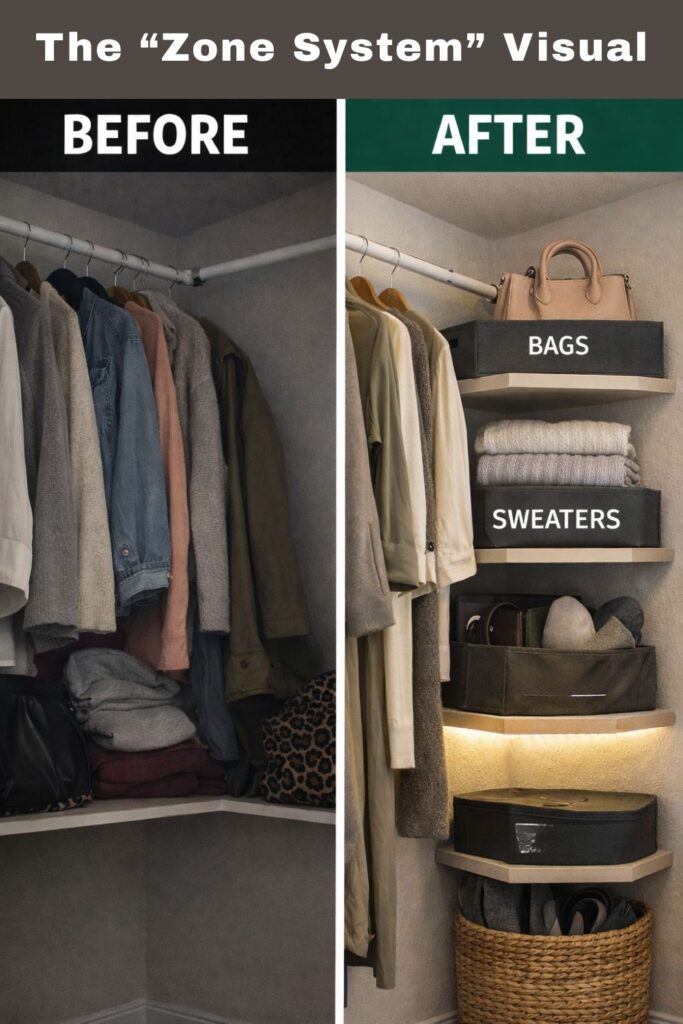
Step 5: Define Clear Zones to Prevent Drift

A corner closet can quickly become chaotic if items migrate toward the back angle and pile up.
Zones prevent that creep.
Assign the corner to specific categories only: Use corner shelves for folded sweaters, bags, or labeled bins so the angle has a consistent purpose.
Keep long-hang and bulky items along outer walls: Avoid placing oversized pieces in the corner where they block access or disrupt flow.
When each section of the closet has a job, dead space doesn’t reappear.
Lighting the Corner to Eliminate Hidden Clutter

Corners often feel smaller because they’re darker. Poor lighting makes even organized storage look messy.
If you want to get more from your life, and are looking for concrete action steps to get you there, check out our Request a Coach page. It’s a “cut the fence-sitting and take action” way to tackle your issues and actually find success. To get off the fence and start to take action, click or tap here.
A small upgrade changes the perception of space.
Install motion-activated LED strip lighting along the rods: Position lights where they illuminate the angled rod connection and corner shelves directly.
Use bright, neutral light tones: Choose daylight-style bulbs that eliminate shadows so items in the back corner remain clearly visible.
Lighting ensures your newly activated corner doesn’t slip back into obscurity.
How to Maintain a Corner Closet Long Term
Corner spaces are prone to becoming “just for now” storage areas. Preventing that requires simple maintenance habits.
Small resets protect the layout.
Perform a monthly corner check: Remove items that have drifted into the back angle without a designated shelf or rod space.
Avoid deep stacking in the corner zone: If items start piling behind others, reduce volume rather than compressing the space further.
If you want to get more from your life, and are looking for concrete action steps to get you there, check out our Request a Coach page. It’s a “cut the fence-sitting and take action” way to tackle your issues and actually find success. To get off the fence and start to take action, click or tap here.
A small corner closet doesn’t have to waste space. When rods follow the angle, shelves fit the geometry, and zones stay intentional, the so-called “dead space” becomes one of the most useful areas in the room.
The difference isn’t more storage.
It’s smarter alignment with the shape you already have.
Are you all about style, decor and organization? Download a copy of our Decluttering Workbook.
*****
Need some in depth help with organization and productivity ? Drop on by our directories choc full of productivity coaches, minimalist coaches, and work/life balance coaches to get your life organized! Or click here to have us match you to the best.
If you want to get more from your life, and are looking for concrete action steps to get you there, check out our Request a Coach page. It’s a “cut the fence-sitting and take action” way to tackle your issues and actually find success. To get off the fence and start to take action, click or tap here.
Read this next

Why Your Vision Board Aesthetic Matters More Than You Think
A vision board that looks good but fades fast needs this simple aesthetic fix. See why calm design keeps your goals impossible to ignore.
Read More
How to Make Every Room Feel Like Christmas: Kitchen, Bedroom, Living Room & Even the Bathroom
Are you all about style, decor and organization? Download a copy of our Decluttering Workbook. **** There’s something special about homes that feel like Christmas in every corner. The magic […]
Read More
Before You Make a 2026 Vision Board, Read This
Before you build your 2026 vision board, learn the simple shifts that make it clearer, calmer, and easier to actually use.
Read More