


Talk to a coach about Organizational coaching

Crystal Faulk
ACC
I help overwhelmed women in transition gain clarity, confidence, and...

Terrie Hein
Certified Life Coach, Certified Insight Coach Practitioner
Coaching to declutter your life, organize your goals, and cook...

Dr Charlene Ashley
Doctorate - Behaviours
I coach individuals to design fulfilling lives through structure, clarity,...

Paloma Chiara

Lana's Gymnastics Club
"Where the best in gymnastics meets fun. Where every child is a star"
lgclubny.com

Anna Sosnina
ICF (ACC)
ICF ACC certified coach, founder of EssorVie Coaching, passionate about...

Tyler Fink
B.A. in Religion, Anthropology, and Philosophy. Master of Divinity (M.Div.) in Missiology
Pastor, husband, and father helping Christian men pursue faithful growth...

Travis Brown
Professional Life coach
With experience in guiding clients to achieve goals, build confidence,...




Under-Desk Pouch Setup for Tools You Need but Hate Seeing
Are you all about style, decor and organization? Download a copy of our Clutter Reset Guide.
*****
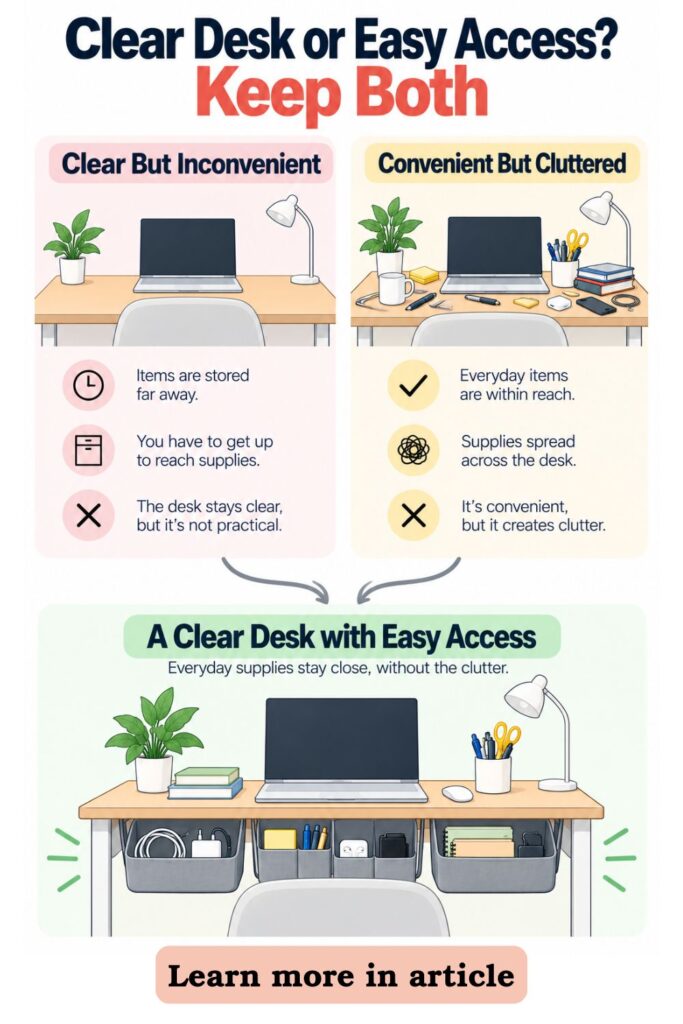
A clean desk can make a workspace feel calmer, but most people still need a surprising number of little things close by. Chargers, sticky notes, spare cords, adapters, earbuds, and small tools all earn their place during the workday, even if they make the surface look cluttered.
The problem is that traditional organizing advice often sends those items too far away. Once everything is tucked into a drawer, cabinet, or box across the room, you have created a new problem. The desk looks better, but the tools you use every day are less convenient.
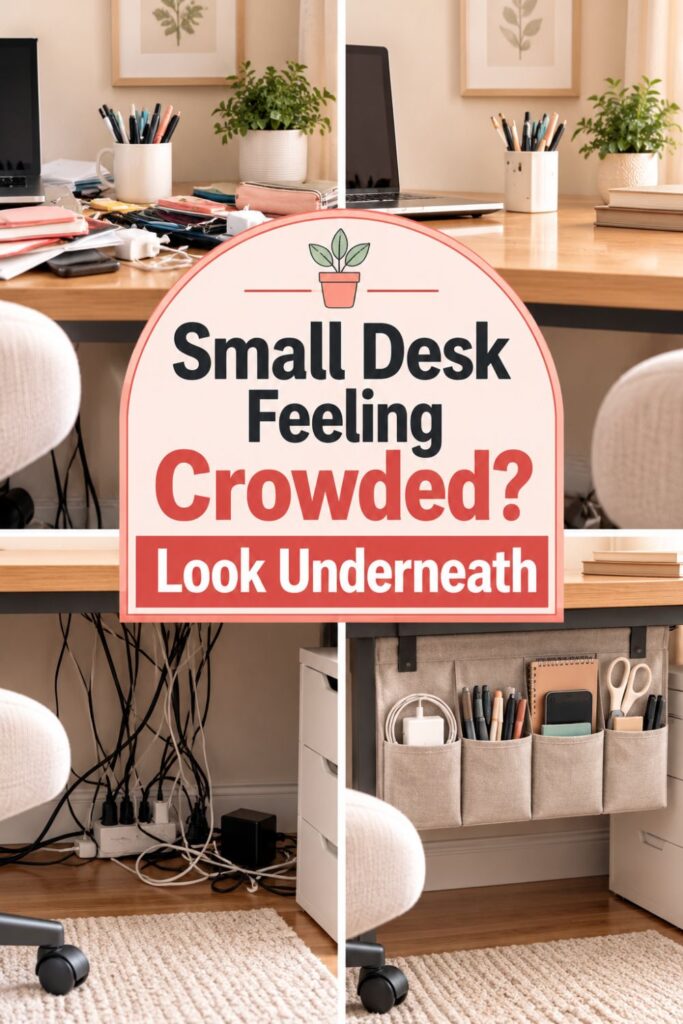
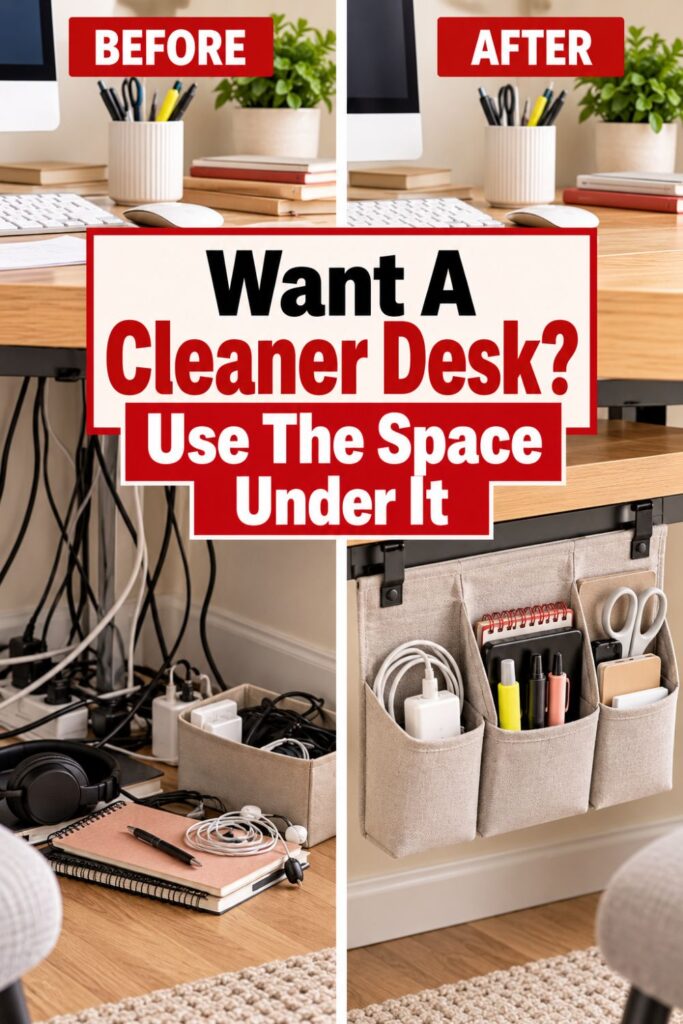
An under-desk pouch setup solves both problems at once. Instead of forcing yourself to choose between a clear surface and easy access, you use the unused space underneath the desktop as a hidden work zone.
The best part is that this does not need to turn into a major organizing project. You are not rebuilding your desk, installing complicated hardware, or reorganizing your entire office. You are simply moving a few recurring clutter items a few inches out of sight.
Start with the things you constantly reach for but do not need to see.
- Think hidden, not far away: Store useful supplies directly underneath the work surface so they stay close without taking up visible space.
- Focus on repeat clutter: Pay attention to the items that regularly land on your desktop even after you tidy it.
- Keep the setup small: A few well-placed pouches usually work better than covering the entire underside of the desk with storage.
- Design for how you work: Place supplies where your hand naturally reaches instead of choosing locations based only on appearance.
The goal is not to create a perfect desk. It is to create an easier environment.
If you want to get more from your life, and are looking for concrete action steps to get you there, check out our Request a Coach page. It’s a “cut the fence-sitting and take action” way to tackle your issues and actually find success. To get off the fence and start to take action, click or tap here.
When chargers, sticky notes, cords, and backup supplies already have nearby homes, keeping the desktop clear stops depending on constant self-discipline. The workspace begins doing more of the organizing work for you.
Need some in depth help with organization and productivity ? Drop on by our directories choc full of productivity coaches, minimalist coaches, and work/life balance coaches to get your life organized! Or click here to have us match you to the best.
1. Decide What Actually Belongs Under Your Desk
Before attaching a single pouch, decide what deserves to live underneath the desk. This step matters because hidden storage can become clutter just as quickly as visible storage if everything gets tossed into it.
Start by looking at what repeatedly appears on your desk during a normal week. Those repeat offenders are usually the best candidates because they are useful enough to keep nearby but not important enough to occupy permanent surface space.
Typical under-desk items might include:
- Charging cables
- USB cords
- Earbuds
- Sticky-note pads
- Spare pens
- Small scissors
- Adapters
- Cleaning cloths
- Backup office supplies
Avoid treating the underside of the desk as a place for anything you simply do not know where to put. Papers, random receipts, large notebooks, snacks, and household odds and ends usually belong somewhere else.
A simple filtering process makes this easier.
- Gather the repeat offenders: Collect the small items that regularly return to the desktop even after you clear it.
- Separate daily tools from backups: Put items you use several times a day in one group and occasional replacements in another.
- Remove unrelated clutter: If an item does not support desk work, resist giving it permanent under-desk space just because it fits.
- Choose a storage limit: Decide how many pouches or pockets you are willing to use before you start organizing.
That last step is especially useful. A limit prevents a quick upgrade from quietly becoming a complicated storage system.
If you want to get more from your life, and are looking for concrete action steps to get you there, check out our Request a Coach page. It’s a “cut the fence-sitting and take action” way to tackle your issues and actually find success. To get off the fence and start to take action, click or tap here.
For most desks, two to four small pouches are enough. One might hold charging supplies, another could hold sticky notes and pens, and a third could hold backup cords or adapters.
The goal is to reduce visual noise while keeping the workspace functional. If the setup starts holding everything you own, it becomes harder to find what you actually need.
Think of under-desk storage as support space, not overflow space. The best items for it are the things that help your workday run smoothly without needing to stay visible.
2. Choose Pouches Based on What They Need to Hold
Not every pouch works equally well for every desk item. A deep pocket might be perfect for spare cables but frustrating for sticky notes, while a shallow holder may work beautifully for pens but poorly for a bulky charging brick.
Choose the storage based on what will live inside it rather than buying several identical pouches and trying to make them work.
Start with size. Small items are easier to retrieve when they cannot sink too far into the pocket.
- Use shallow storage for small supplies: Sticky notes, pens, adapters, earbuds, and small tools are easier to grab when they stay close to the opening.
- Use flexible storage for cords: Cables need room to bend without being crushed into a tight compartment.
- Choose stronger pockets for heavier items: A charging brick or small tool can pull on weak adhesive if the pouch is too flimsy.
- Keep each pouch category simple: One clear purpose per pouch makes it easier to grab what you need without searching.
Visibility also matters, even when the storage itself is hidden. You may prefer mesh or partially open pouches for small supplies because you can quickly see what is inside when you look underneath.
Closed fabric pockets can work better for loose cords because they contain visual clutter more completely. The tradeoff is that you need a clear category system so you do not spend time opening multiple pouches.
If you want to get more from your life, and are looking for concrete action steps to get you there, check out our Request a Coach page. It’s a “cut the fence-sitting and take action” way to tackle your issues and actually find success. To get off the fence and start to take action, click or tap here.
Avoid very deep pockets unless you truly need the capacity. Hidden storage works best when you can reach in and retrieve an item in one motion.
You also do not need specialized office products. Small adhesive pockets, hook-and-loop pouches, lightweight tool pouches, and compact cable holders can all work depending on your desk.
The easiest system is usually the one with the fewest decisions. If you can immediately remember that one pouch holds charging gear, one holds paper supplies, and one holds backups, the setup will be easier to maintain.
Good organization should make the next action obvious.
3. Map the Hidden Zones Before You Attach Anything
The underside of a desk may look like one large empty area, but it is not all equally useful. Some spots are easy to reach, while others interfere with your knees, chair, drawers, cables, or desk hardware.
That is why it helps to map the space before attaching anything permanently.
Start by sitting at the desk exactly as you normally would. Slide your chair in, move your legs, reach for your keyboard, and notice which areas underneath stay comfortably out of the way.
Then test your reach.
If you want to get more from your life, and are looking for concrete action steps to get you there, check out our Request a Coach page. It’s a “cut the fence-sitting and take action” way to tackle your issues and actually find success. To get off the fence and start to take action, click or tap here.
- Find your easiest reach zone: Move one hand underneath the desk without leaning forward or looking. The area your hand naturally lands on is prime storage space.
- Create a secondary zone: Slightly deeper areas can hold backups or items you use less often.
- Protect legroom: Keep pouches away from spots where your knees or thighs might brush against them.
- Check moving parts: Avoid blocking drawers, keyboard trays, adjustable desk mechanisms, vents, or cable routes.
- Leave open space: Do not assume every available inch needs to become storage.
A useful way to think about the setup is to divide the underside into zones.
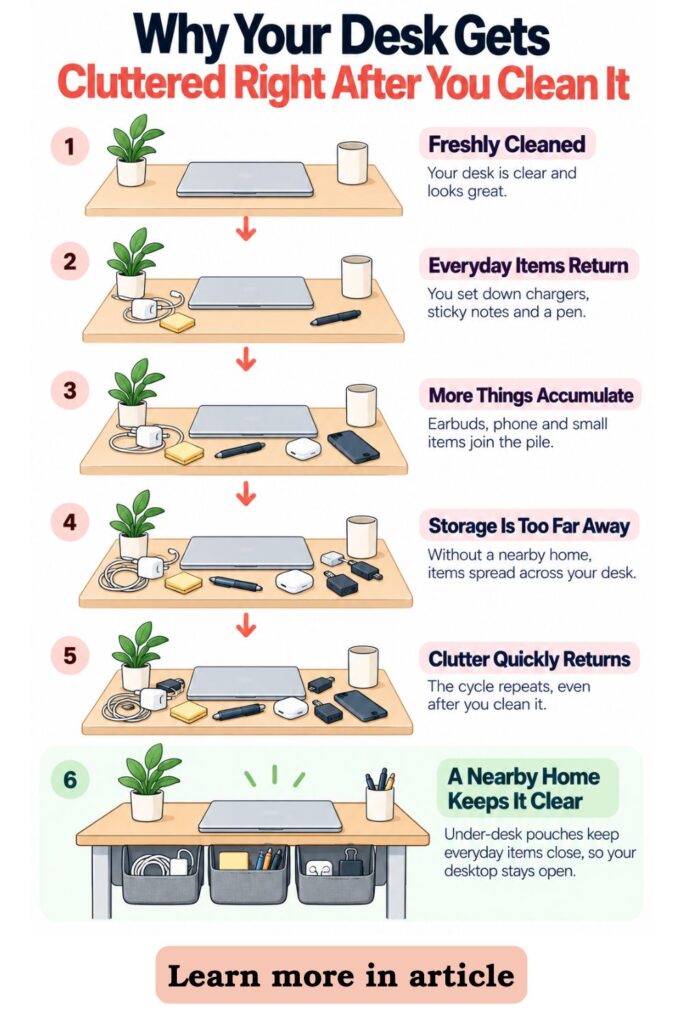
The front edge is usually best for frequent-use items such as sticky notes, earbuds, or a charging cable. Slightly farther back can work for spare cords or backup supplies.
If your desk has drawers on one side, the opposite side may become the easiest location for pouches. If your chair moves frequently, keep storage away from areas where it could snag or bump.
Before attaching anything, temporarily hold the pouch in place and practice grabbing an item from it. You may discover that a location that looks perfect is awkward from your normal sitting position.
This is a small environment-design trick, but it makes a major difference. When the storage fits your natural movement, using it requires less thought.
That matters because the easier it is to put something away, the more likely you are to actually do it.
4. Install the Pouches Without Creating a Bigger Hassle
Once you know what belongs under the desk and where each pouch should go, installation should stay simple. The goal is a quick upgrade, not an afternoon-long project.
Start by cleaning the underside where the pouch will attach. Dust and residue can weaken adhesive and make an otherwise good setup fail.
If you want to get more from your life, and are looking for concrete action steps to get you there, check out our Request a Coach page. It’s a “cut the fence-sitting and take action” way to tackle your issues and actually find success. To get off the fence and start to take action, click or tap here.
Let the surface dry completely before mounting anything.
- Clean before attaching: Wipe the area so adhesive, hook-and-loop strips, or mounting tabs have a smooth surface.
- Test the location first: Hold the pouch in place and reach into it several times before committing.
- Install one pouch at a time: Start with the item category you use most frequently and test it before adding more.
- Face the opening toward your reach: Position the pouch so your hand enters naturally from your normal sitting position.
- Keep the load light: Avoid stuffing the pouch until it sags or pulls away from the desk.
One-at-a-time installation is especially helpful because it prevents overbuilding the system.
You might think you need four pouches and discover that two solve most of the problem. That is a win. Fewer storage zones mean fewer places to search and fewer things to maintain.
Pay attention to how the pouch behaves when items are added. A pocket that looks secure while empty may sag once it holds cables or a charging brick.
If something feels too heavy, move it to a more secure storage area rather than forcing the pouch to support it.
You should also be able to remove and replace items with one hand whenever possible. If you have to hold the pouch open, bend awkwardly, or use both hands to retrieve a cable, the setup is adding friction.
A good under-desk system almost disappears into your routine.
You reach down, grab what you need, use it, and return it without turning the action into a separate organizing task.
If you want to get more from your life, and are looking for concrete action steps to get you there, check out our Request a Coach page. It’s a “cut the fence-sitting and take action” way to tackle your issues and actually find success. To get off the fence and start to take action, click or tap here.
That is what makes the upgrade sustainable.
5. Build a Hidden Charging and Cord Zone
Chargers and cords are often the biggest source of desk clutter because they are useful but visually messy. Even a clean workspace can look chaotic when several loose cables snake across the surface.
A hidden charging zone gives those cords a nearby home without forcing you to pack them away after every use.
Start by separating active charging cords from backups. Active cords are connected and used regularly. Backup cords are extras you only need occasionally.
The two groups should not share the same storage.
- Group cords by purpose: Keep phone, tablet, headphones, and other regularly used charging cables together in a clear charging zone.
- Store only the excess length: Leave the usable end accessible while tucking the extra cable underneath the desk.
- Contain spare cords separately: Put backup cables in a pouch so you immediately know which ones are connected and which ones are extras.
- Keep adapters together: Store compatible adapters or charging blocks near the cords they belong with.
- Avoid trapping heat: Do not tightly enclose electronics or power equipment that becomes warm during use.
One of the simplest setups is to let the working end of a charging cable reach the desktop while the unused length sits inside or beside an under-desk pouch.
That way, you can plug in your device without pulling the entire cable out each time.
You may also want to create a small opening or route that keeps cables from dropping to the floor when unplugged. The easier it is to grab the connector, the less likely you are to leave the entire cable sprawled across the desk.
If you want to get more from your life, and are looking for concrete action steps to get you there, check out our Request a Coach page. It’s a “cut the fence-sitting and take action” way to tackle your issues and actually find success. To get off the fence and start to take action, click or tap here.
For backup cords, coil them loosely and store them by type. Avoid creating a tangled pouch filled with unidentified black cables.
If you have several similar cords, use a simple label or tie so you know what each one powers.
The purpose of the charging zone is not perfect cable management. It is reducing the number of loose cords competing for visual space while keeping the ones you actually use within easy reach.
6. Create Tiny Grab Zones for Sticky Notes, Tools, and Backups
Once the cords are handled, turn your attention to the smaller supplies that quietly fill up a desktop.
Sticky notes, pens, cleaning cloths, scissors, adapters, and little backup supplies often look harmless individually. Together, they can make a desk feel crowded.
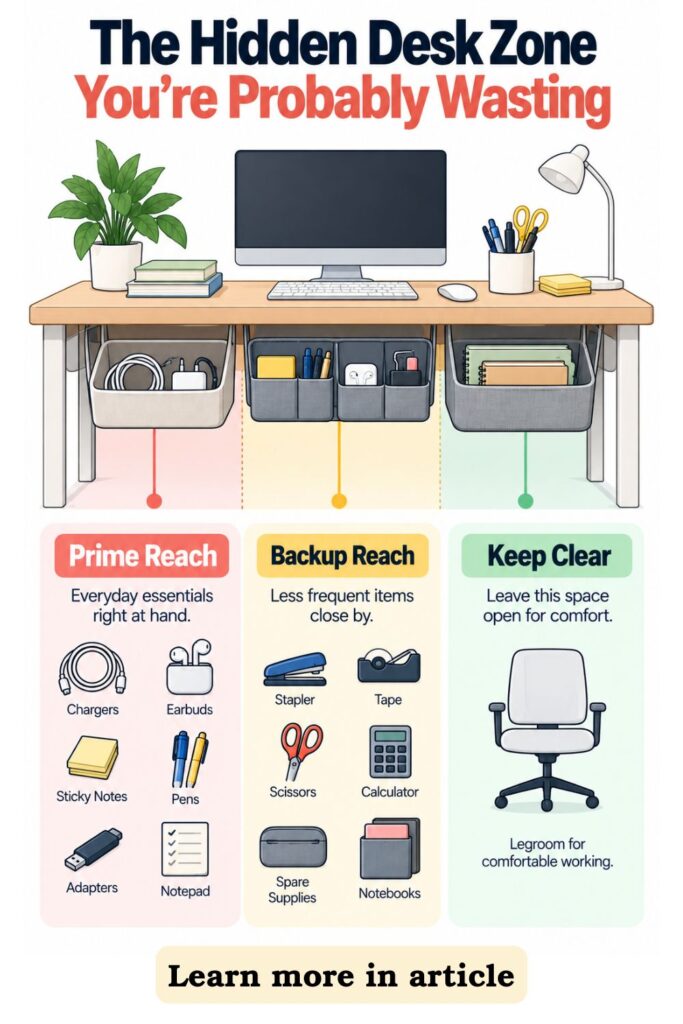
The easiest solution is to give these items tiny grab zones underneath the desk.
A grab zone is simply a small category with one obvious home. You do not need a complicated labeling system. You just need enough separation that you can reach for something without digging.
- Give sticky notes a shallow pocket: Keep one active pad nearby instead of stacking several pads on the surface.
- Create a tiny tool zone: Store small scissors, a ruler, spare pens, or a cleaning cloth together if they support your normal work.
- Make a backup pocket: Keep replacement pens, extra sticky notes, spare adapters, or another charging cable slightly farther back.
- Limit the quantity: Store enough to support the workday, not your entire office-supply collection.
- Keep the surface for active items: If you are not using it now, return it to its hidden zone.
This setup is especially useful if you do not have desk drawers.
If you want to get more from your life, and are looking for concrete action steps to get you there, check out our Request a Coach page. It’s a “cut the fence-sitting and take action” way to tackle your issues and actually find success. To get off the fence and start to take action, click or tap here.
Instead of adding a bulky organizer on top of the desk, you create a lightweight version underneath it.
Try to keep the categories broad enough to remember. “Small tools” is easier than creating separate pockets for pens, scissors, ruler, and cloth unless you truly use all of those items constantly.
The same rule applies to backups. One small refill pouch is usually enough.
When something runs out, pull a replacement from the pouch and restock it later. You do not need five pens and three sticky-note pads sitting within immediate reach at all times.
The biggest benefit is that the desk surface becomes flexible.
You can use the space for a notebook, laptop, project materials, or whatever you are actively working on instead of permanently surrendering that space to supplies.
7. Do the One-Minute Reach Test Before Calling It Finished
A desk setup can look beautifully organized and still be annoying to use. That is why the final test should focus on movement rather than appearance.
Sit at the desk in your normal working position and try to retrieve each category without thinking too hard about it.
If you want to get more from your life, and are looking for concrete action steps to get you there, check out our Request a Coach page. It’s a “cut the fence-sitting and take action” way to tackle your issues and actually find success. To get off the fence and start to take action, click or tap here.
Reach for a charger. Grab a sticky note. Take out a pen or adapter. Pull out a backup cord.
Notice what happens.
- Test every category from your normal position: Avoid moving the chair or leaning dramatically just to reach a pouch.
- Notice hesitation: If you pause because you cannot remember where something is stored, the categories may be too complicated.
- Move high-use items closer: Anything you grab several times a day deserves the easiest location.
- Push low-use items farther back: Save prime reach space for frequent actions.
- Remove ignored items: If you forgot something was stored there, it may not need to stay under the desk.
This test takes less than a minute, but it can prevent weeks of irritation.
Pay special attention to any movement that requires you to look underneath the desk. You may occasionally need to glance down, but frequent-use items should become easy to grab by memory.
That is where environment design becomes useful.
You are not relying on motivation to keep the desk clear. You are shaping the space so the easiest action is also the organized action.
If returning a charging cable takes one movement, you are more likely to put it away. If returning it requires opening a drawer, moving a box, and wrapping the cord perfectly, it will probably end up back on the desk.
Small friction matters.
If you want to get more from your life, and are looking for concrete action steps to get you there, check out our Request a Coach page. It’s a “cut the fence-sitting and take action” way to tackle your issues and actually find success. To get off the fence and start to take action, click or tap here.
Keep adjusting until the system feels almost automatic. You might move one pouch a few inches closer, switch the contents of two pockets, or remove a category that does not deserve prime space.
The finished setup should feel easier than leaving the items out.
That is the real test of whether the system will last.
8. Keep the Pouches From Becoming a Hidden Junk Drawer
Hidden storage can create a false sense of order. The desktop looks clean, but the pouches underneath slowly fill with random objects.
Eventually, you reach into a pocket for a charging cable and pull out a receipt, two pens, an old adapter, a paper clip, and something you do not remember buying.
The easiest way to prevent that is to keep each pouch tied to one clear purpose.
- Use one category per pouch: Keep charging supplies with charging supplies and office tools with office tools.
- Reset during desk cleanup: When you finish working, return stray items to their assigned pockets as part of the same quick reset.
- Watch for overflow: If one pouch becomes difficult to close or search, review its contents before adding more storage.
- Edit before expanding: Remove unused items before installing another pouch.
- Review what you avoid using: A pouch you never reach for may be holding items that belong somewhere else.
You do not need a formal maintenance routine.
A quick check every few weeks is enough. Pull out anything you no longer use, return misplaced items to their proper homes, and make sure the storage still fits your current workflow.
If you want to get more from your life, and are looking for concrete action steps to get you there, check out our Request a Coach page. It’s a “cut the fence-sitting and take action” way to tackle your issues and actually find success. To get off the fence and start to take action, click or tap here.
Your work habits may change over time.
You might stop using sticky notes and start using a tablet. You might get a new charging cable that replaces three older ones. You might discover that the scissors you thought you needed at arm’s reach are barely used.
Let the setup change with you.
One useful rule is that under-desk storage should earn its location. Prime hidden space is valuable because it is both nearby and visually quiet.
If an item has not been used in several weeks, consider moving it to a drawer, cabinet, or supply box instead.
The goal is not to hide more clutter.
The goal is to create a small, useful layer of storage that supports the work you actually do.
When each pouch has a clear purpose, the system stays easy to understand and easy to reset.
If you want to get more from your life, and are looking for concrete action steps to get you there, check out our Request a Coach page. It’s a “cut the fence-sitting and take action” way to tackle your issues and actually find success. To get off the fence and start to take action, click or tap here.
9. How an Organizing Coach Can Help You Design a Desk Around Your Habits
Sometimes the issue is not that you lack storage. The issue is that your current storage does not match the way you naturally work.
That is where an organizing coach can be helpful.
Rather than focusing only on where objects should go, a coach can look at the patterns behind the clutter. Maybe charging cables stay on your desk because the drawer is too far away. Maybe sticky notes pile up because you grab them constantly. Maybe backup supplies take over the surface because you do not have one clear refill location.
Those patterns reveal where the environment is creating unnecessary friction.
- Identify repeat friction: A coach can help you notice which tools keep returning to the surface and why.
- Design around real behavior: Instead of forcing an ideal setup, you can build storage around the actions you already repeat.
- Simplify decisions: Clear categories reduce the number of tiny choices required to put things away.
- Test the system over time: After a week or two, you can adjust pouch locations based on what you actually use.
- Connect the desk to a larger routine: The under-desk setup can become part of a simple start-of-day or end-of-day reset.
This can be especially useful for people who have tried multiple organizing systems that looked good at first but never lasted.
The problem may not be a lack of discipline.
The system may simply ask too much.
If putting something away requires opening a cabinet, sorting a category, wrapping a cord, and finding the right container, leaving it on the desk becomes the easier option.
If you want to get more from your life, and are looking for concrete action steps to get you there, check out our Request a Coach page. It’s a “cut the fence-sitting and take action” way to tackle your issues and actually find success. To get off the fence and start to take action, click or tap here.
A coach can help reverse that.
The goal is to make the organized action require less effort than the messy action.
Even without formal coaching, you can use the same mindset. Look at recurring clutter as information.
Instead of asking, “Why can’t I keep this desk clean?” ask, “What is this clutter telling me about how I use this space?”
That question often leads to a much more practical answer.
A Clean Surface With Everything You Still Need Nearby
A clear desk does not have to mean removing everything useful from reach.
In fact, the best workspace often keeps the right tools very close. The difference is that those tools have designated places to wait when they are not actively being used.
An under-desk pouch setup works because it uses space that would otherwise sit empty.
If you want to get more from your life, and are looking for concrete action steps to get you there, check out our Request a Coach page. It’s a “cut the fence-sitting and take action” way to tackle your issues and actually find success. To get off the fence and start to take action, click or tap here.
Instead of filling the desktop with chargers, sticky notes, cords, adapters, and backup supplies, you move those supporting items underneath the surface while keeping them within arm’s reach.
The change can be surprisingly small.
- Start with only a few recurring clutter items: You do not need to reorganize the entire desk at once.
- Keep frequently used tools closest: Easy access makes the system more likely to stick.
- Store backups farther away: Prime reach space should support daily work.
- Adjust based on real use: If a pouch feels awkward, move it instead of forcing yourself to adapt.
- Protect the empty surface: Use the desktop for what you are working on right now.
That final point is the real payoff.
A clear work surface gives you more room to spread out a notebook, work on a project, use a laptop, review papers, or simply think without visual clutter competing for your attention.
You still have the supplies you need.
They are just waiting a few inches away instead of sitting directly in front of you.
That is what makes this kind of setup so practical. It does not depend on a complete makeover or a complicated routine.
It uses placement to make organization easier.
If you want to get more from your life, and are looking for concrete action steps to get you there, check out our Request a Coach page. It’s a “cut the fence-sitting and take action” way to tackle your issues and actually find success. To get off the fence and start to take action, click or tap here.
When the easiest place to return a charger, sticky note, or small tool is also the place where it stays out of sight, keeping the desk clear starts to feel much less like a chore.
Are you all about style, decor and organization? Download a copy of our Clutter Reset Guide.
Need some in depth help with organization and productivity ? Drop on by our directories choc full of productivity coaches, minimalist coaches, and work/life balance coaches to get your life organized! Or click here to have us match you to the best.
If you want to get more from your life, and are looking for concrete action steps to get you there, check out our Request a Coach page. It’s a “cut the fence-sitting and take action” way to tackle your issues and actually find success. To get off the fence and start to take action, click or tap here.
Read this next

4 Christmas Living Room Styles That Reveal Your Holiday Personality
Are you all about style, decor and organization? Download a copy of our Decluttering Workbook. **** Your living room already knows your holiday personality; it shows up in the textures […]
Read More
7 Super Easy DIY Rustic Outdoor Christmas Porch Decor Ideas
Are you all about style, decor and organization? Download a copy of our Decluttering Workbook.**** Rustic Christmas porch decor has a charm that feels welcoming, warm, and handmade in all […]
Read More
The Secret Techniques Professional Artists Use on Painted Pumpkins
Are you all about style, decor and organization? Download a copy of our Decluttering Workbook. **** Carving pumpkins might be the tradition, but painted pumpkins have taken over as the […]
Read More