


Talk to a coach about Organizational coaching

Crystal Faulk
ACC
I help overwhelmed women in transition gain clarity, confidence, and...

Terrie Hein
Certified Life Coach, Certified Insight Coach Practitioner
Coaching to declutter your life, organize your goals, and cook...

Dr Charlene Ashley
Doctorate - Behaviours
I coach individuals to design fulfilling lives through structure, clarity,...

Paloma Chiara

Lana's Gymnastics Club
"Where the best in gymnastics meets fun. Where every child is a star"
lgclubny.com

Anna Sosnina
ICF (ACC)
ICF ACC certified coach, founder of EssorVie Coaching, passionate about...

Tyler Fink
B.A. in Religion, Anthropology, and Philosophy. Master of Divinity (M.Div.) in Missiology
Pastor, husband, and father helping Christian men pursue faithful growth...

Travis Brown
Professional Life coach
With experience in guiding clients to achieve goals, build confidence,...

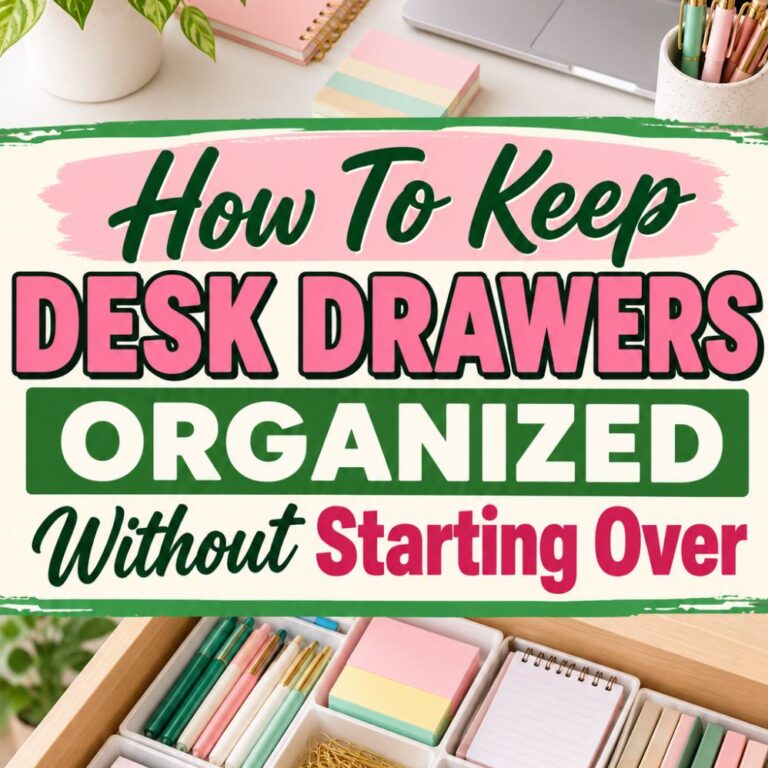


Drawer Zone Map for Everyday Desk Supplies
Are you all about style, decor and organization? Download a copy of our Clutter Reset Guide.
*****
Why Your Desk Drawer Keeps Turning Into a Junk Drawer
You open your desk drawer for a pen and find a loose collection of paper clips, old sticky notes, highlighters, and a pair of scissors buried at the back. The pen is probably in there somewhere, but getting to it turns a small task into an annoying interruption. A tidy-looking drawer can still waste time when its contents have no reliable place to live.
The problem often starts with treating a drawer as one large container. Small supplies slide underneath larger ones, new purchases get dropped on top, and the items you use every day end up mixed with things you barely touch. Emptying the drawer might make it look better for a week, but the same pattern returns unless you change how the space works.
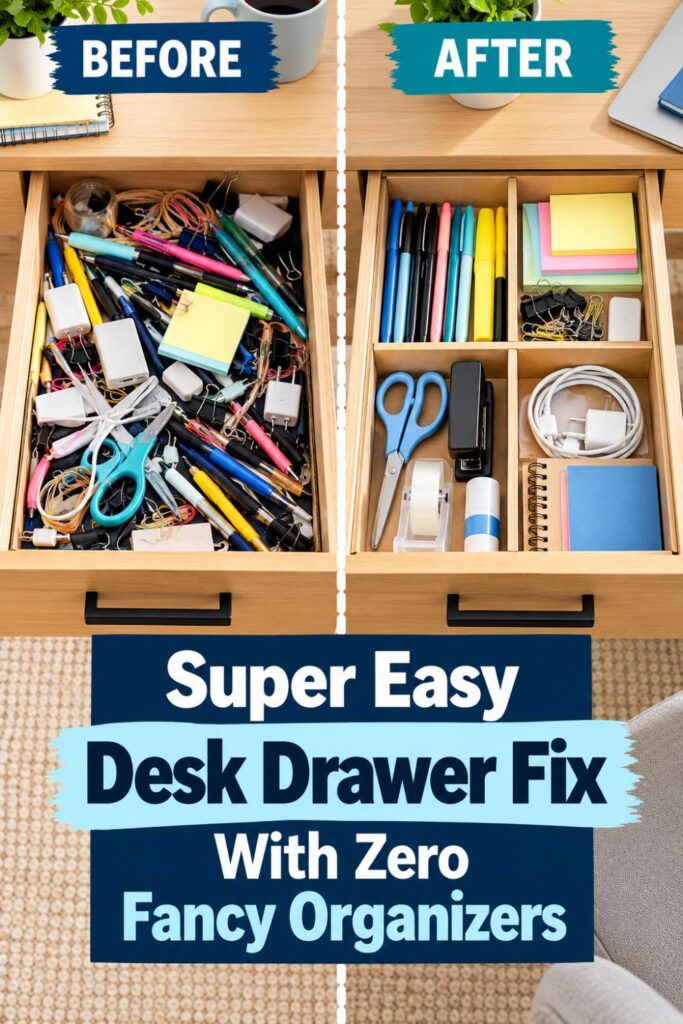
A drawer zone map is a simple plan that divides the interior into sections based on what each supply does. You do not need matching acrylic trays or a custom insert. You need boundaries that make it obvious where to find an item and where to return it.
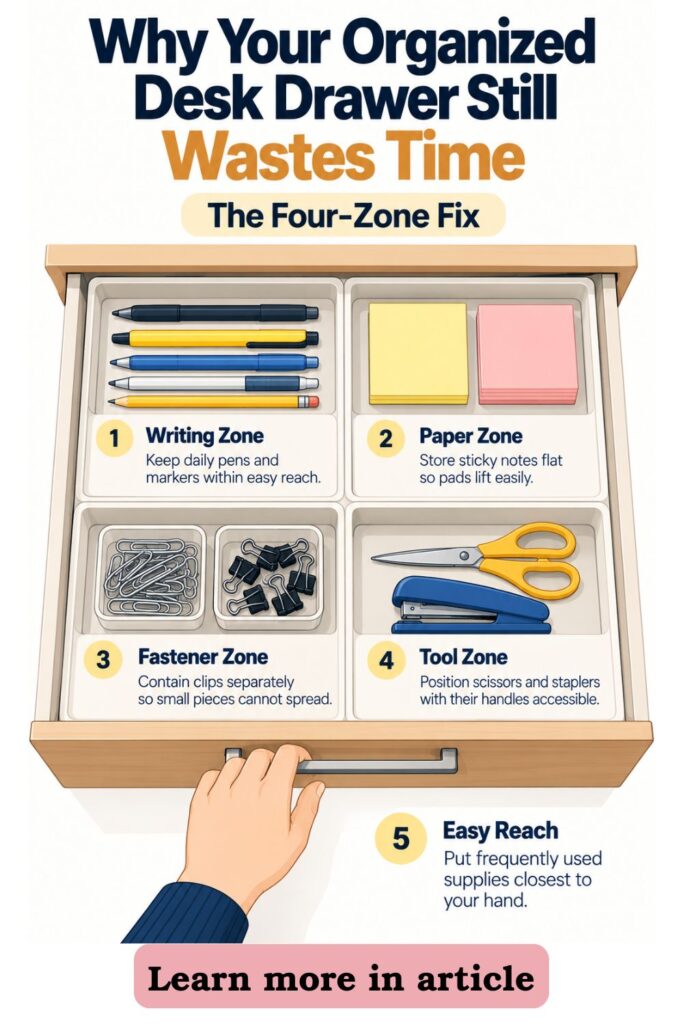
Start by thinking about four practical zones:
- Writing supplies: Pens, pencils, markers, and highlighters belong together so you can grab one without sorting through other stationery.
- Paper supplies: Sticky notes, page flags, and small notepads need a flat space where the top sheet and the whole pad are easy to reach.
- Small fasteners: Paper clips, binder clips, and other tiny pieces need contained compartments so they cannot spread across the drawer.
- Small tools: Scissors, correction tape, a mini stapler, or a short ruler need room that matches their shapes.
The order of these zones will depend on your drawer and habits. Someone who writes notes all day might keep pens at the front, while someone handling paperwork may need clips in the easiest spot. What matters is designing for repeated actions, not arranging supplies according to how they look in a photograph. The following steps show you how to choose what stays, measure the space, draw a working map, and test the layout before calling it finished.
Need some in depth help with organization and productivity ? Drop on by our directories choc full of productivity coaches, minimalist coaches, and work/life balance coaches to get your life organized! Or click here to have us match you to the best.
If you want to get more from your life, and are looking for concrete action steps to get you there, check out our Request a Coach page. It’s a “cut the fence-sitting and take action” way to tackle your issues and actually find success. To get off the fence and start to take action, click or tap here.
Step 1: Empty Your Drawer and Identify What Actually Belongs
Before adding dividers, find out what the drawer is being asked to hold. Pull it open, remove everything, and place the contents on a clear desk or table. Working from an empty drawer makes it easier to see both the available space and the habits that created the clutter.
Do not begin by buying containers. If you organize everything you own without deciding what belongs here, you may end up with attractive compartments that are just as crowded as the original drawer.
- Separate everyday supplies from everything else: Put pens, clips, sticky notes, and small desk tools in one group. Move receipts, chargers, personal items, and supplies for other rooms into separate piles so they do not automatically return to the drawer.
- Check what still works: Test pens and markers, look for dried correction tape, and discard broken or unusable items appropriately. A drawer should not reserve valuable space for tools you cannot use when you need them.
- Sort the keepers by function: Make four small piles for writing tools, paper products, fasteners, and compact tools. If an item seems to fit two categories, choose the group you would instinctively look in first.
- Reduce the duplicates: Keep a working quantity, such as two dependable pens rather than twelve nearly identical ones. Store unopened packets and backup supplies elsewhere so they do not overwhelm the daily-use sections.
- Notice how often you reach for each group: Think through a typical workday and identify which items you use repeatedly. Those supplies will deserve the most accessible positions when you create the zone map.
Once the drawer is empty, wipe away crumbs, ink marks, and dust from the corners. Let it dry before putting anything back, especially if you plan to use paperboard dividers or small boxes.
You should now have a manageable collection rather than a mixed heap. If the remaining supplies still seem too numerous, ask whether every item must be stored in this particular drawer. The goal is to keep the things you need at your fingertips, not to squeeze your entire stationery collection into one space.
Step 2: Measure Your Drawer Before Choosing Any Organizers
A drawer organizer only helps if it fits the actual drawer and the supplies inside it. Even standard-looking desk drawers vary in depth, width, and height. An insert that is slightly too tall can stop the drawer from closing, while one that is too small can slide around whenever you reach for a pen.
Grab a tape measure, a sheet of paper, and a pencil before you start shopping or cutting dividers. Write down the measurements so you can plan the layout without repeatedly testing guesses.
- Measure the usable interior: Measure side to side, front to back, and from the drawer floor to the lowest point above it. Check for tracks, screws, curved corners, and other obstructions rather than assuming the drawer is a perfect rectangle.
- Check the tallest and longest items: Lay your scissors, stapler, tape dispenser, and any stacked note pads on the desk. Compare their dimensions with the drawer so you know which supplies need longer, wider, or shallower compartments.
- Choose low-profile dividers: Look for adjustable separators, shallow trays, or small reused boxes that fit below the drawer’s clearance. Deep organizers are not always better, especially if they hide supplies at the bottom.
- Plan for the space containers take up: Divider walls and tray edges use some of the available width. Leave a little tolerance instead of purchasing an arrangement whose combined dimensions exactly equal the drawer measurements.
- Test before committing: Set empty trays or temporary cardboard shapes inside the drawer. Open and close it slowly, then check whether the arrangement shifts, catches, or leaves awkward gaps that might collect loose supplies.
If you are using repurposed boxes, trim only what is safe to cut cleanly and keep rough edges away from your hands. A removable liner can protect the drawer surface, but it should not prevent containers from sitting flat.
Do not worry about achieving perfect symmetry. A long narrow space may be ideal for pens, while two smaller sections work better for clips and sticky notes. Good measurements help you build around those needs instead of forcing all supplies into equal-sized compartments.
If you want to get more from your life, and are looking for concrete action steps to get you there, check out our Request a Coach page. It’s a “cut the fence-sitting and take action” way to tackle your issues and actually find success. To get off the fence and start to take action, click or tap here.
Step 3: Draw a Simple Four-Zone Map for Your Desk Supplies
Now that you know what stays and how much room you have, turn the empty drawer into a simple map. Sketch a rectangle on paper using the drawer’s approximate proportions. You do not need architectural precision, but you should have enough detail to decide where the four groups will go before rearranging containers again and again.
Think of the front edge as the easiest reach and the back corners as less convenient. The best location for each zone depends on what you grab most often, not on an arbitrary rule that every drawer must look the same.
- Mark a writing zone: Set aside a long, narrow section for pens, pencils, and highlighters. Keep it near the front or beside your dominant hand if writing tools are the items you reach for most.
- Reserve a flat paper zone: Give sticky notes, page flags, and a small notepad a compartment wide enough to lift a whole pad. Avoid wedging the stack beneath trays or larger tools.
- Create a contained fastener zone: Allocate one or two small compartments to paper clips and binder clips. If you also use pushpins, keep them in a closed container to reduce accidental pricks when reaching into the drawer.
- Assign a tool zone: Measure space for scissors, correction tape, a mini stapler, or a ruler. Place longer tools parallel to a drawer side so their handles do not block neighboring supplies.
- Size sections according to real demand: Expand the writing area if you use several markers each day, or shrink the tool area if you only keep scissors. Equal quarters may look tidy on paper but rarely reflect how supplies are used.
Here is one workable starting arrangement: put pens along one side, sticky notes at the front, fasteners in small trays beside them, and tools across the back. Change that order if your work makes another layout more convenient.
Before filling anything, place your empty organizers into the sketched pattern. Check that your hand can reach each section without moving another container. If you must lift a tray to access a regular supply, revise the map now.
Step 4: Set Up Each Supply Zone So Everything Stays in Place
Your map gives every category a location, but the placement inside each compartment matters too. Supplies should be visible and easy to pick up without spilling nearby objects. Instead of filling each zone completely, leave enough open room for normal movement and quick returns.
Install the dividers or trays first, then add items one category at a time. This makes it easier to spot a compartment that needs resizing before the entire drawer fills up.
- Lay writing tools in one direction: Arrange pens, pencils, and highlighters horizontally with their ends aligned. If you have several types, keep the most-used tools closest to the front and put occasional markers toward the back of the same zone.
- Keep paper products flat and reachable: Stack sticky notes and small notepads where you can lift a pad straight out. Store page flags in their own narrow pocket if their packaging slips under larger paper stacks.
- Give fasteners firm boundaries: Place paper clips and binder clips in separate mini trays or sections of one divider. Avoid pouring a whole bulk package into the drawer, since a small working supply is easier to see and replenish.
- Position tools so handles stay accessible: Lay scissors flat with the blades closed and protected, and keep correction tape or a mini stapler beside them. Avoid resting heavier tools on top of notes or delicate supplies.
- Leave a little breathing room: Stop before every section is packed tight. If you cannot remove a pen or note pad without disturbing its neighbors, move the excess to your backup storage.
Open and close the drawer a few times after loading it. If small trays slide, adjust the fit or use an appropriate removable nonslip liner rather than relying on a permanent adhesive. Make sure nothing catches the drawer opening.
The finished setup should feel almost self-explanatory. You can glance inside and know which section holds the item you need. More importantly, returning a tool should be as easy as taking it out, because complicated systems tend to fall apart during busy workdays.
If you want to get more from your life, and are looking for concrete action steps to get you there, check out our Request a Coach page. It’s a “cut the fence-sitting and take action” way to tackle your issues and actually find success. To get off the fence and start to take action, click or tap here.
Step 5: Test Your Drawer Zone Map During a Normal Workday
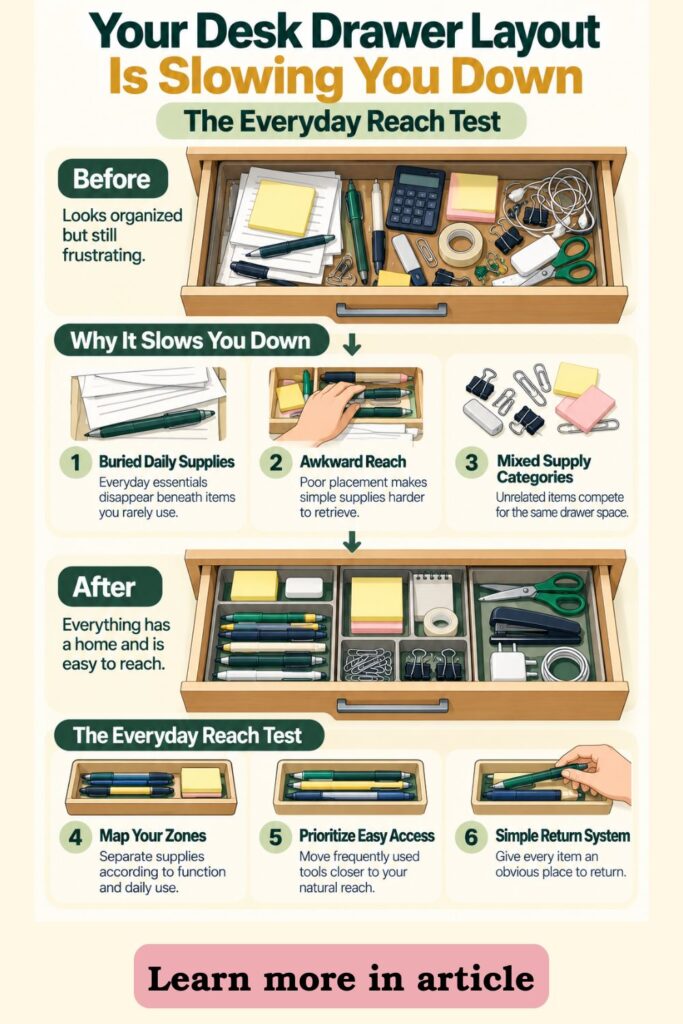
A neat drawer photographed immediately after organizing can hide problems that appear during actual use. Maybe the paper clips are too far back, the pen tray blocks your scissors, or the sticky notes fit only when the package is perfectly squared. A real test will tell you more than an initial visual check.
Use the drawer normally for a few work sessions before treating the arrangement as finished. Do not aim to preserve its appearance. Pay attention to what feels easy and what repeatedly slows you down.
- Run a short retrieval test: Close the drawer and then locate a pen, a paper clip, a sticky note, and a small tool. Each should be visible and removable without lifting another container or moving a different supply category.
- Watch your natural reach: Notice where your hand goes first when you are thinking about work rather than organization. If you repeatedly reach past one zone to another, consider swapping their locations.
- Look for signs of a poor fit: Check for clipped paper caught under a divider, trays that shift when the drawer moves, or tools that need to be rotated awkwardly to come out. Those are layout problems, not personal failures.
- Track where items land after use: At the end of the day, look for pens abandoned in the paper section or clips scattered beside the trays. Ask whether the intended return location is too small, too far away, or not obvious enough.
- Change one thing at a time: Widen a pen area, move the clip tray forward, or remove an unnecessary divider. Test the new position for another day so you can tell whether that adjustment actually helped.
Do not rebuild the entire drawer every time you notice a stray pen. The purpose of testing is to find repeated friction, not to demand perfect behavior from every user.
Once the layout works in ordinary conditions, consider taking a quick reference photo or keeping your sketch. If you remove the trays for cleaning later, you will have an easy reminder of the setup that worked best.
Step 6: Create a Simple Maintenance System That Prevents Drawer Clutter
Even a well-designed drawer can become crowded when new supplies arrive and old ones are never removed. Maintenance should therefore be part of the zone map, not an emergency project you tackle when the drawer stops closing. A few small rules usually work better than an ambitious monthly overhaul.
Focus on making the return process easy. If a pen can be put away with one motion, you are more likely to do it between calls, assignments, or work sessions.
- Give each category one home: Keep writing supplies in their tray, notes in their flat section, fasteners in their compartments, and tools in their longer area. Resist creating a temporary miscellaneous pile in the one empty corner.
- Set a comfortable capacity: Decide what fits without stacking supplies so tightly that they become difficult to remove. When your pen compartment is full, replace an unusable pen rather than adding another layer on top.
- Store bulk packages elsewhere: Keep extra boxes of clips, spare note pads, and unopened markers in a separate cabinet or supply bin. Refill the drawer as needed instead of treating it as a warehouse.
- Add a quick end-of-day return: Before finishing work, spend less than a minute returning loose items to their sections. Pairing the task with shutting down your computer or closing your planner makes it easier to remember.
- Schedule a brief weekly check: Remove stray receipts, discard dead pens, and top up supplies from your backups. Notice whether the same items keep landing outside their zones, since that may signal a layout that needs adjusting.
If another person uses the drawer, explain the four categories rather than expecting them to guess your system. Simple labels can help in a shared workspace, but they are optional when the contents of each section are obvious.
A working drawer is not one that never looks messy. It is one that can be returned to order quickly, without sorting dozens of unrelated objects. Aim for a setup that survives a busy week and still makes the next day’s first task easier.
If you want to get more from your life, and are looking for concrete action steps to get you there, check out our Request a Coach page. It’s a “cut the fence-sitting and take action” way to tackle your issues and actually find success. To get off the fence and start to take action, click or tap here.
How to Make a Four-Zone System Work in Tiny or Awkward Desk Drawers
Not every desk has a wide, rectangular drawer. Some are unusually shallow, narrow enough for a keyboard tray, or interrupted by hardware at the back. The four-zone idea still works, but you may need to be flexible about how those categories are separated.
Start by mapping the usable interior rather than copying an organizer layout from a picture. In a small space, the shape of the dividers matters as much as the number of sections.
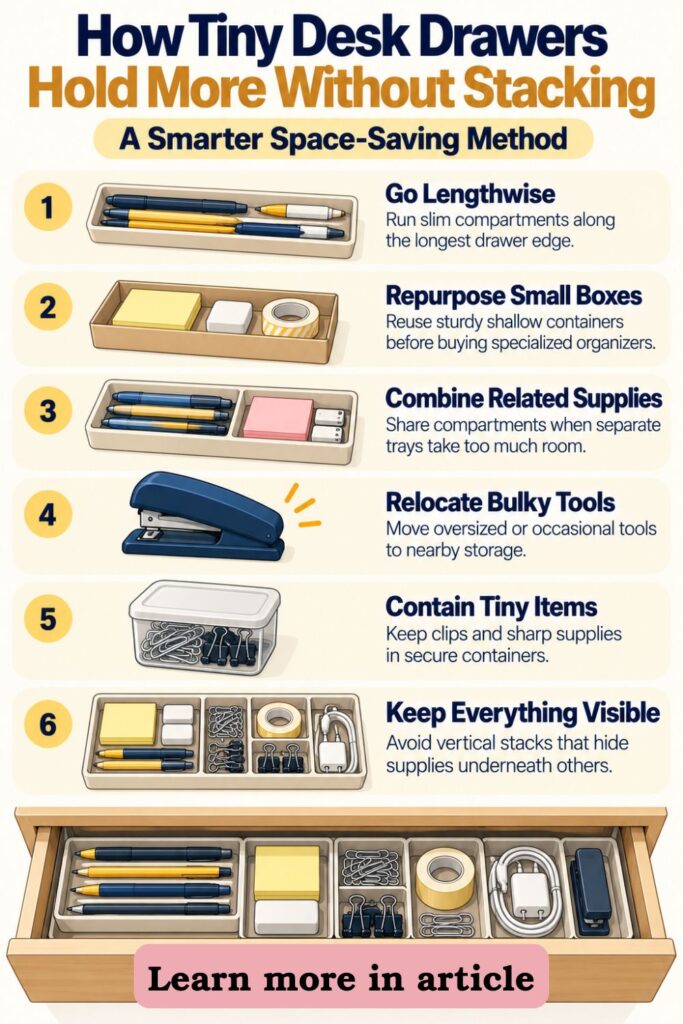
- Run narrow compartments lengthwise: A slim pen tray can sit along one side, leaving the center open for sticky notes and small containers. This often uses space more efficiently than placing several square trays in a single row.
- Repurpose containers with useful dimensions: Try a clean shallow box, a small lid, or a sturdy cut-to-fit paperboard section before purchasing specialized organizers. Test whether it stays flat and permits easy access when the drawer opens.
- Combine categories without losing boundaries: If four separate trays cannot fit, place pens and pencils in one section and divide the remaining space between paper supplies, fasteners, and tools. The categories are still clear even when one compartment serves closely related items.
- Move occasional tools out of the drawer: A full-size stapler or oversized tape dispenser may consume space needed for everything else. Keep large or rarely used tools on a shelf or in another storage spot while reserving the drawer for daily essentials.
- Use shallow containment for tiny items: Mini containers prevent clips and pins from spreading, even when there is not room for a commercial organizer. For sharp items such as pushpins, use a secure lidded container instead of an open cup.
Avoid building vertical stacks that hide the lower layer. In shallow drawers, storing fewer objects usually improves access more than adding another tier of storage.
Finally, check your modified layout with the drawer fully loaded. Open it gently, retrieve each category, and confirm the containers do not snag on hardware or shift into the drawer tracks. A compact system succeeds when you can use it comfortably, not when you manage to fit the maximum number of items inside.
How an Organizational Coach Can Help You Create Systems That Actually Stick
Sometimes the drawer itself is not the main problem. You may organize it carefully, then watch it collect random objects during a hectic week. That pattern can reveal something useful about your schedule, your work transitions, or the amount of effort your storage system requires.
An organizational or productivity coach can help you look at those habits without turning the conversation into a judgment about tidiness. The aim is to create a setup that supports the way you actually work, then choose routines simple enough to maintain.
- Identify your common drop points: A coach might ask when items usually end up in the wrong spot. If you throw pens into the drawer after a video call, that transition may be a useful moment to build a quick return habit.
- Define a measurable goal: Instead of aiming for a perfectly clean drawer, set a practical target such as finding any daily supply without searching through piles. You can assess whether the new zone map meets that goal during regular work.
- Reduce the number of decisions: If remembering four categories feels inconvenient, a coach can help simplify your arrangement and decide what should live somewhere else. Fewer return choices may make follow-through more natural.
- Attach maintenance to an existing routine: You might reset the drawer when closing your laptop on Friday or replenish supplies while reviewing your weekly to-do list. Linking actions to established habits avoids creating another complicated checklist.
- Review what is and is not working: After a couple of weeks, reflect on which categories stay organized and which repeatedly spread. Adjust compartment size, placement, or backup storage based on those observations rather than starting over automatically.
You do not need a coach to organize a desk drawer. The same questions can be used as a self-check if you prefer to work independently. Coaching becomes useful when similar organization problems appear across your workspace and you would benefit from outside perspective, planning, or accountability.
A good organizational system should reduce friction, not create another standard you feel pressured to meet. Whether you work with a coach or on your own, focus on small improvements you can repeat.
If you want to get more from your life, and are looking for concrete action steps to get you there, check out our Request a Coach page. It’s a “cut the fence-sitting and take action” way to tackle your issues and actually find success. To get off the fence and start to take action, click or tap here.
Your Desk Drawer Should Make Work Easier, Not Add Another Task
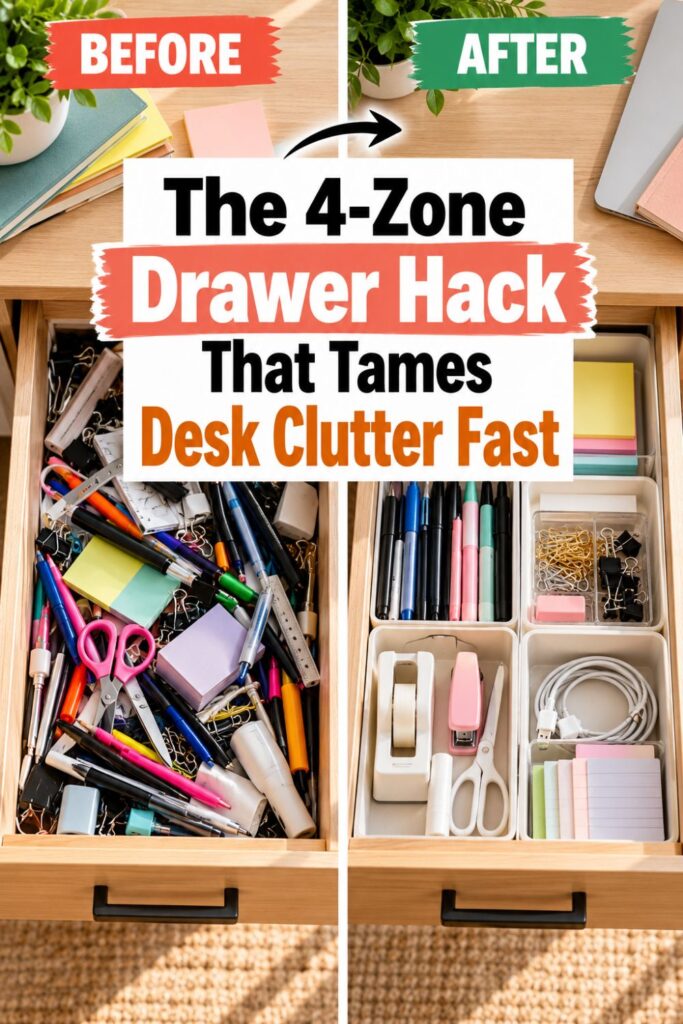
A functional desk drawer is a small but valuable part of a workspace. When you know where your pen, paper clips, sticky notes, and small tools belong, you can move through everyday tasks without interrupting yourself to search. You also avoid the cycle of completely emptying the drawer whenever supplies become difficult to find.
The change comes from giving the drawer a job. Instead of becoming the place where miscellaneous objects disappear, it becomes a compact supply station built around what you reach for most often.
If you are ready to try the method, keep the first version simple:
- Start with one drawer: Clear it out and keep only supplies that support the work you do at that desk. Moving unrelated objects elsewhere is often the biggest improvement you can make before buying a single organizer.
- Choose four useful categories: Set aside spaces for writing tools, paper products, small fasteners, and compact tools. Adapt the groups if your work requires something different, but avoid creating so many categories that putting items away becomes confusing.
- Fit the dividers to the contents: Measure the drawer, choose shallow containers, and allow room for your hand to reach each item. Your layout should support retrieval and return, not just make efficient use of every square inch.
- Test the arrangement in real life: Use the drawer during normal work sessions and watch for supplies that are hard to grab or consistently left out of place. Small adjustments are more useful than repeatedly rebuilding the entire system.
- Maintain it with tiny resets: Return items at the end of the day, check for overflow once a week, and replenish from supplies stored elsewhere. The less work your routine demands, the more likely it is to last.
Do not judge the result by whether every pen remains perfectly aligned. Judge it by whether you can open the drawer, find what you need, and put it back without thinking much about it. That is the real value of a drawer zone map: a clear place for each everyday essential and a simple system that continues working after the organizing session is over.
Are you all about style, decor and organization? Download a copy of our Clutter Reset Guide.
Need some in depth help with organization and productivity ? Drop on by our directories choc full of productivity coaches, minimalist coaches, and work/life balance coaches to get your life organized! Or click here to have us match you to the best.
If you want to get more from your life, and are looking for concrete action steps to get you there, check out our Request a Coach page. It’s a “cut the fence-sitting and take action” way to tackle your issues and actually find success. To get off the fence and start to take action, click or tap here.
Read this next

Why Your Galentine’s Aesthetic Should Be the First Decision You Make
Are you all about style, decor and organization? Download a copy of our Decluttering Workbook.**** A Galentine’s night isn’t just about pink décor or matching pajamas — it’s about creating […]
Read More
Easter Decor Ideas That Feel Intentional (Not Overdone)
Simple Easter decor formulas for porches, doors, mantels, and entryways that feel collected, cozy, and easy to reuse every spring.
Read More
Organizing the Kitchen: How to Save Time and Space
Get your kitchen clutter under control with these handy tips!
Read More