


Talk to a coach about Organizational coaching

Crystal Faulk
ACC
I help overwhelmed women in transition gain clarity, confidence, and...

Terrie Hein
Certified Life Coach, Certified Insight Coach Practitioner
Coaching to declutter your life, organize your goals, and cook...

Dr Charlene Ashley
Doctorate - Behaviours
I coach individuals to design fulfilling lives through structure, clarity,...

Paloma Chiara

Lana's Gymnastics Club
"Where the best in gymnastics meets fun. Where every child is a star"
lgclubny.com

Anna Sosnina
ICF (ACC)
ICF ACC certified coach, founder of EssorVie Coaching, passionate about...

Tyler Fink
B.A. in Religion, Anthropology, and Philosophy. Master of Divinity (M.Div.) in Missiology
Pastor, husband, and father helping Christian men pursue faithful growth...

Travis Brown
Professional Life coach
With experience in guiding clients to achieve goals, build confidence,...


Double-Hang Closet Zone for Small Walk-In Layouts
Are you all about style, decor and organization? Download a copy of our Clutter Reset Guide.
*****
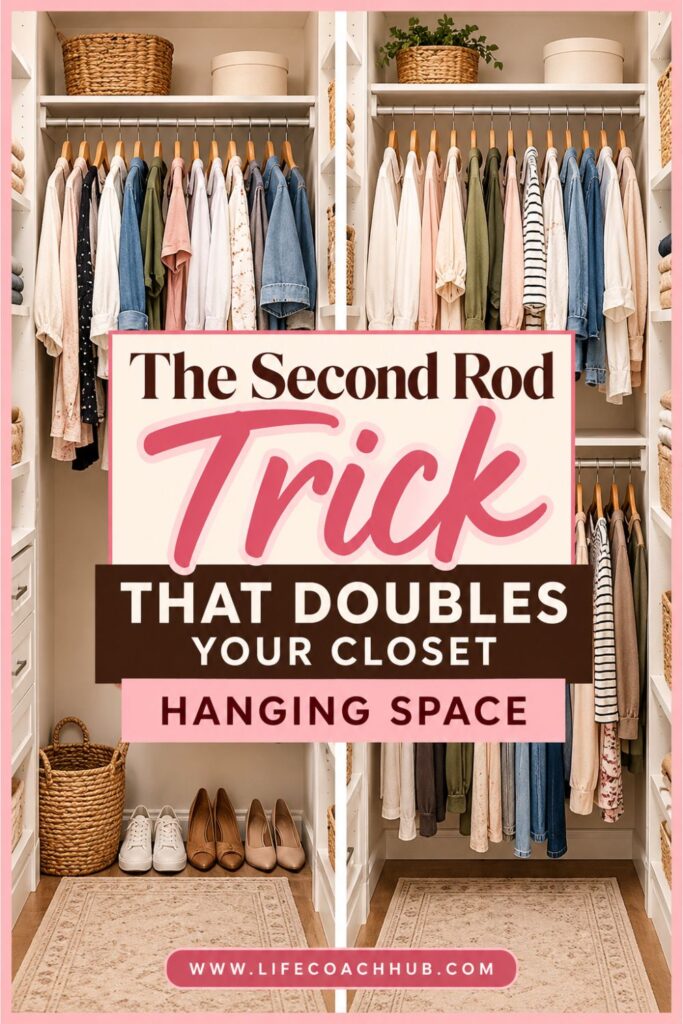
The Small Walk-In Closet Trick That Makes One Hanging Section Work Twice as Hard
A small walk-in closet can feel surprisingly cramped, even when there appears to be plenty of unused space. Shirts crowd together, shoes collect beneath hanging clothes, and finding an outfit becomes unnecessarily frustrating. The problem isn’t always how much clothing you own. Sometimes it’s how the closet uses its available height.
One of the simplest ways to improve a crowded closet is to create a double-hang section. Instead of relying on one clothing rod, you divide the vertical space into two hanging levels. This allows shorter garments to occupy space that might otherwise remain empty.
The best part is that you don’t need to replace your entire closet system. With careful measurements, suitable hardware, and a practical layout, you can transform one existing hanging section into a more efficient storage area.
Here’s how to approach the upgrade without turning it into a major renovation:
Start with the space you already have: Look beneath your current hanging clothes before considering new shelves or storage cabinets. If shorter garments leave a large empty area below them, that space might accommodate a second hanging rod.
Choose clothing that works vertically: Double-hang sections are particularly useful for shirts, blouses, shorter jackets, and trousers folded over hangers. Long dresses and coats need more uninterrupted hanging height, so they usually belong in a separate section.
If you want to get more from your life, and are looking for concrete action steps to get you there, check out our Request a Coach page. It’s a “cut the fence-sitting and take action” way to tackle your issues and actually find success. To get off the fence and start to take action, click or tap here.
Plan around your daily routine: Think about which clothes you reach for most often and where they should hang. A useful closet layout should make everyday outfits easier to access rather than simply maximizing the number of garments stored.
Keep the project manageable: Focus on converting one section rather than reorganizing every wall at once. A smaller project makes it easier to measure accurately, choose appropriate hardware, and evaluate whether the finished arrangement works.
The goal isn’t to squeeze as many hangers as possible into a small closet. It’s to create a practical two-level hanging area that keeps clothing visible, accessible, and easier to manage.
Need some in depth help with organization and productivity ? Drop on by our directories choc full of productivity coaches, minimalist coaches, and work/life balance coaches to get your life organized! Or click here to have us match you to the best.
1. Find the Best Wall Section for a Double-Hang Upgrade
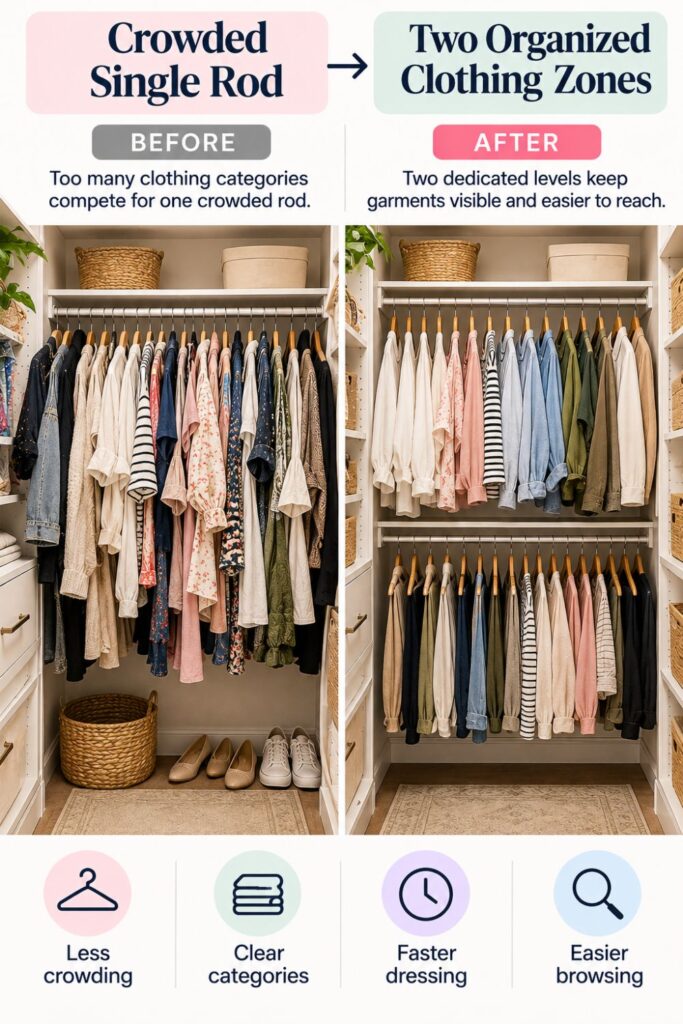
Before purchasing another clothing rod, take a close look at how your walk-in closet is currently arranged. Some hanging sections are excellent candidates for a double-hang setup, while others need their full height to function properly.
Choosing the right location can determine whether your project makes the closet feel more spacious or simply creates another crowded area.
Start by examining the length of the garments hanging in different sections. A rod filled with blouses and shirts will generally offer more opportunities for vertical storage than one holding maxi dresses or long coats.
Use these steps to identify the most practical location:
If you want to get more from your life, and are looking for concrete action steps to get you there, check out our Request a Coach page. It’s a “cut the fence-sitting and take action” way to tackle your issues and actually find success. To get off the fence and start to take action, click or tap here.
Inspect every existing hanging section: Walk around the closet and identify rods holding mostly shorter garments. Look for sections where the clothing ends well above the floor, leaving space that isn’t currently serving a useful purpose.
Check the area beneath the clothing: Examine whether shoes, baskets, drawers, or other storage pieces occupy the lower space. Determine whether these items can move elsewhere without creating clutter in another part of the closet.
Evaluate the surrounding layout: Check how closely the proposed section sits beside corners, doorways, shelves, and neighboring hanging rods. Make sure clothing on a second level won’t interfere with drawers, block access, or protrude into the walking path.
Preserve a full-height hanging zone: Keep at least one suitable section available for dresses, longer jackets, coats, and other garments that shouldn’t be folded. Trying to double-hang every wall often creates more problems than it solves.
You should also consider how comfortably you can reach the upper rod. If accessing everyday clothing requires excessive stretching or a step stool, the arrangement may become inconvenient.
In especially narrow walk-in closets, pay attention to opposing walls. Adding more hanging capacity doesn’t necessarily mean adding more physical depth, but crowded garments can still make the aisle feel restricted.
Once you’ve identified a promising section, remove a few garments and examine the empty space. Visualizing the area without clothing makes it easier to judge whether two hanging levels will fit.
Your ideal location is a section where shorter garments can hang comfortably on both levels while leaving the rest of the closet accessible.
If you want to get more from your life, and are looking for concrete action steps to get you there, check out our Request a Coach page. It’s a “cut the fence-sitting and take action” way to tackle your issues and actually find success. To get off the fence and start to take action, click or tap here.
2. Measure the Closet Before Choosing Your Two Rod Heights
One of the most common mistakes with double-hang storage is assuming that two rods will automatically fit inside any tall closet section. In reality, clothing length, hanger size, shelf placement, and floor clearance all influence the finished layout.
Careful measurements help you avoid an upper row of shirts overlapping the hangers below or a lower row of clothes brushing against your shoes.
Begin by measuring the available height from the floor to the underside of the shelf or obstruction above the hanging area. Also record the width of the section and the usable depth between the wall and the closet aisle.
Next, measure the garments you actually intend to store. A cropped blouse requires less hanging space than a longer jacket, even when both are considered short clothing.
Follow this measuring process:
Record the available dimensions: Measure the complete width and usable height of your selected section. Note any shelves, trim, supports, or other features that reduce the space available for rods and hangers.
Measure clothing on its hangers: Select representative garments and measure from the hanger’s hanging point to the lowest part of each item. Include folded trousers and longer shirts so your calculations reflect what the section needs to accommodate.
Calculate both hanging clearances: Plan enough room for garments beneath the upper rod and enough space for the lower garments to hang freely. Allow extra clearance around hangers so clothing can be removed without constantly catching on the opposite level.
If you want to get more from your life, and are looking for concrete action steps to get you there, check out our Request a Coach page. It’s a “cut the fence-sitting and take action” way to tackle your issues and actually find success. To get off the fence and start to take action, click or tap here.
Mark possible rod positions: Use painter’s tape to indicate your proposed heights on the wall. Hold a loaded hanger at each position to visualize how the garments will hang before committing to an installation.
Remember that the upper rod must remain reachable and that the lower rod shouldn’t place frequently worn garments uncomfortably close to the floor.
For a small walk-in closet, your exact measurements matter more than following a generic diagram. Ceiling height, shelves, clothing lengths, and individual accessibility needs vary considerably.
If the two levels don’t fit comfortably, try a different section or move longer garments elsewhere. Never force a double-hang layout into a space that doesn’t provide adequate clearance.
3. Choose the Right Double-Hang Hardware Without Buying a Whole Closet System
Creating a double-hang closet section doesn’t mean purchasing an expensive modular wardrobe system. In many cases, you can work with the existing upper rod and add a second hanging level using compatible brackets and hardware.
However, choosing the correct equipment is important. Clothing can become surprisingly heavy when several garments are placed together, and poorly supported rods may bend, loosen, or damage the surrounding wall.
Start by inspecting your current closet rod. Check whether it is securely attached, properly supported, and positioned high enough to work with a second hanging level.
If the upper rod is too low, it may need to be repositioned before installing the new one.
If you want to get more from your life, and are looking for concrete action steps to get you there, check out our Request a Coach page. It’s a “cut the fence-sitting and take action” way to tackle your issues and actually find success. To get off the fence and start to take action, click or tap here.
Consider these hardware decisions before shopping:
Decide whether to reuse the existing rod: Examine its condition, mounting brackets, and available height. If the rod is secure and properly positioned, you may only need additional hardware for the lower section rather than replacing everything.
Choose between fixed and adjustable rods: Fixed rods can be cut to fit a specific opening, while adjustable rods offer flexibility for different widths. Compare their published load ratings and installation requirements before deciding which will work for your closet.
Select brackets that match your installation: Choose supports compatible with the rod diameter, mounting surface, and intended clothing load. Some installations require fastening into wall studs or other structural backing, while modular closet systems may have their own attachment methods.
Gather the necessary tools and materials: Prepare a tape measure, level, pencil, suitable fasteners, and the tools specified by the hardware manufacturer. Having everything ready helps prevent mistakes caused by improvising halfway through installation.
If your closet section is particularly wide, check whether the manufacturer requires an additional center support. A long rod carrying too much weight without adequate support may sag over time.
Renters should also check their lease before drilling. Some removable hanging accessories may offer alternatives, but they still need appropriate load ratings and secure attachment points.
Avoid assuming that a tension rod or adhesive bracket can safely support a full wardrobe simply because it fits the opening.
If you want to get more from your life, and are looking for concrete action steps to get you there, check out our Request a Coach page. It’s a “cut the fence-sitting and take action” way to tackle your issues and actually find success. To get off the fence and start to take action, click or tap here.
The smartest purchase is hardware that matches your measurements and expected clothing weight. A straightforward, properly supported setup will usually be more useful than an elaborate closet system that exceeds your needs.
4. Plan a Two-Level Layout That Doesn’t Crowd Your Walk-In Closet
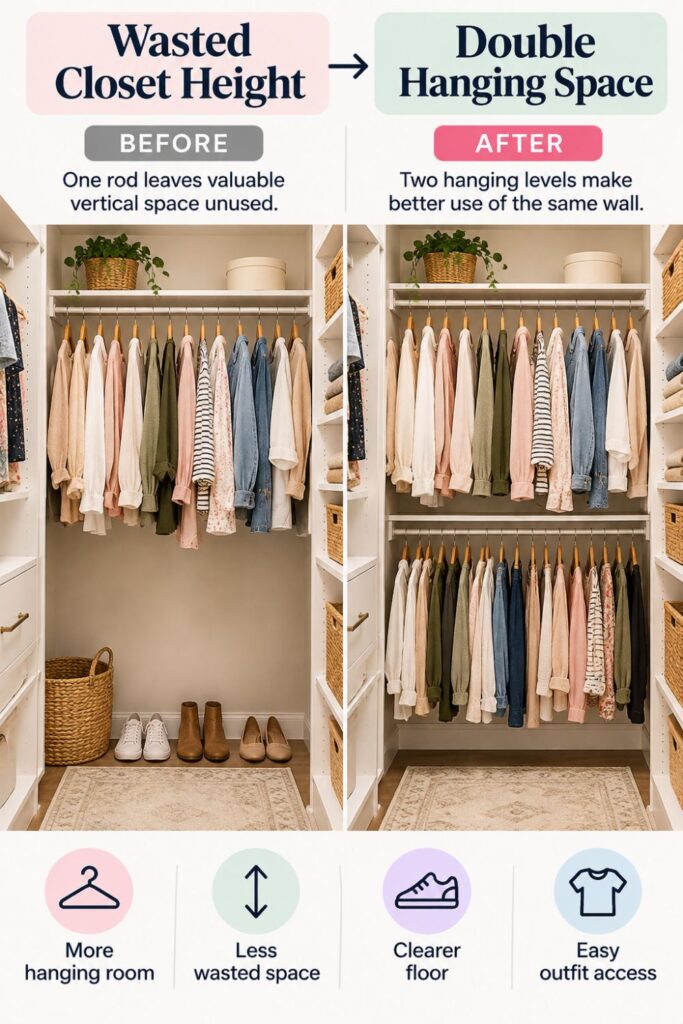
Adding another hanging rod creates more storage capacity, but it doesn’t automatically improve how your closet functions. The placement of each level and the clothing assigned to it matter just as much as the hardware.
In a small walk-in closet, every section shares space with surrounding shelves, drawers, corners, and the walking aisle. A poorly planned double-hang layout can make the closet feel harder to navigate.
Before installing anything, think about how you get dressed throughout the week. Which garments do you use daily, and which ones are only needed occasionally?
Use those answers to create a practical arrangement:
Give each level a clear purpose: Consider placing frequently worn shirts and blouses on the easiest-to-reach rod. Use the other level for shorter jackets, folded trousers, or less frequently needed garments that fit comfortably within the available height.
Protect the closet’s walking area: Stand in the aisle and check where garments will extend when hanging from both rods. Make sure clothing won’t interfere with the opposite wall, make turns awkward, or restrict access to other storage sections.
Keep drawers and shelves accessible: Test nearby drawers, cabinet doors, and pull-out organizers before finalizing your layout. A second hanging level shouldn’t prevent you from opening storage or reaching belongings located behind the proposed clothing section.
If you want to get more from your life, and are looking for concrete action steps to get you there, check out our Request a Coach page. It’s a “cut the fence-sitting and take action” way to tackle your issues and actually find success. To get off the fence and start to take action, click or tap here.
Plan where displaced items will go: If a shoe rack or basket currently occupies the lower area, identify its new home before installing the rod. Moving floor clutter into the aisle would undermine the purpose of the project.
You don’t need to divide your wardrobe evenly between both levels. A slightly fuller upper section and a more open lower section may work better depending on clothing lengths and your daily routine.
It also helps to think about future wardrobe changes. If you frequently purchase longer jackets or dresses, preserve enough alternative hanging space for those additions.
A successful double-hang layout should feel intentional rather than packed. You want clothing to move freely on both rods, with clear access to the rest of the closet.
When the layout works on paper and during a hanger test, you’re ready to install it.
5. Install the Upper and Lower Hanging Rods Step by Step
Once you’ve chosen the location, measured the space, and purchased suitable hardware, it’s time to build your double-hang section. The installation itself can be relatively straightforward, particularly when the existing upper rod can remain in place.
However, accuracy matters. Even a small difference in bracket height can leave a rod uneven, while unsuitable fasteners can compromise the security of the entire installation.
Start by clearing everything from the selected section. Remove clothing, portable organizers, and nearby belongings so you have an unobstructed working area.
If you want to get more from your life, and are looking for concrete action steps to get you there, check out our Request a Coach page. It’s a “cut the fence-sitting and take action” way to tackle your issues and actually find success. To get off the fence and start to take action, click or tap here.
Then work through the installation in this order:
Mark the exact mounting locations: Use your measurements to identify where each bracket should sit. Mark the positions with a pencil, use a level to check alignment, and confirm that the chosen heights provide enough clearance for clothing on both levels.
Prepare the mounting surfaces: Identify suitable structural support and follow the manufacturer’s instructions for the selected fasteners. Do not assume that ordinary drywall alone can safely carry a loaded closet rod without an appropriately rated mounting solution.
Install the brackets securely: Attach the supports according to the hardware instructions, using the specified tools and fasteners. Check whether additional center brackets are required for the width of your installation and expected clothing load.
Fit the rods into position: Place each rod into its brackets and secure any locking screws or retaining hardware. Check that the rods are level, properly seated, and unable to shift unexpectedly during normal clothing removal.
Test the installation gradually: Inspect the finished hardware before adding clothes. Begin with a small number of garments, increase the load gradually within the manufacturer’s limits, and watch for sagging, movement, or loosening.
If you need to reposition the upper rod, complete that work before finalizing the lower level. Otherwise, changes to the top section may affect the clearance you carefully planned below.
Don’t rush the mounting process simply because the project is small. If you’re uncertain about wall construction, hidden utilities, or suitable fasteners, consult a qualified installer before drilling.
If you want to get more from your life, and are looking for concrete action steps to get you there, check out our Request a Coach page. It’s a “cut the fence-sitting and take action” way to tackle your issues and actually find success. To get off the fence and start to take action, click or tap here.
The result should be two stable hanging levels that comfortably accommodate your selected garments without overlapping or obstructing surrounding storage.
6. Organize the Finished Double-Hang Section for Faster Dressing
Once both rods are installed, it’s tempting to start hanging everything immediately. But taking a little time to organize the clothing thoughtfully can make your new double-hang section much easier to use.
The goal is to create a system where you can find the clothes you need without digging through crowded hangers or searching between two levels.
Begin by sorting the garments you plan to store in this section. Separate shirts, blouses, jackets, folded trousers, and other shorter pieces into groups. This helps you see how much room each category needs before deciding where everything belongs.
Use the following approach to arrange your clothes:
Put everyday clothing within easy reach: Choose the more accessible rod for garments you wear most frequently. If you regularly reach for work blouses or casual shirts, keep them where you can see and remove them without stretching or bending unnecessarily.
Give the second level a specific purpose: Use the remaining rod for shorter jackets, folded trousers, or less frequently worn clothing. Keeping similar items together makes the arrangement easier to understand and prevents categories from becoming mixed between levels.
Arrange clothing into smaller groups: Within each rod, organize garments by type, purpose, or color. For example, you might keep office blouses together, followed by casual shirts and lightweight layers, so finding an outfit doesn’t require searching through everything.
If you want to get more from your life, and are looking for concrete action steps to get you there, check out our Request a Coach page. It’s a “cut the fence-sitting and take action” way to tackle your issues and actually find success. To get off the fence and start to take action, click or tap here.
Leave space between clothing categories: Avoid filling both rods completely. Clothing should slide along the rods without excessive resistance, allowing you to browse garments and remove individual pieces without pulling several hangers out together.
Keep longer garments somewhere else: If a jacket or dress hangs too low, move it to your remaining full-height section. Forcing longer clothing into a double-hang area can create overlapping fabric and make the lower level difficult to use.
Matching hangers can create a more consistent appearance, but you don’t need to replace perfectly functional hangers to make the system work.
What matters more is choosing hangers that support your clothes properly and fit the available space.
After arranging everything, step back and look at both levels. You should be able to recognize the clothing categories immediately and reach the garments you use most often without difficulty.
7. Test Your Double-Hang Layout Before Calling It Finished
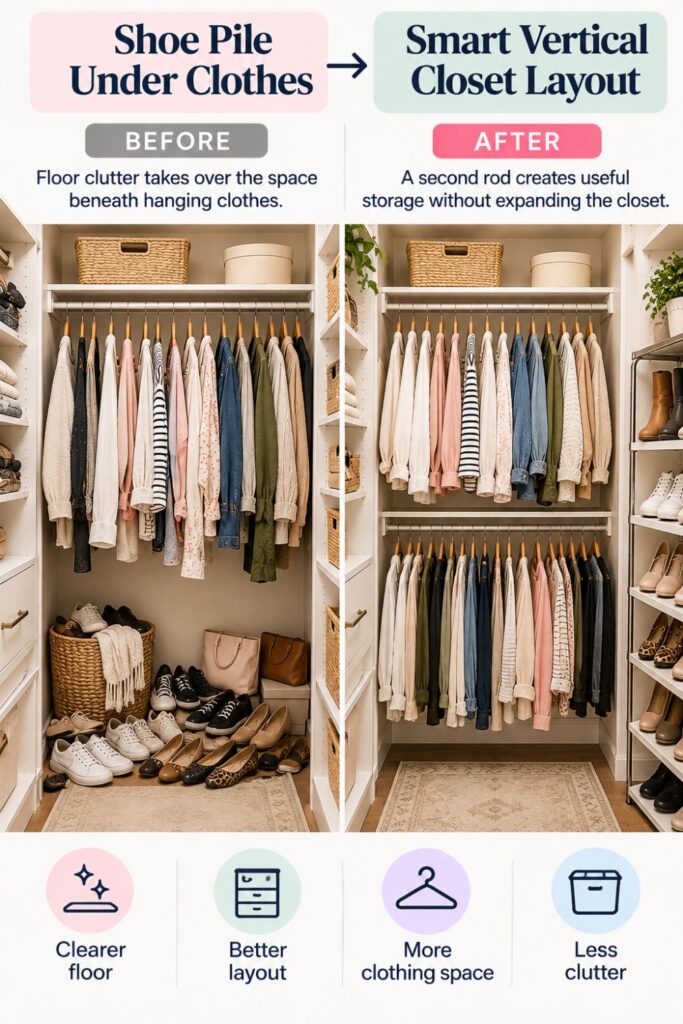
A newly organized closet can look wonderful immediately after installation, but the real test happens when you start using it. A double-hang section needs to function during busy mornings, quick outfit changes, and ordinary laundry routines.
Before considering the project complete, spend some time testing how the arrangement works in everyday situations.
Start by choosing a few typical outfits from your newly organized section. Take the garments off their hangers, return them, and notice whether anything feels awkward or inconvenient.
If you want to get more from your life, and are looking for concrete action steps to get you there, check out our Request a Coach page. It’s a “cut the fence-sitting and take action” way to tackle your issues and actually find success. To get off the fence and start to take action, click or tap here.
Pay particular attention to the space between the two rods. Clothing that appeared to fit while the closet was empty may overlap once both levels are filled.
Use this checklist to evaluate the finished setup:
Practice getting dressed from both levels: Retrieve shirts, trousers, and jackets as you normally would. Notice whether the upper rod is too difficult to reach or the lower rod requires uncomfortable bending during frequent use.
Look for overlapping clothing: Check whether garments hanging from the upper rod touch the lower hangers or become tangled with clothing underneath. If this happens, move longer items elsewhere or reconsider how the available space is divided.
Check access to surrounding storage: Open nearby drawers, reach for shoes, and walk through the closet with clothing hanging on both levels. Make sure the new arrangement doesn’t interfere with other storage areas or restrict the aisle.
Inspect the rods under normal loading: Look for loose brackets, sagging, unusual movement, or other signs that the installation isn’t performing as intended. Remove clothing and address any concerns before continuing to use the section.
Adjust clothing placement before changing hardware: If something feels inconvenient, try swapping garment categories between levels or relocating a few longer pieces. Small organizational adjustments may solve the problem without requiring another installation.
Give yourself several days to evaluate the setup during your normal routine. You may discover that certain clothing categories are more convenient on one level than you initially expected.
If you want to get more from your life, and are looking for concrete action steps to get you there, check out our Request a Coach page. It’s a “cut the fence-sitting and take action” way to tackle your issues and actually find success. To get off the fence and start to take action, click or tap here.
The most effective closet arrangement isn’t necessarily the one that looks perfectly symmetrical. It’s the one that allows you to find, remove, and return clothing with minimal effort.
Treat this testing period as an opportunity to fine-tune the system so the additional hanging space genuinely improves your closet.
8. Keep Your New Double-Hang Closet From Becoming Crowded Again
Creating a second hanging level gives you more usable clothing space, but it can also make it tempting to keep adding garments until both rods are completely full.
Without a simple maintenance routine, your newly organized closet may eventually become just as frustrating as the original setup.
The solution isn’t constant decluttering or another major reorganization. Instead, establish a few straightforward habits that help the double-hang section maintain its original purpose.
Begin by deciding how full you want each rod to be. Your ideal capacity should allow clothing to slide comfortably and remain easy to see.
Use these habits to protect your new storage space:
Set a comfortable clothing limit: Pay attention to how many garments fit without crowding the rods. If hangers become difficult to move or clothing starts overlapping, treat that as a sign to reassess the contents rather than automatically squeezing more items into the section.
If you want to get more from your life, and are looking for concrete action steps to get you there, check out our Request a Coach page. It’s a “cut the fence-sitting and take action” way to tackle your issues and actually find success. To get off the fence and start to take action, click or tap here.
Try a one-in-one-out approach: When purchasing a new blouse, shirt, or jacket, consider whether an older garment could be donated, sold, or moved into seasonal storage. This helps prevent the extra hanging capacity from becoming an invitation to accumulate more clothing.
Rotate clothing when seasons change: Review which garments you actually need accessible during the coming months. Move off-season pieces to another suitable storage area if doing so makes your everyday wardrobe easier to manage.
Return clothes to their assigned zones: After laundry or outfit changes, hang garments back in the correct section. Keeping categories consistent prevents both levels from slowly becoming mixed collections of unrelated clothing.
Complete a quick monthly check: Look for overcrowded areas, misplaced garments, or brackets showing signs of movement. A short review can identify small problems before they affect the entire system.
You don’t need to maintain a perfectly arranged closet every day. The goal is to make it easy to restore order when things become slightly messy.
A well-planned double-hang section should reduce the effort required to manage your wardrobe, not create another complicated routine.
By maintaining comfortable spacing and consistent clothing categories, you can preserve the benefits of your upgrade long after the installation is finished.
9. How an Organization Coach Can Help You Build a Closet Around Your Real Routine
Sometimes the biggest obstacle to an organized closet isn’t a lack of storage. It’s figuring out how to create a system that matches your clothing habits, schedule, and everyday needs.
If you want to get more from your life, and are looking for concrete action steps to get you there, check out our Request a Coach page. It’s a “cut the fence-sitting and take action” way to tackle your issues and actually find success. To get off the fence and start to take action, click or tap here.
You might have enough hanging space but still struggle to find outfits in the morning. Or perhaps your closet looks organized after a weekend reset, only to become cluttered again within a few weeks.
An organization coach can help you examine these patterns and develop a more intentional approach to managing your wardrobe.
Rather than focusing only on the physical arrangement, coaching can help you understand what makes a storage system practical and sustainable for your lifestyle.
Here’s how that support could work alongside your double-hang project:
Identify your everyday wardrobe habits: A coach can help you explore which garments you regularly wear, which categories are difficult to manage, and where your current routine breaks down. This information can guide decisions about what belongs on each hanging level.
Set specific organization goals: Instead of simply wanting a tidier closet, define measurable improvements. You might aim to find work outfits more quickly, keep laundry from accumulating, or make frequently used clothing easier to access.
Create routines that fit your schedule: A coach can help you establish manageable habits for returning clothing to its correct section, reviewing unused garments, and maintaining the organization without setting aside entire weekends.
Address decision-making challenges: If you struggle with deciding what to keep or where belongings should go, coaching can help you develop clear criteria. This makes it easier to maintain clothing categories and avoid repeatedly reorganizing the same space.
If you want to get more from your life, and are looking for concrete action steps to get you there, check out our Request a Coach page. It’s a “cut the fence-sitting and take action” way to tackle your issues and actually find success. To get off the fence and start to take action, click or tap here.
Evaluate the system after installation: Review which parts of your new closet arrangement work well and which still create frustration. Use those observations to adjust daily habits and clothing placement rather than immediately purchasing additional organizers.
An organization coach doesn’t replace a qualified installer or provide structural advice about mounting rods. Their value lies in helping you build routines and make decisions that support the physical improvements you’ve already made.
Ultimately, a double-hang closet works best when the layout supports the person using it.
Combining practical storage improvements with consistent organizational habits can make your wardrobe easier to manage and your mornings feel less rushed.
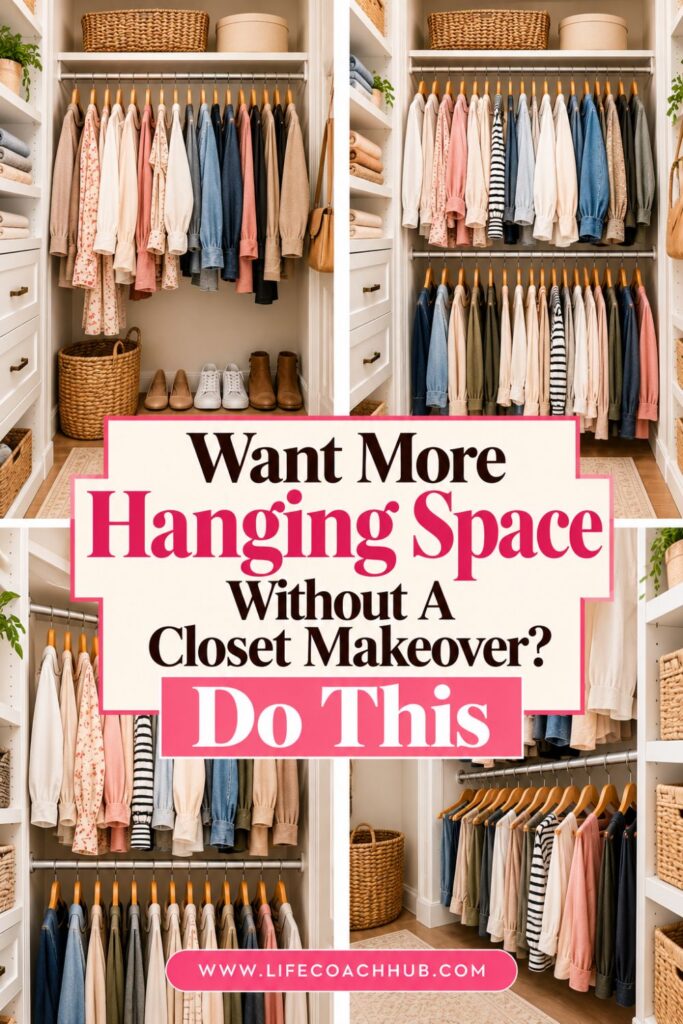
Make More of the Closet You Already Have
A small walk-in closet doesn’t necessarily need custom cabinetry, expensive organizers, or a complete renovation to become more functional. Sometimes, one carefully planned change can make a noticeable difference in how much of the available space you can actually use.
A double-hang section is a practical example of working with what you already have. By dividing one tall hanging area into two shorter levels, you can make better use of vertical space while keeping everyday clothing organized.
The key is approaching the project thoughtfully rather than simply installing another rod and hoping everything fits.
As you plan your own double-hang upgrade, remember these important principles:
If you want to get more from your life, and are looking for concrete action steps to get you there, check out our Request a Coach page. It’s a “cut the fence-sitting and take action” way to tackle your issues and actually find success. To get off the fence and start to take action, click or tap here.
Choose the right section first: Look for a hanging area filled with shorter garments and unused space beneath them. Avoid sacrificing the full-height storage you still need for dresses, long coats, and other lengthy clothing.
Measure before purchasing hardware: Check the available height, width, and garment lengths carefully. Planning rod positions around your actual wardrobe helps prevent overlapping clothing and uncomfortable hanging arrangements.
Prioritize secure installation: Choose rods, brackets, and mounting hardware appropriate for the intended load and supporting structure. A properly installed system protects your closet and makes the new hanging space dependable.
Organize around your everyday habits: Place frequently worn garments in the easiest-to-reach locations and group similar clothing together. The finished layout should simplify getting dressed rather than make you search through two crowded levels.
Maintain the space you’ve created: Leave comfortable room between hangers, return garments to their assigned sections, and review overcrowded areas occasionally. These small habits help preserve the usefulness of both hanging levels.
You don’t have to change every wall in your closet to see an improvement. Start with one suitable section, make the upgrade, and observe how it affects your daily routine.
Once that area functions well, you can decide whether other parts of the closet would benefit from similar adjustments or whether the single improvement is enough.
The goal isn’t to create the largest possible wardrobe inside a small space. It’s to make the clothing you already own easier to store, find, and enjoy.
If you want to get more from your life, and are looking for concrete action steps to get you there, check out our Request a Coach page. It’s a “cut the fence-sitting and take action” way to tackle your issues and actually find success. To get off the fence and start to take action, click or tap here.
With a thoughtful double-hang setup, your small walk-in closet can become more organized, accessible, and practical without the expense or disruption of a full remodel.
*****
Are you all about style, decor and organization? Download a copy of our Clutter Reset Guide.
Need some in depth help with organization and productivity ? Drop on by our directories choc full of productivity coaches, minimalist coaches, and work/life balance coaches to get your life organized! Or click here to have us match you to the best.
If you want to get more from your life, and are looking for concrete action steps to get you there, check out our Request a Coach page. It’s a “cut the fence-sitting and take action” way to tackle your issues and actually find success. To get off the fence and start to take action, click or tap here.
Read this next
Easter Flower Arrangements That Feel Luxe Without The Florist Price Tag
Create luxe-looking Easter flower arrangements with grocery store blooms, simple vases, and easy tricks that make your table feel fresh fast.
Read More
Why Your Galentine’s Aesthetic Should Be the First Decision You Make
Are you all about style, decor and organization? Download a copy of our Decluttering Workbook.**** A Galentine’s night isn’t just about pink décor or matching pajamas — it’s about creating […]
Read More
DIY Desk Organizer Ideas Using Things You Already Have
Are you all about style, decor and organization? Download a copy of our Clutter Reset Guide. ***** Use jars, boxes, trays, clips, and simple containers to create useful desk storage […]
Read More