


Talk to a coach about Organizational coaching

Crystal Faulk
ACC
I help overwhelmed women in transition gain clarity, confidence, and...

Terrie Hein
Certified Life Coach, Certified Insight Coach Practitioner
Coaching to declutter your life, organize your goals, and cook...

Dr Charlene Ashley
Doctorate - Behaviours
I coach individuals to design fulfilling lives through structure, clarity,...

Paloma Chiara

Lana's Gymnastics Club
"Where the best in gymnastics meets fun. Where every child is a star"
lgclubny.com

Anna Sosnina
ICF (ACC)
ICF ACC certified coach, founder of EssorVie Coaching, passionate about...

Tyler Fink
B.A. in Religion, Anthropology, and Philosophy. Master of Divinity (M.Div.) in Missiology
Pastor, husband, and father helping Christian men pursue faithful growth...

Travis Brown
Professional Life coach
With experience in guiding clients to achieve goals, build confidence,...


Catch-All Drawer Rescue Plan for Home Office Clutter
Are you all about style, decor and organization? Download a copy of our Clutter Reset Guide.
*****
Your Home Office Drawer Doesn’t Need More Organizers. It Needs a Better System.
You open your home office drawer looking for a pen. Instead, you find three dried-out markers, a knot of charging cords, loose receipts, and a key you cannot identify. The pen is probably in there somewhere, but finding it has become a project of its own.
A catch-all drawer usually starts with good intentions. It gives small things a place to go when you need to clear your desk quickly. Over time, though, the drawer becomes a holding area for anything that lacks a proper home.
That is why adding another tray rarely fixes the problem by itself. You might create neater piles, but you still have too many objects competing for the same limited space. Before you can organize the drawer, you need to decide what deserves to be inside it.
This rescue plan follows a specific order: empty, sort, edit down, reassign, divide, and rebuild. Each stage solves a different problem. Skipping straight to dividers can leave you with a beautifully organized collection of things you never use.
The goal is not an empty drawer or a photograph-perfect setup. The goal is a drawer that helps you work. You should be able to reach for a pen, grab a charger, or find a paper clip without shifting six unrelated objects first.
You also do not need to tackle your entire office to make progress. Choose the one drawer that causes the most frustration, clear a little work surface, and get a rubbish bag and a box for items that belong elsewhere. Use organizers you already own until you know exactly what needs containing.
If you want to get more from your life, and are looking for concrete action steps to get you there, check out our Request a Coach page. It’s a “cut the fence-sitting and take action” way to tackle your issues and actually find success. To get off the fence and start to take action, click or tap here.
By the end, every remaining item will have a reason to stay and a specific place to return to. More importantly, you will have a way to make decisions when new clutter shows up. That is what turns a one-time cleanup into a system you can actually maintain.
Need some in depth help with organization and productivity ? Drop on by our directories choc full of productivity coaches, minimalist coaches, and work/life balance coaches to get your life organized! Or click here to have us match you to the best.
Step 1: Empty the Drawer and Discover What’s Really Inside
The first step is also the one most people are tempted to skip: take everything out. Sorting around existing piles makes it too easy to overlook objects hiding beneath other objects. A completely empty drawer gives you a clearer starting point and shows you the space you actually have.
Set aside enough desk or table space to see the contents without stacking them. Keep a rubbish bag nearby, but resist making every decision immediately. Right now, the priority is to expose what has accumulated.
- Clear the entire drawer: Remove organizers, stationery, papers, cables, and even the tiny objects tucked into the back corners. Put everything where you can inspect it. If the drawer is removable, take it out carefully to check for items trapped behind it.
- Check the hidden clutter: Look underneath trays and along the edges for loose staples, old sticky notes, mystery screws, and dried-out pens. These small things often reveal how long the drawer has been acting as a dumping ground.
- Separate obvious rubbish: Toss empty wrappers, broken plastic pieces, dried-out markers, and scraps that have no purpose. Put papers with personal or financial details in a separate pile for secure shredding rather than throwing them into an open bin.
- Notice what the drawer contains: Without organizing yet, look at the overall mix. Are there mostly desk supplies, or are keys, medicine, coins, batteries, and unrelated household objects taking up valuable room? This observation helps you define the drawer’s future job.
- Clean the empty space: Wipe the bottom and sides, then let them dry. Check how far the drawer opens and whether rails or an unusually shallow interior will limit the size of any containers you use later.
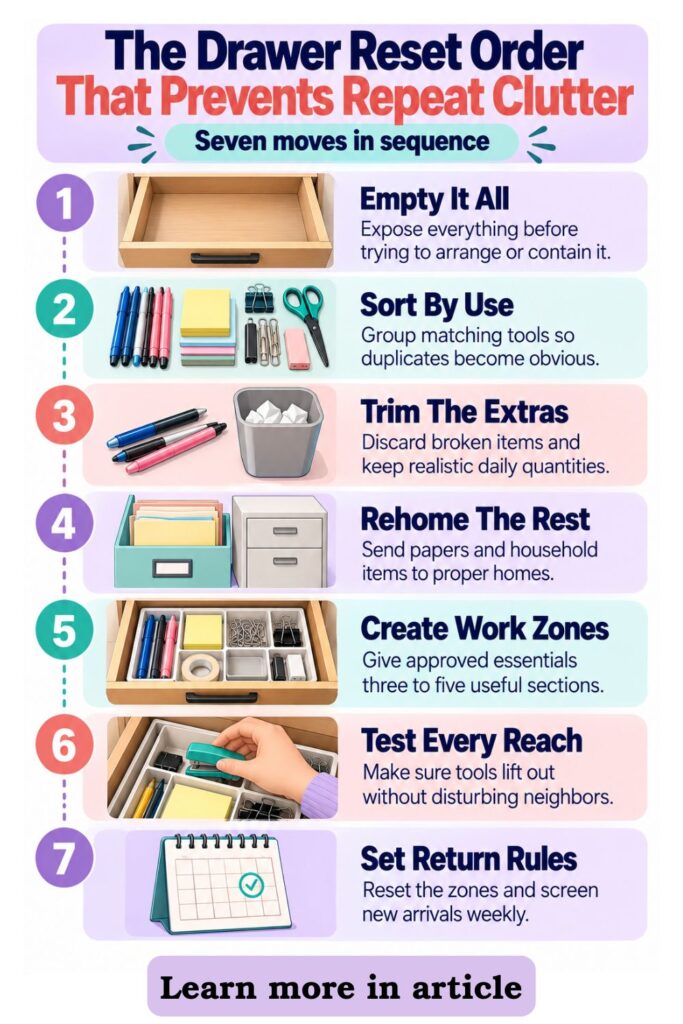
Take a quick photo of the emptied contents if you want a useful record of the starting point. You may be surprised by how much space is occupied by items you did not know were there. Do not refill the drawer yet; its emptiness is what makes the next decisions easier.
Step 2: Sort Everything Into Categories That Actually Make Sense
Once the drawer is empty, resist the urge to arrange everything neatly straightaway. First, you need to see what kinds of items you have and how many of each are competing for space. Sorting makes those patterns visible before you decide what stays.
Create small piles on your work surface. If space is tight, use sheets of paper as temporary labels and move one category into a shallow box while you work on another.
- Create broad sorting groups: Start with writing tools, paper supplies, electronics, work tools, and items that belong elsewhere. These categories are starting points, not permanent rules. Adjust them to match what you actually do in your office.
- Put like items together: Gather every pen into one pile, every charging cable into another, and all clips or fasteners into a third. Seeing six half-used notepads together makes it much easier to recognize duplication than finding them one at a time.
- Separate daily tools from backups: Keep frequently used pens, sticky notes, scissors, and chargers together for now. Place spare cartridges, extra cords, and occasional-use tools in a different group, even if they are technically office supplies.
- Make a temporary mystery pile: Set aside unidentified keys, unfamiliar adapters, loose components, and objects you cannot immediately name. Check what each belongs to before deciding whether to keep it. Avoid letting this pile become a permanent category.
- Combine categories sensibly: Paper clips and binder clips may share a small supply zone, while charging cords need their own space. Avoid creating so many categories that each contains only one tiny item, unless that item genuinely needs protection or quick access.
When you finish, scan the groups from left to right. Which ones support work you do every day? Which ones seem to exist only because you never chose another place for them?
If you want to get more from your life, and are looking for concrete action steps to get you there, check out our Request a Coach page. It’s a “cut the fence-sitting and take action” way to tackle your issues and actually find success. To get off the fence and start to take action, click or tap here.
The answer will guide the editing stage. Sorting is not about making attractive piles. It is about giving yourself enough information to make confident decisions instead of putting everything back automatically.
Step 3: Edit Down the Contents Before Buying Any Drawer Organizers
Now that everything is grouped, the drawer’s biggest problem is easier to see: too much stuff. Buying dividers before reducing the volume can force you to store things more tightly rather than more usefully. Editing down creates the breathing room that makes organization work.
Handle one category at a time so decisions stay manageable. Think about the supplies your current work requires, not the version of your workday you imagine having someday.
- Test every writing tool: Scribble with each pen and marker on scrap paper. Discard the ones that skip, have dried out, or are uncomfortable to use. Keep a small selection you reach for regularly rather than an entire cup’s worth of mediocre backups.
- Compare duplicate tools: Lay out all scissors, staplers, rulers, and charging accessories. Choose the best working version for this drawer. Move useful spares to a separate supply area, donate suitable extras, and recycle damaged items where facilities accept them.
- Set realistic quantity limits: Decide how many sticky-note pads, pens, clips, and spare cables you need at your desk. A practical limit might be one active notepad and one backup, not every partially used pad you have collected. Adjust the numbers to your workload.
- Challenge just-in-case objects: Ask when you last used an item and whether you would know to look for it here. If the answer is unclear, it does not deserve prime drawer space merely because it might be useful one day.
- Create outgoing groups: Use separate containers for rubbish, recycling, donation, secure shredding, and relocation. Finish each removal task promptly. A box of rejected items left beside your desk is simply clutter waiting for its next location.
Do not worry about filling the drawer evenly. Empty space is not wasted space when it allows you to see, retrieve, and return essential objects without a struggle.
Before moving on, count what is left in each category. Those smaller, purposeful groups will tell you whether you need dividers at all and which sizes would actually help.
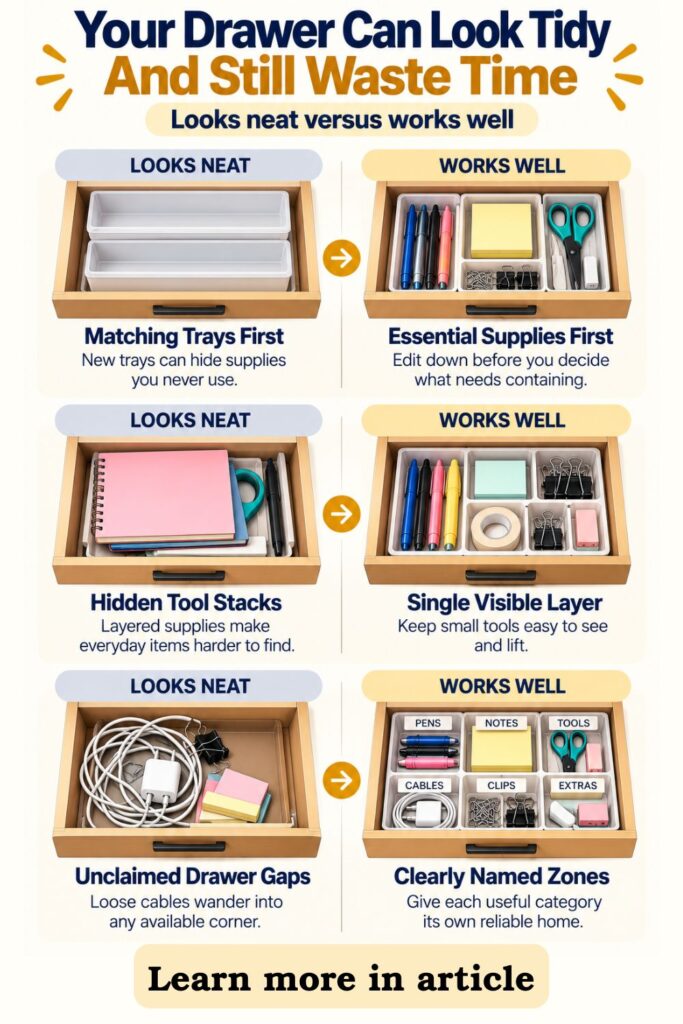
Step 4: Reassign Everything That Doesn’t Belong in Your Home Office Drawer
Editing down decides what is worth keeping. Reassigning decides where those things should live. An object can be perfectly useful and still be wrong for a small drawer beside your desk.
Your aim is to protect this drawer for work essentials. Otherwise, every household item without a home will eventually crowd out the supplies you need each day.
- Move household objects to their proper zones: Return spare batteries to an appropriate battery-storage spot, personal accessories to their usual storage, and medicine to a safe location that meets its storage instructions. Do not leave these items in the drawer simply because they fit.
- Sort paperwork by its next action: Put documents you need to deal with in an action folder, file records you must retain, and securely shred unneeded papers containing sensitive information. Loose receipts and notes should not become a permanent paper layer underneath your stationery.
- Relocate bulk office supplies: Keep everyday quantities nearby, but move extra printer paper, cartridges, unopened pens, and rarely used accessories to a labelled cabinet or secondary supply box. That frees the drawer for objects you actually reach for.
- Resolve the mystery category: Match unfamiliar cables and adapters to the devices in your home. Label what you identify and store it with the correct equipment. For unknown parts, use a small temporary review bag with a date rather than returning them to the drawer indefinitely.
- Write a one-sentence purpose: Choose a rule such as, “This drawer holds small supplies I use at my desk each week.” Use that statement when you’re unsure about an object. If it does not support the drawer’s purpose, choose another location.
As you relocate items, put them away completely rather than making several piles around the office. That final trip is part of the project, not an optional cleanup afterward.
If you want to get more from your life, and are looking for concrete action steps to get you there, check out our Request a Coach page. It’s a “cut the fence-sitting and take action” way to tackle your issues and actually find success. To get off the fence and start to take action, click or tap here.
If some objects still have no obvious home, that signals a separate storage decision. Solve it outside this drawer. A functional catch-all rescue depends on ending the habit of making one small space responsible for everything.
Step 5: Create a Drawer Layout With Clearly Defined Storage Zones
Only after you have reduced the contents should you decide how the drawer will be divided. The best layout starts with the objects you kept, not with a set of containers you hope will work. You may discover that a few repurposed boxes solve the problem better than a costly organizer.
Think of the drawer as a small work station. Each zone should support a particular task and make returning items almost automatic.
- Measure the usable interior: Record the width, depth, and height, including any lip or hardware that blocks part of the space. Check that a tray will fit with the drawer closed. Measurements prevent you from buying organizers that look suitable but jam against the frame.
- Choose three to five practical zones: For example, create sections for pens, paper accessories, everyday tools, charging essentials, and a very small miscellaneous work category. If your job rarely involves paper, allocate more room to the tools you actually use.
- Put high-use supplies at the front: Position your favorite pens, sticky notes, and frequently used cable where your hand naturally reaches. Store less-used tools toward the back. This keeps your most common actions quick and uncomplicated.
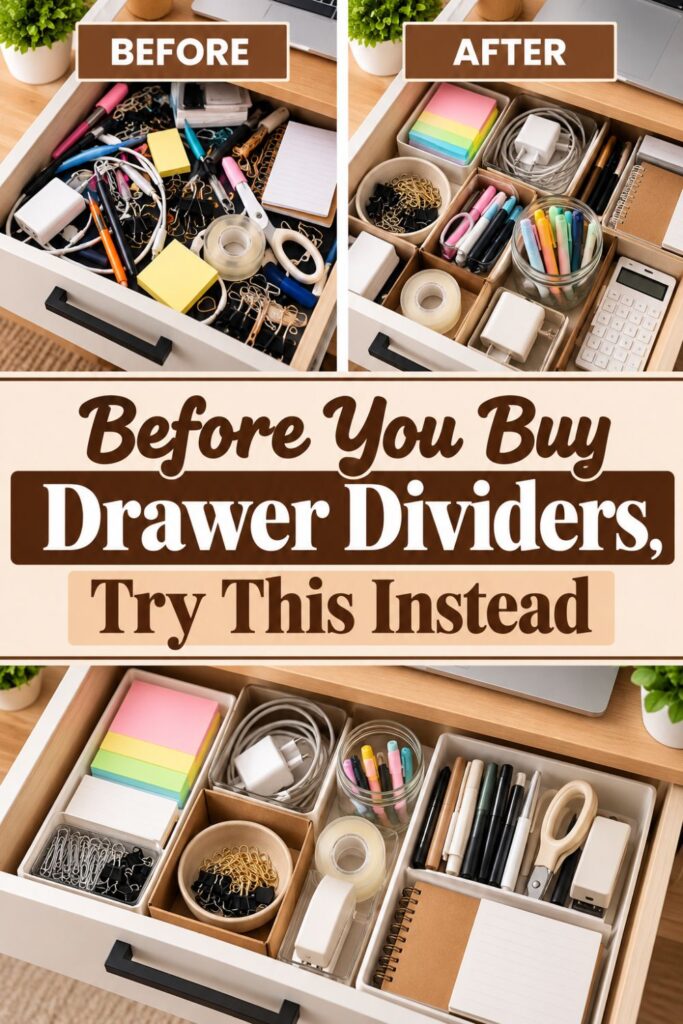
- Match containers to item shapes: Use a long tray for writing tools, a shallow cup or divided box for clips, and a small holder for coiled cables. Try sturdy boxes you already own before shopping for adjustable drawer dividers.
- Create boundaries that stay in place: Fit compartments snugly so they do not slide when you open the drawer. If necessary, use removable non-slip liner beneath trays. Keep categories separate enough that small pieces cannot migrate underneath larger objects.
Do a dry run with empty trays before adding supplies. Open and close the drawer and check whether each area is easy to reach. Shift the layout now, while rearranging it is simple.
The right number of zones is the number you can remember without labels. A sensible, slightly imperfect layout will outperform an elaborate one that takes too much effort to use.
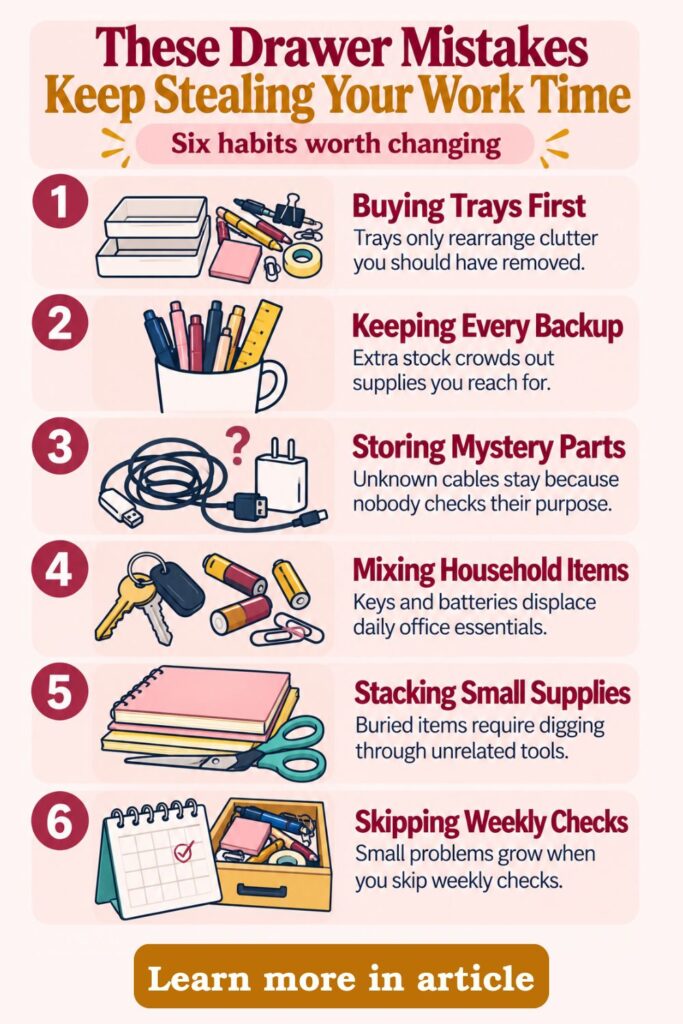
Step 6: Rebuild the Drawer So Everything Is Easy to Find and Return
This is the satisfying stage, but it still requires a little testing. A drawer can look tidy when freshly arranged and become frustrating the first time you need something. Rebuilding should focus on how the contents behave during a normal workday.
Bring back only the supplies approved during your editing stage. If an object did not make the cut, do not quietly return it because there happens to be room.
- Fill one zone at a time: Place pens in their long compartment, clips in a small tray, and charging accessories in their designated section. Work category by category. This makes it easier to spot when one group needs more space than you planned.
- Keep contents in a single visible layer: Avoid stacking small tools underneath notebooks or laying loose cables across other compartments. You should be able to identify most items with a quick glance. If something needs digging to reach, reconsider its placement.
- Group tools by the way you use them: Place sticky notes near pens if you often use them together. Keep a charging cable beside its adapter rather than storing them in opposite corners. Practical pairings matter more than perfectly symmetrical compartments.
- Leave deliberate breathing room: Resist filling every empty gap with extra supplies. Make sure your fingers can lift out a stapler or notepad without disturbing other objects. Open space also allows a category to change slightly without becoming messy.
- Run a retrieval test: Close the drawer, then open it to find a pen, a paper clip, and a charger in turn. Notice anything that slides, catches, or hides. Change the placement until the drawer works smoothly without rearranging other contents.
If labels help you remember the new zones, keep them small and practical. They are especially useful if other people share the workspace, but they cannot replace clear categories.
If you want to get more from your life, and are looking for concrete action steps to get you there, check out our Request a Coach page. It’s a “cut the fence-sitting and take action” way to tackle your issues and actually find success. To get off the fence and start to take action, click or tap here.
Take a final look at the contents and ask whether every item is easy to put away. A system succeeds when returning things is just as convenient as finding them.
Step 7: Set Simple Rules That Stop the Drawer From Becoming a Catch-All Again
The drawer is organized, but the habits that filled it have not necessarily changed. Without a few boundaries, the same random items will drift back in. Maintenance should be brief enough to fit into real workdays.
Instead of promising to keep the drawer perfect, create a small set of rules that makes the right choice easy. These rules should support the layout you have already built.
- Use an entry rule: Before dropping an object into the drawer, ask whether it belongs in one of the named zones. If it does not, choose another home. This single decision prevents the return of keys, receipts, packaging, and unrelated household objects.
- Replace supplies instead of collecting them: When a pen runs out or a sticky-note pad is finished, replace it with one usable item. Avoid keeping half a dozen backups beside your daily supplies. Store bulk purchases in a separate stock area.
- Reset after work sessions: Return pens, cords, and tools to their sections before leaving the desk. This only takes a short moment when the drawer has clear compartments. Do not wait for everything to become mixed together again.
- Schedule a weekly check: Choose a repeatable moment, such as the end of Friday’s workday, to remove stray objects and check crowded zones. Spend a few minutes correcting small problems before they become another full drawer rescue.
- Adapt the zones when work changes: A new project may require different supplies or a dedicated tool. Reassess which items earn drawer space rather than squeezing them into the existing layout. Remove a low-use category if a new one matters more.
A useful habit is to notice the first sign of friction. If you routinely toss things on top of a tray instead of inside it, the tray may be too small, too far back, or simply unnecessary.
The point of these rules is not strictness for its own sake. It is protecting the time and attention you spent reclaiming the drawer, one ordinary workday at a time.
What to Do When Your Drawer Keeps Collecting Random Things
If your drawer fills up again, do not assume the system failed because you lack discipline. Repeated clutter usually provides practical information: something in your home or work routine is easier to drop in the drawer than to put away properly. The solution is to find that friction point.
Watch what lands in the drawer over the next several days. Do not judge the objects yet. Look for a pattern you can actually change.
- Identify the usual entry point: Do random items appear when you clear your desk before calls, open mail, or tidy up at the end of the day? Recognizing the moment of accumulation helps you address the actual behavior rather than reorganizing endlessly.
- Find missing homes elsewhere: If batteries, receipts, and spare cables keep returning, they may not have convenient storage locations. Give those categories logical places outside the desk drawer. A simple labelled box nearby may be more effective than an elaborate system in another room.
- Make the correct destination easier: If you must walk across the house to file every piece of paper, papers will probably pile up near your desk. Add a clearly marked action folder close to where you work, then process it on a regular schedule.
- Use a temporary decision tray carefully: Place genuinely unresolved objects in a small tray outside the drawer. Set a limit on its size and empty it at a chosen time each week. This is a short-term sorting station, not permission to create a second permanent junk drawer.
- Adjust overcrowded categories: If cords overflow despite regular resets, check whether you have too many or need a wider section. If paper clips scatter, try a smaller enclosed container. Fix the specific weakness instead of rebuilding the entire drawer.
Remember that not every stray object signals a crisis. One receipt or spare pen is easy to correct when the basic layout still works. What matters is recognizing repeat offenders before they take over.
If you want to get more from your life, and are looking for concrete action steps to get you there, check out our Request a Coach page. It’s a “cut the fence-sitting and take action” way to tackle your issues and actually find success. To get off the fence and start to take action, click or tap here.
Use the drawer as feedback about your routines. Small changes to nearby storage and daily decisions can do more than another round of new organizers.
How an Organization Coach Can Help You Build Systems That Actually Stick
Sometimes the difficult part of organizing is not choosing trays or moving objects. It is deciding what to keep, setting realistic limits, and following through when your schedule is busy. An organization or productivity coach can help you examine those decisions without turning one drawer into an overwhelming project.
This support is especially useful if you have reorganized the same workspace repeatedly. Rather than simply prescribing a different layout, a coach can help you understand why the previous one was difficult to maintain.
- Spot your recurring clutter patterns: A coach might ask when the drawer becomes a dumping ground and what makes discarding or relocating things difficult. Those answers can reveal whether the problem is unclear priorities, inconvenient storage, or too many decisions at the end of the workday.
- Define the drawer’s real purpose: Work through the tasks you perform most often and the tools those tasks require. A coach can help you distinguish essential desk supplies from objects you keep nearby out of habit. That clarity makes future editing decisions easier.
- Build routines that match your schedule: Instead of adopting an unrealistic daily organizing ritual, choose a quick reset you can do between work sessions. The goal is a repeatable practice that fits around meetings, caregiving, creative work, or other real responsibilities.
- Set measurable next steps: Turn a vague goal such as “get organized” into actions like emptying the drawer today, relocating backups tomorrow, and testing the layout by Friday. Checkpoints can make a stalled project easier to restart and finish.
- Transfer the method to other areas: Once the drawer works, apply the same sequence to a filing shelf, supply cabinet, or desktop. Focus on one space at a time, using the same questions about purpose, quantity, access, and maintenance.
A coach is not necessary for everyone, and an organizing product is not a substitute for making clear choices. The value of guidance is in building a decision process you can use independently.
Whether you work with someone or use these prompts on your own, the aim is the same: a workspace designed around how you actually live and work.
One Functional Drawer Can Change How Your Entire Desk Works
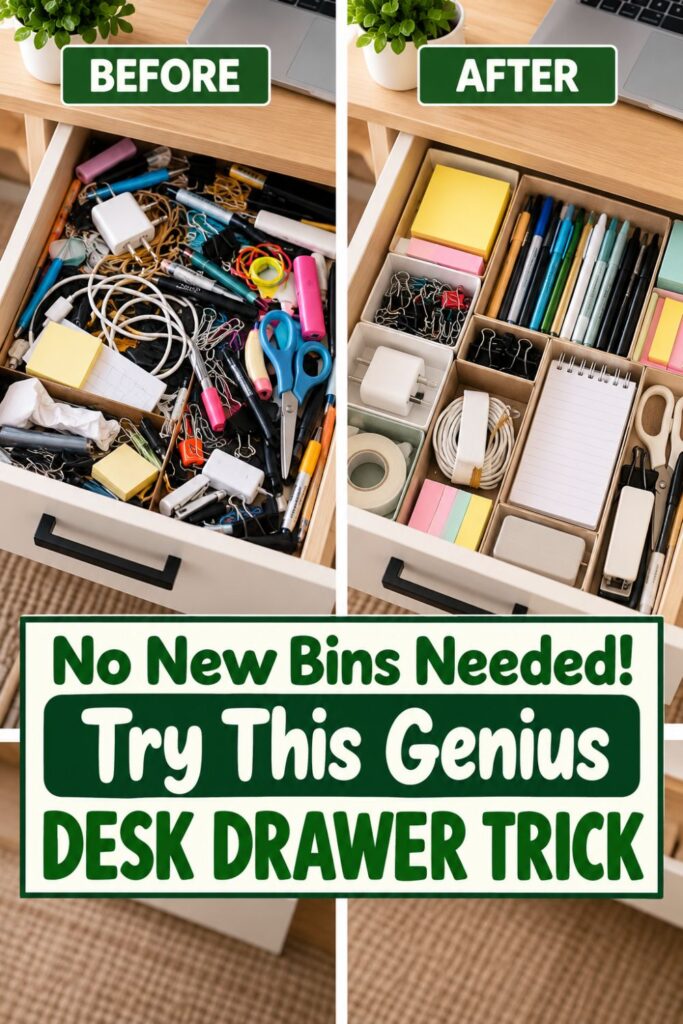
An organized home office drawer may seem like a small accomplishment, especially if the rest of your workspace needs attention. But one reliable storage area can remove a surprising number of minor interruptions from the day. When pens, notes, cables, and tools have consistent homes, you stop searching for them every time you sit down to work.
That result comes from the order of the rescue, not from a particular organizer. Emptying the drawer exposes the problem. Sorting shows which categories have accumulated, and editing down reduces the volume to what you genuinely need. Reassigning misplaced items protects the drawer’s purpose, while dividers give the remaining supplies usable boundaries.
Rebuilding the drawer is where all those decisions become practical. Your favorite pen goes where you instinctively reach for it. Your charger has a compartment instead of being buried under a pile of papers. The daily tools you rely on become visible and easy to return after use.
If you want to get more from your life, and are looking for concrete action steps to get you there, check out our Request a Coach page. It’s a “cut the fence-sitting and take action” way to tackle your issues and actually find success. To get off the fence and start to take action, click or tap here.
Just as important, you now have a way to handle new clutter. You can ask whether an object belongs in the drawer before adding it. You can notice when one zone becomes crowded and adjust the quantity or layout rather than allowing a mess to spread.
You do not need expensive bins, a large office, or a free weekend to repeat this process. Start with one drawer and use what you already have. A few well-chosen compartments and some clear rules are often enough to make the space more useful.
If another part of your office is struggling, apply the same sequence there. A shelf crowded with backup supplies or a desktop buried under loose papers may need the same first question: what actually belongs here? Solve that question before deciding how to contain everything.
For now, open the drawer that frustrates you most. Take everything out, discard the obvious rubbish, and sort what remains into honest categories. The goal is not a perfect workspace by tonight. It is one drawer you can trust to work tomorrow.
*****
Are you all about style, decor and organization? Download a copy of our Clutter Reset Guide.
Need some in depth help with organization and productivity ? Drop on by our directories choc full of productivity coaches, minimalist coaches, and work/life balance coaches to get your life organized! Or click here to have us match you to the best.
If you want to get more from your life, and are looking for concrete action steps to get you there, check out our Request a Coach page. It’s a “cut the fence-sitting and take action” way to tackle your issues and actually find success. To get off the fence and start to take action, click or tap here.
If you want to get more from your life, and are looking for concrete action steps to get you there, check out our Request a Coach page. It’s a “cut the fence-sitting and take action” way to tackle your issues and actually find success. To get off the fence and start to take action, click or tap here.
Read this next

Closet Curtain Ideas That Hide Clutter and Soften the Space
Are you all about style, decor and organization? Download a copy of our Decluttering Workbook. ***** A style-meets-organization roundup for using curtains to conceal open closets, simplify visual clutter, and make […]
Read More
Easter Table Decorations That Look High-End but Take Almost No Effort
Create Easter centerpieces that look high-end with simple pieces, smart spacing, and easy formulas you can copy for any spring table.
Read More
How to Develop Organizational Skills
Learn how to develop organizational skills in order to reduce your stress.
Read More