


Talk to a coach about Organizational coaching

Crystal Faulk
ACC
I help overwhelmed women in transition gain clarity, confidence, and...

Terrie Hein
Certified Life Coach, Certified Insight Coach Practitioner
Coaching to declutter your life, organize your goals, and cook...

Dr Charlene Ashley
Doctorate - Behaviours
I coach individuals to design fulfilling lives through structure, clarity,...

Paloma Chiara

Lana's Gymnastics Club
"Where the best in gymnastics meets fun. Where every child is a star"
lgclubny.com

Anna Sosnina
ICF (ACC)
ICF ACC certified coach, founder of EssorVie Coaching, passionate about...

Tyler Fink
B.A. in Religion, Anthropology, and Philosophy. Master of Divinity (M.Div.) in Missiology
Pastor, husband, and father helping Christian men pursue faithful growth...

Travis Brown
Professional Life coach
With experience in guiding clients to achieve goals, build confidence,...

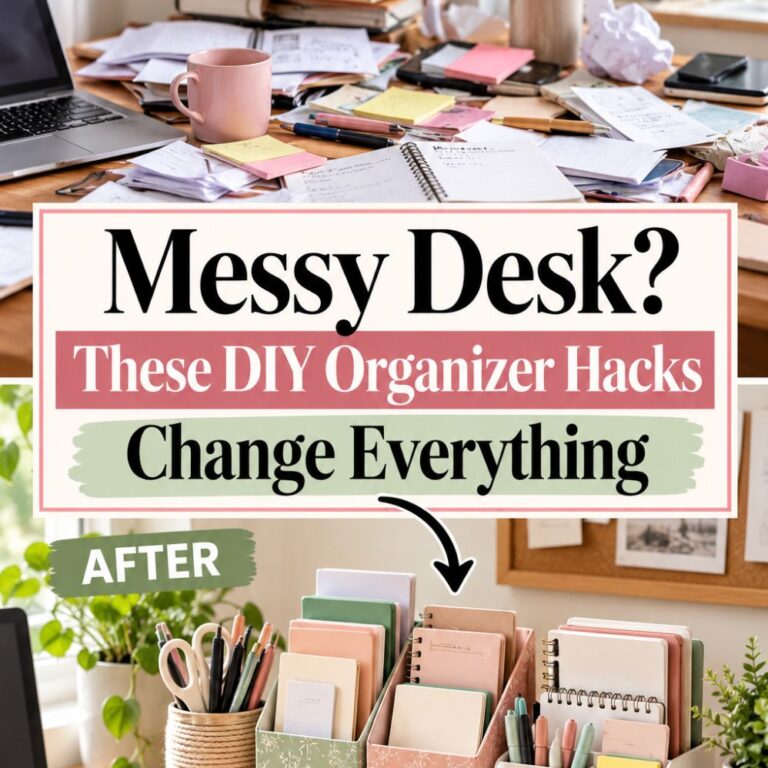



Monitor-Base Storage Shelf for Double-Duty Desk Space
Want to try this at home? No worries! Download a copy of our Clutter Reset Guide.
*****
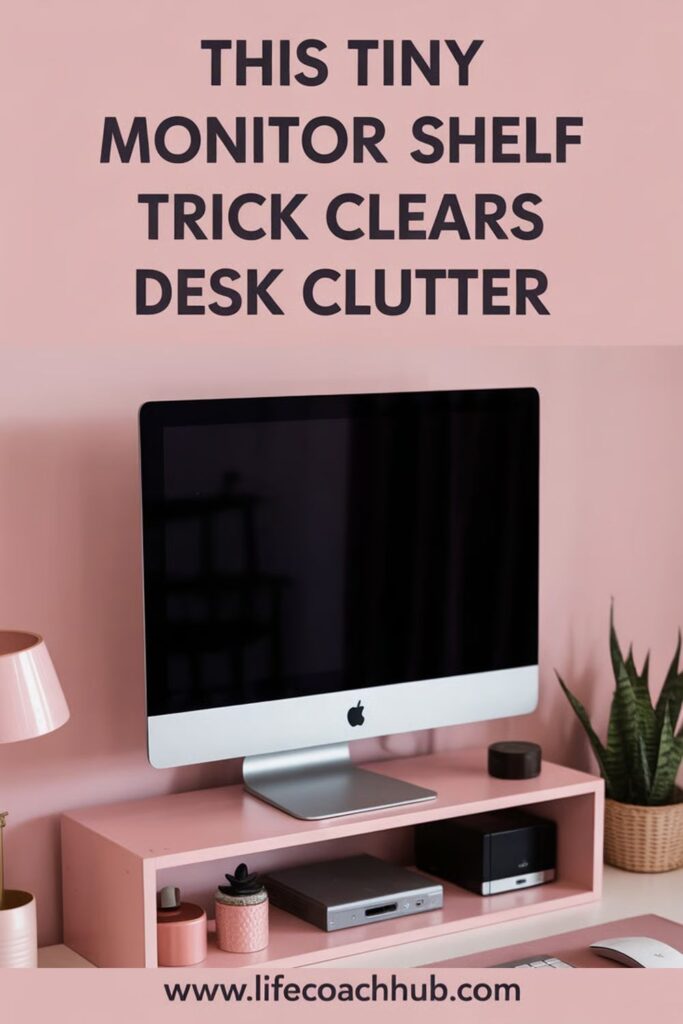
A monitor can take up more desk space than it seems. The base sits right in the center of the work surface, but the space under and around it often goes unused. When your desk is small, that unused space can make the whole setup feel more cramped than it needs to.
A monitor-base storage shelf gives that area a real purpose. It can lift the screen, create a slide-in spot for your keyboard, hold daily supplies, and help hide the visual mess of cords. The key is setting it up with intention, not simply adding another piece of furniture to the desk.
This works especially well for home offices, bedroom workstations, student desks, and shared family work areas. It does not require a full desk makeover. You are simply turning one overlooked zone into a smarter storage area.
The goal is not to pack the shelf with as much as possible. In fact, the best version usually looks simple. A few useful items, one or two containers, and a clear keyboard or notebook zone can make the desk feel more open almost immediately.
Think of the monitor shelf as a small command center. It should hold the things you reach for often, clear the surface when you need room to work, and make the desk easier to reset at the end of the day.
Need some in depth help with organization and productivity ? Drop on by our directories choc full of productivity coaches, minimalist coaches, and work/life balance coaches to get your life organized! Or click here to have us match you to the best.
If you want to get more from your life, and are looking for concrete action steps to get you there, check out our Request a Coach page. It’s a “cut the fence-sitting and take action” way to tackle your issues and actually find success. To get off the fence and start to take action, click or tap here.
Choose the Right Monitor Shelf Height
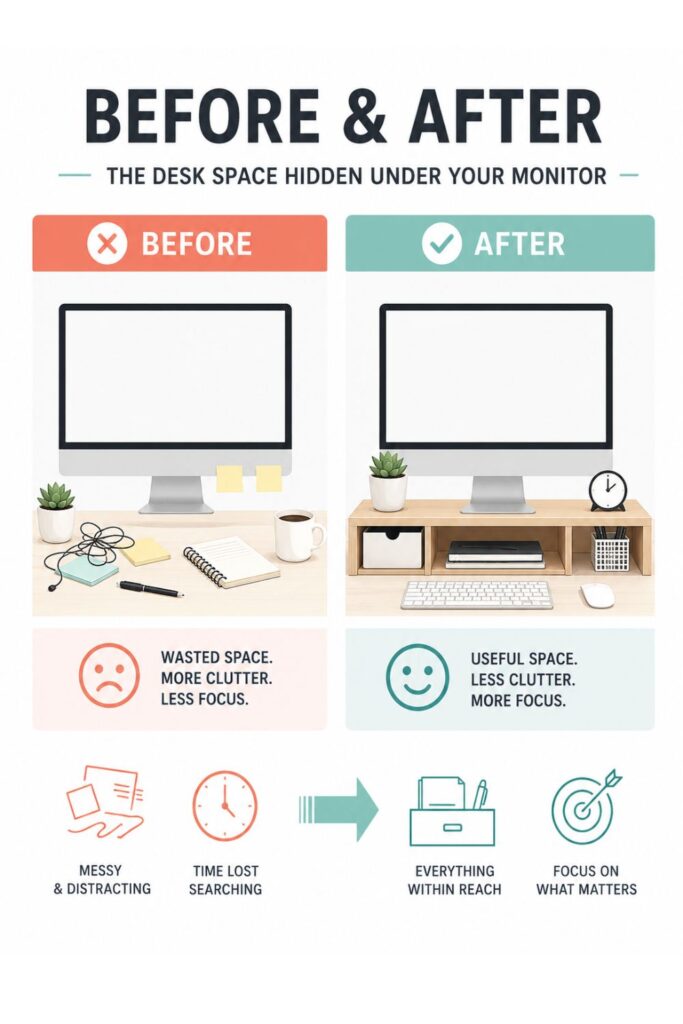
A monitor shelf only works if it makes the desk more comfortable, not more awkward. Before buying or setting up anything, look at where your screen sits right now. If the top third of the screen is already near eye level, a tall riser may push it too high.
Measure your screen and sightline: Sit in your normal working position and notice whether you are looking straight ahead, slightly down, or craning upward. A shelf should support better posture, but it should not force your neck into an uncomfortable position.
If your monitor already feels high enough, choose a very low shelf or use a side shelf instead. You can still create storage around the monitor without raising the screen too much.
Check the space under the shelf: Measure what you want to slide underneath. This might be your keyboard, planner, notebook, tablet, small laptop, or a stack of current papers.
A shelf that looks cute but cannot fit your daily items will quickly become frustrating. You want enough clearance that items move in and out easily.
Useful things to measure before choosing a shelf:
- Keyboard height and width
- Notebook or planner size
- Desk depth
- Monitor base width
- Mouse space
- Lamp or speaker placement
Match the shelf width to your desk: A long shelf can look balanced on a large desk, but it can overwhelm a small one. If your desk is narrow, choose a shelf that sits mostly under the monitor and leaves room for your mouse, drink, or writing area.
The right shelf should feel like it gives you space back. If it makes the desk feel boxed in, it is probably too large, too tall, or too compartment-heavy.
If you want to get more from your life, and are looking for concrete action steps to get you there, check out our Request a Coach page. It’s a “cut the fence-sitting and take action” way to tackle your issues and actually find success. To get off the fence and start to take action, click or tap here.
Decide What Belongs Under the Monitor
The monitor shelf should hold the items you actually need during a normal work session. This is where many desk systems go wrong. The shelf becomes a place for random extras, and then it stops helping.
Store only daily-use items there: Start by listing what you reach for several times a day. These are the strongest candidates for the shelf area.
That might include:
- A notebook
- Sticky notes
- One or two pens
- Reading glasses
- Earbuds or headphones
- A charging cord
- A planner
- A small timer
- A current project folder
The shelf should make these items easier to access, not bury them under backup supplies.
Move extras out of the prime zone: Extra pens, unopened sticky note pads, old receipts, spare cables, tech boxes, and rarely used office tools should not live under the monitor. They may be useful, but they do not need the most visible spot on the desk.
Store backup supplies in a drawer, bin, cart, cabinet, or closet. The monitor shelf is best used for active work items.
Create a simple grab zone: Choose one small tray or container for the items you touch often. This keeps tiny supplies from scattering across the shelf.
For example, a shallow tray could hold one pen, sticky notes, lip balm, and a charging cable. A small cup could hold writing tools, but keep it low enough that it does not crowd the monitor.
If you want to get more from your life, and are looking for concrete action steps to get you there, check out our Request a Coach page. It’s a “cut the fence-sitting and take action” way to tackle your issues and actually find success. To get off the fence and start to take action, click or tap here.
A good test is this: can you reset the shelf in under one minute? If yes, the setup is probably simple enough. If you have to sort through piles, you are storing too much there.
Build a Clean Keyboard Slide-In Zone
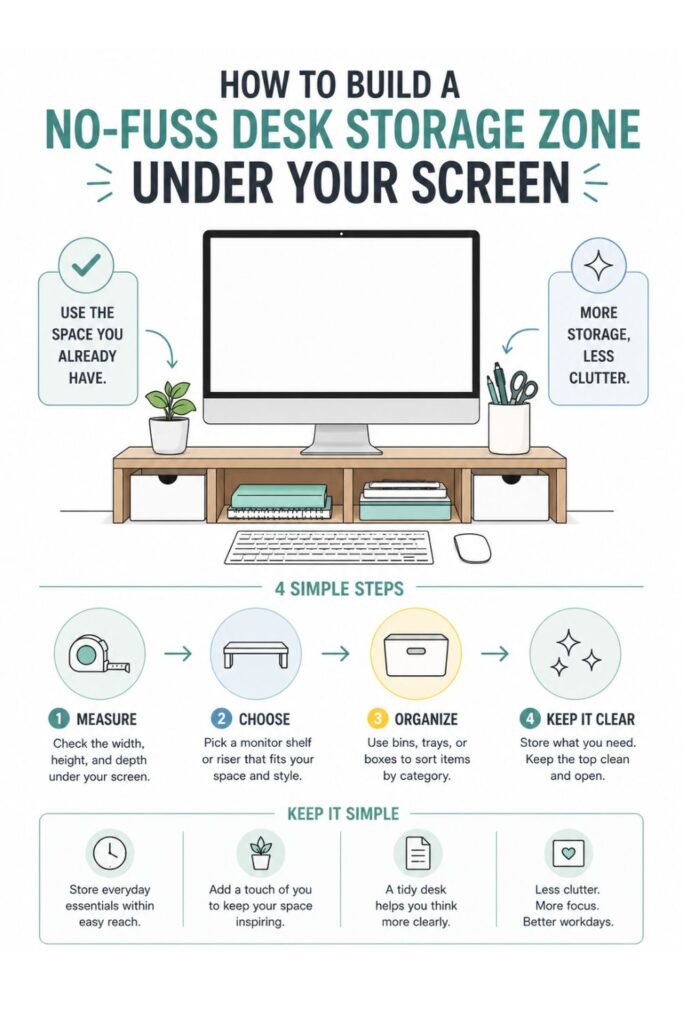
One of the best reasons to use a monitor-base shelf is to create a place for the keyboard to go when you are not typing. This is especially helpful on desks that also need to work for writing, planning, journaling, paperwork, or crafting.
Clear the center space first: Before adding containers, protect the open area directly under the monitor. This is the most valuable part of the shelf because it can turn into a slide-in zone.
When the keyboard can tuck away, the desk instantly becomes more flexible. You can pull out a notebook, review paperwork, write a list, or use the space for a short project without shoving everything aside.
Keep small supplies to the sides: Put pens, sticky notes, clips, or tech accessories on the left or right side of the shelf. Avoid spreading them across the full width.
This keeps the middle open and makes the desk feel less crowded. It also gives the shelf a more intentional look because every item has a clear place.
Test the movement before finalizing: Slide the keyboard in and out several times with your containers and supplies in place. Pay attention to whether your hands bump anything, whether cords snag, or whether the keyboard sits crooked.
If the movement feels annoying, simplify the setup. The easier it is to slide the keyboard away, the more likely you are to use the system every day.
If you want to get more from your life, and are looking for concrete action steps to get you there, check out our Request a Coach page. It’s a “cut the fence-sitting and take action” way to tackle your issues and actually find success. To get off the fence and start to take action, click or tap here.
A helpful layout might look like this:
- Center: keyboard slide-in space
- Left side: notebook or planner
- Right side: small tray for pens, sticky notes, and charger
- Back edge: routed cords
- Top of shelf: one small decor or utility item
The keyboard zone is what makes the shelf double-duty. It gives the desk a reset button without requiring any major rearranging.
Add Small Containers Without Creating Clutter
Small containers can make a monitor shelf much more useful, but too many containers can make it feel crowded. The goal is to contain the little things that wander, not to fill every inch of space.
Choose one or two matching containers: A shallow tray, small drawer insert, mini bin, or low cup is usually enough. Matching or coordinated containers help the desk look calmer and more planned.
You do not need a full desk organizer with lots of compartments unless you truly use each section. On a small desk, simpler is usually better.
Assign each container one job: Every container should have a clear purpose. If one tray holds pens, chargers, receipts, paper clips, keys, and random notes, it will quickly become another junk drawer.
Better categories include:
- Writing tools
- Current sticky notes
- Tech cords
- Daily personal items
- Paper clips and small office supplies
- Current project cards or notes
Keep the categories narrow enough that you know where things go without thinking.
If you want to get more from your life, and are looking for concrete action steps to get you there, check out our Request a Coach page. It’s a “cut the fence-sitting and take action” way to tackle your issues and actually find success. To get off the fence and start to take action, click or tap here.
Keep container height low: Tall containers can block the screen area and make the monitor feel visually heavy. Low-profile storage keeps the shelf useful without making the desk feel crowded.
A shallow tray is often better than a deep bin because you can see everything at a glance. It also discourages piling.
If you like the look of drawers, choose a shelf with one slim drawer rather than several bulky ones. A single drawer can hide small items while keeping the surface clean.
The best container setup should make cleanup easier. At the end of the day, you should be able to return everything to its spot quickly, without reorganizing the whole shelf.
Tame the Cables Around the Monitor Base
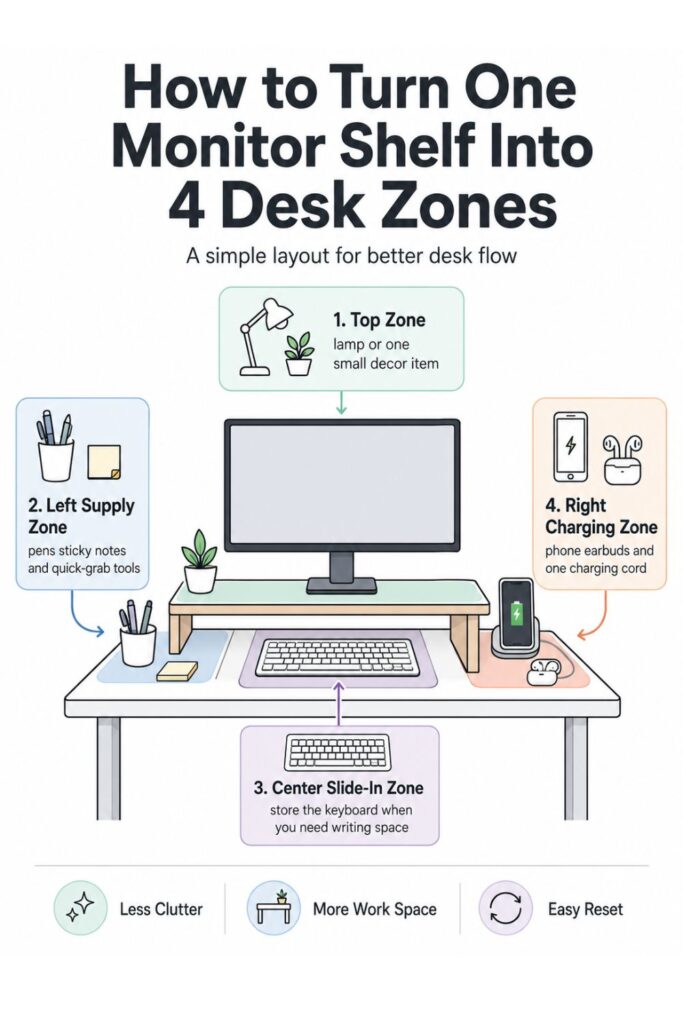
Cords can make even a clean desk look messy. A monitor shelf helps because it gives you a structure to route cables behind or underneath. With a few small adjustments, the shelf can hide a surprising amount of visual clutter.
Route cords toward the back: Pull monitor cords, charging cables, speaker wires, and keyboard cords toward the back edge of the desk. The shelf can act like a soft visual barrier, especially if it has a back lip or solid sides.
Try not to let cords cross through the center work area. The front of the desk should stay open for hands, notebooks, and daily tools.
Clip loose cords in one spot: Use a small adhesive cord clip, binder clip, cable tie, or hook near the back of the shelf. This keeps charging cords from sliding off the desk or hanging loosely across the work surface.
If you want to get more from your life, and are looking for concrete action steps to get you there, check out our Request a Coach page. It’s a “cut the fence-sitting and take action” way to tackle your issues and actually find success. To get off the fence and start to take action, click or tap here.
You do not need an elaborate cable system. Even one clip can make a big difference if it keeps the most-used charging cord in place.
Create a charging landing spot: If you charge your phone, earbuds, mouse, keyboard, or tablet at your desk, choose one side of the monitor shelf as the charging zone. This keeps devices from spreading all over the surface.
A charging zone might include:
- One cord clip
- One small tray
- One charging cable
- A spot for earbuds or phone
- A clear path to the outlet or power strip
The trick is to keep charging items grouped together. When charging has a home, cords stop migrating into every part of the desk.
Do a quick check once a week for unused cords. If you do not know what a cable belongs to, remove it from the desk until you confirm it is needed.
Make the Top of the Shelf Work Too
The top of the monitor shelf can be useful, but it needs restraint. This is the most visible part of the setup, so anything placed there will affect how crowded or open the desk feels.
Use the top surface carefully: Choose one or two items that either help you work or make the desk feel pleasant. This could be a small clock, a lamp, a plant, a tiny catchall, a speaker, or a framed note.
Avoid turning the top into a display shelf for everything you like. Too many items around the monitor can make it harder to focus.
If you want to get more from your life, and are looking for concrete action steps to get you there, check out our Request a Coach page. It’s a “cut the fence-sitting and take action” way to tackle your issues and actually find success. To get off the fence and start to take action, click or tap here.
Keep screen edges clear: Do not place anything that blocks the monitor, webcam, speakers, or sightline. Items that sit too close to the screen can create a cluttered feeling even when the desk is technically organized.
Leave breathing room around the monitor. The screen should still feel like the main focus of the desk.
Use balance when it helps: If the shelf looks uneven, place one small item on each side of the monitor base. For example, a small plant on one side and a pen cup on the other can make the setup feel more finished.
You can also use the top of the shelf for a simple work cue. A small timer, focus card, or daily note can remind you what you are working on without adding a pile of papers.
Good top-shelf options include:
- Small plant
- Timer
- Desk lamp
- Minimal clock
- One supply cup
- Tiny tray for earbuds
- Current focus card
The shelf top should support the desk, not compete with it. If it starts to look busy, remove one item at a time until the space feels easier to look at.
Create a Two-Minute Desk Reset Routine
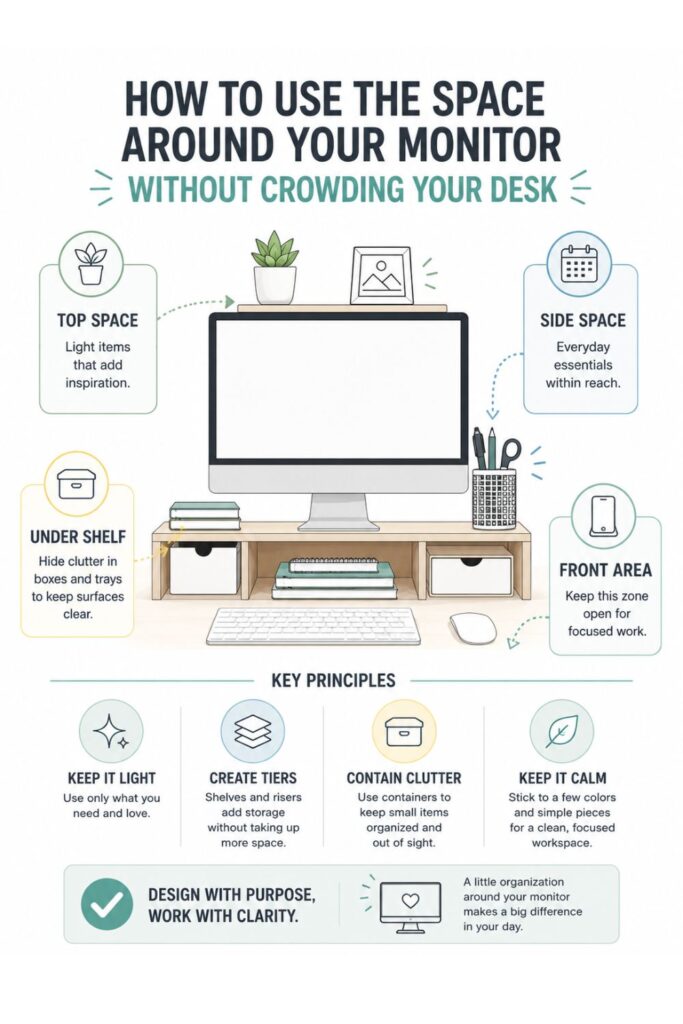
A monitor shelf is only helpful if it stays usable. The good news is that this type of setup is easy to reset because the storage area is small and visible. A short routine can keep clutter from spreading.
Reset the shelf at the end of each work block: Slide the keyboard back under the shelf, return pens to their container, tuck the notebook into its spot, and move cups or papers off the desk. This takes less time than a full cleanup because the system already has defined zones.
If you want to get more from your life, and are looking for concrete action steps to get you there, check out our Request a Coach page. It’s a “cut the fence-sitting and take action” way to tackle your issues and actually find success. To get off the fence and start to take action, click or tap here.
The goal is not perfection. It is making the desk ready for the next time you sit down.
Use a “nothing loose” rule: Anything under the monitor should be flat, contained, or actively in use. Loose items are what make a small desk feel messy fastest.
For example, one notebook under the shelf is fine. Five loose receipts, two pens, a charger, and sticky notes scattered across the shelf will feel cluttered even if they are small.
Keep one weekly review day: Once a week, take everything off the shelf and remove what no longer belongs. This is especially useful for old notes, random cords, receipts, wrappers, paper scraps, and extra supplies.
A simple weekly review might look like this:
- Toss trash
- Move old notes to a folder or recycling
- Return extra supplies to backup storage
- Check cords
- Wipe the shelf
- Put back only what you use often
This keeps the system low effort because clutter never has time to build into a big project. The shelf stays functional because you are regularly protecting its purpose.
If the reset starts taking longer than two minutes, that is a sign the shelf is holding too much. Remove a category, simplify the containers, or move less-used items somewhere else.
How an Organization Coach Could Help You Make It Stick
A monitor shelf can make the desk look better, but the real win is creating a setup that matches how you work. This is where an organization coach can be helpful, especially if your desk keeps getting messy no matter how many products you try.
If you want to get more from your life, and are looking for concrete action steps to get you there, check out our Request a Coach page. It’s a “cut the fence-sitting and take action” way to tackle your issues and actually find success. To get off the fence and start to take action, click or tap here.
Identify the real desk problem first: A coach can help you figure out why clutter builds up. The issue might be too many supplies, unclear paper flow, no place for active projects, messy cords, or a desk that has to serve too many purposes.
Once you know the real problem, the monitor shelf can be set up to solve it. Otherwise, it may just become another surface to fill.
Create a desk rule that fits your routine: A coach can help you choose simple rules that are easy to repeat. The best rules are specific enough to guide you, but not so strict that they feel annoying.
Examples include:
- Only current project papers stay on the desk
- Keyboard slides under the monitor after each work session
- Charging items stay on the right side
- Pens return to one tray
- Backup supplies do not live on the shelf
- The desk gets reset before lunch and at the end of the day
Turn the shelf into a habit trigger: The monitor shelf can become a visual cue for starting and ending work. When the shelf is clear, you know the desk is ready. When it gets crowded, it is a signal to pause and reset before clutter spreads.
This is especially useful for people who work from home, share a desk, or switch between admin tasks, creative work, and planning. A coach can help connect the physical setup to a repeatable work rhythm.
The shelf is small, but it can support a bigger habit: keeping your work area easy to use every day.
Small Variations for Different Desk Setups
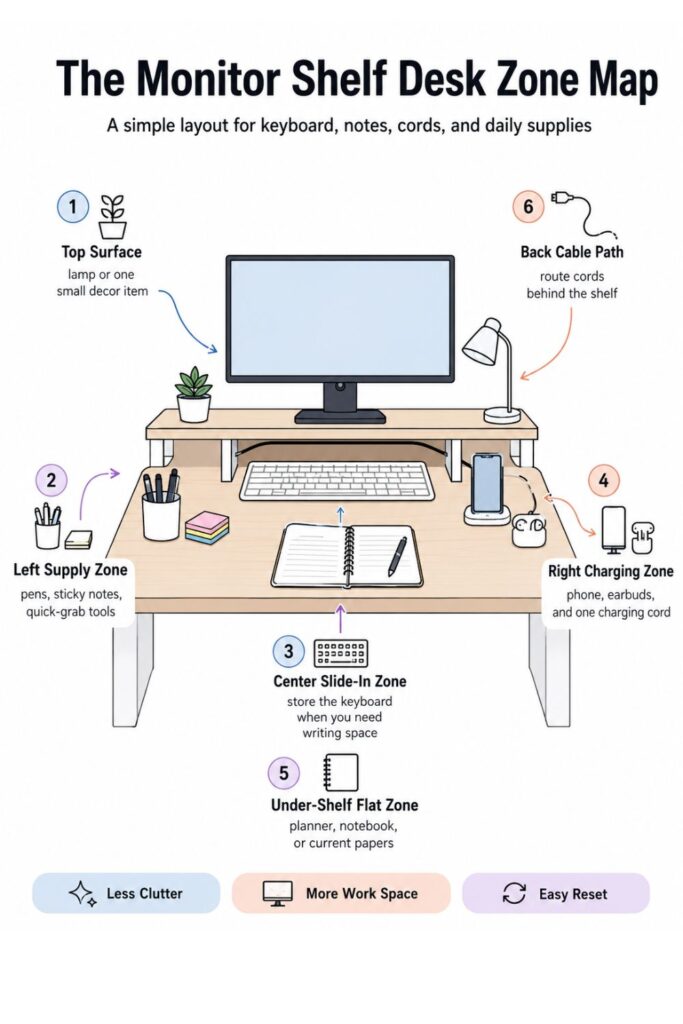
Not every desk needs the same monitor shelf setup. The best version depends on how much space you have, what equipment you use, and whether the desk has one purpose or several.
If you want to get more from your life, and are looking for concrete action steps to get you there, check out our Request a Coach page. It’s a “cut the fence-sitting and take action” way to tackle your issues and actually find success. To get off the fence and start to take action, click or tap here.
For tiny desks: Choose a slim monitor riser with one open space underneath. Skip bulky drawers or deep compartments unless you truly need them.
On a very small desk, the priority should be open surface area. A keyboard slide-in zone, one small tray, and simple cord control may be all you need.
Tiny desk setup idea:
- Slim shelf
- Keyboard underneath
- One pen tray
- Charging cord clipped at the back
- Notebook stored flat
For shared desks: Use removable storage so the desk can reset quickly between users. A small tray under the monitor can hold your personal items and be lifted away when someone else needs the space.
This works well for family desks, homework stations, guest rooms, and multipurpose tables. The shelf creates structure without making the desk feel permanently taken over.
For laptop-and-monitor setups: Keep the laptop stand, docking station, or hub on one side of the monitor shelf. Do not crowd the center if you need room to move between devices.
Use the shelf for the items that support both screens, such as earbuds, a notebook, one charger, and a mouse. Avoid storing too many extras near the laptop because cables can quickly multiply.
For paper-heavy work: Use the under-shelf area for one current folder or planner. Keep archived papers somewhere else so the monitor shelf does not become a paper stack zone.
If you want to get more from your life, and are looking for concrete action steps to get you there, check out our Request a Coach page. It’s a “cut the fence-sitting and take action” way to tackle your issues and actually find success. To get off the fence and start to take action, click or tap here.
For creative work: Keep the shelf setup extra simple. Creative projects often need open space, so the shelf should hold only the tools you use every session, not every supply you own.
The best variation is the one you can maintain easily. Start simple, then add only what solves a real problem.
Make the Desk Feel Bigger Without Adding More Furniture
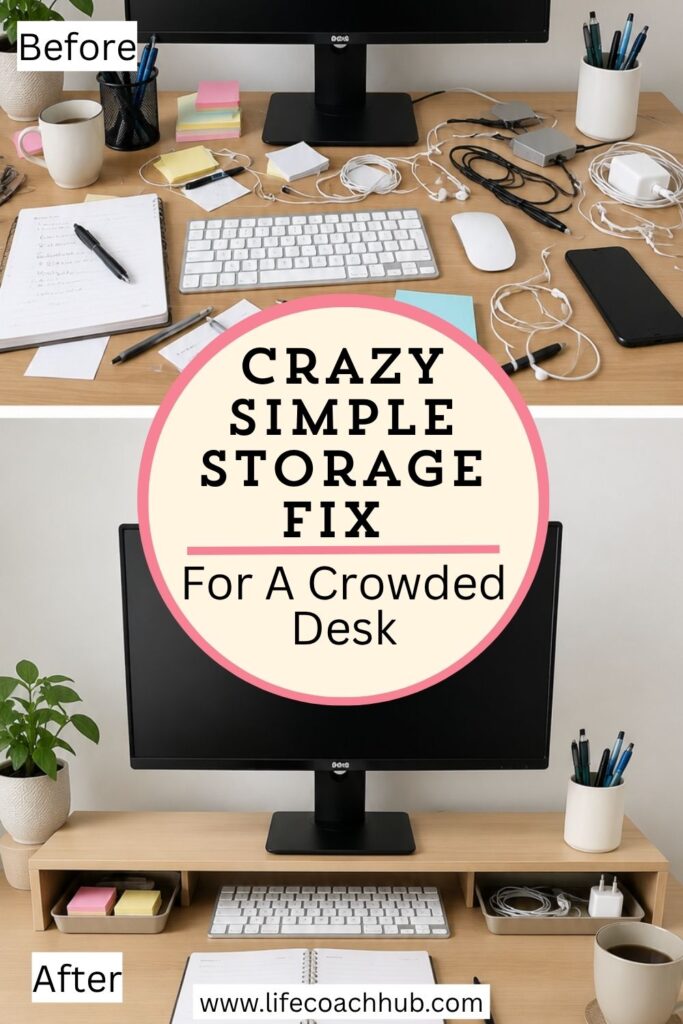
A monitor-base storage shelf is a small upgrade, but it can change the way your whole desk functions. Instead of letting the monitor take up the center of the surface, you turn that area into a useful storage zone.
The most important part is not the shelf itself. It is the system you build around it. Choose the right height, keep the center open when possible, store only daily-use items, and give cords a clear path toward the back.
A good shelf should make the desk easier to use in more than one way. It can lift the monitor, clear space for writing, hide small supplies, hold your current notebook, and create a place for the keyboard to disappear when you need more room.
Keep the setup simple at first. Add one shelf, one tray, and one reset habit. Then watch how the desk feels during a normal day.
If the shelf starts collecting clutter, remove items instead of adding more organizers. The goal is not to create a perfect-looking desk. The goal is to make the space easier to work at, easier to reset, and less visually crowded.
A double-duty desk does not need more furniture or a complicated makeover. Sometimes it just needs one smarter zone. When the monitor base starts working harder, the rest of the desk can finally breathe.
If you want to get more from your life, and are looking for concrete action steps to get you there, check out our Request a Coach page. It’s a “cut the fence-sitting and take action” way to tackle your issues and actually find success. To get off the fence and start to take action, click or tap here.
*****
Want to try this at home? No worries! Download a copy of our Clutter Reset Guide.
Need some in depth help with organization and productivity ? Drop on by our directories choc full of productivity coaches, minimalist coaches, and work/life balance coaches to get your life organized! Or click here to have us match you to the best.
If you want to get more from your life, and are looking for concrete action steps to get you there, check out our Request a Coach page. It’s a “cut the fence-sitting and take action” way to tackle your issues and actually find success. To get off the fence and start to take action, click or tap here.
Read this next

This Year’s Unmissable Halloween Door Decor Trends: Better than 2024?
Are you all about style, decor and organization? Download a copy of our Decluttering Workbook. **** Halloween 2025 is already proving to be a season of fresh ideas, bolder statements, […]
Read More
Easter Flower Arrangements That Feel Luxe Without The Florist Price Tag
Create luxe-looking Easter flower arrangements with grocery store blooms, simple vases, and easy tricks that make your table feel fresh fast.
Read More
13 Surprising Household Items That Make Stunning Fall Decor
Are you all about style, decor and organization? Download a copy of our Decluttering Workbook. **** Fall has a way of making us want to cozy up our homes, but […]
Read More