


Talk to a coach about Organizational coaching

Crystal Faulk
ACC
I help overwhelmed women in transition gain clarity, confidence, and...

Terrie Hein
Certified Life Coach, Certified Insight Coach Practitioner
Coaching to declutter your life, organize your goals, and cook...

Dr Charlene Ashley
Doctorate - Behaviours
I coach individuals to design fulfilling lives through structure, clarity,...

Paloma Chiara

Lana's Gymnastics Club
"Where the best in gymnastics meets fun. Where every child is a star"
lgclubny.com

Anna Sosnina
ICF (ACC)
ICF ACC certified coach, founder of EssorVie Coaching, passionate about...

Tyler Fink
B.A. in Religion, Anthropology, and Philosophy. Master of Divinity (M.Div.) in Missiology
Pastor, husband, and father helping Christian men pursue faithful growth...

Travis Brown
Professional Life coach
With experience in guiding clients to achieve goals, build confidence,...



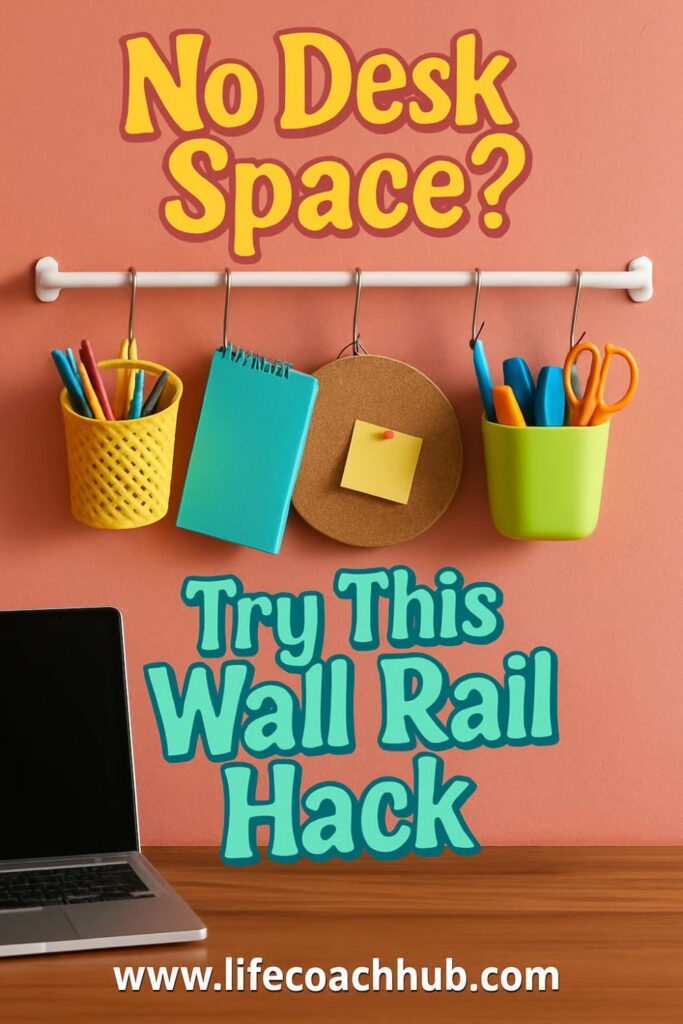
Vertical Desk Wall Rail Setup for No-Space Workstations
Want to try this at home? No worries! Download a copy of our Clutter Reset Guide.
*****
A tiny desk can start feeling crowded before the workday even begins. One notebook, one coffee mug, one charger, and a few pens can take over the entire surface. Then there is nowhere comfortable to write, type, sketch, sort papers, or spread out the thing you are actually trying to work on.
That is where a vertical desk wall rail can help. Instead of trying to squeeze more storage onto the desktop, this setup moves your daily essentials onto the wall. The wall becomes the support system, and the desk becomes a clear working surface again.
This does not need to be a big project. You can use a wall rail, peg strip, slim pegboard, adhesive hooks, magnetic bar, or a simple combination of small wall-mounted pieces. The best version is the one that fits your space, your wall limits, and the items you reach for most often.
The goal is not to display every office supply you own. It is to create a small, reachable system for the things that normally land all over your desk.
A good vertical rail setup can hold:
- Pens and markers
- Sticky notes
- Headphones
- Charging cords
- Scissors
- Small notebooks
- Clips or tape
- Daily reminders
- Lightweight tools
The key is to build it around how you actually use your desk. If you use something every day, it should be easy to grab and easy to put back. If you barely touch it, it probably does not belong in the prime wall zone.
If you want to get more from your life, and are looking for concrete action steps to get you there, check out our Request a Coach page. It’s a “cut the fence-sitting and take action” way to tackle your issues and actually find success. To get off the fence and start to take action, click or tap here.
Think of this as a desk reset that uses height instead of surface area. You are not adding more furniture. You are simply giving your most-used items a better home.
Need some in depth help with organization and productivity ? Drop on by our directories choc full of productivity coaches, minimalist coaches, and work/life balance coaches to get your life organized! Or click here to have us match you to the best.
Pick the wall zone that is easiest to reach
Choose your main vertical strip: Start by sitting at your desk like you normally would. Notice where your hand naturally reaches without leaning, twisting, or standing up. That is your best wall zone.
For most desks, the easiest rail placement is either directly in front of the desk, slightly to one side, or along the side wall if the desk sits in a corner. The rail should feel like an extension of your workspace, not like storage across the room.
If you have a monitor, make sure the rail will not sit behind the screen where you cannot reach it. If you use a laptop, leave enough visual breathing room so the wall does not feel crowded while you work.
A good wall zone should be:
- Easy to reach while seated
- Clear of shelves, frames, and outlets
- Close to where supplies pile up
- Wide enough for a few small tools
- Not directly in the path of your elbows
Keep the setup inside your natural work area: It can be tempting to use every inch of wall space once you start thinking vertically. But for a tiny workstation, a compact setup usually works better than a wide one.
A narrow rail or vertical strip keeps your supplies in one easy-to-scan area. This matters because the whole point is to reduce searching. If pens are on the left wall, sticky notes are above the monitor, and cords are behind you, the system becomes annoying fast.
If you want to get more from your life, and are looking for concrete action steps to get you there, check out our Request a Coach page. It’s a “cut the fence-sitting and take action” way to tackle your issues and actually find success. To get off the fence and start to take action, click or tap here.
Try taping a rough outline on the wall before installing anything. Use painter’s tape to mark the size of the rail or peg strip you are considering. Then sit down and pretend to reach for a pen, hook up a charger, grab headphones, and remove a note.
This quick test helps you avoid installing a system that looks good but feels awkward. The best rail location is not always the prettiest spot. It is the spot your body will actually use without thinking.
Decide what belongs on the rail before buying anything
Sort your desk items by daily use: Before choosing a rail, empty the desktop as much as you can. Pull off the pens, papers, cords, clips, sticky notes, headphones, small tools, and random items that keep collecting there.
Then sort everything into three groups.
- Daily use
- Weekly use
- Rarely used
The daily-use pile is the one that deserves the best wall space. These are the items that interrupt your flow when they are missing, buried, tangled, or scattered across the desk.
The weekly-use pile can go in a drawer, nearby bin, shelf, or lower-priority wall spot. These things do not need to be front and center if they are not part of your normal work rhythm.
The rarely used pile should not go on the rail at all. A wall rail can become cluttered just as quickly as a desktop if it turns into a place for every object that has no better home.
Limit the first setup to essentials: For the first version, choose fewer items than you think you need. A good starter rail might only include:
If you want to get more from your life, and are looking for concrete action steps to get you there, check out our Request a Coach page. It’s a “cut the fence-sitting and take action” way to tackle your issues and actually find success. To get off the fence and start to take action, click or tap here.
- One pen cup
- One hook for headphones
- One clip for current notes
- One small basket for sticky notes
- One cord clip or hook
- One tiny tool spot for scissors or tape
This keeps the project simple and easier to maintain. You can always add more later once you see how the rail works in real life.
The mistake many people make is designing for every possible supply instead of designing for the next normal workday. If you do not use binder clips every day, they do not need prime wall space. If you reach for your charger five times a day, it should be one of the easiest things to grab.
A no-space workstation works best when every item earns its spot. The rail is not meant to hold more stuff. It is meant to remove the right stuff from your desktop so you can work without clearing a pile first.
Choose a rail, peg strip, or wall bar that matches your desk problem
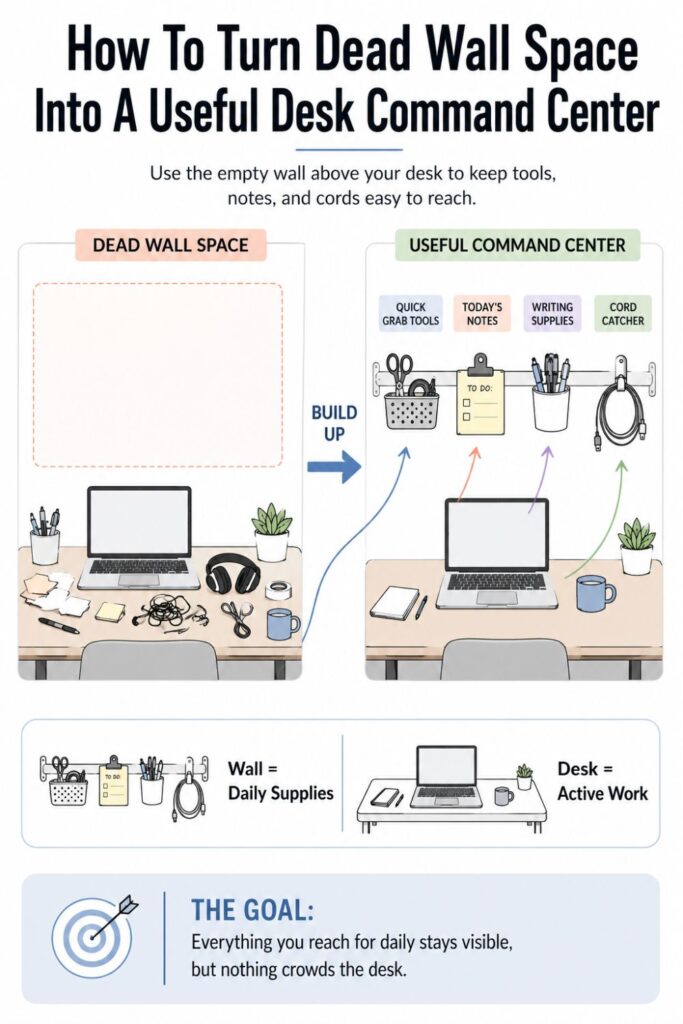
Pick the simplest rail style for your supplies: Once you know what needs to move upward, choose the wall system that fits those items. Different rail styles solve different problems, so it helps to start with the mess you are trying to fix.
If loose tools are the issue, a peg strip or pegboard-style rail gives you flexible hooks and containers. If cords are the problem, a small wall basket and cable clips may matter more than a full rail. If headphones keep taking over your desk, one sturdy hook might solve more than an entire organizer.
Here are a few common options:
- Wall rail with hooks for headphones, scissors, and hanging cups
- Peg strip for adjustable hooks, baskets, and clips
- Slim pegboard for a more flexible vertical command center
- Magnetic strip for lightweight metal tools
- Adhesive hooks for renters or quick setups
- Small mounted shelf for one notebook or device stand
The best choice is not the biggest one. It is the one that handles your daily items without making the wall feel busy.
Match the hardware to your wall limits: Your wall type matters. Drywall, brick, plaster, tile, and wood all need different installation approaches. A lightweight adhesive hook may be fine for headphones, but it may not hold a loaded basket full of tools.
If you want to get more from your life, and are looking for concrete action steps to get you there, check out our Request a Coach page. It’s a “cut the fence-sitting and take action” way to tackle your issues and actually find success. To get off the fence and start to take action, click or tap here.
If you rent, start with removable options wherever possible. Look for adhesive hooks, lightweight rails, or tension-style accessories that do not require holes. Keep the weight low and follow the product limits carefully.
If you own the space or can drill, screws and anchors give you more security. This is especially helpful if you want to hang a metal rail, a small shelf, or multiple containers.
Before installing, check for:
- Outlet placement
- Light switches
- Wall texture
- Monitor height
- Chair movement
- Cord access
- Item weight
A wall rail should make your desk easier to use, not create a new worry about things falling. Choose a system that can safely hold the items you plan to store, then keep the first version light and practical.
Create small hanging zones instead of one mixed storage line
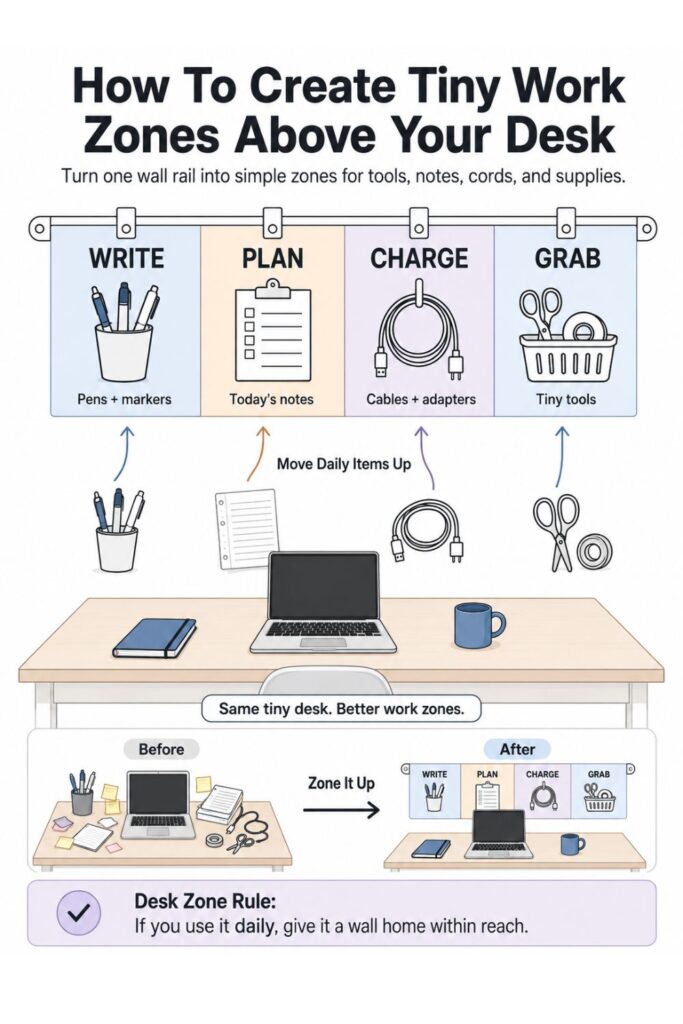
Group items by task: A rail works better when it is organized by activity, not just by size. If every hook and cup becomes a random catchall, you will still have to search for things. The only difference is that now the searching happens on the wall instead of the desk.
Think about what you actually do at your workstation. You might write notes, join calls, charge devices, sort papers, plan your day, or work on creative projects. Each of those tasks can have a tiny wall zone.
For example:
- Writing zone: Pens, highlighters, sticky notes
- Tech zone: Headphones, charger, cable clip
- Paper zone: Clipboard, current note, small file pocket
- Tool zone: Scissors, tape, small ruler, clips
These zones do not need labels unless labels help you. The placement itself should make sense. Writing tools go together. Cords go together. Paper reminders stay separate from loose supplies.
If you want to get more from your life, and are looking for concrete action steps to get you there, check out our Request a Coach page. It’s a “cut the fence-sitting and take action” way to tackle your issues and actually find success. To get off the fence and start to take action, click or tap here.
Use containers only where they solve a real problem: Containers are useful, but too many can make the wall feel crowded. Each hook, cup, basket, or clip should have a clear job.
A pen cup makes sense if pens keep rolling across the desk. A small basket makes sense if sticky notes, clips, and charging blocks need one contained place. A hook makes sense if headphones are always lying on your keyboard.
But if a container does not solve a specific problem, skip it for now. Empty containers tend to attract clutter. Before long, they hold receipts, old notes, coins, dead batteries, and things that were never supposed to live near your desk.
For a clean first setup, try this simple combination:
- One cup for writing tools
- One hook for headphones
- One small basket for sticky notes or charging blocks
- One clip for the active paper
- One cable holder for the main charger
That is enough for many small desks. You can expand later if you notice a true need, but start with a rail that is easy to understand at a glance.
Keep the desktop clear with a “nothing lives here” rule
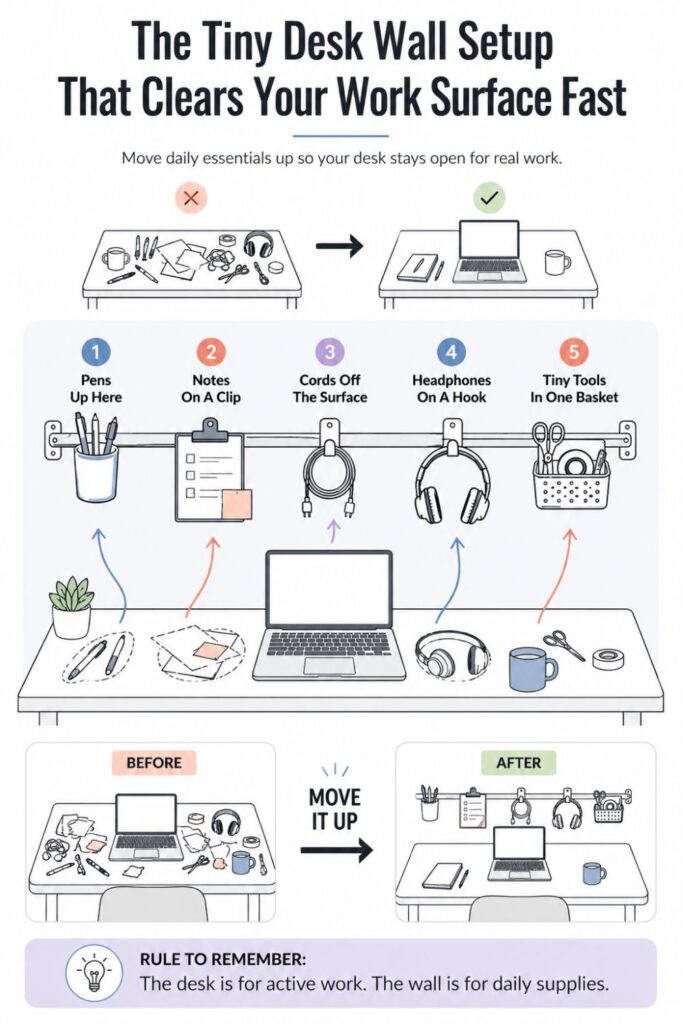
Move permanent items off the desk surface: The rail only works if you actually let it replace desktop storage. Once a pen cup, hook, basket, or clip has a wall home, remove those items from the desk and return them to the rail after each use.
This is where the setup starts to feel different. Instead of clearing the desk every time you need room, the surface stays mostly open because the storage has moved somewhere else.
A useful rule is: the desk is for active work, not permanent storage.
If you want to get more from your life, and are looking for concrete action steps to get you there, check out our Request a Coach page. It’s a “cut the fence-sitting and take action” way to tackle your issues and actually find success. To get off the fence and start to take action, click or tap here.
That means the desk can hold what you are using right now, such as:
- Laptop or keyboard
- Current notebook
- Current paperwork
- Drink
- Planner
- One active project
But the desk should not permanently hold pens, cords, extra notebooks, headphones, tape, sticky notes, and supplies that already have a home on the wall.
Leave the desk for active work only: This rule is especially helpful for very small desks because clutter has less room to hide. On a large desk, a few extra items may not seem like much. On a tiny desk, those same items can make the whole space feel unusable.
At the end of a work block, do a quick surface check. Ask yourself:
- What am I still using?
- What can go back on the rail?
- What belongs somewhere else entirely?
- What is sitting here only because I did not decide where it goes?
This quick reset keeps the rail connected to daily behavior. Otherwise, the wall looks organized while the desktop slowly fills back up.
The “nothing lives here” rule does not mean your desk has to be empty all day. It means every item needs a reason to be on the surface. If it is not part of the work happening right now, it goes back to its assigned home.
That one habit can make a tiny workstation feel much more manageable.
Add one paper-control spot for notes, lists, and reminders
Create a visible note zone: Paper is one of the fastest ways to lose a small desk. A single note is fine. Then a receipt lands next to it. Then a list, an appointment card, a printed form, and a notebook join the pile. Soon the desk is covered, and nothing feels important because everything is visible at once.
If you want to get more from your life, and are looking for concrete action steps to get you there, check out our Request a Coach page. It’s a “cut the fence-sitting and take action” way to tackle your issues and actually find success. To get off the fence and start to take action, click or tap here.
A vertical rail setup should include one paper-control spot. This can be a clipboard, a small wall pocket, a clip rail, a cork strip, or even one strong binder clip attached to the rail.
The point is to give current papers a visible home that is not the desktop.
Use this spot for:
- Today’s task list
- One reminder
- A form you need to finish
- A sticky note with an important detail
- A small weekly checklist
- A project card
Keep it close to eye level if possible. That way, important notes are easy to see without spreading across the desk.
Use a strict rotation rule: The paper zone should not become long-term paper storage. It is only for what needs attention soon.
A good rule is “today, this week, or remove it.”
If a paper is no longer active, move it to a folder, planner, file box, recycling bin, or digital note system. Do not let old reminders stay on the wall until they become invisible.
You can make this easier with a simple weekly paper reset. Once a week, remove everything from the note zone and decide:
If you want to get more from your life, and are looking for concrete action steps to get you there, check out our Request a Coach page. It’s a “cut the fence-sitting and take action” way to tackle your issues and actually find success. To get off the fence and start to take action, click or tap here.
- Keep active
- File
- Digitize
- Toss
- Move to planner
This small habit prevents the rail from becoming a wall of stale reminders. It also protects the purpose of the desk setup. The wall should help you focus on what matters now, not hold every paper you might someday need.
For a no-space workstation, one paper-control spot is usually enough. More than that can turn into visual noise. Start with one clip or one pocket, then only add more if your work truly requires it.
Build in a cable and charging mini-zone
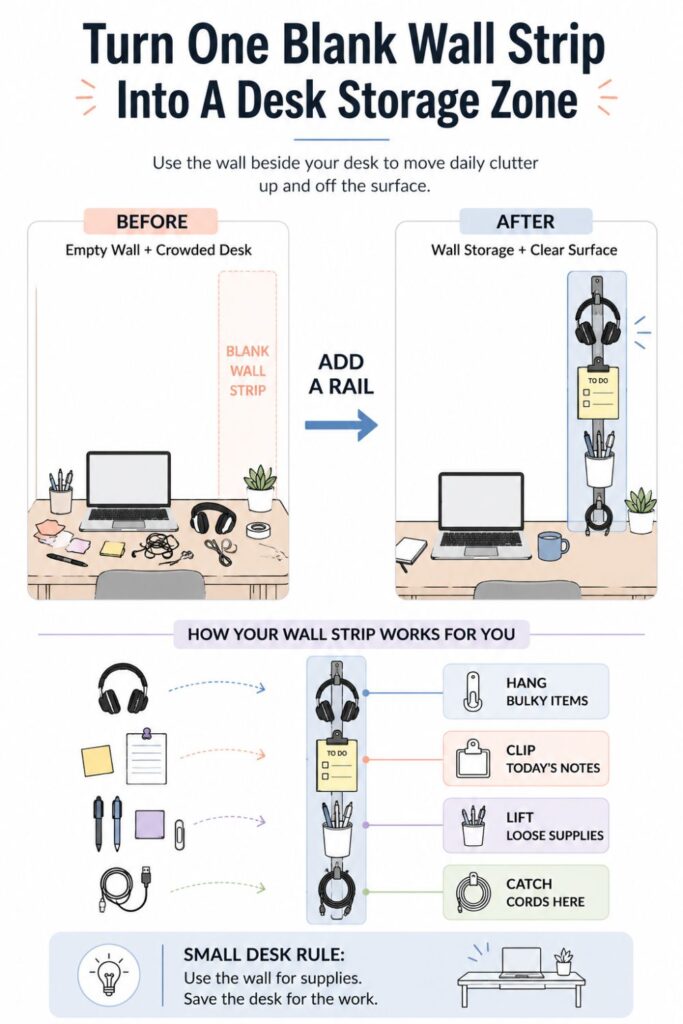
Give cords a vertical path: Cords can make a small desk feel messy even when there are not many items on it. A charger stretched across the surface, earbuds tangled near the keyboard, or a loose cable hanging off the edge can make the whole setup feel unfinished.
A wall rail can help by giving cords a place to pause, hang, or route neatly. You do not need an elaborate cable management system. You just need the cord to stop living in the middle of the work surface.
Try adding:
- Adhesive cable clips
- A small hook for charging cords
- A mini basket for charging blocks
- A cord wrap attached near the rail
- A clip to hold the cable end in place
- A small label for similar-looking cords
Place the cable zone close to the outlet or charging station if possible. If the outlet is under the desk, guide the cord upward along the desk leg or wall edge, then secure the end near the rail.
Separate charging from working space: The goal is not to display every cord. It is to keep your most-used charger reachable without letting it sprawl across the desk.
If you charge your phone during the day, create one specific spot for that cord. If you use headphones, give them a hook near the cable area. If you switch between laptop chargers or device cords, keep only the daily-use cord in the prime spot and store the extras elsewhere.
If you want to get more from your life, and are looking for concrete action steps to get you there, check out our Request a Coach page. It’s a “cut the fence-sitting and take action” way to tackle your issues and actually find success. To get off the fence and start to take action, click or tap here.
Be careful with wall baskets for devices. A lightweight basket may hold sticky notes or charging blocks, but it may not safely hold a phone, tablet, or power bank unless it is designed for that weight.
A simple cord routine can make a big difference:
- Pull the charger down when needed
- Plug in the device
- Unplug when finished
- Clip the cable end back in place
This keeps the charger accessible without letting it become part of the desk clutter. For a tiny workstation, that small change can free up more usable space than you might expect.
Make the setup easy to reset in under one minute
Assign every rail item a visible return spot: A vertical rail setup should be so obvious that you can reset it without thinking. If you need to pause and decide where the tape goes, where the headphones go, or which basket holds cords, the system is too complicated.
Each item should have one clear home. Not a general area. Not a vague category. A specific spot.
For example:
- Headphones hang on this hook
- Pens go in this cup
- Sticky notes go in this basket
- Current paper goes on this clip
- Charger clips into this holder
- Scissors hang on this hook
This sounds simple, but it matters. The easier the return spot, the more likely you are to use it when tired, distracted, or in a hurry.
If multiple items keep landing in the wrong place, that is useful information. It usually means the spot is inconvenient, unclear, or not matched to how you naturally move.
If you want to get more from your life, and are looking for concrete action steps to get you there, check out our Request a Coach page. It’s a “cut the fence-sitting and take action” way to tackle your issues and actually find success. To get off the fence and start to take action, click or tap here.
Do a quick end-of-work sweep: A rail system is only as good as the reset habit attached to it. You do not need a long cleaning routine. You just need a one-minute sweep at the end of your work block.
Try this:
- Put pens back in the cup
- Hang headphones
- Clip the charger back
- Remove old sticky notes
- Put the current paper in the note zone
- Clear anything that does not belong on the desk
This works because it is small enough to repeat. You are not reorganizing the whole workstation. You are simply returning the few daily-use items to the homes you already created.
If the reset takes longer than a minute, the rail may be holding too much. Remove anything you do not use daily and simplify the layout.
The best setup is not the most impressive one. It is the one you can maintain when the day has been busy and you do not feel like cleaning. If the reset is easy, the desk stays clearer with much less effort.
How an organizing coach could help you make the setup stick
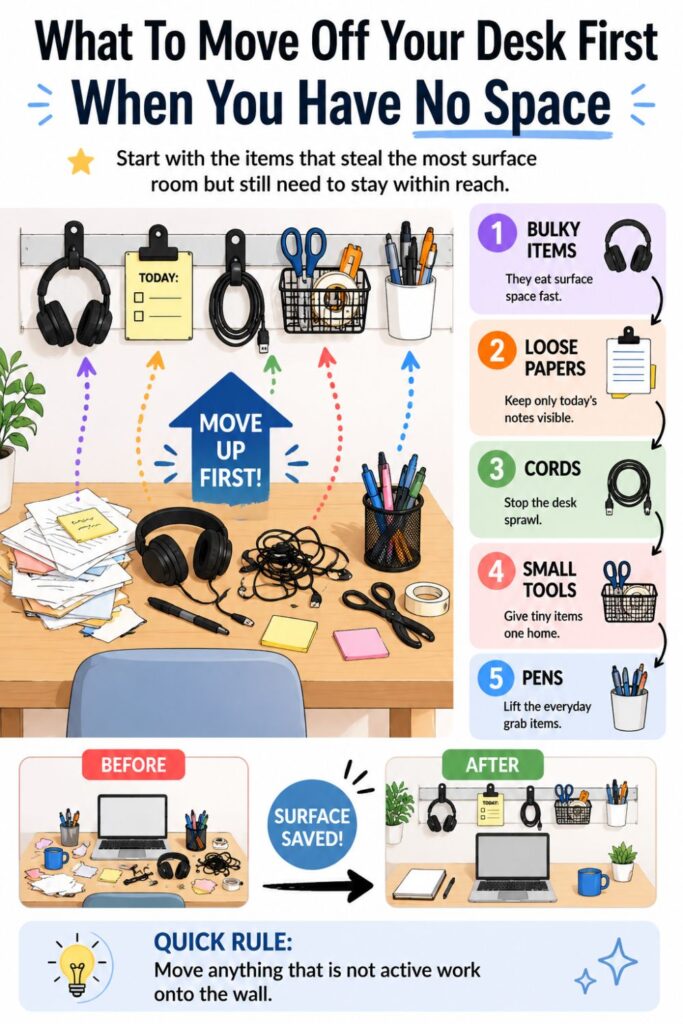
Identify the real friction points: Sometimes the issue is not that you need more containers. It is that the current setup does not match your habits. An organizing coach can help you notice where the system is breaking down and why.
For example, you may think the problem is that you are messy with papers. But the real issue might be that there is no clear place for “I need this later today.” So every paper stays on the desk because putting it away feels like losing it.
Or you may think you need a bigger desk. But the bigger issue might be that your most-used tools are stored in three different places, so everything ends up on the surface for convenience.
If you want to get more from your life, and are looking for concrete action steps to get you there, check out our Request a Coach page. It’s a “cut the fence-sitting and take action” way to tackle your issues and actually find success. To get off the fence and start to take action, click or tap here.
A coach can help you look at patterns like:
- What keeps landing on the desk?
- What do you reach for most often?
- What do you avoid putting away?
- Which items need to stay visible?
- Which items are visual clutter?
- What part of the workday creates the biggest mess?
This is helpful because the best rail setup is personal. A student, remote worker, crafter, coach, writer, and business owner may all need different wall zones.
Turn the rail into a simple routine: A coach can also help turn the setup into a habit, not just a one-time project. That matters because a new organizer can feel exciting for a few days, then slowly stop working if there is no routine attached.
A coach might help you create a simple reset plan, such as:
- Two-minute desk reset at the end of each workday
- Friday paper clear-out
- Weekly supply check
- Monthly rail edit
- One active project rule
- One visible reminder rule
They can also help you decide what “organized enough” means for your real life. The goal is not a perfect desk. The goal is a workspace that helps you start faster, stay focused longer, and finish without leaving a mess that blocks the next work session.
Small upgrades that make the rail feel more finished
Add labels only where they help: Labels can make a rail system easier to use, especially if the desk is shared or if you tend to mix items together. But not every container needs a label. A cup full of pens is usually obvious. A basket that holds several small items may benefit from one.
Use labels for categories that are easy to confuse, such as:
- Cords
- Notes
- Tools
- Stamps
- Clips
- Daily
- To File
Keep the labels short. The goal is quick recognition, not detailed instructions.
If you want to get more from your life, and are looking for concrete action steps to get you there, check out our Request a Coach page. It’s a “cut the fence-sitting and take action” way to tackle your issues and actually find success. To get off the fence and start to take action, click or tap here.
If you want the setup to feel clean, use the same label style across all containers. This could be small white labels, kraft labels, simple printed text, or a label maker. Matching labels can make the wall feel more intentional without adding extra supplies.
Balance function with a clean look: A vertical rail is visible, so the way it looks does matter. If it feels too busy, you may start ignoring it or feel like the desk is still crowded even when the surface is clear.
One easy way to make it feel more finished is to choose fewer colors and materials. You do not have to buy anything fancy. Just avoid mixing too many random containers if the wall is already in your line of sight.
You might choose:
- All white containers
- Natural wood and black hooks
- Clear acrylic pieces
- Soft neutral bins
- Matching metal hooks
- One repeated container style
Leave a little empty space on the rail too. Empty space makes the useful items easier to see. It also gives you room to add one temporary item without the whole system falling apart.
If the rail still feels visually heavy, move less-used items somewhere else. A wall setup should help the desk feel lighter, not make the whole workstation feel busier.
Small upgrades are best after you know the setup works. First make it functional. Then make it nicer to look at.
Common mistakes to avoid with a vertical desk rail
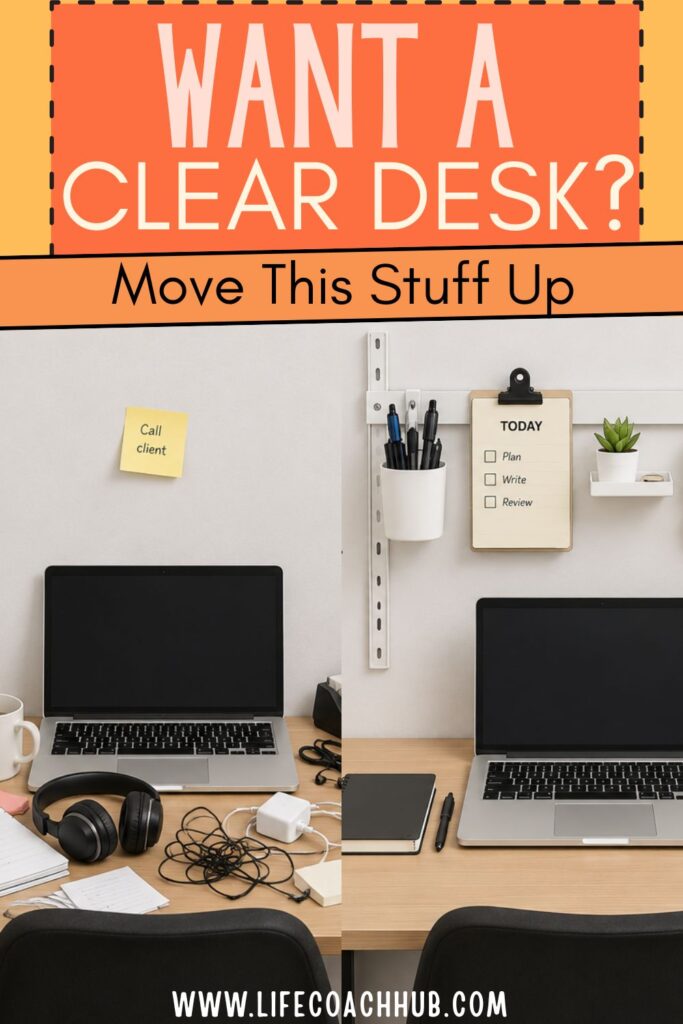
Do not hang everything you own: The biggest mistake is treating the rail like extra storage instead of better storage. If every supply moves to the wall, the desk may be clear, but the workstation can still feel cluttered.
If you want to get more from your life, and are looking for concrete action steps to get you there, check out our Request a Coach page. It’s a “cut the fence-sitting and take action” way to tackle your issues and actually find success. To get off the fence and start to take action, click or tap here.
The rail should hold the items that support your workday. It should not hold every pen, every notebook, every cord, every craft tool, or every extra supply.
A good test is to ask, “Would I reach for this during a normal work session?”
If the answer is no, it probably does not need prime wall space.
Try to avoid storing:
- Old receipts
- Extra notebooks
- Backup cords
- Rarely used tools
- Random office supplies
- Finished paperwork
- Decorative items that take over useful space
A little decoration is fine, but function should come first in a no-space workstation.
Do not place items too high or too low: Placement can make or break the system. If the pen cup is too high, you will stop using it. If the cord clip is hidden behind the monitor, the cord will end up back on the desk. If the note zone is too low, you may forget to check it.
Keep the most-used items in the easiest reach zone. Less-used items can go slightly higher or lower, but they should still be visible and safe to access.
Also watch for weight issues. Heavy baskets, overloaded cups, or poorly attached hooks can damage the wall or fall at the worst time. Start light and test the setup before loading it fully.
If you want to get more from your life, and are looking for concrete action steps to get you there, check out our Request a Coach page. It’s a “cut the fence-sitting and take action” way to tackle your issues and actually find success. To get off the fence and start to take action, click or tap here.
Another common mistake is ignoring the chair. Slide your chair in and out, turn slightly, and move like you normally would. Make sure hooks, baskets, or hanging items will not bump your shoulder, arm, or monitor.
A vertical rail should feel effortless. If you have to dodge it, stretch for it, or think too hard to use it, adjust the layout until it supports the way you naturally work.
A desk that finally has room to breathe
A vertical desk wall rail works because it changes what your desk is responsible for. The desk no longer has to hold every supply, reminder, cord, tool, and active project at the same time. The wall handles the essentials, and the surface stays open for the work in front of you.
This is especially helpful in a no-space workstation because there is so little room for error. A few loose items can make the whole desk feel crowded. But when those items have reachable wall homes, the space can feel clearer almost immediately.
Start small. Pick one reachable wall strip, choose the items you use every day, and give each one a specific spot. Do not worry about building the perfect rail on the first try. A simple hook, cup, clip, and cord holder can already make a noticeable difference.
The best setup is the one you can keep using without extra effort. If it helps you start work faster, find supplies easily, and clear the surface in under a minute, it is doing its job.
Over time, you can adjust the rail as your work changes. Add a basket if you truly need one. Remove a hook if it keeps collecting clutter. Move the note zone if you are not checking it. Let the system respond to your habits instead of forcing yourself into a layout that only looks good.
A small desk does not have to feel like a constant compromise. With the right vertical setup, your wall can carry the clutter-prone pieces, your essentials can stay within reach, and your desktop can finally have room to breathe.
If you want to get more from your life, and are looking for concrete action steps to get you there, check out our Request a Coach page. It’s a “cut the fence-sitting and take action” way to tackle your issues and actually find success. To get off the fence and start to take action, click or tap here.
*****
Want to try this at home? No worries! Download a copy of our Clutter Reset Guide.
Need some in depth help with organization and productivity ? Drop on by our directories choc full of productivity coaches, minimalist coaches, and work/life balance coaches to get your life organized! Or click here to have us match you to the best.
If you want to get more from your life, and are looking for concrete action steps to get you there, check out our Request a Coach page. It’s a “cut the fence-sitting and take action” way to tackle your issues and actually find success. To get off the fence and start to take action, click or tap here.
Read this next

How to Transform Your Coffee, Entry, and Dining Tables with DIY Fall Decor
Turn everyday tables into cozy fall focal points with easy DIY decor ideas you can make on a budget. See the simple projects inside!
Read More
Budget-Friendly DIY Organization Hacks: How to Save Big with Clever Tricks
We all dream of a Pinterest-worthy home where every item has its place, but getting organized can often feel expensive. Between custom storage bins, acrylic drawer systems, and built-in shelving, […]
Read More
This Year’s Unmissable Halloween Door Decor Trends: Better than 2024?
Are you all about style, decor and organization? Download a copy of our Decluttering Workbook. **** Halloween 2025 is already proving to be a season of fresh ideas, bolder statements, […]
Read More