


Talk to a coach about Organizational coaching

Crystal Faulk
ACC
I help overwhelmed women in transition gain clarity, confidence, and...

Terrie Hein
Certified Life Coach, Certified Insight Coach Practitioner
Coaching to declutter your life, organize your goals, and cook...

Dr Charlene Ashley
Doctorate - Behaviours
I coach individuals to design fulfilling lives through structure, clarity,...

Paloma Chiara

Lana's Gymnastics Club
"Where the best in gymnastics meets fun. Where every child is a star"
lgclubny.com

Anna Sosnina
ICF (ACC)
ICF ACC certified coach, founder of EssorVie Coaching, passionate about...

Tyler Fink
B.A. in Religion, Anthropology, and Philosophy. Master of Divinity (M.Div.) in Missiology
Pastor, husband, and father helping Christian men pursue faithful growth...

Travis Brown
Professional Life coach
With experience in guiding clients to achieve goals, build confidence,...



Top Drawer Reset System for Workday Essentials
Are you all about style, decor and organization? Download a copy of our Clutter Reset Guide.
*****
Your Top Drawer Should Make Your Workday Easier, Not Slower
Your top desk drawer should be the easiest place to find what you need during a busy workday. Instead, it often becomes the place where everything goes when you need to clear your desk in a hurry. Pens roll beneath papers, sticky notes disappear under receipts, and the charging adapter you used yesterday seems impossible to find today.
None of those interruptions feels like a big deal on its own. But reaching into the same drawer five times and searching through clutter each time can make an already full day more frustrating. A drawer that should help you work starts creating extra decisions instead.
The solution is not necessarily another matching organizer or a bigger desk. It is a top drawer designed around what you actually do, with everyday essentials in predictable places and a simple way to put everything back. Think of it as a small command zone for the tasks you repeat throughout the day.
The important distinction is between storing supplies and supporting a routine. A storage drawer can hold thirty pens, four notebooks, spare batteries, and old mail. A workday command zone holds the pen you use, the notes you reach for, and the small tools that help you move from one task to the next.
You also do not have to empty your whole office to get started. This system focuses on one drawer, which makes the project manageable even if your workspace is shared, compact, or part of a bedroom. You can use trays you already own, repurposed boxes, or a few inexpensive dividers.
The goal is a drawer that works on a regular Tuesday, not just in an after photo. You will sort what belongs, map out three accessible zones, choose compartments that fit, and test the arrangement during a real workweek. Then you will add a quick daily reset so a useful system does not slowly turn back into a catchall.
If you want to get more from your life, and are looking for concrete action steps to get you there, check out our Request a Coach page. It’s a “cut the fence-sitting and take action” way to tackle your issues and actually find success. To get off the fence and start to take action, click or tap here.
Before buying anything, open your drawer and notice what gets in your way. That moment of noticing is the starting point for a setup built around your day rather than someone else’s ideal desk.
Need some in depth help with organization and productivity ? Drop on by our directories choc full of productivity coaches, minimalist coaches, and work/life balance coaches to get your life organized! Or click here to have us match you to the best.
Step 1: Empty Your Top Drawer and Find What Actually Belongs There
Trying to organize a crowded drawer while everything is still inside usually means moving the same clutter from one corner to another. Start with a full view of the contents so you can decide what deserves valuable, easy-to-reach space. Set aside a small clear area on your desk or floor before you begin.
- Remove everything before rearranging: Take out every pen, note, cord, receipt, and mystery object, including items tucked into the back corners. Wipe out crumbs and dust, then lay the contents where you can see them without stacking one category on another. Leave the drawer empty while you make decisions so its limited space does not dictate what you keep.
- Identify your true daily essentials: Think about the supplies you reached for during the last few ordinary workdays rather than everything you might someday need. Put your preferred pen, current sticky notes, and any routinely used accessory in a Daily Essentials group. If you have twelve working pens but always choose the same two, the others do not need prime drawer space.
- Sort items into three clear groups: Make separate piles labeled Daily Essentials, Occasional Supplies, and Belongs Elsewhere. Occasional Supplies might include a spare highlighter, replacement note pad, or infrequently used stapler. The third pile could contain old mail, personal accessories, outdated papers, or tools that belong in another room, and each of those items needs a destination outside this drawer.
- Set a realistic limit on what goes back: Decide how many of each item make sense for daily use, such as two pens instead of an entire packet. Keep refills together in a secondary storage spot, not scattered across your most accessible compartments. When in doubt, ask whether an item supports a task you routinely do at this desk.
Do not treat this as a contest to throw away the most things. You are making room for the tools that earn their place through regular use. With the drawer empty and the essentials identified, the layout becomes much easier to design.
Step 2: Divide the Drawer Into Three Reach-Friendly Zones
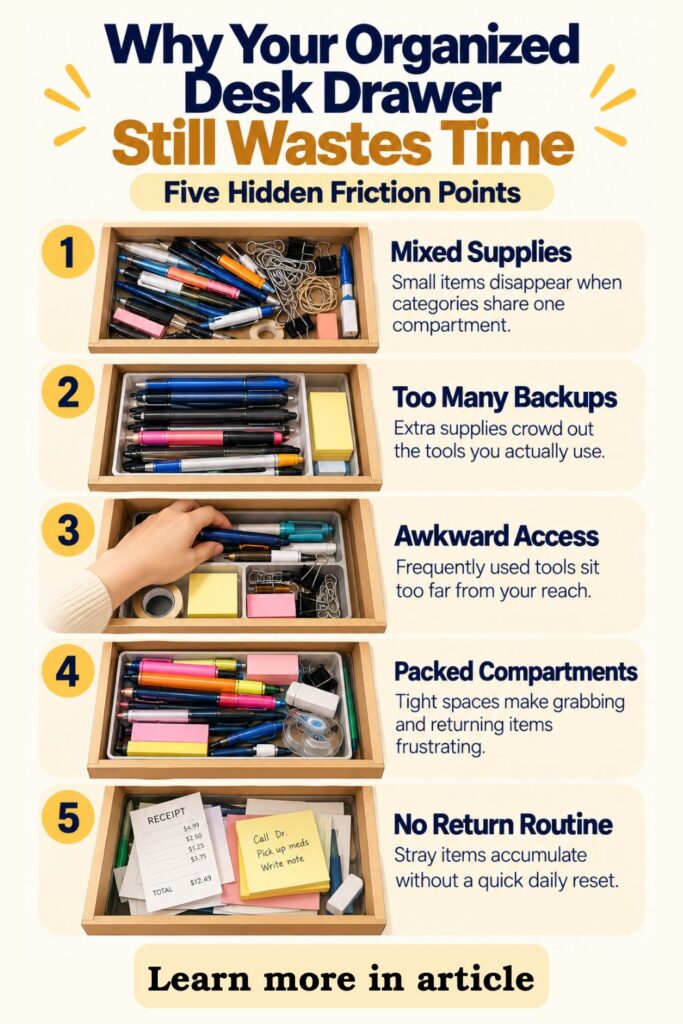
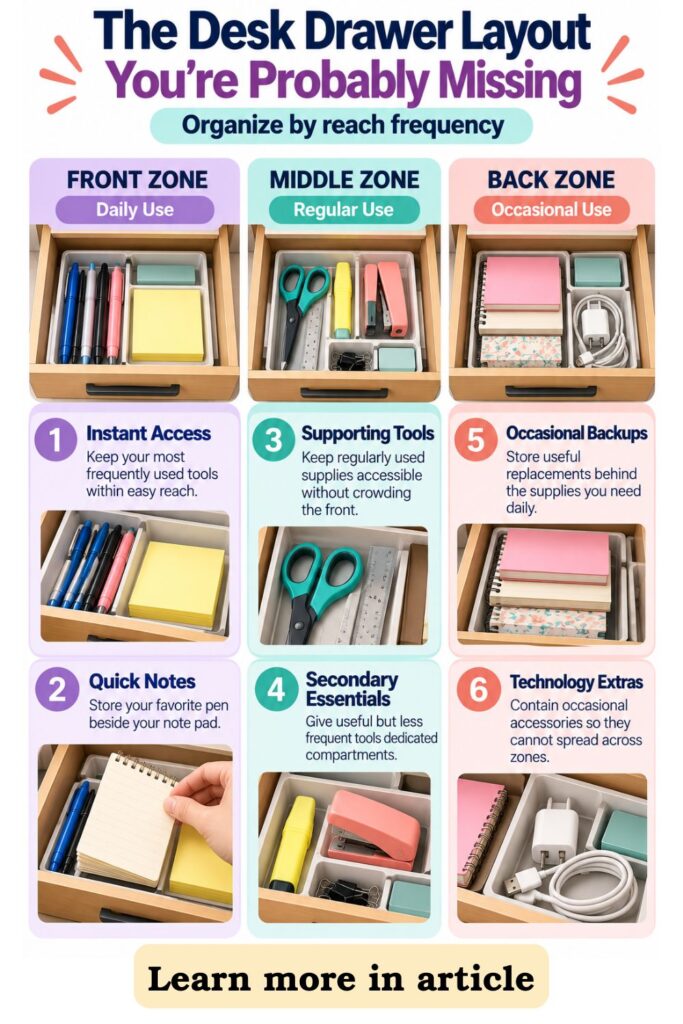
The simplest drawer layout is not based on the size of each supply category. It is based on how often your hand needs to reach for something. Imagine three bands running from the front of the drawer to the back, with the most frequently used items closest to you.
- Make the front your instant-access zone: Reserve the front section for the tools you need without breaking concentration, such as your favorite pen, small sticky-note pad, or paper clips used throughout the day. Keep these items visible and separated instead of piling them together. The goal is to open the drawer, pick up what you need, and close it in one easy motion.
- Give the middle to supporting supplies: Place objects you use regularly but not constantly in the center, such as scissors, a highlighter, a small ruler, or a stapler that fits comfortably. These tools should still be easy to reach, but they do not need the best spot. If an object blocks access to something used every hour, swap their positions.
- Use the back for occasional essentials: Save the rear section for a small number of useful backups, like an extra note pad, spare pen refill, or USB adapter needed only now and then. Avoid treating this space as permission to keep unrelated odds and ends. A back zone works only when it remains a deliberate part of the system rather than a hidden dumping ground.
- Adjust the map to your natural reach: If you are right-handed, the front-right compartment may be the most comfortable place for your writing tools. A left-handed person may prefer the opposite side, while a very shallow drawer may need three side-by-side zones instead. Test the locations by pretending to take a call, jot down a note, and return the pen.
These zones are a starting map, not a rigid diagram. Your drawer’s dimensions and your own work habits should shape the final arrangement. Once each area has a purpose, you can choose dividers that reinforce the boundaries instead of fighting them.
Step 3: Build Small Compartments That Stop Supplies From Mixing
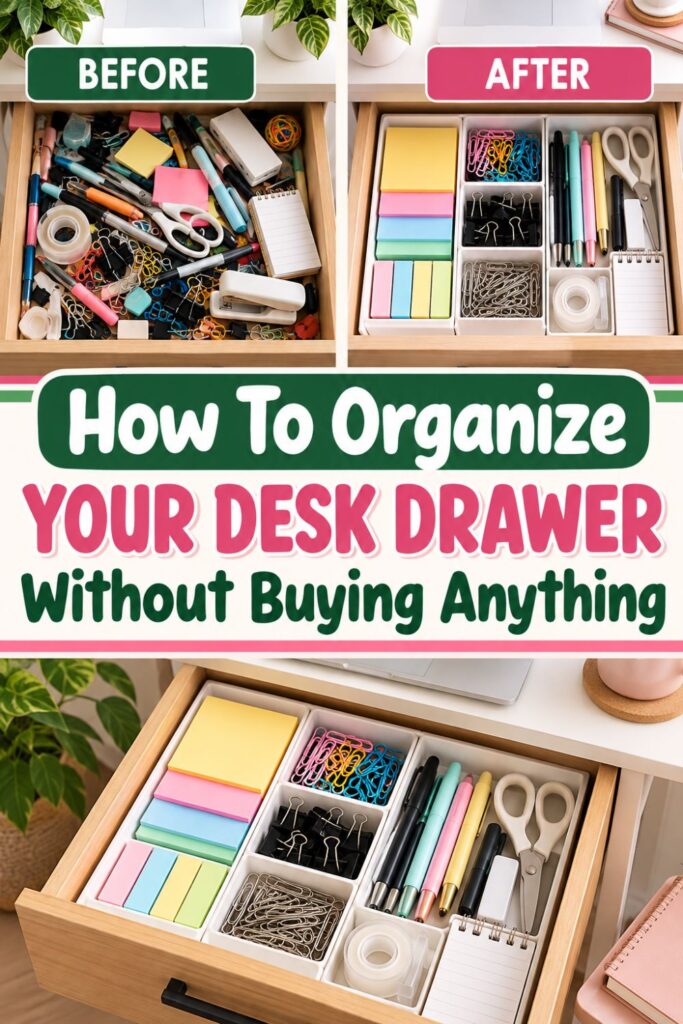
Even a carefully planned drawer can become messy when pens roll into paper clips and adapters slide beneath notepads. Compartments create physical boundaries, which make the drawer easier to use and easier to reset. You do not need an expensive matching set, but you do need containers that fit the space and the objects inside it.
- Measure the usable space first: Use a ruler or tape measure to check the drawer’s inside width, front-to-back depth, and height beneath any rail or drawer frame. Measure the objects that need to lie flat, especially longer pens, scissors, or charging cables. Leave enough clearance above the organizers so the drawer closes without catching on a tool or lifting a tray.
- Choose dividers around your supplies: Lay out a few shallow trays, adjustable drawer dividers, or sturdy repurposed boxes on the empty drawer base before committing to a purchase. Long compartments suit pens and pencils, while smaller sections keep clips or adapters from roaming. If a tray leaves a narrow unusable gap, try turning the arrangement or using two simpler containers instead.
- Give small categories their own homes: Place writing tools in one section, sticky notes or index cards in another, and loose accessories in a small contained area. Coil short cables loosely and keep them away from sharp stationery that could snag them. Group items by the way you retrieve them, so you do not need to lift three different containers to find one paper clip.
- Leave room for your hand to move: Do not fill every compartment to the top just because the organizer has space. You should be able to pinch a sticky-note pad, lift a pen, and return scissors without pushing neighboring objects aside. A little open space also makes it obvious when an unrelated item has landed in the drawer.
For a low-cost trial, use small boxes you already have and rearrange them before buying permanent organizers. A strip of removable shelf liner underneath can help lightweight trays stay in place if they slide. What matters is that every boundary makes grabbing and returning supplies simpler.
If you want to get more from your life, and are looking for concrete action steps to get you there, check out our Request a Coach page. It’s a “cut the fence-sitting and take action” way to tackle your issues and actually find success. To get off the fence and start to take action, click or tap here.
Step 4: Arrange Your Essentials Around Your Real Workday Routine
A perfectly divided drawer can still be inconvenient if the arrangement does not match how you work. The next step is to organize by action, not merely by the names of objects. Think about the small transitions that happen between opening your computer and signing off for the day.
- Follow your usual sequence of tasks: Picture your first hour of work and note when you reach for a pen, write a reminder, connect a device, or handle a document. Put the objects used during these moments in the most reachable compartments. Supplies associated with less common tasks can sit farther back, even when they are larger or look more impressive.
- Make a one-motion note-taking spot: Keep your preferred pen next to a small pad or stack of sticky notes, rather than putting the two items at opposite ends of the drawer. When a meeting begins or a thought occurs, you should be able to grab both quickly. Return them as a pair afterward so the next note is just as easy to capture.
- Contain the technology extras: Put a short charging cable, small adapter, or USB drive in one dedicated compartment if you actually use them at this desk. Avoid keeping every cable you own in the drawer, since loose cords quickly invade nearby sections. If an accessory is needed only once a month, it probably belongs in secondary storage.
- Run a realistic reach test: Sit in your normal working position and perform three familiar actions, such as writing a quick note, finding scissors, and plugging in a device. Notice whether you reach awkwardly, shuffle supplies, or open a second container to reach the first. Move any troublesome item to a more obvious location before calling the layout finished.
A useful arrangement should feel nearly automatic, not like a puzzle you must remember. Resist labeling ten tiny compartments if three or four obvious groups will do the job. Let your actual movements tell you what belongs closest, and allow the drawer to become a quiet support for your routine.
Step 5: Create a Reset-Friendly Layout That Is Easy to Maintain
Getting a drawer organized is only the first half of the project. The real test is whether it stays usable after a string of busy days, surprise calls, and rushed task changes. Build the reset into the layout itself so tidying requires little thought and almost no extra setup.
- Make the return path obvious: Each essential should have a home you can recognize immediately, even when you are tired or distracted. Keep frequently used compartments open and easy to reach rather than stacking trays or hiding supplies under lids. If returning one pen means moving three other items, simplify that part of the arrangement.
- Do a brief end-of-day reset: Before you close your laptop, place stray pens, notes, clips, and accessories back in their assigned sections. Remove receipts, wrappers, or loose papers that wandered into the drawer during the day. Check whether the tools you will need first tomorrow are visible, then close the drawer and move on.
- Schedule a deeper weekly reset: Set aside 10 to 15 minutes at the end of the week to clear scraps, wipe dusty corners, and replace used-up supplies from your backup storage. Look for anything that has repeatedly landed in the wrong compartment. Instead of tidying around the problem, decide whether that object needs a different home or should leave the drawer entirely.
- Use a firm rule for overflow: When one section is full, do not quietly spread its contents into the neighboring zone. Check for duplicates, outdated notes, or backup supplies that can be moved elsewhere. Treat crowded compartments as useful feedback about what you actually need, not a signal to buy more organizers right away.
To make the reset stick, attach it to something that already happens, such as saving your final document or reviewing tomorrow’s calendar. A small repeating action is easier to maintain than waiting for a free Saturday. Your goal is a drawer that can be restored in moments because the structure is already doing most of the work.
Step 6: Test Your Drawer for One Workweek and Fix What Is Not Working
An organized drawer can look excellent on the day you set it up and still fail during normal work. That does not mean you need to start over. Give the system a full workweek so you can tell the difference between a genuinely useful layout and one that only looks neat when untouched.
- Notice which items you actually reach for: Each day, pay attention to the compartments you open first and the tools you use repeatedly. A favorite pen may earn a spot at the very front, while a decorative notebook might never leave its section. Use these observations to make the layout more accurate instead of relying on your original guesses.
- Watch for recurring clutter patterns: If loose notes keep ending up on top of the dividers, ask whether their designated compartment is too narrow or hard to reach. If cables repeatedly escape their tray, try a deeper section or remove extras. Repeated clutter in the same spot often points to an awkward design choice rather than a lack of effort.
- Change one thing at a time: Move a tray, switch the positions of two supplies, or remove one unnecessary category, then see whether that adjustment makes the drawer easier to use. Avoid emptying and rebuilding everything after a single frustrating afternoon. Small changes let you identify what solved the problem without losing the parts that already work.
- Set a simple success check: At the end of the week, ask whether you can find your three most-used tools quickly and put them away without shifting other items. Also notice whether your end-of-day reset feels manageable. If either task is harder than it should be, simplify the layout before adding labels, extra trays, or more categories.
The finished system does not have to look identical to anyone else’s desk drawer. It has to support your work without demanding constant attention. A few thoughtful adjustments can make the difference between a one-time tidy and a routine you actually keep.
What If Your Desk Drawer Is Too Small or Shared With Someone Else?
A tiny or shared drawer needs the same basic principles, but it has less room for mistakes. Every compartment must earn its space, and the layout may need to prioritize access over perfect symmetry. You can still build a practical command zone without squeezing in a full-sized organizer.
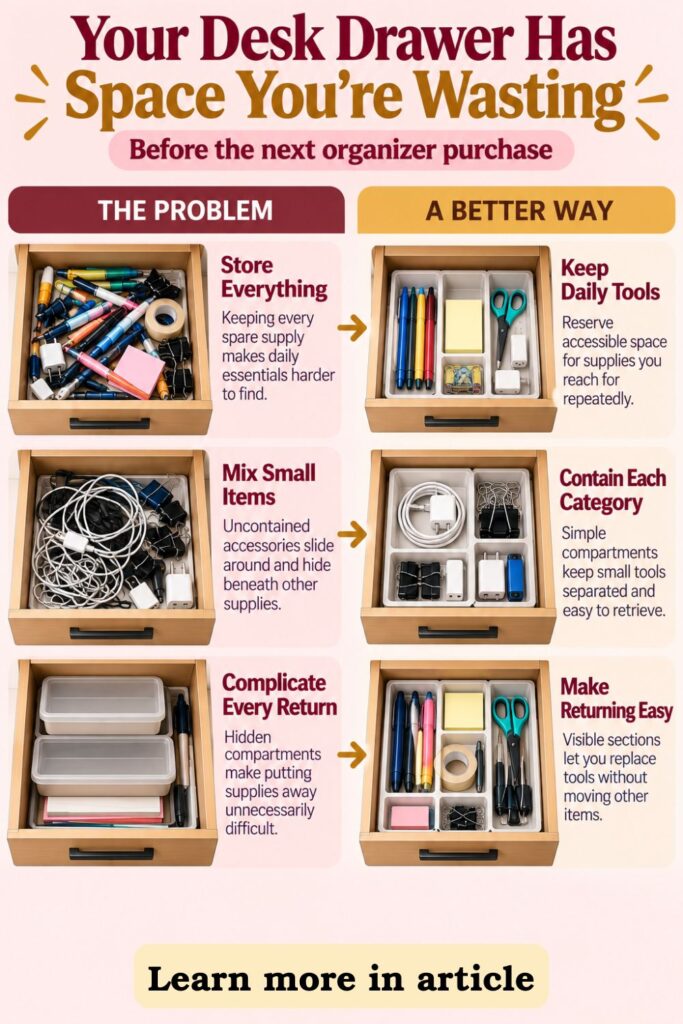
- Use low-profile storage in shallow drawers: Choose short trays and dividers that sit below the drawer opening, then store pens, note pads, and accessories in single layers where possible. Tall containers can catch on the underside of the desk and make everyday use annoying. If scissors or a bulky stapler cannot fit comfortably, move them to another reachable location instead of forcing them inside.
- Adapt the zones to a narrow shape: If front-to-back bands do not fit, use two or three slim sections along the drawer’s length or width. Put the tools you grab most often closest to the side you naturally reach from. The principle stays the same even when the compartments look different: frequent-use supplies get the easiest access.
- Create clear boundaries for shared supplies: In a drawer used by two people, agree on one common area for pens, notes, or clips and separate small sections for personal essentials. Keep the shared section in a spot both people can reach easily. Make the return rules simple enough that neither person has to remember a complicated set of labels or exceptions.
- Give temporary items an exit route: If stray papers or borrowed tools inevitably land in the drawer, reserve a very small temporary holding spot. Empty it at the end of the day, returning items to their owners or proper storage locations. The holding space should remain small, because a generous catchall compartment can quickly consume the whole drawer.
Be willing to keep fewer things in a compact workspace. Some essentials may work better on a nearby shelf or in a pencil cup, while the drawer handles the supplies that benefit from being tucked away. A smaller command zone can still feel dependable when everything inside has a clear purpose.
If you want to get more from your life, and are looking for concrete action steps to get you there, check out our Request a Coach page. It’s a “cut the fence-sitting and take action” way to tackle your issues and actually find success. To get off the fence and start to take action, click or tap here.
How an Organization or Productivity Coach Can Help You Build Habits That Last
Sometimes the drawer is easy to organize but hard to keep that way. If you repeatedly clear it out only to watch it fill again, the problem may be less about the dividers and more about how the routine fits your day. An organization or productivity coach can help you examine those habits without turning a small workspace issue into another overwhelming project.
- Identify where clutter begins: A coach might ask when you tend to drop loose objects into the drawer and what is happening around those moments. Perhaps you clear your desk just before calls or stash notes while switching between tasks. Naming that pattern gives you a more useful starting point than simply deciding to be tidier.
- Connect the reset to an existing habit: Work together to choose a reliable cue, such as shutting down your computer or checking the following day’s appointments. Practice returning supplies immediately after that cue instead of relying on a reminder you might ignore. A short routine tied to an established action is often easier to remember than a vague promise to organize more.
- Set a measurable maintenance goal: Rather than aiming for a flawless drawer every day, choose a realistic target like completing a brief reset on four workdays this week. Mark each completed reset on a small checklist or calendar. Review whether the target fits your workload, then adjust it if the routine is too demanding or too easy to forget.
- Simplify the system around your work style: A coach can help you notice whether you need more visible storage, fewer categories, or a different reset time. Someone who switches tasks frequently may benefit from a particularly simple front zone, while a person handling paperwork may need a better place for temporary notes. The point is to build a routine that supports real behavior.
You do not need coaching to organize a single drawer, and a coach cannot substitute for making basic storage decisions. But outside accountability can be useful when clutter is one piece of a broader struggle with workday routines. The objective remains practical: a setup you can use and maintain without giving it much thought.
Start Tomorrow With Everything You Need Within Reach
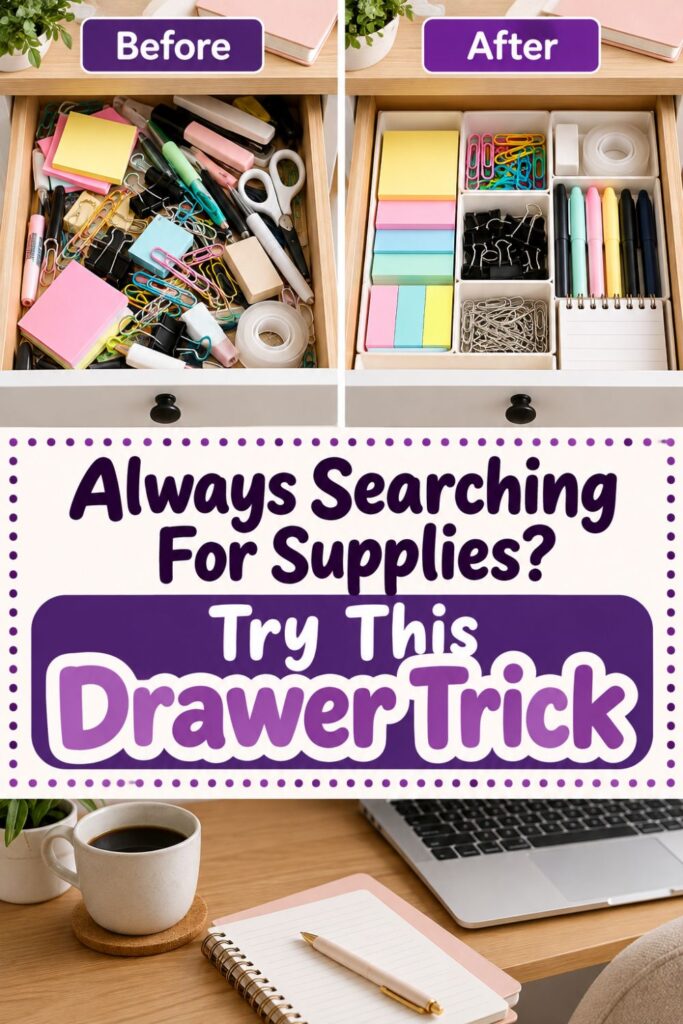
A useful desk drawer is not the one with the most perfectly matched containers. It is the one that gives you the right tool when you need it and makes putting that tool back feel easy. When the system is built around your real workday, organization becomes part of how the space functions rather than a separate chore.
Begin with the most important decision: what deserves a place in the top drawer at all. Keep the items you genuinely use close by and give backups or unrelated objects somewhere else to live. That single choice creates breathing room before a divider ever enters the picture.
From there, let reach and frequency guide the arrangement. Put your most-used tools toward the front, supporting supplies in the middle, and occasional essentials farther back. Use simple compartments to prevent things from mixing, but do not let the containers become more complicated than the supplies they hold.
If you want a quick checklist before your next workday, focus on these actions:
- Clear and choose: Empty the drawer, remove unrelated items, and select the supplies you reach for during ordinary work tasks. Keep only the number of each item that fits comfortably.
- Zone and contain: Give high-use, supporting, and occasional supplies distinct places, using trays or dividers that fit the actual drawer. Leave enough space to pick things up without shifting neighboring objects.
- Reset and refine: Return supplies at the end of the day, do a short weekly cleanout, and adjust any compartment that repeatedly creates friction. Treat the first layout as a useful starting point rather than a permanent rule.
You can make meaningful progress with supplies and containers you already own. There is no need to wait for an ideal organizer, an empty weekend, or an entirely redesigned office. Start with one drawer and let the next few workdays show you what truly belongs there.
The most satisfying result is not opening a flawless drawer once. It is opening a dependable one again tomorrow, finding what you need without searching, and closing it knowing that everything has an easy place to return.
If you want to get more from your life, and are looking for concrete action steps to get you there, check out our Request a Coach page. It’s a “cut the fence-sitting and take action” way to tackle your issues and actually find success. To get off the fence and start to take action, click or tap here.
*****
Are you all about style, decor and organization? Download a copy of our Clutter Reset Guide.
Need some in depth help with organization and productivity ? Drop on by our directories choc full of productivity coaches, minimalist coaches, and work/life balance coaches to get your life organized! Or click here to have us match you to the best.
If you want to get more from your life, and are looking for concrete action steps to get you there, check out our Request a Coach page. It’s a “cut the fence-sitting and take action” way to tackle your issues and actually find success. To get off the fence and start to take action, click or tap here.
Read this next

Which Christmas Decor Style Fits You Best? Elegant, Minimalist, Cozy, or Rustic
Are you all about style, decor and organization? Download a copy of our Decluttering Workbook. Your Holiday Style Is About More Than Décor Every December, the same question quietly returns: […]
Read More
How to Get Vision Board Inspiration Without Looking at Images First
Start your 2026 vision board with clarity, not random images. This simple reset shows how to choose direction before inspiration.
Read More
Aesthetic Desk Organization Ideas That Still Feel Practical
Are you all about style, decor and organization? Download a copy of our Clutter Reset Guide. ***** Create a desk that looks beautiful on the surface but still keeps daily […]
Read More