


Talk to a coach about Organizational coaching

Crystal Faulk
ACC
I help overwhelmed women in transition gain clarity, confidence, and...

Terrie Hein
Certified Life Coach, Certified Insight Coach Practitioner
Coaching to declutter your life, organize your goals, and cook...

Dr Charlene Ashley
Doctorate - Behaviours
I coach individuals to design fulfilling lives through structure, clarity,...

Paloma Chiara

Lana's Gymnastics Club
"Where the best in gymnastics meets fun. Where every child is a star"
lgclubny.com

Anna Sosnina
ICF (ACC)
ICF ACC certified coach, founder of EssorVie Coaching, passionate about...

Tyler Fink
B.A. in Religion, Anthropology, and Philosophy. Master of Divinity (M.Div.) in Missiology
Pastor, husband, and father helping Christian men pursue faithful growth...

Travis Brown
Professional Life coach
With experience in guiding clients to achieve goals, build confidence,...

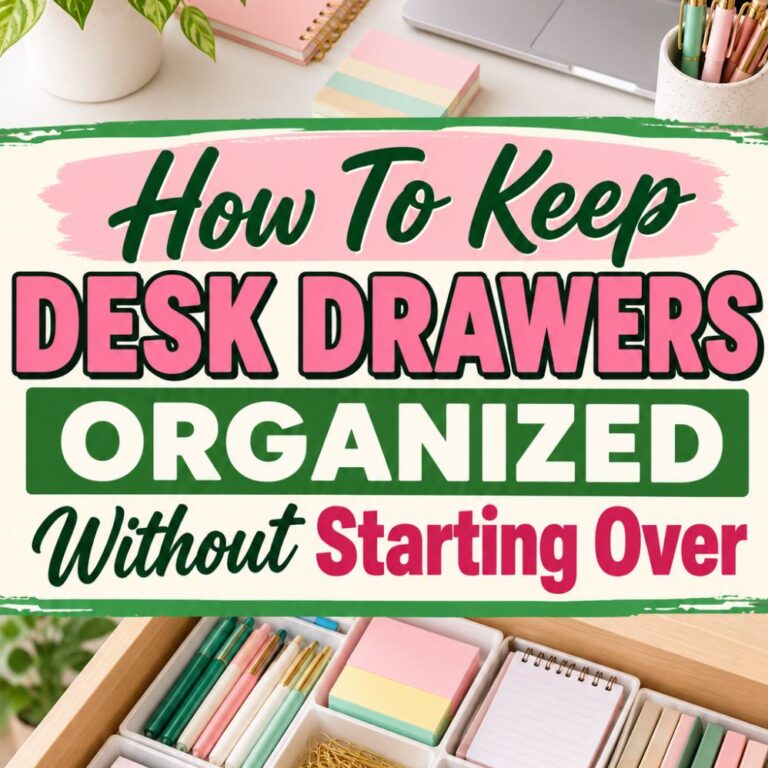


No-Mess Pen and Pencil Drawer System
Are you all about style, decor and organization? Download a copy of our Clutter Reset Guide.
*****
Why Your Pen Drawer Keeps Turning Into a Mess
You open your desk drawer to grab a pen, and somehow the one you want is buried beneath six others. A highlighter has lost its cap, two pencils are rolling around, and the pen that looks promising has stopped working. It is a tiny interruption, but it happens often enough to make your workspace feel harder to use.
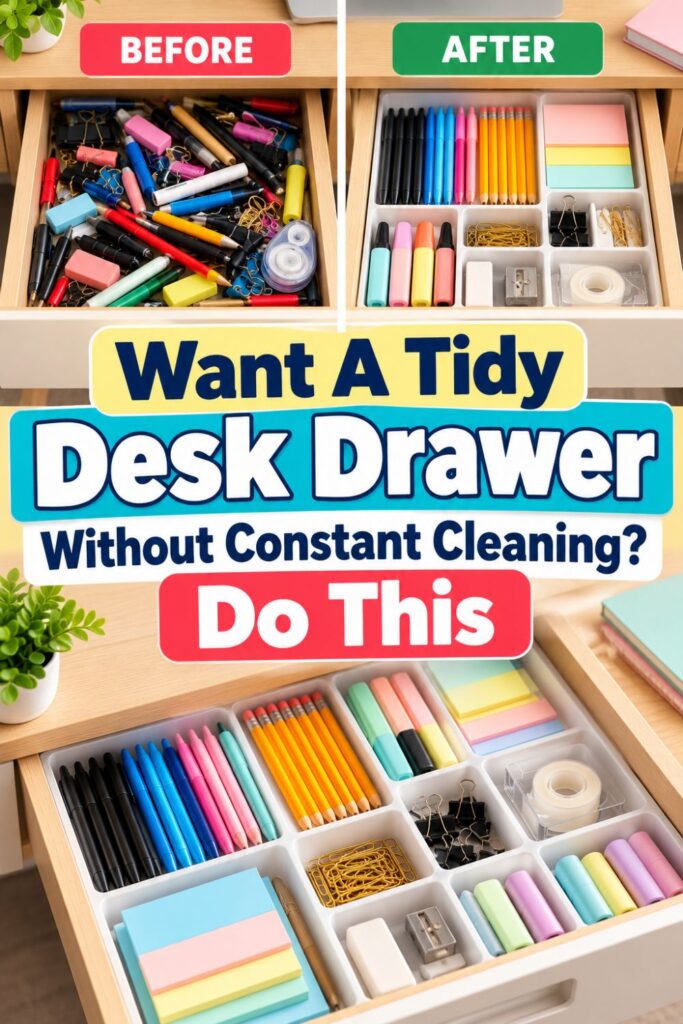
The usual fix is to buy a drawer organizer, line up everything neatly, and hope it stays that way. Sometimes it does, for a few days. Then the same loose pile returns because the organizer changed where the supplies sit without changing how you use them.
A lasting pen and pencil drawer system starts with two questions: What kind of tool is this? and How often do I reach for it? The answers tell you which supplies belong together and which deserve the easiest spots in the drawer. You do not need an expensive insert or a perfectly matched stationery collection.
Here is what the system is designed to do:
- Make everyday tools easy to grab: Your favorite writing pens and pencils should be visible as soon as you open the drawer, without lifting a tray or moving other supplies first.
- Stop categories from mixing: Pens, pencils, highlighters, and specialty markers need clear boundaries so they cannot roll into one growing pile every time the drawer opens.
- Keep backup supplies out of the way: Extra packs and rarely used tools need a home, but not in the valuable space reserved for the items you use daily.
- Make putting things back almost automatic: A useful compartment should be just as easy to return a pen to as it is to take one out of.
The steps below walk you through clearing the drawer, choosing a layout, arranging each category, and testing whether your setup works during an ordinary week. The goal is not a drawer that looks untouched. It is a drawer you can use repeatedly without having to organize it all over again.
Need some in depth help with organization and productivity ? Drop on by our directories choc full of productivity coaches, minimalist coaches, and work/life balance coaches to get your life organized! Or click here to have us match you to the best.
If you want to get more from your life, and are looking for concrete action steps to get you there, check out our Request a Coach page. It’s a “cut the fence-sitting and take action” way to tackle your issues and actually find success. To get off the fence and start to take action, click or tap here.
Step 1: Empty Your Drawer and Find Out What’s Actually Worth Keeping
Before you decide where anything should go, remove everything from the drawer. Yes, even the paper clips in the corner and the mysterious pen cap with no pen attached. Starting with an empty space makes it easier to see the actual problem instead of rearranging the same clutter into slightly neater piles.
Spread a towel or sheet of paper on your desk and place the contents there. Keep a scrap sheet nearby for testing ink. This is a sorting job, not an invitation to overhaul your entire office, so stay focused on the one drawer.
- Sort writing tools by type: Put ballpoint pens, gel pens, pencils, mechanical pencils, highlighters, and specialty markers into separate groups. Make another small pile for erasers, sharpeners, lead refills, and other accessories that support writing.
- Test what still works: Scribble with every pen and marker, checking for reliable ink flow rather than keeping something because it might work someday. Check pencils for usable length and inspect mechanical pencils for jammed or damaged mechanisms.
- Remove obvious clutter: Discard dried-out pens, broken items, pencil shavings, and packaging you no longer need. Recycle suitable materials where local options exist, and set aside usable surplus supplies to donate or share.
- Choose favorites, not just quantities: If you own twelve black pens but regularly reach for the same two, keep those within easy reach. Set extra working pens aside for a backup supply area instead of filling the main drawer.
- Clean the drawer itself: Wipe away dust, ink residue, and graphite marks with a suitable cloth, then let the interior dry. A clean base helps removable liners and organizers sit properly without trapping grit underneath.
At this point, resist the urge to put things back. Seeing the full collection outside the drawer is useful information. It shows which categories are genuinely important and which have been occupying space simply because there was nowhere else to put them.
Step 2: Use the Three-Level Frequency Test to Decide What Stays
Sorting by type solves only half the puzzle. If your favorite ballpoint sits behind a collection of art markers you use once a month, the drawer will still frustrate you. The second sorting rule is frequency: how often you actually reach for a tool during your normal day.
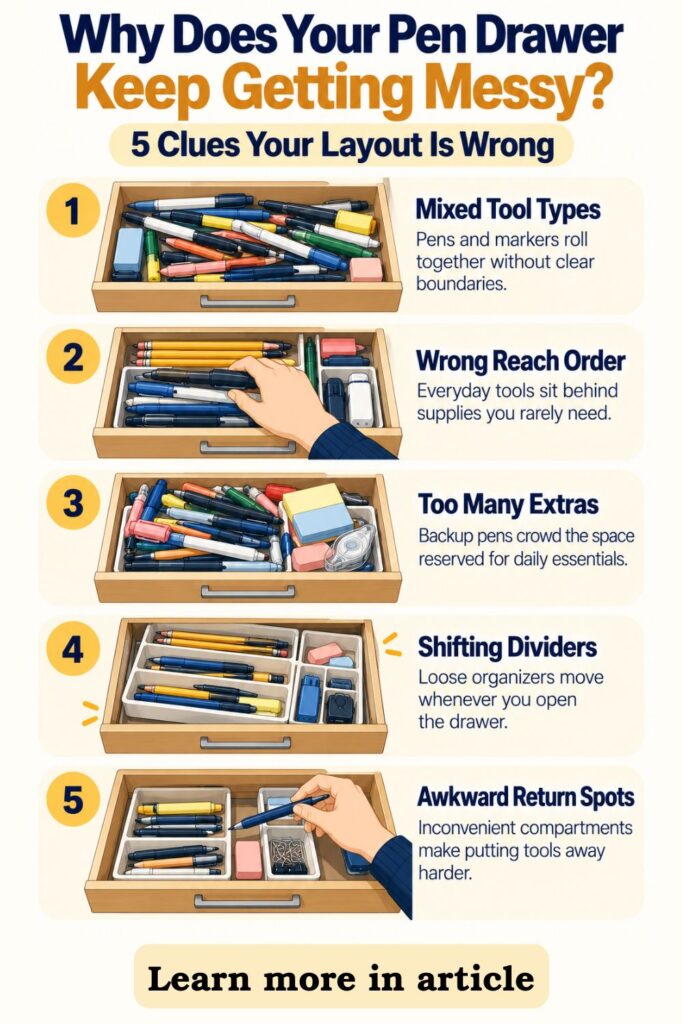
Make three groups on the desk: daily, occasional, and backup. Use your recent habits as evidence. A pen you love but have not touched in months does not automatically qualify as an everyday essential just because it looks nice.
- Build your daily-use group: Choose the pens and pencils you use for notes, planners, homework, signatures, or regular work. Keep this group small enough that you can identify and grab the tool you need at a glance.
- Identify occasional-use tools: Place highlighters, colored pens, permanent markers, and specialty writing tools here if they support specific tasks rather than your everyday routine. They deserve organized storage, but not the most convenient drawer positions.
- Separate genuine backups: Put extra working pens, unopened refills, replacement erasers, and spare pencil leads into a third group. A backup is useful because it is available when needed, not because it stays beside every pen in active use.
- Notice repeated exceptions: If you highlight documents every afternoon, your highlighter belongs in the daily group even if someone else’s would be occasional. Let your own workflow determine priority instead of following a generic stationery checklist.
- Decide what belongs elsewhere: If the drawer is shallow or narrow, move bulky spare packs or seldom-used art supplies to a labeled box or another storage spot. Protect the space for tools you reach for while seated at your desk.
This simple test prevents a common organizing mistake: giving equal access to items with very different jobs. You are not ranking which supplies matter most overall. You are choosing which ones need to be available within seconds and which can live one step farther away.
Step 3: Build a Drawer Zone Map Before Buying Any Organizers
An organizer that looks perfect in a product photo can be frustrating in your actual desk. Its compartments may be too short for pencils, too deep for small erasers, or too wide to fit the drawer. Before purchasing anything, map out the space you have and the tool groups you need to store.
Measure the inside of the drawer with a ruler or tape measure. Record usable width, front-to-back depth, and interior height, then check whether the drawer has rails, rounded corners, or a lip that changes what will fit. Close the drawer gently to confirm how much clearance an organizer would need.
If you want to get more from your life, and are looking for concrete action steps to get you there, check out our Request a Coach page. It’s a “cut the fence-sitting and take action” way to tackle your issues and actually find success. To get off the fence and start to take action, click or tap here.
- Sketch a simple top-down map: Draw a rectangle for the drawer and mark the front edge closest to your chair. You do not need a scale drawing, just a clear plan that distinguishes the easiest-to-reach areas from the back.
- Reserve the front for daily tools: Give favorite pens and pencils the nearest compartments. Leave occasional highlighters or markers farther back so they remain available without interrupting your everyday grab-and-return routine.
- Plan by category and dimensions: Allow long enough spaces for full-length pencils and narrow enough sections to keep pens from rolling sideways. Small erasers and refills may need tiny cups or compartments rather than long channels.
- Leave working room around each group: Do not plan a tray so tightly packed that your fingers cannot lift a pen without shifting the others. A little unfilled space makes the system faster and easier to maintain.
- Test the layout with temporary boundaries: Arrange small boxes, folded cardstock, or existing trays in the empty drawer to simulate the zones. Put a few tools inside and check that the drawer closes and everything remains reachable.
Think of this as a trial layout, not a permanent commitment. Your sketch helps you buy fewer unnecessary organizers and exposes problems while they are still easy to fix. The next step is choosing dividers that support the map rather than forcing the map to fit the dividers.
Step 4: Choose Dividers That Stop Pens and Pencils From Mixing
The best drawer organizer is not necessarily the one with the most compartments. It is the one that gives each tool type a sensible boundary and stays put when the drawer moves. A simple set of trays can work better than an elaborate insert if the trays match your supplies.
Start with what you already own. Shallow boxes, small containers, and spare desk trays may provide enough separation at no cost. When using repurposed containers, check that the edges are smooth and that the height will not interfere with closing the drawer.
- Match the divider to your drawer: Use low-profile trays in shallow drawers and adjustable dividers where the width or depth makes fixed inserts awkward. Check interior dimensions, not just the advertised size of the organizer.
- Give long tools enough room: Test your longest pencil or marker before choosing a compartment. When a pencil must sit diagonally or sticks over a divider, the arrangement becomes harder to use and may jam the drawer.
- Limit oversized mixed sections: One giant tray labeled “pens” allows the same rolling, crossing, and hiding that caused the original pile. Use narrower channels or separate cups when distinct categories need their own boundaries.
- Keep small supplies contained: Put erasers, spare leads, and sharpeners in a small compartment rather than leaving them in gaps around the trays. These little pieces are usually the first items to migrate across the drawer.
- Stop inserts from sliding: Choose a snug arrangement or add a removable nonslip drawer liner beneath loose trays. Open and close the drawer several times to make sure the compartments hold their positions during normal movement.
Avoid creating more divisions than your routine can support. If two kinds of everyday pens are used interchangeably, they may share a compartment. Clear categories matter more than perfect symmetry. The finished setup should look straightforward enough that someone else could put a borrowed pen back in the right area without a long explanation.
Step 5: Arrange Writing Tools by Type and Reach Priority
Now you can combine the two rules into one working drawer: type determines which tools share a section, and frequency determines where that section goes. This step is where a collection of separated supplies becomes a system that actually saves time.
Sit at your desk as you normally would and open the drawer. Notice which corner your hand reaches first and how far you can comfortably reach without standing or shifting your chair. That is your highest-priority storage area, even if it is not the most visually balanced spot.
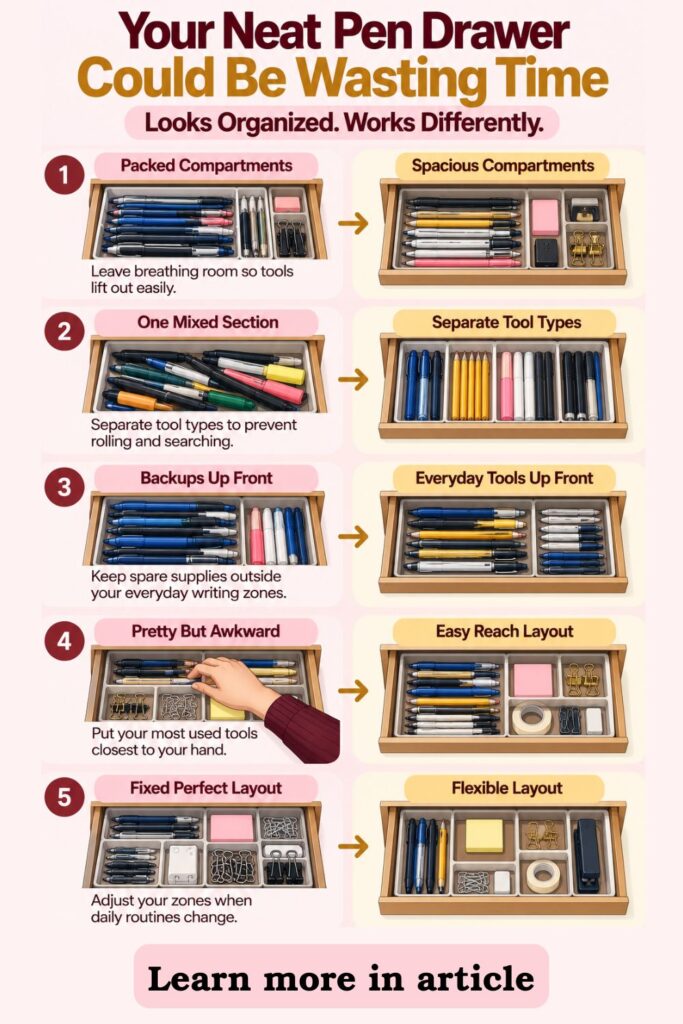
- Set up an everyday pen lane: Place the small group of pens you reach for most often near the front. If black and colored pens serve different daily purposes, use adjacent sections so each type remains easy to identify.
- Create a dedicated pencil lane: Keep wooden or mechanical pencils together in a nearby channel. Put the eraser, lead refills, or sharpener in a small neighboring compartment so the supplies needed for pencil tasks stay connected.
- Place occasional tools farther back: Give highlighters, markers, and specialty pens their own compartments behind or beside the everyday zones. Separate them by type only as much as your normal tasks require.
- Keep backup supplies out of active lanes: Resist topping off each compartment with every duplicate you own. Leave enough room for tools to rest flat and for your fingers to pick up a single item easily.
- Test a real writing task: Pretend you are taking notes, highlighting a page, and correcting a pencil mark. Retrieve and return each tool while seated, then move any compartment that creates awkward reaching or unnecessary searching.
A useful layout does not have to be identical from one desk to another. Left-handed and right-handed users may prefer different front corners, and a student may reach for pencils more often than a remote worker. Arrange the drawer around your actual movement, not an idealized photograph.
Step 6: Create a Backup Supply System That Prevents Overflow
Even a thoughtfully divided drawer can fall apart when spare pens slowly fill every open space. A new pack goes in, then a few promotional pens arrive, and before long the daily-use lane becomes a storage area for duplicates. The easiest protection is to separate active supplies from reserves.
If you want to get more from your life, and are looking for concrete action steps to get you there, check out our Request a Coach page. It’s a “cut the fence-sitting and take action” way to tackle your issues and actually find success. To get off the fence and start to take action, click or tap here.
Choose a modest backup container outside the main drawer. It might be a labeled box on a shelf, a small bin in a cabinet, or a separate supply drawer if you have one. The important part is that it is easy to find but does not compete with the tools you use every day.
- Set limits for active supplies: Decide how many pens and pencils belong in the working drawer based on the space and your habits. Keep a few dependable choices rather than using every inch of the compartment simply because you can.
- Store unopened packs together: Place spare pens, replacement pencils, leads, and erasers in the backup container. Keep similar supplies together so you can check what you already own before buying more.
- Replace instead of piling on: When a working pen runs dry or a pencil becomes unusable, remove it and bring one replacement from backup. Avoid adding new supplies on top of old ones without clearing space first.
- Handle unexpected extras immediately: If you receive free pens or buy a multipack, test what needs testing and put the surplus directly in backup storage. Do not drop extras into the drawer as a temporary holding area.
- Check stock before shopping: Look through your reserve supplies before purchasing replacements. This prevents duplicate buying and keeps the backup container from becoming a second unmanageable pile.
If the backup box overflows, it is a signal to review what is worth keeping, not to find a bigger box automatically. You can donate usable extras where appropriate or reduce future purchases. Your main drawer stays functional when backup storage acts as a supply source rather than an extension of the clutter.
Step 7: Make the Drawer Easy to Reset in Under Two Minutes
A well-designed drawer still needs occasional attention, especially during busy days. Pens will be returned to the wrong section, pencils may leave shavings, and supplies may collect after meetings or schoolwork. The difference is that a simple system can be restored quickly without emptying the drawer again.
Think of maintenance as a tiny part of using the workspace, not a separate weekend project. The quickest reset happens when each item has an obvious home and compartments are not packed to the edges. If putting a pen away requires rearranging the tray, the design needs adjusting.
- Return tools to their zones: When you finish writing, drop the pen or pencil into its designated compartment rather than any available space. Aim for the right section, not a perfectly straight row of supplies.
- Add labels only where helpful: Use small removable labels for easily confused categories, especially in a shared desk. Skip labels when the contents are already obvious, because the system should feel easy rather than overly formal.
- Make a weekly two-minute check: At the end of a workweek, place stray tools back in their sections, remove waste, and check for dried-out pens. Handle only the drawer rather than expanding the task to the whole room.
- Watch for crowding: If one section repeatedly fills beyond its intended limit, move excess tools to backup or widen that zone. Crowding is useful feedback about whether the layout still matches your habits.
- Refresh the setup when routines change: A different class, work assignment, or hobby may change which tools you need daily. Update the front-row compartments instead of expecting an old arrangement to suit a new schedule.
The two-minute reset is not a test of discipline. It is a check that the drawer remains easy to use. When returning supplies takes little thought, mess is less likely to build up, and even a busy week will not require another complete organization session.
What to Change When Your Organized Pen Drawer Starts Falling Apart Again
Suppose you followed every step and, a week later, the drawer is messy again. That does not necessarily mean you need stricter rules or a better-looking organizer. It may mean your layout is asking you to do something that does not fit how you work.
Treat the recurring mess as a clue. Look at where objects actually land and which compartments stay neat without effort. These patterns can show you what to change much faster than repeating the entire cleanout.
- Find the first trouble spot: Notice whether the pen lane overflows, the eraser cup collects random items, or highlighters migrate to the front. Work on the section that breaks down first rather than redesigning every part of the drawer.
- Reduce categories that feel fussy: If you constantly mix gel and ballpoint pens because you use them interchangeably, combine them into one everyday pen zone. A system with fewer meaningful categories can be easier to maintain.
- Move the problem item closer: If a marker is always dropped in the front because its actual compartment is hard to reach, reconsider its placement. The tool may be used more often than you originally expected.
- Check whether the compartments themselves shift: If trays slide when the drawer opens, the neat layout can unravel without anyone putting things back incorrectly. Add a nonslip liner or adjust the fit before changing the sorting system.
- Test one change for a full week: Widen a busy section, move a commonly used tool, or remove one unnecessary divider. Observe whether the problem improves before making more adjustments.
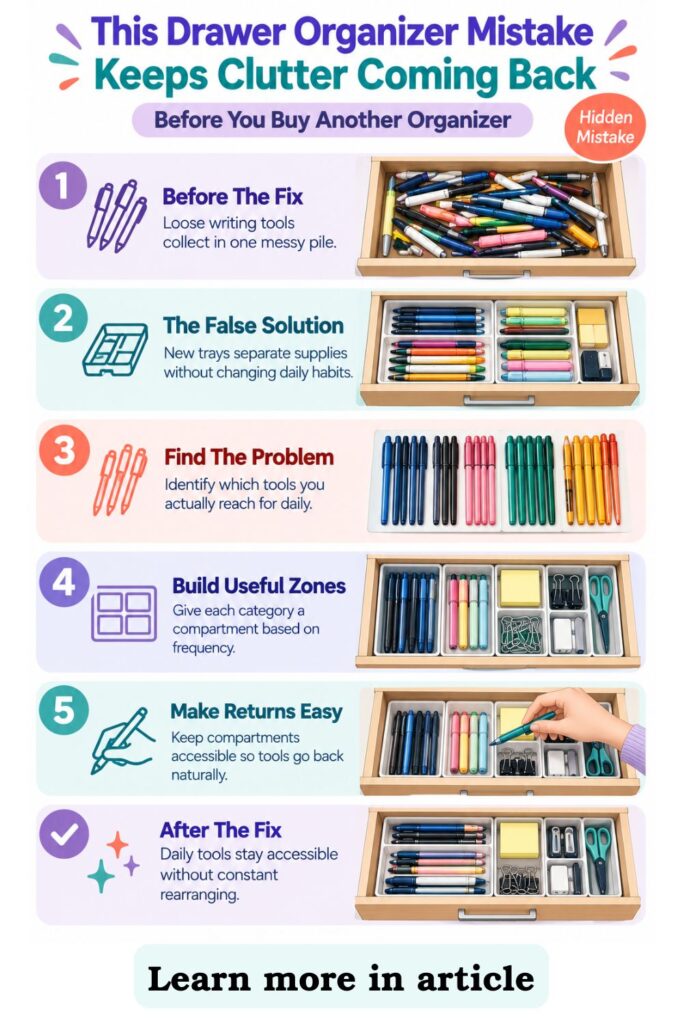
A working organization system is allowed to evolve. Your goal is not to enforce an arrangement that seemed logical on day one. It is to create the easiest possible path between using a writing tool and returning it to its home. When a drawer repeatedly fights that process, change the drawer system, not just your intentions.
If you want to get more from your life, and are looking for concrete action steps to get you there, check out our Request a Coach page. It’s a “cut the fence-sitting and take action” way to tackle your issues and actually find success. To get off the fence and start to take action, click or tap here.
How an Organization Coach Can Help You Build Systems That Actually Stick
Sometimes the pen drawer is one small example of a larger pattern. You organize the desk, then it fills up again. The same thing happens with paperwork, computer accessories, or supplies for different projects. When that cycle is frustrating, an organization or productivity coach may help you look beyond the drawer itself.
A coach does not have to prescribe a perfect storage product or a rigid routine. Their value may come from helping you notice the habits, decisions, and working conditions that make your organization efforts difficult to maintain. The aim is to design a manageable process that fits the way you actually live and work.
- Identify where systems break down: Talk through when the drawer becomes messy and what tends to happen immediately beforehand. You may discover that rushed transitions between tasks, shared supplies, or unclear storage locations create repeat problems.
- Set a specific, realistic goal: Instead of deciding to “be more organized,” choose a visible result, such as keeping everyday pens in one easy-access section for the next two weeks. A clear goal makes progress easier to assess.
- Build a return habit into existing routines: Link the quick drawer reset to something you already do, such as closing your laptop or packing up after class. This can reduce the need to remember a separate organizing task.
- Use check-ins to refine the system: Review which steps feel natural and which create resistance. A coach can help you adjust the routine and focus on workable changes rather than treating a messy week as a total failure.
- Apply the lesson to other spaces: Once the pen system feels easy, use the same questions about type, frequency, and return effort to organize paper supplies, charging cables, or another frequently used drawer.
You can also use these coaching-style questions on your own. What do I reach for most? What makes putting it away inconvenient? What is one change I can test this week? A useful organizing habit starts with honest observation, not a demand for a flawless desk.
A Pen Drawer That Stays Organized Starts With One Simple Rule
A tidy pen drawer is not really about making all the supplies line up. It is about being able to find what you need and put it back without thinking twice. When you can open the drawer, choose the right writing tool, and get on with your work, the system is doing its job.
The most important decision is simple: give each tool a home according to its type, then choose that home’s location according to how often the tool is used. Those two rules take much of the guesswork out of arranging pens, pencils, markers, and the small accessories that tend to disappear beneath them.
If you are starting today, keep the first reset straightforward:
- Empty and test the contents: Remove everything, check which writing tools still work, and set aside broken items or supplies that do not belong in the drawer. This gives you an honest starting point.
- Sort by use, not just appearance: Divide working tools into daily, occasional, and backup groups. Your favorite everyday pen deserves more convenient storage than a collection of markers you rarely need.
- Create a few dependable zones: Use trays or dividers to keep pens, pencils, and small accessories separate. Choose compartments that fit both the drawer and the supplies without making retrieval awkward.
- Protect the everyday compartments: Keep extra packs and rarely used tools in a different storage spot. Leave enough space that taking out and returning a pen remains comfortable throughout the week.
- Review instead of restarting: Spend a couple of minutes returning strays and noticing which sections fill too quickly. Adjust one troublesome zone rather than treating every messy day as a reason to begin again.
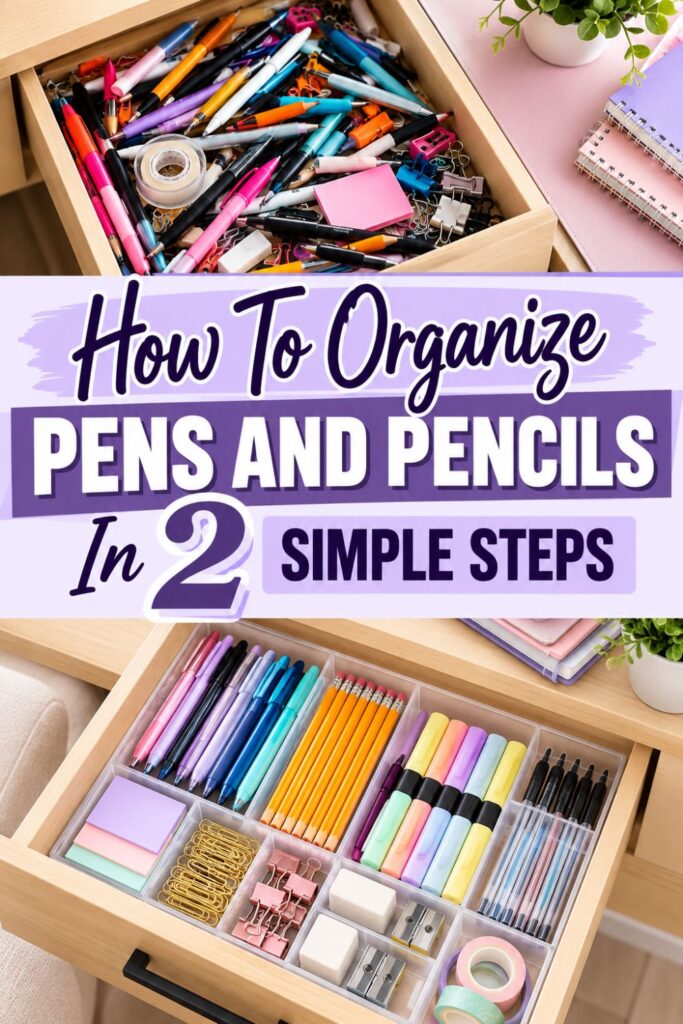
Give the drawer an ordinary workweek before deciding whether the layout needs improvement. Pay attention to what your hand reaches for and where supplies naturally end up. Small changes based on real use are more valuable than buying a new organizer whenever things look untidy.
You do not need a picture-perfect drawer. You need a reliable place for the tools that help you think, plan, learn, and work. Start with one drawer, keep the categories clear, and make the easiest action the organized one.
If you want to get more from your life, and are looking for concrete action steps to get you there, check out our Request a Coach page. It’s a “cut the fence-sitting and take action” way to tackle your issues and actually find success. To get off the fence and start to take action, click or tap here.
*****
Are you all about style, decor and organization? Download a copy of our Clutter Reset Guide.
Need some in depth help with organization and productivity ? Drop on by our directories choc full of productivity coaches, minimalist coaches, and work/life balance coaches to get your life organized! Or click here to have us match you to the best.
If you want to get more from your life, and are looking for concrete action steps to get you there, check out our Request a Coach page. It’s a “cut the fence-sitting and take action” way to tackle your issues and actually find success. To get off the fence and start to take action, click or tap here.
Read this next

10 Cozy Burr Basket Ideas Under $30 To Warm You Up on Cold Days
There’s something special about giving a gift that feels like a hug. Burr baskets — simple bundles of cozy, comforting items — are the perfect way to show care when […]
Read More
Budget-Friendly DIY Organization Hacks: How to Save Big with Clever Tricks
We all dream of a Pinterest-worthy home where every item has its place, but getting organized can often feel expensive. Between custom storage bins, acrylic drawer systems, and built-in shelving, […]
Read More
Spring Clean Your Life!
Get in there and you deep clean everything!
Read More