


Talk to a coach about Organizational coaching

Crystal Faulk
ACC
I help overwhelmed women in transition gain clarity, confidence, and...

Terrie Hein
Certified Life Coach, Certified Insight Coach Practitioner
Coaching to declutter your life, organize your goals, and cook...

Dr Charlene Ashley
Doctorate - Behaviours
I coach individuals to design fulfilling lives through structure, clarity,...

Paloma Chiara

Lana's Gymnastics Club
"Where the best in gymnastics meets fun. Where every child is a star"
lgclubny.com

Anna Sosnina
ICF (ACC)
ICF ACC certified coach, founder of EssorVie Coaching, passionate about...

Tyler Fink
B.A. in Religion, Anthropology, and Philosophy. Master of Divinity (M.Div.) in Missiology
Pastor, husband, and father helping Christian men pursue faithful growth...

Travis Brown
Professional Life coach
With experience in guiding clients to achieve goals, build confidence,...

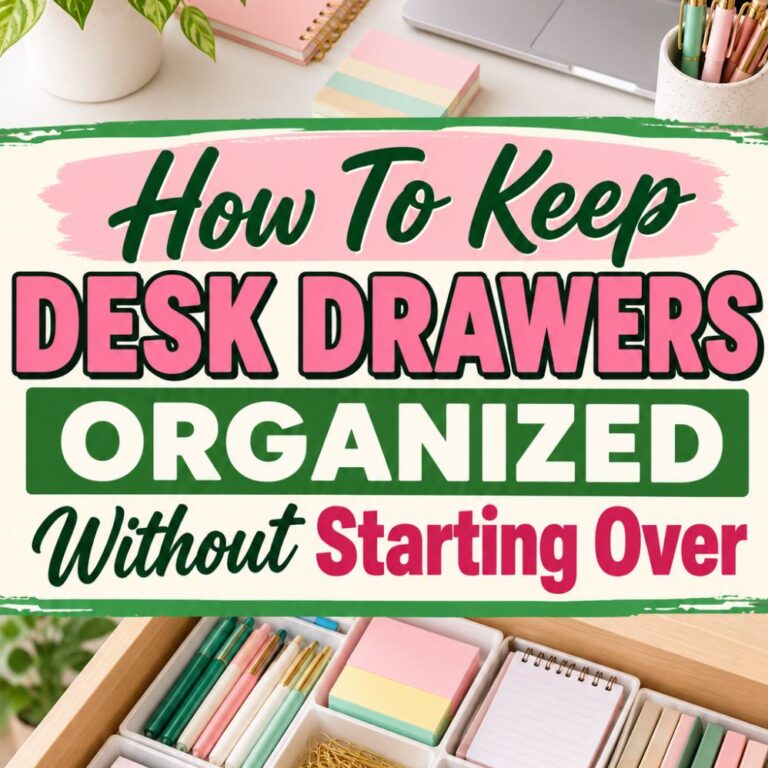


Label-First Drawer System for Shared Office Supplies
Are you all about style, decor and organization? Download a copy of our Clutter Reset Guide.
*****
Why Shared Office Drawers Keep Turning Into Junk Drawers
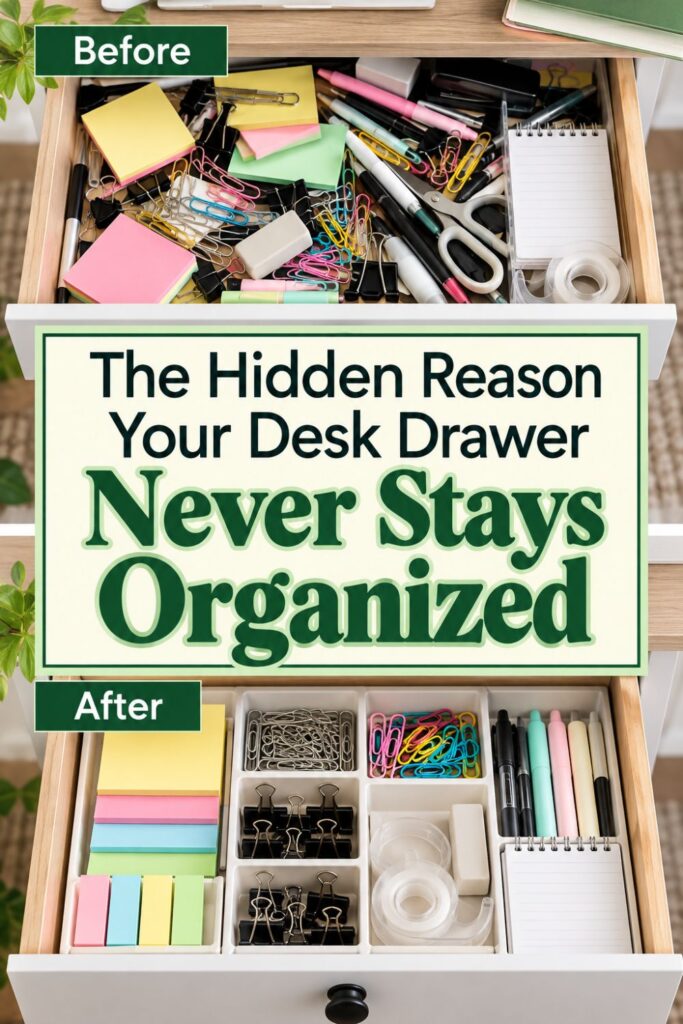
You open the office supply drawer looking for a pen, but instead find a pile of paper clips, dried-out markers, loose sticky notes, and three rolls of tape buried underneath everything. Someone organized it last month, yet somehow the mess has returned. If several people use the same drawer, this probably sounds familiar.
The problem usually isn’t that people are careless. It’s that everyone has a slightly different idea of where things belong. One person puts scissors beside the pens, another drops them near the tape, and someone else leaves them wherever there’s room.
Traditional drawer organization often starts with buying trays or dividers. You fit the organizers into the drawer, distribute the supplies, and hope everyone remembers the arrangement. It looks beautiful on day one, but the system depends on people knowing where the original organizer intended everything to go.
A label-first drawer system reverses that process. Instead of organizing first and labeling afterward, you decide what belongs in each section, give that section a clear name, and then build the storage layout around those labels.
This small change makes a surprisingly big difference in shared spaces. When each supply has a clearly marked home, people no longer need to guess where something belongs.
The method works especially well for:
If you want to get more from your life, and are looking for concrete action steps to get you there, check out our Request a Coach page. It’s a “cut the fence-sitting and take action” way to tackle your issues and actually find success. To get off the fence and start to take action, click or tap here.
- Shared offices where several coworkers use the same supplies.
- Home offices shared by partners, roommates, or family members.
- Reception desks and administrative workstations.
- Small business offices with limited storage space.
- Classroom supply drawers and communal work areas.
You don’t need expensive drawer organizers or a perfectly coordinated set of storage containers. A few basic dividers, readable labels, and a clear understanding of what everyone uses are enough to get started.
The goal isn’t to create a drawer that looks perfect in a photograph. It’s to build a system that stays functional on a busy Tuesday afternoon, even when five different people have opened it.
Here’s how to make that happen.
Need some in depth help with organization and productivity ? Drop on by our directories choc full of productivity coaches, minimalist coaches, and work/life balance coaches to get your life organized! Or click here to have us match you to the best.
1. Empty the Drawer and Identify What Everyone Actually Uses
Before creating labels or purchasing organizers, you need to understand what’s actually living inside the drawer. Shared drawers often collect much more than everyday office supplies, including personal belongings, broken tools, and items nobody uses anymore.
Start by removing everything. Don’t try to organize one corner at a time because you’ll miss the duplicates and misplaced objects hiding underneath larger supplies.
Spread the contents across a desk or table where you can see everything clearly. This gives you an opportunity to understand how the drawer is currently being used before deciding how it should work.
- Start with a complete drawer reset: Remove every item, including loose staples, old sticky notes, and anything tucked into existing organizers. Wipe down the empty drawer and check whether any old dividers are damaged or taking up unnecessary space.
- Separate shared supplies from personal belongings: Create one pile for communal items such as pens, scissors, tape, and paper clips. Move personal chargers, private documents, notebooks, and other belongings to their appropriate locations so the drawer serves its intended purpose.
- Sort supplies by everyday usefulness: Divide communal items into daily essentials, occasional-use tools, excess stock, and things that need to be discarded. Test questionable pens, remove empty packaging, and check whether damaged supplies are worth keeping.
- Check what everyone actually reaches for: Ask coworkers which supplies they use most frequently and whether something important is consistently missing. This helps prevent one person’s preferences from determining a layout that everyone else finds inconvenient.
Pay special attention to duplicates. A drawer might contain twelve highlighters when only three are needed for daily use, or several half-used tape rolls that could be consolidated.
If you want to get more from your life, and are looking for concrete action steps to get you there, check out our Request a Coach page. It’s a “cut the fence-sitting and take action” way to tackle your issues and actually find success. To get off the fence and start to take action, click or tap here.
Set aside extras in a separate supply cabinet rather than returning everything to the drawer. Everyday storage works better when there’s enough room to see and retrieve what’s inside.
At this stage, resist the temptation to arrange anything neatly. Your job is simply to identify which items deserve a permanent home and which items shouldn’t be occupying the drawer at all.
Once you know what needs to stay, you can start creating a labeling system that makes sense to everyone.
2. Create Your Label Categories Before Buying Drawer Organizers
Here’s where the label-first method becomes different from ordinary drawer organization. Instead of looking at empty compartments and deciding what fits, you’ll decide which categories the drawer needs before introducing containers or dividers.
Think of your labels as addresses. Every supply needs somewhere specific to live, and that address should make sense to anyone opening the drawer.
Start with a sheet of paper or a few sticky notes. Write down the categories your team needs based on the items you kept during the first step.
- Group supplies by obvious functions: Create categories such as Pens and Pencils, Sticky Notes, Tape, Fasteners, and Small Tools. Group items according to how people recognize and use them rather than creating a separate label for every individual object.
- Write your labels before arranging supplies: Make a temporary label for each proposed category and place the matching supplies beneath it on your work surface. This quickly reveals categories that are too broad, unnecessarily specific, or missing altogether.
- Choose words everyone understands: Avoid personal abbreviations such as Misc Admin or abbreviations that only one employee recognizes. A label reading Paper Clips and Binder Clips communicates its purpose much more clearly than a vague label reading Accessories.
- Combine categories when drawer space is limited: Use broader labels such as Fasteners for paper clips, binder clips, and rubber bands if they can reasonably share a compartment. Keep unrelated items separate when combining them would make supplies harder to locate.
The most important rule is to make labels specific enough to guide someone without being so detailed that maintaining the system becomes complicated.
For example, labeling three different compartments Blue Pens, Black Pens, and Red Pens might be unnecessary in a small office. One Pens compartment may be easier for everyone to maintain.
If you want to get more from your life, and are looking for concrete action steps to get you there, check out our Request a Coach page. It’s a “cut the fence-sitting and take action” way to tackle your issues and actually find success. To get off the fence and start to take action, click or tap here.
On the other hand, grouping scissors, tape, pens, and paper clips under Office Supplies provides almost no guidance because everything in the drawer fits that description.
Aim for a handful of practical categories that reflect actual usage.
Before moving forward, test your labels with someone who didn’t create them. Ask where they would put a stapler, a loose binder clip, or a fresh pack of sticky notes.
If they hesitate, adjust the categories now. Clear labels are the foundation of the entire system.
3. Map the Drawer Around Labels Instead of Available Compartments
Now that you’ve identified the categories, it’s time to give them physical locations. This is the stage where many drawer organization projects go wrong because people arrange supplies according to whatever compartments happen to be available.
A label-first system works in the opposite direction. You plan where everything should go, then choose or adjust the dividers to support that plan.
Begin by measuring the inside of your empty drawer. Note the usable width, depth, and height, including any space lost to drawer hardware or unusual corners.
- Measure the usable drawer space: Use a ruler or measuring tape to record the internal dimensions rather than relying on the drawer’s outside measurements. Check the height carefully because tall containers and upright supplies can prevent shallow office drawers from closing.
- Arrange temporary labels inside the empty drawer: Place your category labels where you think each group should live, using paper rectangles to represent the approximate compartment sizes. Move the labels around until the layout feels logical before purchasing or installing anything.
- Put daily essentials closest to the front: Reserve the most accessible sections for frequently used pens, sticky notes, and other supplies people reach for throughout the day. Place less-used items such as spare staples or specialty tools farther toward the back.
- Give larger categories enough room: Assign more space to bulky items such as staplers and tape dispensers while reserving smaller sections for paper clips and rubber bands. Avoid making every compartment identical simply because symmetrical layouts look appealing.
Think about how someone will use the drawer during a busy workday.
If you want to get more from your life, and are looking for concrete action steps to get you there, check out our Request a Coach page. It’s a “cut the fence-sitting and take action” way to tackle your issues and actually find success. To get off the fence and start to take action, click or tap here.
If employees constantly reach for sticky notes while answering calls, those supplies should be easy to grab. They shouldn’t need to lift another container or move several objects to reach them.
You can also arrange supplies by task. For example, tape, scissors, and sticky notes might sit near one another if they’re frequently used together.
Once your proposed layout makes sense, try a quick rehearsal. Place the supplies loosely on top of their temporary labels and check whether everything fits comfortably.
Adjust the categories or positions before moving on. This planning stage prevents the frustration of buying organizers that look attractive but don’t support how the drawer is actually used.
4. Build Simple Compartments That Match Your Label Map
With your label map finished, you can finally choose the physical organizers. Because you already know what each section needs to hold, selecting dividers becomes much easier.
You don’t necessarily need to buy anything new. Existing drawer trays, small containers, or adjustable dividers may work perfectly well if they match the layout you’ve planned.
The important thing is that each category has a clear boundary. Labels explain where supplies belong, while compartments help prevent them from drifting into neighboring sections.
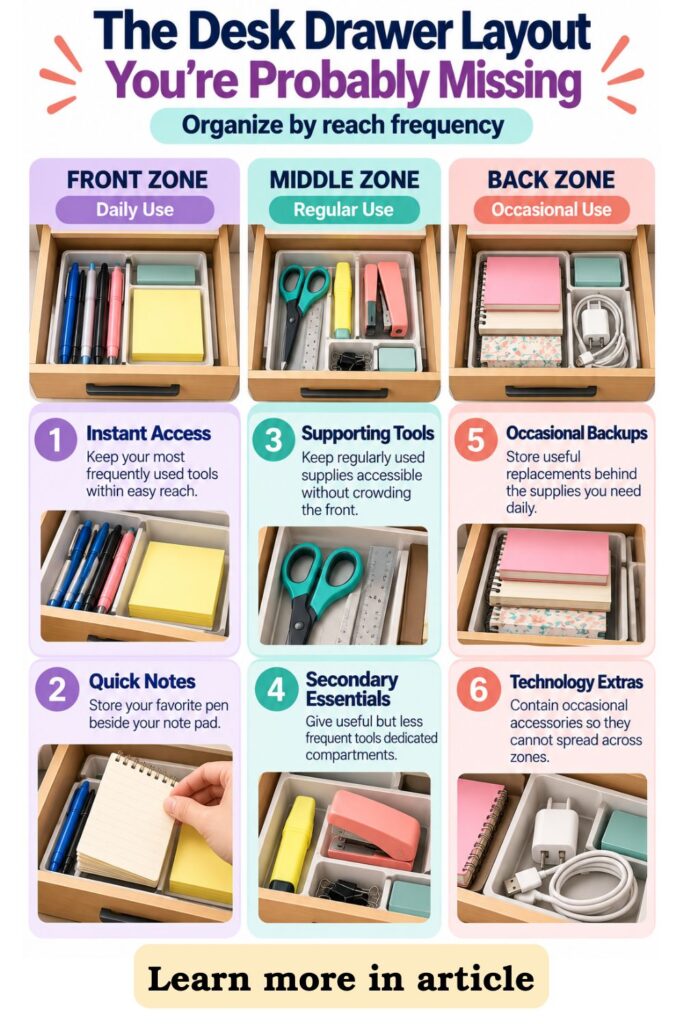
- Choose dividers that fit the planned categories: Look for adjustable drawer dividers, shallow trays, or removable containers that match the sizes you established earlier. Prioritize practical fit, accessibility, and easy cleaning rather than matching colors or purchasing a complete organizer set.
- Create a dedicated section for every label: Position containers so each category has a recognizable home without overlapping neighboring sections. If you use a larger tray with several compartments, make sure the boundaries remain obvious when supplies begin running low.
- Keep small items from mixing together: Use shallow containers for paper clips, pushpins, rubber bands, and other loose items that tend to scatter when a drawer opens. Avoid deep containers that allow small objects to disappear underneath one another.
- Leave enough room to remove supplies easily: Test whether scissors can be lifted without catching on the drawer, sticky notes can be grabbed without digging, and pens can be returned without precise positioning. A compartment that’s packed tightly will become difficult to maintain.
A useful rule is to avoid filling every available inch with organizers. Some breathing room makes it easier to remove items, clean the drawer, and accommodate small changes.
If you want to get more from your life, and are looking for concrete action steps to get you there, check out our Request a Coach page. It’s a “cut the fence-sitting and take action” way to tackle your issues and actually find success. To get off the fence and start to take action, click or tap here.
If you have an unusually shaped drawer, don’t force a standard organizer into it. Mix different container sizes or use adjustable dividers to create sections that better suit the available space.
For a budget-friendly setup, small repurposed boxes can also work as temporary compartments. Just make sure they’re sturdy enough to withstand regular use and don’t slide around excessively.
Once the compartments are installed, compare them with your original label map.
Every category should now have a clearly defined physical location. If something doesn’t fit, adjust the compartment rather than squeezing supplies into a space that was never intended for them.
5. Apply Labels Where Everyone Can See Them
Your drawer now has organized sections, but the most important part of the system is still missing. Without visible labels, coworkers may understand where supplies belong today but forget the arrangement after a few weeks.
This is especially true in shared spaces where employees have different routines. One person might remember that tape belongs beside the stapler, while another assumes it should sit next to the scissors.
Labels remove that uncertainty by making the correct location visible every time someone opens the drawer.
- Place labels at the point of return: Attach each label to the inside front edge of its compartment, the visible rim of a container, or another surface that remains easy to read. Avoid placing labels underneath supplies where they disappear as soon as the drawer is filled.
- Use clear and consistent formatting: Choose short category names and print or write them in a readable size. Keep the style consistent across compartments so employees can scan the drawer quickly instead of interpreting several different labeling formats.
- Choose labels that withstand daily handling: Use durable label tape, removable adhesive labels, or reusable holders that tolerate frequent contact. For shared offices where categories may change, removable labels make adjustments easier without leaving a buildup of adhesive residue.
- Test every label with an unfamiliar user: Ask a coworker who wasn’t involved in organizing the drawer to find and return several supplies. Watch whether they identify the correct compartments immediately or need to stop and think.
You don’t need elaborate decorative labels. Simple black text on a light background is usually enough, particularly inside a drawer where lighting may be limited.
If you want to get more from your life, and are looking for concrete action steps to get you there, check out our Request a Coach page. It’s a “cut the fence-sitting and take action” way to tackle your issues and actually find success. To get off the fence and start to take action, click or tap here.
Avoid labels that are overly clever or vague. A label reading Little Essentials might look appealing, but it doesn’t tell someone whether a stapler, rubber band, or eraser belongs there.
Keep the wording consistent with the categories you established earlier.
If two people interpret a label differently, treat that as useful feedback rather than a mistake on their part. Rename or divide the category until its purpose becomes obvious.
The best labels are the ones people barely need to think about. They make returning supplies feel automatic because the drawer itself communicates where everything belongs.
6. Reload the Drawer Without Overfilling Its Labeled Zones
Once your labels and compartments are ready, it’s time to return the supplies. This may seem like the easiest part, but it’s also where a carefully planned drawer can become overcrowded.
The temptation is to put everything back simply because it was there before. Unfortunately, too many supplies can make even a well-labeled layout difficult to use.
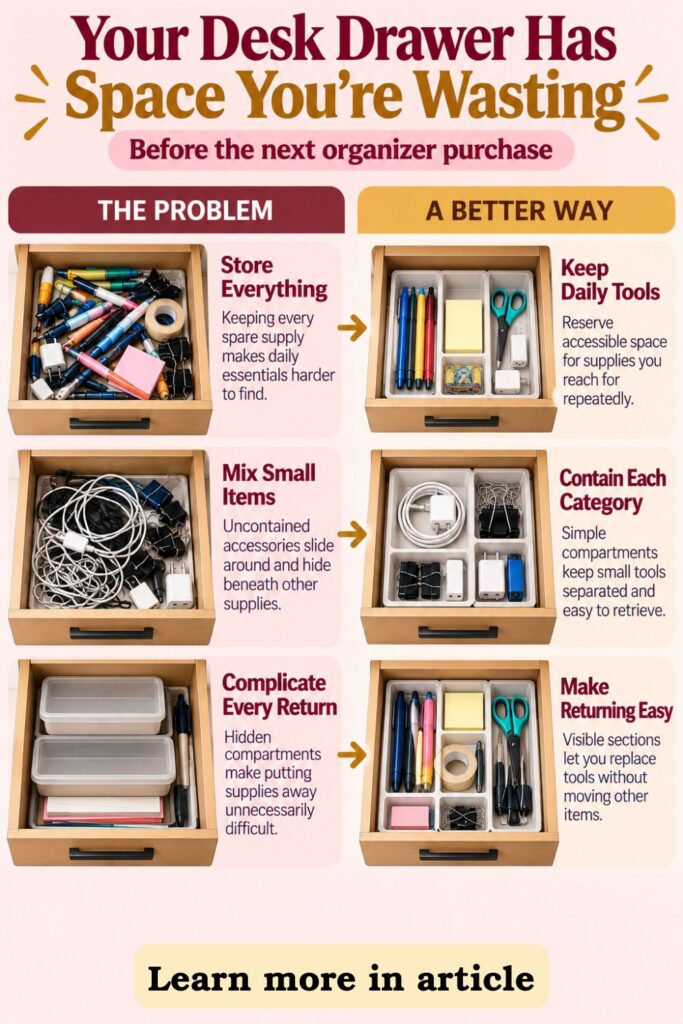
Instead, think of the drawer as an everyday working station rather than the office’s entire supply inventory.
- Match every item to its assigned home: Return supplies one category at a time, placing pens beneath the Pens label, sticky notes in their designated section, and fasteners in their matching container. If an item doesn’t have an obvious destination, reconsider whether it belongs in the drawer.
- Set a practical quantity limit: Keep enough supplies for everyday needs without filling compartments to their maximum capacity. For example, a small shared office might need a handful of working pens rather than several unopened boxes occupying the same section.
- Move backup supplies somewhere separate: Store unopened packages, excess tape, extra notebooks, and bulk stationery in a supply cabinet or designated stock area. This keeps the drawer focused on immediate access rather than long-term storage.
- Check the finished layout in action: Open and close the drawer several times, remove commonly used supplies, and return them to their labeled homes. Confirm that nothing catches, spills, blocks a label, or requires moving another container to access.
Pay attention to how full each compartment looks. If a category is packed so tightly that items have to be arranged perfectly, there’s a good chance coworkers will stop maintaining it.
If you want to get more from your life, and are looking for concrete action steps to get you there, check out our Request a Coach page. It’s a “cut the fence-sitting and take action” way to tackle your issues and actually find success. To get off the fence and start to take action, click or tap here.
Leave enough space for supplies to be dropped into their sections naturally.
You should also decide what happens when something runs out. Employees need to know whether they can retrieve replacements themselves or should notify the person responsible for ordering supplies.
A simple restocking arrangement prevents empty compartments from becoming temporary storage for unrelated objects.
Finally, take a moment to view the drawer from the perspective of someone using it for the first time.
Can they identify the supplies quickly? Can they put everything away without asking questions?
If the answers are yes, your label-first layout is ready for everyday use.
7. Create a Two-Minute Reset Rule Everyone Can Follow
Even the most carefully labeled drawer needs a maintenance routine. Supplies get used during busy workdays, people are interrupted, and occasionally something ends up in the wrong compartment.
The difference between an organized drawer and a permanently messy one is how quickly the system can recover.
If you want to get more from your life, and are looking for concrete action steps to get you there, check out our Request a Coach page. It’s a “cut the fence-sitting and take action” way to tackle your issues and actually find success. To get off the fence and start to take action, click or tap here.
A complicated cleaning schedule isn’t necessary. A simple two-minute reset, combined with clear expectations, is usually much easier for a team to maintain.
- Make returning supplies part of using them: Establish the expectation that shared items go back into their labeled sections immediately after use. Explain that returning a pen or pair of scissors takes less effort when everyone follows the same system.
- Assign one person to monitor restocking: Choose a team member to check whether everyday supplies are running low and coordinate replacements when needed. This doesn’t mean that person must clean up after everyone else, only that someone is responsible for keeping supplies available.
- Build a quick weekly drawer check: Choose a consistent time to return misplaced items, throw away empty packaging, and identify anything that needs replenishing. The process should be simple enough to complete in approximately two minutes when the system is working well.
- Keep maintenance instructions minimal: If a reminder is needed, use one short note such as Return Supplies to Labeled Zones. Avoid creating a lengthy list of rules that turns an ordinary supply drawer into another administrative responsibility.
The easiest time to maintain a shared drawer is often during an existing routine. For example, whoever closes the office on Friday might check the drawer while tidying the reception area.
Alternatively, team members might take turns performing the reset during their regular workstation cleanup.
The exact schedule matters less than consistency.
It’s also important to distinguish between maintenance problems and design problems. If the same compartment overflows every week, the issue may be its size rather than anyone’s behavior.
Use the reset as an opportunity to notice what isn’t working.
A successful maintenance routine shouldn’t feel like a major organizational project. It should be a small, predictable habit that keeps the drawer usable without requiring someone to reorganize it from scratch every month.
8. What to Fix When People Keep Ignoring the Labels
You followed the steps, created clear labels, and arranged the supplies neatly. A few weeks later, paper clips are mixed with pens, scissors are missing, and sticky notes have migrated into another compartment.
If you want to get more from your life, and are looking for concrete action steps to get you there, check out our Request a Coach page. It’s a “cut the fence-sitting and take action” way to tackle your issues and actually find success. To get off the fence and start to take action, click or tap here.
Before assuming people aren’t following the rules, investigate why the system isn’t working.
In shared spaces, repeated clutter often reveals something about the layout itself. A compartment may be difficult to reach, a label may be unclear, or a category may simply be too small for the supplies it holds.
The goal is to identify the source of the problem rather than repeatedly correcting the same mess.
- Watch where supplies actually get returned: Notice which items consistently end up outside their assigned compartments. If several coworkers place the tape dispenser near the scissors, that may indicate those supplies are naturally used together and could benefit from neighboring locations.
- Simplify labels that cause confusion: Replace broad or unfamiliar category names with words that immediately identify their contents. If Small Tools regularly becomes a collection of unrelated objects, divide it into more useful categories or specify exactly which tools belong there.
- Move frequently misplaced items closer to where they’re used: Reconsider the layout when supplies are repeatedly left near the front of the drawer rather than returned to compartments at the back. Moving high-use items to easier locations may solve the problem without additional reminders.
- Rework zones that constantly overflow: Increase compartment space, reduce stored quantities, or relocate less frequently used supplies when a category becomes overcrowded. A compartment that requires perfect stacking is unlikely to remain practical during a busy day.
Try changing only one or two things at a time. This allows you to see whether the adjustment improves the system without creating more confusion.
You might also discover that employees need an additional category. For example, a shared office that frequently uses postage supplies may benefit from a dedicated Mailing section rather than mixing those items with everyday stationery.
Don’t treat your initial layout as permanent.
The label-first method is designed to make storage locations obvious, but those locations can evolve as office needs change.
When something repeatedly ends up in the wrong place, ask whether that location might actually make more sense. Sometimes the best improvement comes from adapting the system to real behavior rather than expecting everyone to follow an arrangement that feels inconvenient.
If you want to get more from your life, and are looking for concrete action steps to get you there, check out our Request a Coach page. It’s a “cut the fence-sitting and take action” way to tackle your issues and actually find success. To get off the fence and start to take action, click or tap here.
9. How an Organizational Coach Can Help Shared Systems Stick
Organizing a shared drawer may seem like a small task, but the challenges behind it often appear in other parts of the workplace. Supplies are misplaced, employees make different assumptions about responsibilities, and routines gradually disappear.
When the same problems keep returning, the issue may involve team habits rather than the physical storage system alone.
An organizational or productivity coach can help individuals and small teams understand how their routines affect shared spaces. Instead of simply recommending more containers, a coach can support the development of practical habits that make organization easier to maintain.
- Identify habits that undermine shared organization: A coach can help team members recognize when supplies are left out, why certain storage locations are ignored, and which everyday interruptions make cleanup difficult. Understanding these patterns makes it easier to design solutions that fit actual working conditions.
- Build shared agreements around the drawer: Work with employees to establish expectations for returning supplies, handling missing items, and requesting replacements. A coach can facilitate conversations that clarify responsibilities without making routine organization feel like a source of conflict.
- Connect maintenance to existing work routines: Help team members choose consistent moments for returning supplies or completing a quick drawer reset. Linking these actions to habits employees already perform can make the new system easier to remember.
- Review the system without assigning blame: Encourage short, practical check-ins focused on what’s working and what needs adjustment. If the drawer becomes messy again, the conversation can focus on improving labels, locations, or routines rather than criticizing individual employees.
For small business owners, this approach can be particularly helpful when several people share one workspace but no one has clear responsibility for maintaining communal areas.
A coach might suggest beginning with a single drawer before introducing similar routines across the office. This gives the team an opportunity to practice shared expectations in a manageable setting.
Of course, professional coaching isn’t necessary for every organization project.
Many teams can apply these same principles independently by discussing what they need, choosing realistic routines, and reviewing the results together.
The broader lesson is that organization works best when the physical setup supports how people actually behave.
If you want to get more from your life, and are looking for concrete action steps to get you there, check out our Request a Coach page. It’s a “cut the fence-sitting and take action” way to tackle your issues and actually find success. To get off the fence and start to take action, click or tap here.
Labels provide clarity, compartments provide structure, and shared habits help keep everything working after the initial cleanup.
A Shared Drawer That Stays Organized Without Constant Rework
A shared office drawer shouldn’t require one person to remember where everything belongs or spend Friday afternoons putting supplies back in order.
When a drawer depends on one employee’s personal arrangement, the system becomes difficult for everyone else to maintain. Even the neatest layout can fall apart when people don’t understand where supplies are supposed to go.
The label-first method offers a more practical alternative.
By deciding on categories before introducing organizers, you create a layout based on actual supplies and everyday needs. Labels communicate where items belong, while appropriately sized compartments make those locations easy to use.
The process is straightforward enough to repeat:
- Start with the supplies you actually need: Remove unnecessary items, separate personal belongings, and keep the drawer focused on everyday shared use.
- Create clear labels before arranging containers: Give each supply category an obvious name and a planned location before deciding how to divide the drawer.
- Build compartments around those categories: Use simple dividers or trays that provide enough room for supplies to be retrieved and returned comfortably.
- Make maintenance part of the routine: Establish a quick reset, assign responsibility for restocking, and adjust any categories that regularly create confusion.
Once the system is working, you can apply the same approach to other shared storage areas.
A filing cabinet might benefit from clearly labeled document categories. A supply closet could use labeled shelves for printer paper, mailing materials, and extra stationery. Even a shared craft drawer becomes easier to maintain when every material has a recognizable destination.
If you want to get more from your life, and are looking for concrete action steps to get you there, check out our Request a Coach page. It’s a “cut the fence-sitting and take action” way to tackle your issues and actually find success. To get off the fence and start to take action, click or tap here.
You don’t need to tackle the entire office at once.
Choose the drawer that causes the most frustration and start there. Pay attention to how people use it, create labels that make sense to everyone, and allow the layout to evolve when necessary.
The most successful organization systems aren’t always the most elaborate ones. They’re the systems that make everyday actions easier.
When someone can open a drawer, find exactly what they need, and return it without stopping to think, you’ve created something much more useful than a tidy space.
You’ve created a shared system that can take care of itself with just a little everyday attention.
*****
Are you all about style, decor and organization? Download a copy of our Clutter Reset Guide.
Need some in depth help with organization and productivity ? Drop on by our directories choc full of productivity coaches, minimalist coaches, and work/life balance coaches to get your life organized! Or click here to have us match you to the best.
If you want to get more from your life, and are looking for concrete action steps to get you there, check out our Request a Coach page. It’s a “cut the fence-sitting and take action” way to tackle your issues and actually find success. To get off the fence and start to take action, click or tap here.
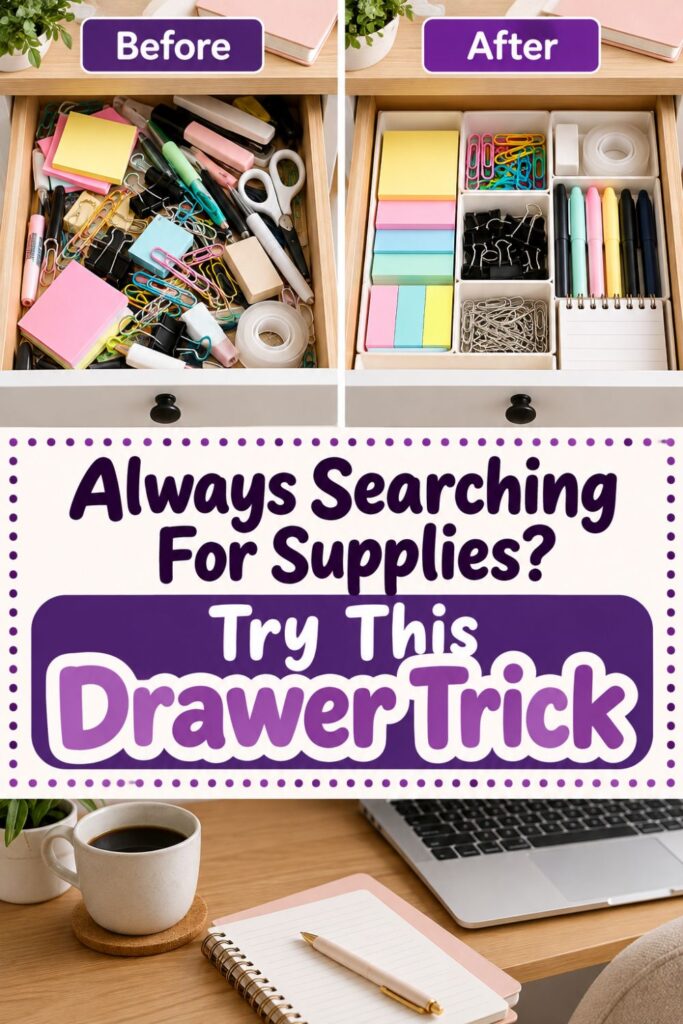
If you want to get more from your life, and are looking for concrete action steps to get you there, check out our Request a Coach page. It’s a “cut the fence-sitting and take action” way to tackle your issues and actually find success. To get off the fence and start to take action, click or tap here.
Read this next

A Practical Way to Use Vision Boards for Manifestation
Use your vision board in a smarter, more practical way so manifestation feels clearer, calmer, and easier to follow every day.
Read More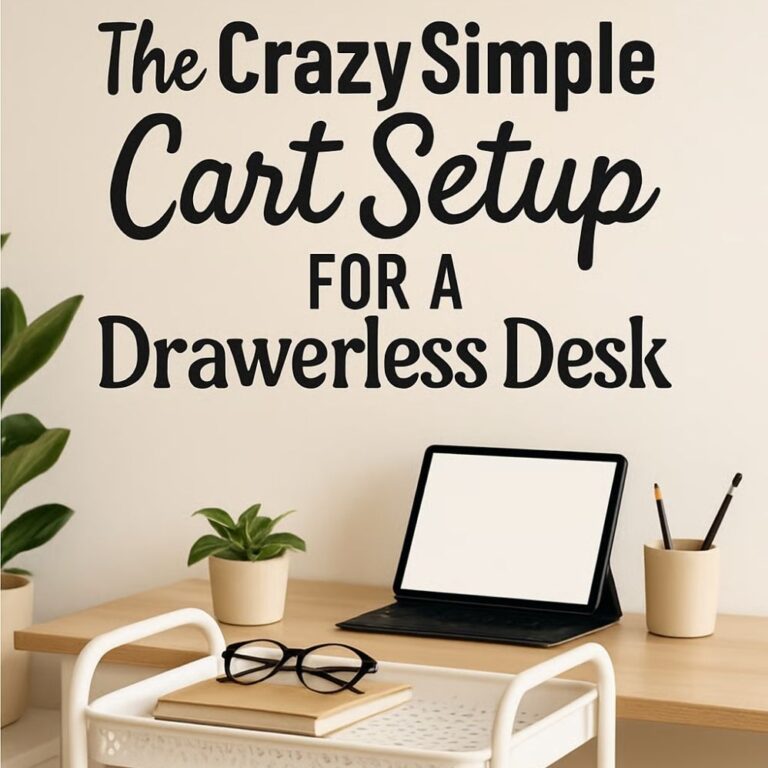
Sidecar Cart System for Desks With No Drawer Space
No desk drawers? This sidecar cart setup keeps supplies close, clears the desktop, and makes tiny workspaces feel instantly easier.
Read More
9 Christmas Staircase Decor Upgrades Designers Love (Super Easy to Copy)
Are you all about style, decor and organization? Download a copy of our Decluttering Workbook. **** Your staircase is one of the first things guests see, but it’s usually the […]
Read More