


Talk to a coach about Organizational coaching

Crystal Faulk
ACC
I help overwhelmed women in transition gain clarity, confidence, and...

Terrie Hein
Certified Life Coach, Certified Insight Coach Practitioner
Coaching to declutter your life, organize your goals, and cook...

Dr Charlene Ashley
Doctorate - Behaviours
I coach individuals to design fulfilling lives through structure, clarity,...

Paloma Chiara

Lana's Gymnastics Club
"Where the best in gymnastics meets fun. Where every child is a star"
lgclubny.com

Anna Sosnina
ICF (ACC)
ICF ACC certified coach, founder of EssorVie Coaching, passionate about...

Tyler Fink
B.A. in Religion, Anthropology, and Philosophy. Master of Divinity (M.Div.) in Missiology
Pastor, husband, and father helping Christian men pursue faithful growth...

Travis Brown
Professional Life coach
With experience in guiding clients to achieve goals, build confidence,...



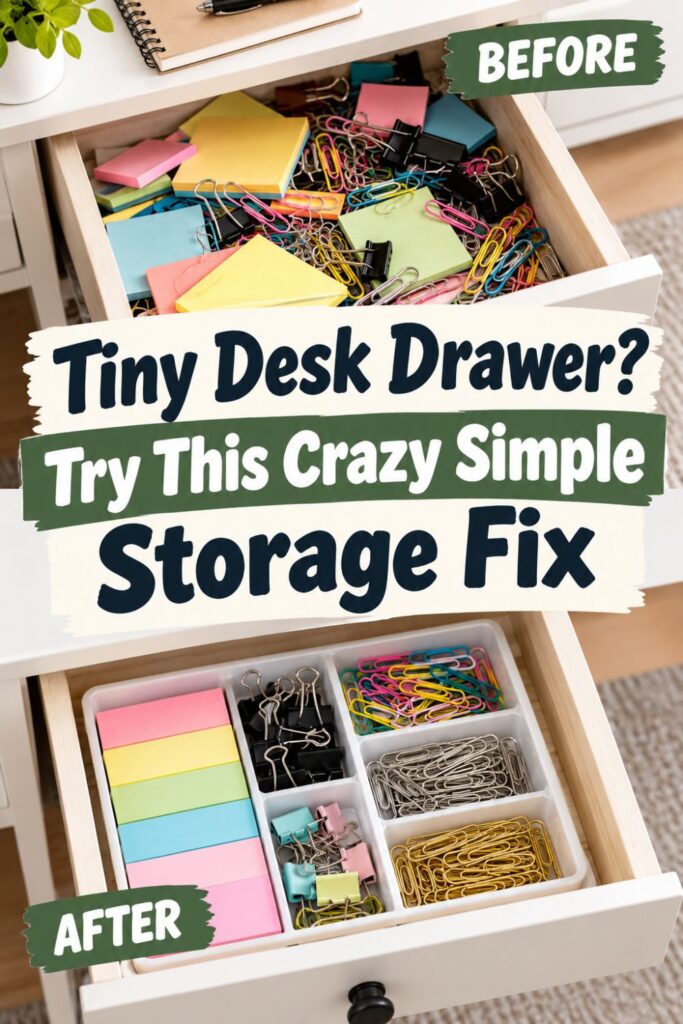
Sticky Note and Paper Clip Drawer Setup for Small Desks
Are you all about style, decor and organization? Download a copy of our Clutter Reset Guide.
*****
Why Tiny Desk Supplies Create Such Big Clutter
A paper clip should be easy to find. So should a sticky note when you need to jot down a reminder. But in a small desk drawer, those tiny essentials have a habit of disappearing beneath stray pens, old receipts, and supplies you barely use.
The problem usually is not the size of the drawer. It is the lack of boundaries inside it. When everything shares one open compartment, items slide around each time you open the drawer, and a simple task turns into a search through clutter.
Small desks make that frustration more noticeable. You may not have spare desktop space for a collection of supply holders, and adding another organizer on top can make your workspace feel even tighter. The better option is often to make the drawer you already have work harder.
A compact drawer setup relies on micro-zoning, which means giving small categories their own clearly defined spaces. Instead of tossing everything into one tray, you create a home for sticky notes, a separate home for paper clips, and a few carefully chosen spots for other daily essentials.
Before you start, keep two principles in mind. They will guide every decision you make about what stays in the drawer:
- Store what you actually reach for: A working drawer should hold everyday supplies, not entire bulk packages or items you might need someday. The less it has to contain, the easier it is to use.
- Make returning items effortless: Each compartment should be obvious and easy to access. If putting a paper clip away feels like a chore, the system probably needs simplifying.
You do not need matching containers or a complete desk makeover to get started. A few small trays, a quick sort, and a layout based on your habits can make a surprising difference.
If you want to get more from your life, and are looking for concrete action steps to get you there, check out our Request a Coach page. It’s a “cut the fence-sitting and take action” way to tackle your issues and actually find success. To get off the fence and start to take action, click or tap here.
The goal is not a drawer that looks perfect for one afternoon. It is a practical setup that lets you reach in, grab what you need, and get back to work without thinking about where everything belongs.
Need some in depth help with organization and productivity ? Drop on by our directories choc full of productivity coaches, minimalist coaches, and work/life balance coaches to get your life organized! Or click here to have us match you to the best.
Empty Your Desk Drawer and Find Out What Actually Belongs There
Before buying a single organizer, take everything out of your drawer. This first step matters because it reveals what is truly competing for space. You cannot design useful compartments around a collection of objects you have not actually examined.
Spread the contents on a table or clear section of your desk. You might discover three half-used sticky note pads, a handful of paper clips, rubber bands, spare pens, and a few things that wandered in from elsewhere. Seeing the full collection makes decisions easier.
- Sort by what each item does: Make separate piles for sticky notes, paper clips, binder clips, page flags, writing tools, and other small necessities. Avoid creating a vague miscellaneous pile that simply recreates the problem outside the drawer.
- Identify your daily essentials: Ask which supplies you use during a normal workday and which you reach for only once in a while. Keep frequently used items close and move occasional supplies to a cabinet, shelf, or backup box.
- Remove unrelated clutter: Recycle outdated notes and unnecessary packaging, put personal belongings back where they belong, and deal with loose receipts. A drawer reserved for work supplies should not become storage for everything that needs a temporary home.
- Reduce duplicates before arranging anything: Choose one active sticky note pad and a reasonable handful of clips instead of squeezing every replacement into the drawer. Store unopened or surplus supplies elsewhere so they do not crowd out the items you need.
Now look at what remains. If a category has only one useful item, it may share a divided section with a closely related tool. If another category needs much more room, that is useful information for the layout you will build next.
Do not worry about deciding the exact position of every object yet. The purpose of this stage is to create a realistic inventory and make sure the drawer contains supplies that earn their space. A small drawer works best when its contents are chosen intentionally, not simply kept by default.
Measure Your Drawer Before Buying Any Organizers
A drawer organizer that looks compact online can still be too wide, too tall, or too deep for your desk. Measuring first saves you from buying trays that leave unusable gaps or stop the drawer from closing. It also helps you work with containers you may already own.
Empty the drawer completely before taking measurements. Use a ruler or tape measure and write down the inside width, the front-to-back depth, and the available height. Measure the usable space rather than the outside dimensions of the drawer front.
If you want to get more from your life, and are looking for concrete action steps to get you there, check out our Request a Coach page. It’s a “cut the fence-sitting and take action” way to tackle your issues and actually find success. To get off the fence and start to take action, click or tap here.
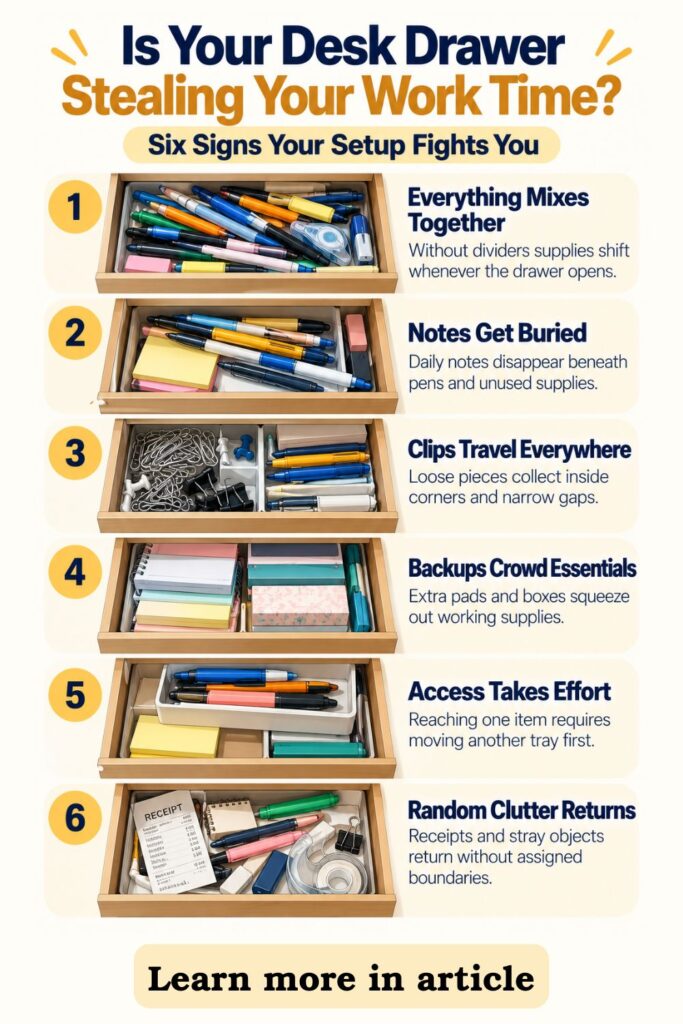
- Check the corners and hardware: Look for rounded corners, rails, screws, or other features that reduce usable space. If the drawer narrows toward the back, measure that area separately rather than assuming every inch is the same width.
- Allow room for smooth closing: Place a sticky note stack or small tray inside and close the drawer gently. Anything that catches the desk frame or the drawer above is too tall, even if it technically fits when the drawer is open.
- Test what you already have: Try small stationery trays, shallow boxes, or sturdy repurposed containers before shopping. The best solution is the one that fits your actual supplies, not necessarily a matching set.
- Plan a flexible arrangement: Position empty containers in the drawer without fixing them in place. Leave enough room to lift out a sticky note pad and reach into clip compartments without removing neighboring trays.
A rough sketch can help if the drawer is especially narrow. Draw a rectangle and mark possible sections for sticky notes, paper clips, and a few other essentials. Keep the shapes simple so you can rearrange them later.
If you need to buy dividers, take your measurements with you and pay attention to each organizer’s interior dimensions as well as its exterior size. A tray may fit neatly but still be too narrow for your preferred sticky note pad.
The few minutes spent checking dimensions will make the next steps easier. Instead of forcing supplies into whichever organizer happens to fit, you can build a layout around how the drawer opens and what you actually use.
Divide One Small Drawer Into Four Useful Micro-Zones
A tiny drawer does not need a separate compartment for every single object. It needs just enough structure to keep different types of supplies from mixing together. Four micro-zones are a practical starting point because they create boundaries without making the layout complicated.
Think about the drawer as a small working station. Each zone should answer one question: where does this type of item go? Once that answer is obvious, finding something and putting it away become much simpler.
- Make a sticky note zone: Reserve a flat space for the pad you use most and, if room allows, one replacement. Keep notes lying flat so their edges do not curl or catch beneath neighboring supplies.
- Create a paper clip zone: Use a small contained compartment for loose clips rather than leaving them on the open drawer surface. Choose a size that makes clips easy to scoop out without tipping everything over.
- Add a tiny tools zone: Give frequently used extras such as binder clips, an eraser, or a compact correction tool one defined area. Keep this category limited to items that genuinely support your everyday tasks.
- Leave one flexible zone: Reserve a narrow spot for page flags, pencil leads, or one other supply specific to your work. Flexible does not mean miscellaneous, so decide what belongs there before filling it.
- Arrange zones in order of use: Put the items you reach for most near the front and less-used supplies toward the back. Check that you can retrieve each item without moving another container first.
If your drawer cannot accommodate four containers, use a single tray with four internal sections or combine two related categories with a divider. The important feature is a clear boundary, not the number of separate products you buy.
Try the layout for a few days before committing to adhesive or permanent dividers. You may discover that your paper clips belong closer to the front or that you rarely touch the tiny tools zone.
A good micro-zoning system is easy to explain at a glance. When every small item has a predictable home, the drawer stops behaving like a catch-all and starts functioning as part of your workspace.
If you want to get more from your life, and are looking for concrete action steps to get you there, check out our Request a Coach page. It’s a “cut the fence-sitting and take action” way to tackle your issues and actually find success. To get off the fence and start to take action, click or tap here.
Set Up a Sticky Note Compartment That Keeps Pads Flat and Accessible
Sticky notes look easy to store because they are small and neatly stacked. In practice, several pads of different sizes can slip beneath supplies, develop bent corners, or become buried in the drawer. Giving them one properly sized space prevents that familiar paper pile.
Start with the pad you actually use. You may like standard square notes for reminders or narrow page flags for marking documents. The drawer should reflect that preference instead of holding every size and color you have collected.
- Choose one primary pad: Select the sticky note size you reach for during a normal day and make it the centerpiece of this zone. Move seldom-used sizes to backup storage rather than letting them compete for the same space.
- Find a shallow flat tray: Choose a compartment slightly wider and deeper than the pad so it is easy to lift out. Avoid tall-sided containers that make you pinch awkwardly at the paper whenever you need a note.
- Give page flags their own slot: Store narrow flags beside the main pad in a smaller divided space if you regularly use them. Otherwise, keep them with occasional office supplies outside the drawer.
- Keep backup pads under control: Make room for one spare pad only if it fits without covering or compressing the active one. Store bulk packs elsewhere so the compartment stays easy to use.
- Test access from your usual position: Sit at the desk and open the drawer as you normally would. Confirm that you can reach the notes quickly without dragging a pen tray aside or pulling the drawer out too far.
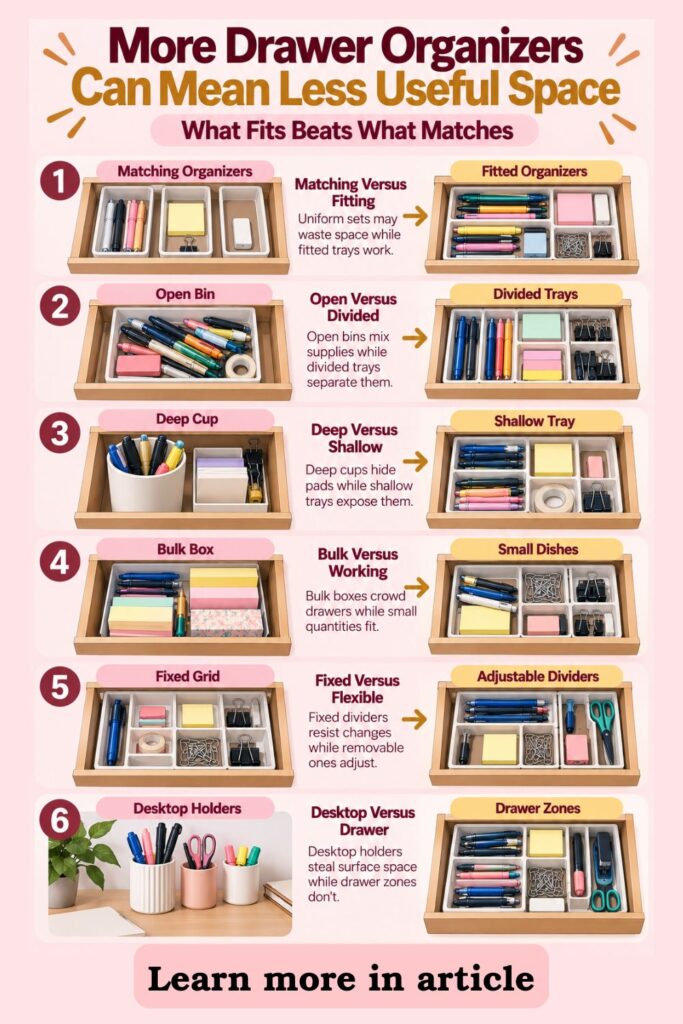
Pay attention to the direction in which the pad sits. A small rotation may make it easier to grasp and can free a narrow strip of space beside it for flags or other flat supplies.
There is no need to arrange pads by color unless that distinction helps your work. A simple setup with one active pad and clear edges is usually more useful than a tightly packed collection.
When the sticky note compartment is working, you should be able to open the drawer, pick up a pad, and close it again in a smooth motion. That is the practical test that matters.
Keep Paper Clips and Binder Clips From Taking Over the Drawer
Paper clips are small enough to scatter into every open space, while binder clips can take up more room than you expect. When both are tossed into the same drawer section, you may end up searching through a noisy jumble for the exact clip you need. Containment matters more here than decoration.
Start by looking at how many clips you use in a typical week. Most people do not need a full package immediately within reach. A modest working supply can sit in the drawer, with the remainder stored somewhere else.
- Choose a container for loose paper clips: Use a small dish, shallow box, or fitted divider that keeps them from migrating across the drawer. It should be wide enough to retrieve a clip with your fingers but not so large that it wastes space.
- Separate sizes only when useful: If you switch often between standard and jumbo clips, give them distinct small sections. If you almost never use the larger ones, keep them with backup supplies instead.
- Group binder clips without crowding: Place a few binder clips together in their own small compartment or in the tiny tools zone. Avoid combining them with loose clips if their handles snag or make smaller pieces difficult to grab.
- Set a realistic quantity limit: Decide how many clips fit comfortably without spilling over the edges. Refill that supply when it runs low rather than turning the drawer into the storage location for an entire box.
- Test the drawer in motion: Open and close it several times at a normal pace to see whether the container slides or spills. Add a non-slip liner beneath the container if necessary.
If you use a small magnetic holder, make sure it does not interfere with other supplies and that the clips are easy to remove. A plain shallow cup often works just as well without introducing another gadget.
If you want to get more from your life, and are looking for concrete action steps to get you there, check out our Request a Coach page. It’s a “cut the fence-sitting and take action” way to tackle your issues and actually find success. To get off the fence and start to take action, click or tap here.
The best clip storage is not necessarily the cleverest option. It is the one that holds the pieces securely, lets you find the right size, and takes up only the space they deserve.
Once paper clips have a predictable home, they are less likely to mix with sticky notes or collect in the drawer’s corners. That one change can make the entire drawer feel more manageable.
Arrange Your Tiny Supplies So Everything Is Easy to Reach
Even a perfectly divided drawer can feel awkward if the wrong items sit in the wrong places. The final arrangement should reflect how you use your desk, not just how nicely the containers fit together. Reach and visibility are part of organization.
Before settling on a layout, think through your workday. Perhaps you grab sticky notes during calls and paper clips when sorting documents. Those patterns tell you which sections deserve the easiest access and which can sit farther back.
- Place frequent supplies near the front: Give your active sticky note pad and most-used clips the spots closest to your hands. Try to avoid placing daily essentials behind containers that must be lifted out first.
- Move occasional tools toward the back: Store an eraser, extra binder clips, or similar supplies farther away if you use them less often. Keep taller items where they will not block your view or interfere with closing.
- Close awkward gaps between trays: Reposition containers so stray clips cannot collect in narrow spaces along the sides. Do not force a tight fit that makes it difficult to remove a tray for cleaning.
- Stabilize light containers when necessary: Cut a removable non-slip liner to fit beneath the organizers if they shift as the drawer moves. Check that the added material does not raise containers too high.
- Run a simple task test: While seated, retrieve a sticky note, take out a paper clip, and return both to their places. Notice any movement that feels inconvenient and adjust the layout before calling it finished.
Small changes can improve usability more than buying another organizer. Turning a rectangular tray sideways, moving one section forward, or reducing the number of stored clips may solve a problem immediately.
Do not glue everything into place on the first day. Let the drawer handle a few actual work sessions so you can see what feels natural rather than relying only on the initial arrangement.
A functional drawer should support your routine quietly. When you no longer need to shuffle trays or think about where a small item belongs, your setup is doing its job.
Create a Two-Minute Reset That Keeps the Drawer Organized
Setting up the drawer is only half the job. The real test comes after a week of busy mornings, quick notes, and rushed transitions between tasks. Without a simple reset, even neatly divided compartments can slowly collect items that do not belong.
If you want to get more from your life, and are looking for concrete action steps to get you there, check out our Request a Coach page. It’s a “cut the fence-sitting and take action” way to tackle your issues and actually find success. To get off the fence and start to take action, click or tap here.
The solution is not an elaborate cleaning routine. It is a short habit that makes returning supplies just as easy as grabbing them. Two minutes at the end of a work session can be enough to catch small messes before they build up.
- Return supplies to their assigned zones: Put loose paper clips back in their container and place sticky note pads flat in their tray. If a section regularly fills with unrelated objects, make that boundary clearer or reconsider its location.
- Remove new clutter right away: Take out receipts, snack wrappers, outdated reminders, and other objects that slipped into the drawer during the day. Decide whether to discard each item or move it to its proper home rather than creating a temporary pile.
- Check the supply levels briefly: Notice whether the active sticky note pad is nearly finished or the clip compartment is getting empty. Refill from backup storage only when you need to, and keep the replacement amount modest.
- Reset at a consistent moment: Attach the habit to shutting down your computer, finishing your last task, or preparing for tomorrow. A routine linked to something you already do is easier to remember than an extra chore with no natural starting point.
- Review the layout after one week: Ask which supplies were easiest to use and which categories kept escaping their compartments. Resize or reposition a zone if it consistently fails, rather than assuming you need to start over.
Some days the drawer will look less tidy than others. That does not mean the system has failed, especially if everything can be returned to its place quickly. A useful organization method leaves room for normal working habits.
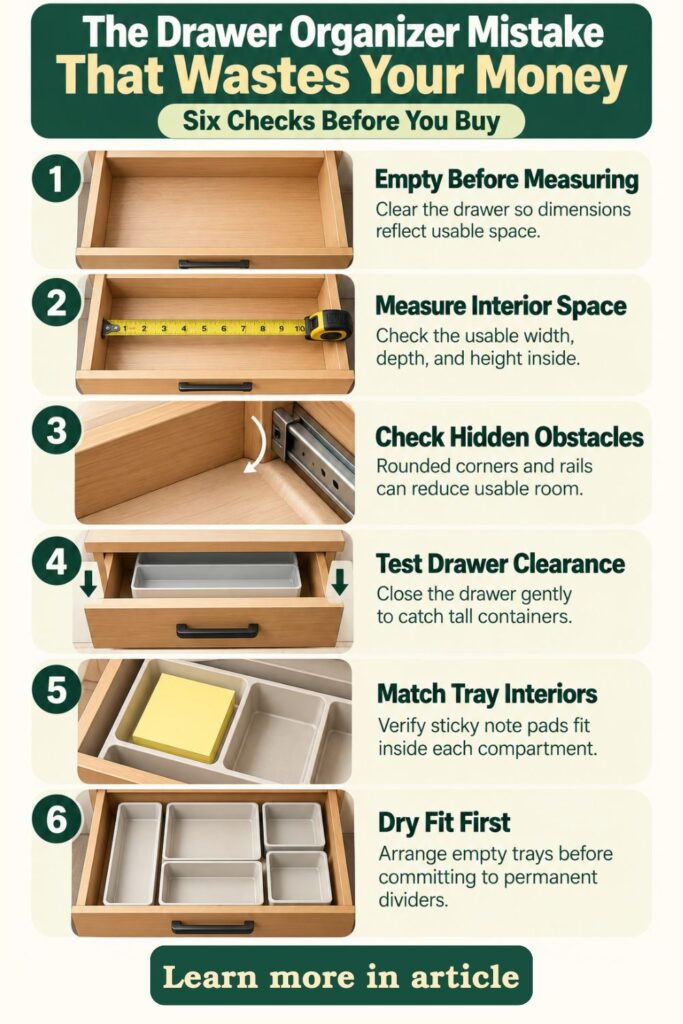
If two minutes consistently feels like too much, simplify the number of items kept inside. Fewer supplies usually mean fewer things to sort and fewer decisions at the end of the day.
The goal is a drawer that resets easily, not one that never becomes untidy. Small, repeatable actions protect the space you worked to create without adding another demanding task to your schedule.
How to Adapt This Drawer Setup for Shared or Extra-Small Desks
Not every desk has room for a full set of four compartments. Some drawers are barely wide enough for a sticky note pad, while shared workspaces must accommodate different people’s habits. The micro-zoning principle still works, but the physical layout may need to change.
Start with the constraints rather than trying to copy a standard organizer arrangement. Check which supplies are absolutely necessary, how often the drawer is opened, and who needs access. Then create the smallest number of clearly defined sections that will do the job.
- Combine zones when space is extremely limited: Use one shallow tray with internal dividers instead of four separate containers. Give sticky notes their own flat section and keep loose paper clips in a contained pocket so the two cannot mix.
- Choose modular dividers where needs change: Select removable trays or adjustable partitions that can shift as supplies change. This is especially helpful for students, remote workers, or anyone whose desk serves more than one purpose.
- Agree on shared supply boundaries: If two people use the drawer, decide which items are communal and how much space each category should occupy. A simple shared rule such as keeping one active pad and one small clip supply prevents the drawer from filling with duplicates.
- Move bulk supplies to a backup location: Store unopened sticky note packs, large boxes of clips, and occasional tools in a nearby cabinet or labeled box. Treat the drawer as an everyday access point rather than a warehouse.
- Protect the easiest-to-reach area: Reserve the front section for whichever items everyone needs most often. Keep less-used supplies behind them so a quick task does not require moving several containers.
If there is no room for an organizer at all, a shallow divided box may be enough. Make sure it fits the drawer safely and can be lifted out without spilling its contents. A minimal layout is better than overcrowded storage.
Shared and very small drawers benefit from quick reviews because their needs change. When an item repeatedly lands outside its zone, either assign it a clearer place or move it elsewhere.
If you want to get more from your life, and are looking for concrete action steps to get you there, check out our Request a Coach page. It’s a “cut the fence-sitting and take action” way to tackle your issues and actually find success. To get off the fence and start to take action, click or tap here.
A good arrangement is not determined by how many compartments it contains. It succeeds when every user can find the basics quickly and return them without negotiation or extra effort.
How an Organization or Productivity Coach Can Help You Build Systems That Stick
Sometimes the difficult part is not arranging the supplies. It is maintaining the habit once deadlines, interruptions, and changing routines enter the picture. If you have organized the same desk drawer several times and watched it become cluttered again, it may help to examine the patterns behind that cycle.
An organization or productivity coach can help you think through how you use your workspace. The aim is not to create a picture-perfect drawer. It is to build a system that fits your actual day and supports the way you work.
- Notice where clutter starts: A coach may ask when items are most often left out or tossed into the drawer without sorting. Identifying whether the problem occurs during calls, transitions, or end-of-day cleanup makes the next change more specific.
- Connect storage to your workflow: Review the tasks that require sticky notes, clips, and other small tools. Then place those supplies where they are easiest to reach during the activities in which you use them.
- Set one manageable maintenance goal: Choose a small action such as returning loose supplies before shutting down for the day. Make the goal specific enough to notice whether you followed through without expecting a complicated daily checklist.
- Build a reminder into an existing routine: Pair the drawer reset with a familiar cue, such as clearing your desktop or closing your planner. This makes the new habit part of a sequence rather than another thing to remember on its own.
- Review what is actually working: After a week or two, look at which zones stay organized and which ones still collect clutter. Adjust the system to reduce friction instead of treating every lapse as a problem with motivation.
You do not need a coach to use these questions. You can jot down what goes wrong, change one part of the layout, and observe whether the adjustment makes the drawer easier to maintain.
Coaching becomes most useful when the drawer is one example of a broader challenge with organizing tasks and routines. A practical system, paired with an achievable habit, can help keep small frustrations from repeatedly distracting you from your work.
A Small Drawer Can Make Your Whole Desk Work Better
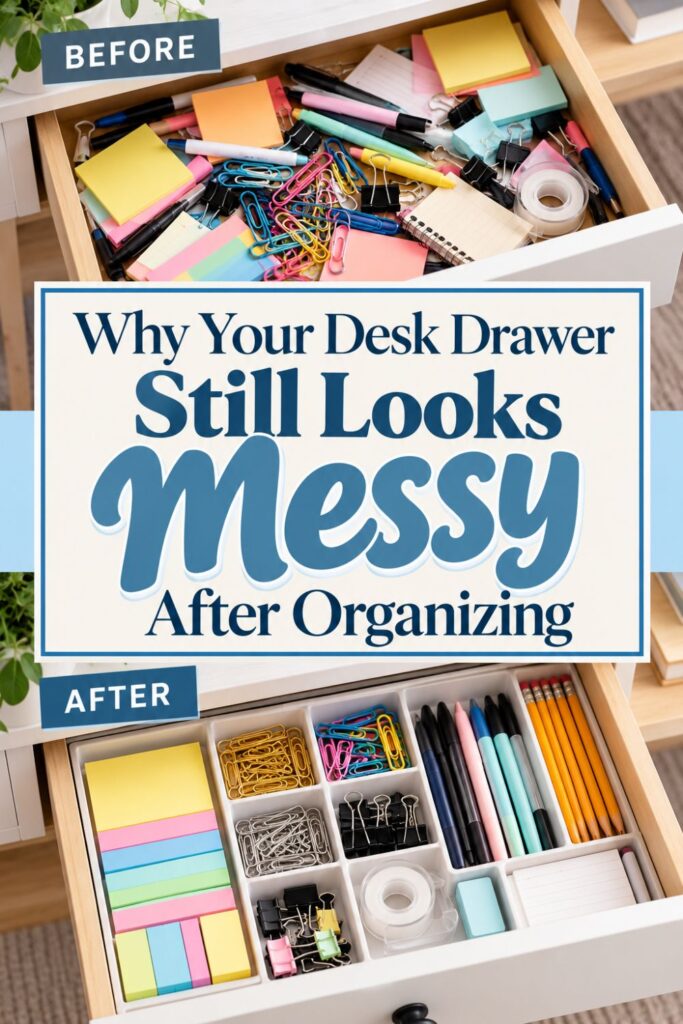
A functional desk does not require a large room, expensive inserts, or a perfectly matching set of accessories. Often, the difference comes from giving the smallest everyday supplies an obvious place to live. When sticky notes lie flat and paper clips stay contained, they stop taking over space that should support your work.
Think back to the purpose of the drawer. It is not supposed to hold every item you own or make your desk look impressive when someone opens it. It should give you quick access to what you use and let you return those items without a second thought.
If you are ready to set up your own drawer, follow this simple order. It keeps the process manageable and prevents unnecessary purchases:
If you want to get more from your life, and are looking for concrete action steps to get you there, check out our Request a Coach page. It’s a “cut the fence-sitting and take action” way to tackle your issues and actually find success. To get off the fence and start to take action, click or tap here.
- Start with a complete clear-out: Remove everything and decide which supplies genuinely belong within reach. Put rarely used items and duplicate packages in a separate backup location before thinking about containers.
- Measure before choosing organizers: Check the actual interior width, depth, and height so trays do not block the drawer or waste limited space. Repurpose suitable containers if they fit securely and hold your supplies well.
- Create clear micro-zones: Give sticky notes a flat area and paper clips a small contained space. Add only the extra compartments needed for tools you use regularly.
- Test the setup during real work: Reach for the supplies from your normal seated position and notice what feels awkward. Change the position or size of a compartment before assuming the whole layout needs replacing.
- Keep the reset easy: Return supplies to their homes and remove stray clutter at the end of the day. Review the layout when your needs change rather than continually adding more organizers.
Remember that the right setup for a student may look different from one used by a remote worker or small business owner. The categories and quantities can change while the underlying system stays the same: keep essentials close, separate unlike items, and leave breathing room.
Start with the sticky note pad and paper clips you reach for most. Give them two dependable places, test how the drawer feels, and build from there only if needed. A small, well-planned drawer can make the rest of your desk feel much easier to use.
*****
Are you all about style, decor and organization? Download a copy of our Clutter Reset Guide.
Need some in depth help with organization and productivity ? Drop on by our directories choc full of productivity coaches, minimalist coaches, and work/life balance coaches to get your life organized! Or click here to have us match you to the best.
If you want to get more from your life, and are looking for concrete action steps to get you there, check out our Request a Coach page. It’s a “cut the fence-sitting and take action” way to tackle your issues and actually find success. To get off the fence and start to take action, click or tap here.
Read this next

10 Front Door Christmas Decoration Ideas That Make Your Home Feel Magical
Make your front door feel instantly Christmas-ready with easy, magical decorating ideas that work for any porch size or budget.
Read More
7 Super Easy DIY Rustic Outdoor Christmas Porch Decor Ideas
Are you all about style, decor and organization? Download a copy of our Decluttering Workbook.**** Rustic Christmas porch decor has a charm that feels welcoming, warm, and handmade in all […]
Read More
The Galentine’s Decor Trick That Makes Any Space Feel Pulled Together
Create a Galentine’s setup that feels warm, effortless, and pulled together with one simple decor trick that changes everything.
Read More