


Talk to a coach about Organizational coaching

Crystal Faulk
ACC
I help overwhelmed women in transition gain clarity, confidence, and...

Terrie Hein
Certified Life Coach, Certified Insight Coach Practitioner
Coaching to declutter your life, organize your goals, and cook...

Dr Charlene Ashley
Doctorate - Behaviours
I coach individuals to design fulfilling lives through structure, clarity,...

Paloma Chiara

Lana's Gymnastics Club
"Where the best in gymnastics meets fun. Where every child is a star"
lgclubny.com

Anna Sosnina
ICF (ACC)
ICF ACC certified coach, founder of EssorVie Coaching, passionate about...

Tyler Fink
B.A. in Religion, Anthropology, and Philosophy. Master of Divinity (M.Div.) in Missiology
Pastor, husband, and father helping Christian men pursue faithful growth...

Travis Brown
Professional Life coach
With experience in guiding clients to achieve goals, build confidence,...
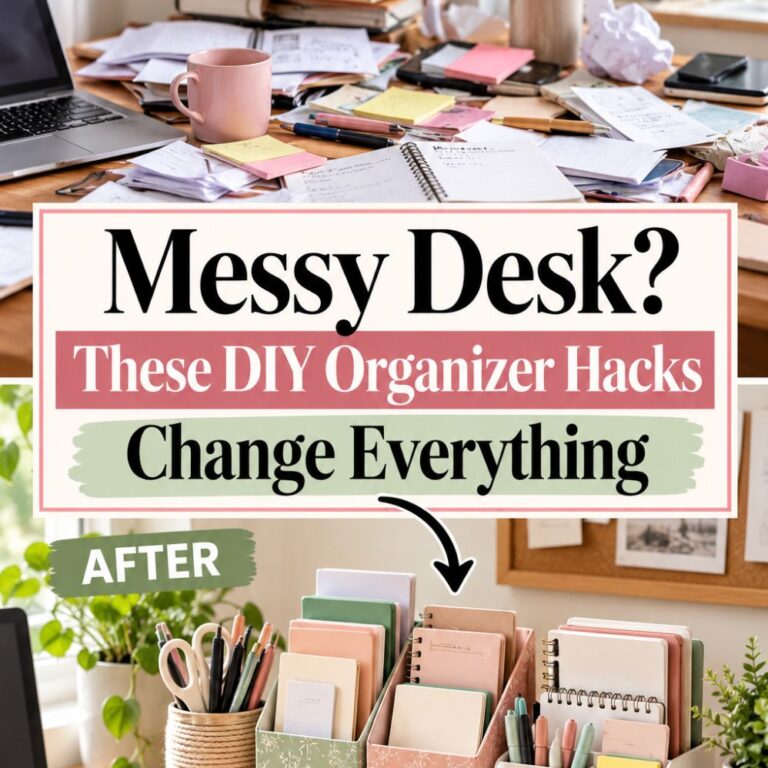





Tray-Based Catchall Zone for Daily Desk Essentials
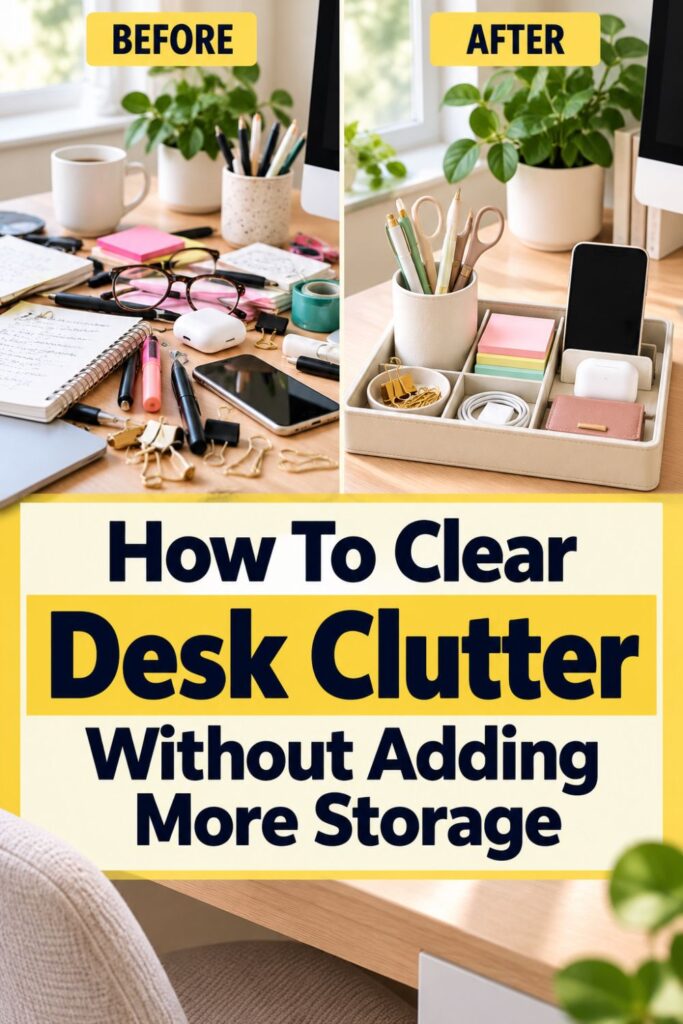
Why Your Daily Essentials Keep Taking Over the Desk
A messy desk does not always mean you have too much stuff. Sometimes the problem is much smaller. The same handful of objects gets picked up, used, and dropped throughout the day until they slowly spread across your entire work surface.
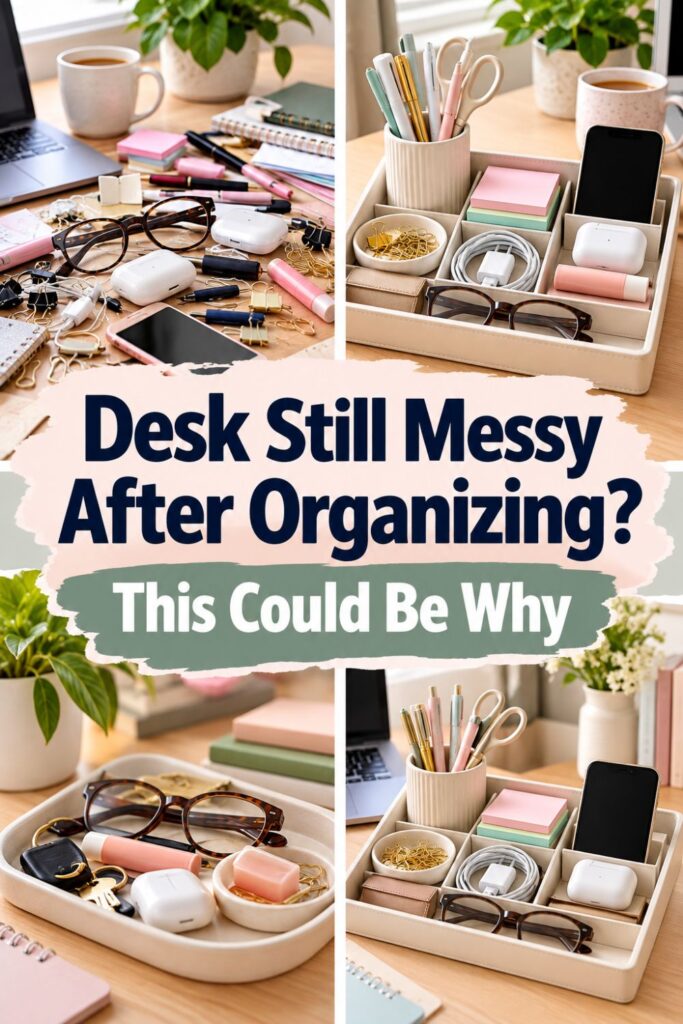
Think about the things that seem to wander around your desk. Your glasses end up beside the keyboard. Earbuds get left near your notebook. A favorite pen rolls toward the monitor, while lip balm, sticky notes, charging adapters, and other small essentials fill whatever empty spaces remain.
A simple tray can stop that spread by giving those frequently used objects one visible boundary.
The goal is not to hide everything. In fact, hiding frequently used items can make an organization system harder to maintain because you have to open a drawer or container every time you need something.
Instead, create a one-touch zone. You pick something up when you need it, then return it to the tray with one easy movement when you are done.
Start by noticing what repeatedly lands on your desk during a normal workday.
- Watch what keeps migrating: Pay attention to the items that repeatedly appear beside your keyboard, laptop, mouse, notebook, or monitor.
- Ignore the rest of the desk for now: You do not need to declutter your entire workspace before trying this system.
- Focus on frequently used objects: Look for the things you reach for several times throughout the day rather than everything you happen to store nearby.
- Give the tray one clear purpose: It is a landing zone for daily essentials, not a place to put anything that does not have another home.
This distinction matters.
A tray works because it creates a physical limit. Instead of allowing five small objects to occupy five different areas of your desk, those objects share one defined space.
If you want to get more from your life, and are looking for concrete action steps to get you there, check out our Request a Coach page. It’s a “cut the fence-sitting and take action” way to tackle your issues and actually find success. To get off the fence and start to take action, click or tap here.
That means you can keep the convenience of having everyday items visible without letting them gradually take over your entire workspace.
1. Choose a Tray That Creates a Useful Boundary
The best tray for this system is not necessarily the prettiest one. Its main job is to create a clear boundary around the small items that would otherwise spread across your desk.
Start with the amount of desk space you can comfortably give up.
Your tray should sit outside your main working area. You should still have enough room for your keyboard, mouse, laptop, notebook, or whatever you regularly use while working.
If adding the tray forces you to push other essential items around, the tray is probably too large.
Look for something shallow and open. Deep baskets and containers might hold more, but they can also encourage you to pile objects on top of one another.
A shallow tray makes everything easier to see.
- Measure your available space: Identify a small section along one side or corner of the desk that can become the tray zone.
- Choose low sides: Look for a tray that keeps items contained without blocking your view of what is inside.
- Keep the footprint modest: A smaller tray naturally limits how much can accumulate.
- Avoid complicated compartments at first: You do not need a specialized desktop organizer with a designated slot for every object.
- Use something you already own: A serving tray, small valet tray, shallow dish, desk tray, or decorative plate can work perfectly well.
The limited size is part of the system.
If you want to get more from your life, and are looking for concrete action steps to get you there, check out our Request a Coach page. It’s a “cut the fence-sitting and take action” way to tackle your issues and actually find success. To get off the fence and start to take action, click or tap here.
If you choose a huge tray, you may simply create a new surface for clutter. Suddenly there is room for receipts, snacks, mail, spare cables, notebooks, and every other small item you do not know where to put.
A smaller tray makes you choose.
It should comfortably hold the items you genuinely use during the day while becoming visibly crowded when unrelated objects begin sneaking in.
That visual limit gives you an easy signal that it is time to remove something.
You are not trying to build permanent storage on top of your desk. You are creating a small, convenient landing zone for the objects that need to stay close while you work.
2. Decide Which Items Have Earned a Spot
Once you have a tray, resist the temptation to immediately fill it.
The system works best when tray space has to be earned. Only objects that play a regular role in your workday should live there permanently.
Start by looking at what you actually use rather than what you think you might need.
If you want to get more from your life, and are looking for concrete action steps to get you there, check out our Request a Coach page. It’s a “cut the fence-sitting and take action” way to tackle your issues and actually find success. To get off the fence and start to take action, click or tap here.
For example, you may have ten pens on your desk but consistently reach for the same one. You may keep three charging cables nearby even though only one is used during a typical workday.
Those extras do not need premium desk space.
Try using a simple question: Do I regularly reach for this while sitting at my desk?
If the answer is yes, it may deserve a place in the tray.
Possible daily essentials might include:
- Your favorite pen
- Glasses
- Earbuds
- Lip balm
- A small charging adapter
- One sticky-note pad
- A small remote
- A USB drive you regularly use
- A stylus
- A hair tie or clip you frequently reach for
Your list will be different because the system should reflect your routine.
Choose the everyday version: If you own several versions of something, keep the one you use most often in the tray and move backups elsewhere.
Remove occasional-use items: Something you use once every two weeks does not need to occupy valuable desk space every day.
If you want to get more from your life, and are looking for concrete action steps to get you there, check out our Request a Coach page. It’s a “cut the fence-sitting and take action” way to tackle your issues and actually find success. To get off the fence and start to take action, click or tap here.
Keep unrelated clutter out: Receipts, mail, food wrappers, coins, packaging, and objects waiting to be returned to another room should not become permanent residents.
Be careful with paper: Even a small stack of papers can quickly cover everything else in the tray. Give documents their own system.
You do not have to get the selection perfect immediately.
Start with four or five objects and use the tray for several days. You will quickly notice what deserves to stay.
If you repeatedly reach into a drawer for something, that item might need tray space.
If something sits untouched all week, it probably does not.
3. Arrange the Tray for One-Touch Use
A catchall tray should make your day easier, not give you another tiny area that needs constant organizing.
That is why the arrangement should stay simple.
If you want to get more from your life, and are looking for concrete action steps to get you there, check out our Request a Coach page. It’s a “cut the fence-sitting and take action” way to tackle your issues and actually find success. To get off the fence and start to take action, click or tap here.
The easiest way to think about the tray is as a one-touch system. You should be able to pick something up and put it back without moving another object first.
If you have to lift your glasses to reach your earbuds or shuffle three pens around to find a charging adapter, the tray is too crowded or poorly arranged.
Start with the items you use most often.
Place them along the edge closest to you so they can be reached quickly. Less frequently used items can sit slightly farther back.
Keep frequently used items closest: Your favorite pen, earbuds, glasses, or other high-use essentials should require the least effort to grab.
Create loose zones: You might keep writing tools on one side, personal items in the middle, and small technology accessories on the other.
Avoid stacking: Whenever possible, let everything remain visible in one layer.
Leave empty space: Do not treat every inch of the tray as storage space that needs to be filled.
If you want to get more from your life, and are looking for concrete action steps to get you there, check out our Request a Coach page. It’s a “cut the fence-sitting and take action” way to tackle your issues and actually find success. To get off the fence and start to take action, click or tap here.
That final step is surprisingly important.
Empty space makes the system easier to use. If the tray is packed tightly, returning an item requires precision. You may need to move something or carefully fit it back into a specific spot.
That creates friction.
When there is a little extra room, you can simply place the item back inside the boundary.
You also do not need perfect alignment. Your pens do not need to sit at exactly the same angle every time, and your earbuds do not need to be folded into an elaborate shape before being returned.
The goal is containment, not display.
You should be able to look at the tray and immediately understand where your essentials are without feeling like you need to tidy it every hour.
A good catchall zone gives each item enough of a home that you can find it quickly, while remaining flexible enough for real daily use.
If you want to get more from your life, and are looking for concrete action steps to get you there, check out our Request a Coach page. It’s a “cut the fence-sitting and take action” way to tackle your issues and actually find success. To get off the fence and start to take action, click or tap here.
4. Put the Tray Where It Helps Without Stealing Work Space
Even a perfectly organized tray can become annoying if it sits in the wrong place.
Placement should follow your natural movements while you work.
Think about where you already tend to drop small objects. If your glasses, earbuds, and pen always end up on the right side of your keyboard, that may already be telling you where the tray belongs.
Instead of fighting that habit, use it.
Put the tray close enough that returning something requires almost no extra movement.
At the same time, keep it outside your primary work zone. The center of your desk usually needs to remain flexible for typing, writing, reading, or moving your mouse.
Follow your natural reach: Place the tray on the side where you instinctively put small objects.
Protect your central work area: Keep it away from the space directly in front of your keyboard, laptop, or notebook.
If you want to get more from your life, and are looking for concrete action steps to get you there, check out our Request a Coach page. It’s a “cut the fence-sitting and take action” way to tackle your issues and actually find success. To get off the fence and start to take action, click or tap here.
Avoid awkward stretching: You should be able to reach the tray comfortably while seated.
Watch your cords: Make sure charging cables or wired earbuds can reach the tray without crossing your main work area.
Test before committing: Use the tray in one location for a few days before deciding that it has found its permanent spot.
Left-handed and right-handed people may naturally prefer different placements. Your desk layout may also influence which side works best.
If you frequently take video calls, for example, you may want earbuds and lip balm closer to your dominant hand. If you regularly switch between handwriting and typing, a pen tray may work better beside your notebook area.
Do not choose a position simply because it looks balanced in a photograph.
Your desk needs to function while you are busy, distracted, or moving quickly between tasks.
The best tray location is the one that makes putting something away feel easier than leaving it somewhere else.
If you want to get more from your life, and are looking for concrete action steps to get you there, check out our Request a Coach page. It’s a “cut the fence-sitting and take action” way to tackle your issues and actually find success. To get off the fence and start to take action, click or tap here.
When the tray is positioned well, your existing habit of dropping objects on the desk does not need to disappear.
You simply redirect that habit into one small, intentional zone.
5. Create a Simple “Tray or Somewhere Else” Rule
The biggest danger with a catchall tray is right there in the name.
If the tray becomes the place where absolutely everything gets tossed, it will eventually turn into a miniature junk drawer sitting in plain sight.
Prevent that by giving yourself one simple rule: an item either belongs in the daily tray or it belongs somewhere else.
There should not be a third category called “I will put this here for now.”
That temporary category is how receipts, paper clips, spare batteries, jewelry, mail, old notes, and random household objects slowly take over.
When something lands in the tray, ask whether it supports your normal desk routine.
If you want to get more from your life, and are looking for concrete action steps to get you there, check out our Request a Coach page. It’s a “cut the fence-sitting and take action” way to tackle your issues and actually find success. To get off the fence and start to take action, click or tap here.
Keep genuine daily essentials: Items you repeatedly use while working can stay.
Move backups elsewhere: Extra pens, spare chargers, additional sticky notes, and duplicate accessories belong in secondary storage.
Return wandering objects: If something actually belongs in the kitchen, bathroom, bedroom, or another workspace, move it there.
Keep paper separate: Documents, receipts, bills, and mail need their own collection point rather than being layered over small essentials.
The size of the tray gives you another useful rule.
When the tray is full, remove something.
Do not immediately upgrade to a bigger tray.
A full tray is information. It tells you that too many objects are trying to claim daily-access status.
If you want to get more from your life, and are looking for concrete action steps to get you there, check out our Request a Coach page. It’s a “cut the fence-sitting and take action” way to tackle your issues and actually find success. To get off the fence and start to take action, click or tap here.
Look through them and ask what you actually used recently.
You may discover that the spare charging cable has not moved in a month. Three pens may have appeared where you only need one. A pile of sticky notes may be occupying half the tray even though you rarely use them.
Move those items to a drawer, cabinet, small supply box, or other secondary storage area.
This gives your desk a simple hierarchy.
Daily essentials stay visible and close.
Occasional supplies stay nearby but out of the way.
Everything else lives somewhere else.
That distinction keeps the catchall useful instead of allowing it to become another clutter problem you eventually have to organize.
If you want to get more from your life, and are looking for concrete action steps to get you there, check out our Request a Coach page. It’s a “cut the fence-sitting and take action” way to tackle your issues and actually find success. To get off the fence and start to take action, click or tap here.
6. Build a 60-Second Desk Reset Around the Tray
The easiest organization systems are the ones that are simple to restore.
You should not need a weekly desk makeover to keep this tray working. Instead, connect it to a tiny end-of-day reset that takes about a minute.
When you finish working, look at the tray first.
Return the items that belong there, then remove anything that wandered into the zone during the day.
Your reset might look like this:
- Return the regular essentials: Put your pen, glasses, earbuds, stylus, or other daily items back inside the tray.
- Remove obvious outsiders: Take away cups, wrappers, mail, receipts, or anything that belongs somewhere else.
- Clear the area around the tray: Pick up loose objects that have landed beside it.
- Straighten only if needed: You do not have to carefully rearrange every item.
- Stop when the desk is functional: The goal is readiness, not perfection.
Using the edge of the tray as a visual boundary makes this especially easy.
Inside the tray, your daily essentials are allowed to remain visible.
Outside the tray, the work surface gets cleared.
If you want to get more from your life, and are looking for concrete action steps to get you there, check out our Request a Coach page. It’s a “cut the fence-sitting and take action” way to tackle your issues and actually find success. To get off the fence and start to take action, click or tap here.
That creates a simple rule your brain can understand at a glance. You do not need to make a separate decision about every small object.
If it belongs to your daily essentials, it goes inside the tray.
If it does not, it goes somewhere else.
This also makes morning setup easier.
Instead of searching for your glasses, favorite pen, earbuds, or adapter before starting work, the items you use most should already be waiting in one predictable spot.
The reset should stay deliberately short.
If you turn it into a detailed organizing ritual that requires wiping every surface, sorting every drawer, and perfectly arranging supplies, you are less likely to do it consistently.
The tray works because resetting it is almost effortless.
If you want to get more from your life, and are looking for concrete action steps to get you there, check out our Request a Coach page. It’s a “cut the fence-sitting and take action” way to tackle your issues and actually find success. To get off the fence and start to take action, click or tap here.
A minute of maintenance at the end of the day can prevent several days of small objects slowly spreading back across your workspace.
7. Fix the System When the Tray Starts Becoming Cluttered
Even a good organization system can drift over time.
Your routine changes. New objects appear. Something gets dropped into the tray because you are busy, then another item joins it the next day.
Eventually, you may look at your neat little catchall zone and realize it has become crowded.
That does not mean the system failed.
It usually means the tray needs a quick edit.
Start by looking for items that have stopped moving.
If something has been sitting in the same position for weeks, there is a good chance it does not need immediate access anymore.
If you want to get more from your life, and are looking for concrete action steps to get you there, check out our Request a Coach page. It’s a “cut the fence-sitting and take action” way to tackle your issues and actually find success. To get off the fence and start to take action, click or tap here.
Remove inactive items: Move anything you rarely use into a drawer or secondary supply area.
Look for duplicates: Keep one favorite pen, one charging adapter, or one sticky-note pad rather than multiple versions.
Watch for category creep: Beauty products, snacks, receipts, coins, jewelry, mail, and household objects can slowly transform the tray into general clutter.
Check what keeps landing outside the tray: That can reveal whether the tray is too small, poorly positioned, or missing an item you genuinely use often.
Shrink before expanding: Remove unnecessary contents before replacing your tray with something larger.
Pay special attention to objects that repeatedly sit beside the tray rather than inside it.
That is useful information.
Maybe your glasses do not fit comfortably. Perhaps a cable cannot reach. Maybe the tray is slightly too far from where you actually work.
If you want to get more from your life, and are looking for concrete action steps to get you there, check out our Request a Coach page. It’s a “cut the fence-sitting and take action” way to tackle your issues and actually find success. To get off the fence and start to take action, click or tap here.
You may only need to shift the tray six inches or rearrange what is inside.
The best organization systems respond to your behavior rather than expecting you to behave perfectly.
If you constantly ignore part of the setup, change the setup.
Give yourself permission to experiment.
The tray you create today does not have to remain exactly the same six months from now.
Your work routine, technology, habits, or desk layout may change.
The goal is not to maintain one perfect arrangement forever.
It is to preserve the basic principle: frequently used essentials stay together inside one small, easy-to-maintain boundary rather than spreading across the entire desk.
If you want to get more from your life, and are looking for concrete action steps to get you there, check out our Request a Coach page. It’s a “cut the fence-sitting and take action” way to tackle your issues and actually find success. To get off the fence and start to take action, click or tap here.
Adapt the Tray to the Way You Actually Work
There is no universal list of objects that belongs in a desk catchall.
A useful tray should reflect what you actually do at your desk.
Someone who spends most of the day writing may need a pen, highlighter, glasses, and sticky notes nearby. Someone who spends hours in online meetings may reach for earbuds, lip balm, glasses, and a small remote instead.
That is why your first setup should be treated as an experiment rather than a final arrangement.
Use the tray for about a week and notice what happens.
Track what you constantly grab: Anything you reach for several times each day has probably earned its place.
Notice what never moves: Items that remain untouched may belong in secondary storage.
Watch what you keep adding: If you repeatedly bring the same object onto the desk, consider giving it a permanent tray spot.
If you want to get more from your life, and are looking for concrete action steps to get you there, check out our Request a Coach page. It’s a “cut the fence-sitting and take action” way to tackle your issues and actually find success. To get off the fence and start to take action, click or tap here.
Separate daily and project-specific items: Supplies needed for one temporary project do not necessarily need to remain on the desk afterward.
This distinction can prevent your tray from expanding every time your work changes.
For example, you might need a USB drive, highlighter, ruler, or extra cable while working on a particular project. Bring those things out while you need them, then return them to their normal storage location when the project ends.
Your permanent tray stays focused on everyday essentials.
This approach is especially helpful if your desk serves multiple purposes.
You may work from home during the day, handle personal paperwork at night, and use the same surface for hobbies or studying on weekends.
Instead of trying to keep every possible supply within reach at all times, let the tray hold the small items that cross most of those routines.
Everything else can rotate in and out.
If you want to get more from your life, and are looking for concrete action steps to get you there, check out our Request a Coach page. It’s a “cut the fence-sitting and take action” way to tackle your issues and actually find success. To get off the fence and start to take action, click or tap here.
The result is a desk system based on actual behavior rather than an imaginary version of your workday.
That usually makes it easier to maintain because you are not forcing yourself to follow an organization method that looks tidy but does not match how you really work.
How an Organization Coach Could Help Fine-Tune the System
Sometimes a clutter problem keeps returning even after you buy containers, clear the desk, and promise yourself you will put everything away.
In that situation, the issue may not be a lack of storage.
The real problem may be friction.
An organization coach can help you look at the small behaviors happening around your desk and identify why certain objects never make it back to their intended homes.
For example, you may technically have a drawer for earbuds, but the drawer is across the room. You may own a beautiful pen organizer, but it sits on the opposite side of the desk from where you naturally write.
Those systems create extra steps.
If you want to get more from your life, and are looking for concrete action steps to get you there, check out our Request a Coach page. It’s a “cut the fence-sitting and take action” way to tackle your issues and actually find success. To get off the fence and start to take action, click or tap here.
A coach would typically look at what you actually do rather than simply telling you to become more disciplined.
Identify where things naturally land: The areas where you already drop objects can reveal the best locations for storage.
Look for unnecessary steps: Opening lids, walking across the room, untangling cords, or moving other objects can make a system harder to maintain.
Separate real needs from imagined needs: You may think ten supplies need to stay within reach when only four are used regularly.
Adjust the environment first: Changing the tray location or reducing its contents may be more effective than trying to change your habits through willpower.
Review the system after testing it: What worked easily? What did you keep ignoring? What continued to create clutter?
You can also use these coaching-style questions on your own.
Ask yourself why an object keeps ending up somewhere rather than immediately deciding that you need another organizer.
If you want to get more from your life, and are looking for concrete action steps to get you there, check out our Request a Coach page. It’s a “cut the fence-sitting and take action” way to tackle your issues and actually find success. To get off the fence and start to take action, click or tap here.
If your earbuds always land beside your laptop, the answer may be obvious. That is where you use them, so that is where their home should probably be.
Organization becomes easier when the physical environment supports behavior that already happens naturally.
Your tray is a small example of that idea.
Instead of creating a complicated system and trying to remember to follow it, you create one obvious landing spot exactly where your daily habits already happen.
Let One Small Zone Protect the Rest of Your Desk
The goal of a catchall tray is not to create a perfectly empty desk.
A workspace can still contain useful objects and feel organized. The difference is whether those objects have boundaries or gradually spread into every open area.
One small tray gives your daily essentials permission to stay visible.
Your glasses do not need to disappear into a drawer every time you take them off. Your favorite pen does not need an elaborate storage system. Your earbuds do not need to be packed away between every call.
If you want to get more from your life, and are looking for concrete action steps to get you there, check out our Request a Coach page. It’s a “cut the fence-sitting and take action” way to tackle your issues and actually find success. To get off the fence and start to take action, click or tap here.
They simply need a reliable place to return.
Start smaller than you think you need.
Choose a modest tray and add only the things you regularly use. You can always adjust the contents after several days of real use.
Protect the boundary: Let daily essentials live inside the tray while keeping the surrounding work surface open.
Keep returning items easy: If putting something away requires several movements, simplify the setup.
Edit instead of expanding: When the tray becomes crowded, remove unnecessary items before buying more storage.
Allow the system to change: Update the contents as your routine changes rather than forcing yourself to maintain an outdated setup.
Most importantly, do not turn this into a major organization project.
If you want to get more from your life, and are looking for concrete action steps to get you there, check out our Request a Coach page. It’s a “cut the fence-sitting and take action” way to tackle your issues and actually find success. To get off the fence and start to take action, click or tap here.
You do not need to empty every drawer, buy matching containers, label your supplies, or spend an afternoon rebuilding your workspace.
The strength of this system is its simplicity.
You are taking the loose objects that already live on your desk and giving them one defined place.
That small change can make the rest of the desk feel noticeably calmer because clutter no longer has unlimited territory.
When the tray works properly, returning your essentials requires almost no thought.
Pick something up.
Use it.
Put it back inside the boundary.
If you want to get more from your life, and are looking for concrete action steps to get you there, check out our Request a Coach page. It’s a “cut the fence-sitting and take action” way to tackle your issues and actually find success. To get off the fence and start to take action, click or tap here.
That is the entire system, and that simplicity is exactly what makes it easy to keep using.
If you want to get more from your life, and are looking for concrete action steps to get you there, check out our Request a Coach page. It’s a “cut the fence-sitting and take action” way to tackle your issues and actually find success. To get off the fence and start to take action, click or tap here.
Read this next

The Galentine’s Formula: Decor, Tables, and Activities That Just Work
Are you all about style, decor and organization? Download a copy of our Decluttering Workbook. ***Galentine’s Day has become one of those rare gatherings that people genuinely enjoy planning for […]
Read More
Easter Flower Arrangements That Feel Luxe Without The Florist Price Tag
Create luxe-looking Easter flower arrangements with grocery store blooms, simple vases, and easy tricks that make your table feel fresh fast.
Read More
The Top 9 Tips To Organizing Your Life
It is easy enough to organize your life nowadays. There are thousands of systems, tips and hints available.
Read More