


Talk to a coach about Relationship coaching

Dr Soraya Sawicki, DSW, CPC, RMT
DSW, CPC, CSC, RMT
Personalized wellness coaching for stress relief, energy, and inner harmony.

Daniel Herron
CPLC
You know what it's like to avoid, to push away....

Dr. Kate Watson
B.A Psychology, M.Ed. Psychological Counseling, Dr.PH in Public Health, Certified Health Coach, Certified Life Coach, Certified Mind and Body Specialist, Certified Women's Empowerment Coach, Certified Neurodiversity Coach
Dr. Kate Watson helps people with boundaries, coping strategies, and...

James Morrison
Relationship Coach Certified, PGCert Psych
Attentive listener, experienced life coach specializing in relationships.

Jeff Batton
the coach of what not to do!
I specialize in identifying underlying patterns in your life that...

Lee Wilson
Master Diploma, Marriage Counseling
Breakup recovery & relationship coach with 20+ yrs experience and...

Dr. Patty ll Beach
Metaphysician, Doctor of Divinity & Spirituality
Intuitive Psychic Life Coach & Metaphysician for Spiritual Awakening

Ivy Lofberg
Member of Relationship Coaching Institute, IAC-accredited Professional Coach, OneSpirit Interfaith Minister
Author of 5 G.R.E.A.T Laws of Dating, dedicated to helping...


Teacher Gift Baskets That Don’t Look Last-Minute

A Thoughtful Teacher Gift Is Easier Than You Think
It is the evening before a school celebration, and you suddenly remember the teacher gift. Between homework, dinner, and everything else on the family calendar, finding something thoughtful can feel like one more impossible task. You want the teacher to feel appreciated, but you have neither the time nor the energy for an elaborate project.
The good news is that a last-minute gift does not have to look like one. A small basket can feel coordinated and personal when every item has a reason to be there. The trick is to stop thinking about everything you could include and start with the one decision that makes the rest easier.
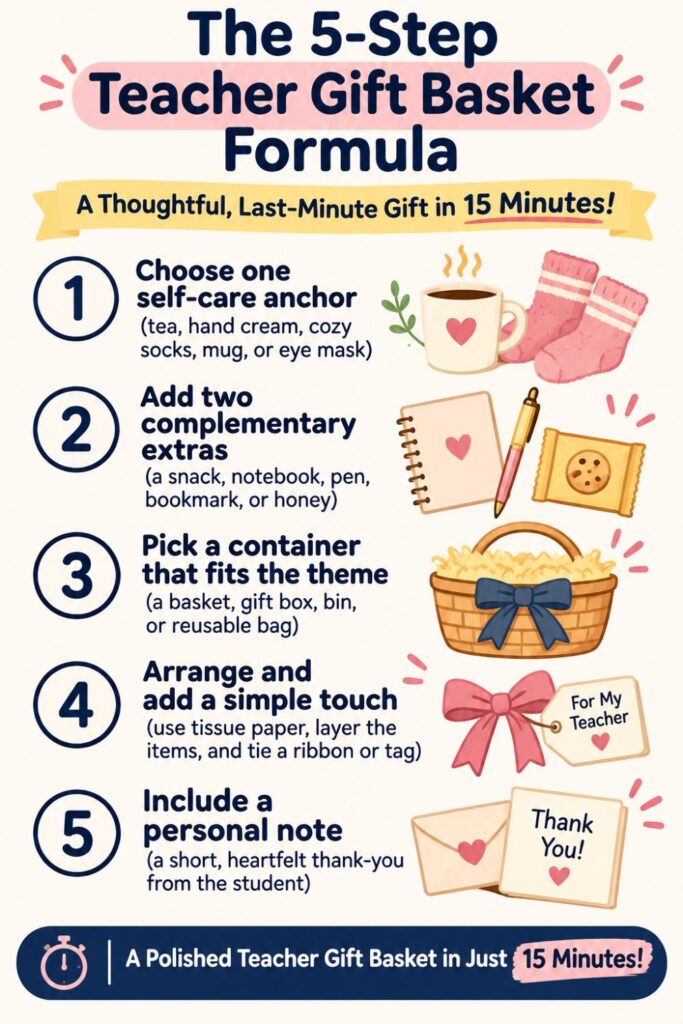
Use this simple formula: one main gift, two small extras, and one personal note from the student. Choose a self-care item as your starting point, match two useful or comforting additions to it, and arrange everything in a container that fits. That is enough to create a gift with a clear theme and a finished appearance.
Before you begin, look around for supplies you already have. A clean gift box, small storage basket, tissue paper, and blank card may be waiting in a drawer. If you need to shop, use the formula as your list rather than wandering the aisles looking for inspiration.
The assembly itself can take about 15 minutes once the items are on hand. You will spend a few minutes choosing the theme, a few arranging the pieces, and a few helping your child write a meaningful note. There is no need for complicated wrapping or craft skills.
Most importantly, this is a gift from a student to a teacher. The teacher does not need a basket packed with expensive products to know their work matters. A useful little collection and a specific thank-you can communicate that beautifully.
Need some relationship guidance? Drop on by our directories choc full of relationship coaches and dating coaches to help make your love life the best it can be. Or click here to have us match you to the best.
1. Start With One Main Gift Instead of Trying to Fill an Entire Basket
The quickest way to become overwhelmed is to begin with an empty basket and ask yourself how to fill it. That question leads to too many possibilities, from snacks and candles to stationery and bath products. Instead, choose just one main item and let it set the direction.
If you want to get more from your life, and are looking for concrete action steps to get you there, check out our Request a Coach page. It’s a “cut the fence-sitting and take action” way to tackle your issues and actually find success. To get off the fence and start to take action, click or tap here.
Think of this item as the anchor. It should be something the teacher can use or enjoy, ideally with a quiet self-care theme. A modest gift that feels considered is better than a larger item selected only because it fills space.
- Choose one useful comfort item: Start with herbal tea, a good-quality hand cream, cozy socks, a reusable mug, or a soft eye mask. Select something that fits comfortably in a small container and is easy to pair with two inexpensive extras.
- Use a preference you actually know: If your child has noticed a favorite tea, color, or type of snack, that detail can guide your choice. If you know nothing about the teacher’s preferences, stick to neutral, practical items instead of guessing about strong scents or personal tastes.
- Name the theme in plain language: Call it a “tea break,” “cozy evening,” or “little moment of calm” basket. Once you can describe the theme in a few words, you have a simple test for every extra item you consider adding.
- Set a stop rule: After choosing a suitable anchor, stop comparing alternatives. The goal is to complete a thoughtful basket, not find the one perfect product among dozens of options.
For example, a small box of individually wrapped teas can become a tea-break basket. A pair of warm socks could lead to a cozy comfort basket. Even a simple notebook can anchor a quiet-moment theme when paired with the right extras.

If your first choice is unavailable, substitute another item from the same general category. Do not restart the entire plan because the store lacks a specific brand or color. One good choice is all you need to take the next step.
2. Add Two Small Extras That Make the Gift Feel Complete
Once you have an anchor, the next step is much easier. You are no longer shopping for “teacher gifts” in general. You are finding two small things that belong with the item you have already chosen.
Those two extras should have different jobs. One should complement the main item, and the other should add something useful, comforting, or personal. Keeping the count low makes the basket easier to arrange and prevents it from becoming a collection of random purchases.
- Choose an item that supports the anchor: Pair tea with a honey stick or wrapped biscuits, a reusable mug with hot cocoa, or cozy socks with a small packet of herbal tea. Think about how the teacher might enjoy the items together during a short break.
- Add one practical finishing item: A bookmark, attractive pen, small notepad, or individually wrapped treat can make the set feel complete. Choose something modest that does not compete visually with the main gift.
- Check the three items as a group: Put them side by side before adding anything to the basket. If one item seems out of place, replace it with something closer to the theme rather than adding a fourth item to explain it.
- Make sensible substitutions: When you do not know about allergies or dietary restrictions, use nonfood extras such as stationery or a bookmark. When fragrance preferences are unknown, avoid heavily scented lotion or candles and choose a more neutral comfort item.
Here are three combinations that follow the same structure:
- Tea break: Herbal tea, a honey stick, and a bookmark.
- Cozy comfort: Soft socks, a packet of cocoa, and a small notebook.
- Everyday reset: A reusable mug, a nice pen, and a wrapped snack.
You do not need to buy every combination on the list. Pick one, use what is readily available, and move forward. Three thoughtfully connected items usually look more intentional than six unrelated ones squeezed into a basket.
3. Choose a Container That Makes Everything Look Intentional
The container is not merely something to carry the gifts in. It controls how the contents look together, and it can make a simple collection feel finished. Fortunately, you do not need a specialty gift basket or an expensive box.
If you want to get more from your life, and are looking for concrete action steps to get you there, check out our Request a Coach page. It’s a “cut the fence-sitting and take action” way to tackle your issues and actually find success. To get off the fence and start to take action, click or tap here.
Start by placing your three items on a table and estimating the space they need. A container that is too large makes the gifts look sparse, while one that is too small hides the contents or crushes the packaging. Aim for a snug arrangement with a little room for tissue paper.
- Choose the smallest practical container: Try a short wicker basket, sturdy gift box, reusable desk bin, or small decorative bag. Test the fit before adding any filler so you know the main item and both extras can remain visible.
- Consider a useful second purpose: A pencil cup can hold compact gifts, while a small organizer might later sit on a desk or shelf. A reusable container adds value without increasing the number of gift products you need to choose.
- Keep the color palette simple: Pick two coordinating colors, such as cream and sage, navy and white, or pale pink and beige. Use tissue paper or ribbon in one of those colors to connect packaging that would otherwise look mismatched.
- Build a shallow base: Fold tissue paper into the bottom or behind the items to lift them into view. Avoid stuffing the basket with so much filler that the gifts become difficult to remove.
If you have only a plain cardboard box, line it neatly with tissue and fold the outer edges down for a crisp finish. A clean paper gift bag can also work if the items are too awkward for an open basket. The consistent colors and personal note will do much of the visual work.
Before moving on, lift the container gently and check that it feels stable. A teacher may be carrying books, bags, and classroom supplies, so practical packaging matters. Choose a container that can travel easily and keep everything upright.
4. Arrange the Basket Using a Simple Three-Level Formula
Good gift-basket styling is mostly about making the contents easy to see. You do not need florist techniques, elaborate wrapping, or a mound of decorative filler. A simple three-level arrangement is enough to make the gift look thoughtfully assembled.
Think of the container as a small display with a back, center, and front. The tallest item creates height, the anchor draws attention, and the smallest pieces fill the lower spaces. Once those positions are clear, adjusting the arrangement becomes a quick process.
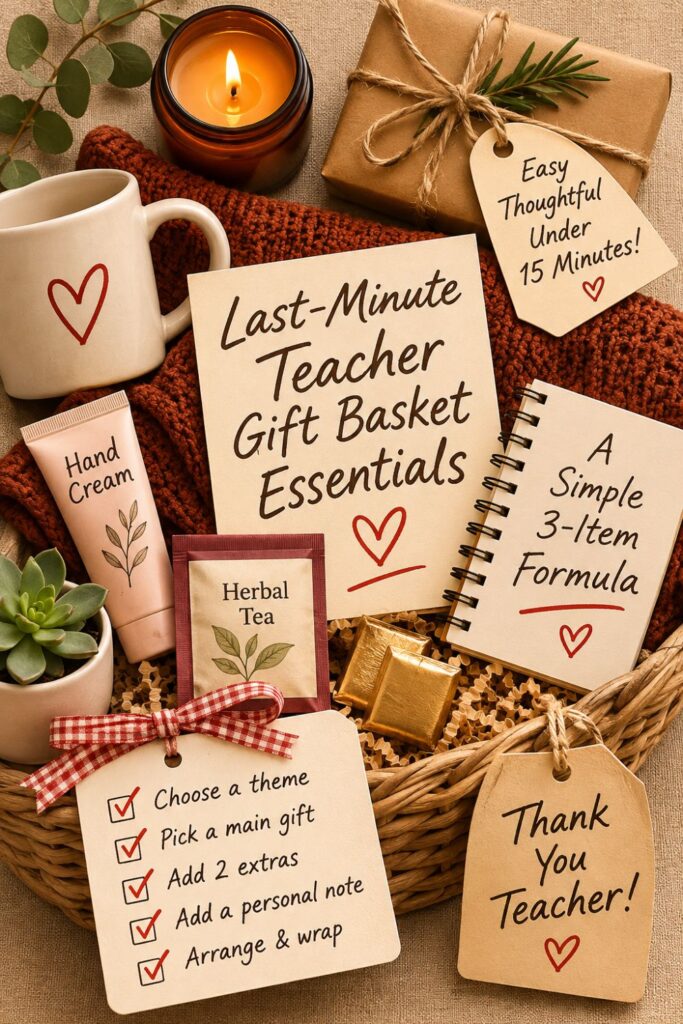
- Put the tallest item toward the back: Stand a notebook, mug package, or tall tea box behind the other gifts. Angle it slightly if necessary so the front label remains visible and the item does not block everything else.
- Give the anchor the clearest position: Set the main gift near the center, facing forward. If the anchor is small, raise it with folded tissue so it remains the first thing the teacher notices.
- Tuck the extras into the lower spaces: Place the two additions to either side or slightly in front of the centerpiece. Keep enough separation that all three can be identified without unpacking the gift.
- Use one restrained finishing touch: Tie a ribbon around the handle, fold the tissue neatly, or attach a simple tag. Select one method rather than layering bows, artificial flowers, and extra ornaments.
Step back and view the basket from the angle at which it will be handed over. Can you identify the main item? Do the smaller pieces look connected to it, and is the container supporting the arrangement rather than overwhelming it?
If something seems off, change the height or position before buying more decorations. Often, one piece of folded tissue under a small product solves the problem. The goal is not a store-window display, but a tidy, generous-looking gift that is easy to carry and enjoy.
5. Add a Student-Written Note That Makes the Gift Personal
The note is what turns a pleasant collection of products into a genuine expression of appreciation. Teachers receive many general thank-you messages, but a specific memory or kind observation can make a short card stand out. This is also the easiest way to let the student take part in the gift.
If you want to get more from your life, and are looking for concrete action steps to get you there, check out our Request a Coach page. It’s a “cut the fence-sitting and take action” way to tackle your issues and actually find success. To get off the fence and start to take action, click or tap here.
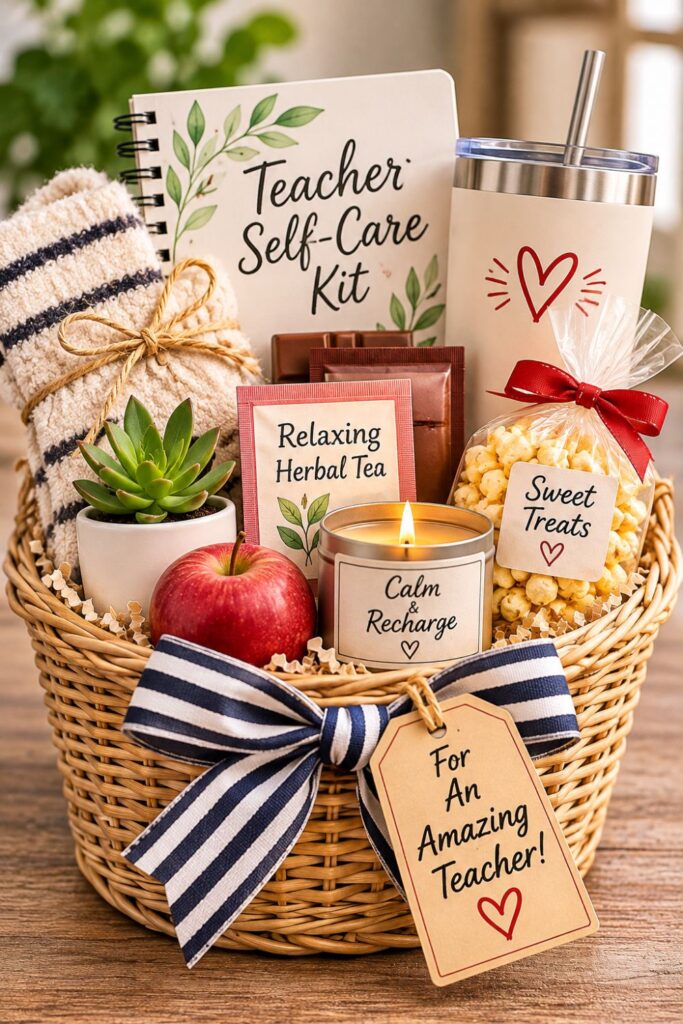
Keep the message brief. A young child does not need to write a formal letter, and an older student does not need a long speech. One specific thank-you and one personal detail are enough to make the message feel sincere.
- Ask one easy question: Try “What is something your teacher helped you learn?” or “What is your favorite part of their class?” Give your child a moment to answer in their own words instead of suggesting a polished phrase immediately.
- Use a fill-in-the-blank script: Write, “Dear [Teacher’s Name], thank you for [something specific]. My favorite thing about your class is [a real detail]. I hope you enjoy this little gift. From, [Student’s Name].” Let your child fill the blanks with their own ideas.
- Adapt the format to the student’s age: Younger children can draw a picture and finish a sentence such as “Thank you for helping me ____.” Older students can write two or three sentences about a favorite lesson, encouraging moment, or classroom tradition.
- Make the card part of the presentation: Attach it to the handle with ribbon or tuck it upright at the front of the container. Check that the student’s name is visible and the card will not slip out during the trip to school.
Avoid making the child copy a message that does not sound like them. “Thank you for helping me when math was hard” is more meaningful than an elaborate compliment they would never say. A genuine line in uneven handwriting often carries more warmth than a perfectly printed tag.
If time is extremely tight, the parent can write the opening and the student can finish one sentence. The important part is giving the child ownership of the appreciation. The gift may be assembled by a busy adult, but the thank-you should still come from the student.
6. Put Everything Together With This 15-Minute Teacher Gift Basket Checklist
Once the products and container are ready, set a 15-minute timer and work through the steps in order. The timer is for assembly, not for traveling to a store or searching several shops for supplies. Keeping that distinction clear makes the method realistic on a busy evening.
Set everything on one clean surface before you start. You need the anchor item, two extras, a container, tissue paper, a ribbon or tag, and a card with a pen. Having the materials within reach prevents repeated trips to drawers and closets.
- Minutes 0 to 2, confirm the theme: Put the three gift items together and decide which is the anchor. Remove anything that does not belong with the set so you do not spend time reconsidering it later.
- Minutes 2 to 5, prepare the container: Choose the right-sized basket or box and add folded tissue as a low base. Test the fit of all three items before securing anything in place.
- Minutes 5 to 8, arrange the products: Position the tallest item at the back, the anchor near the center, and the smaller extras toward the front. Adjust their heights until each item can be seen clearly.
- Minutes 8 to 11, finish the wrapping: Straighten the tissue, tie one ribbon or attach a simple gift tag, and gently lift the basket to check its balance. Remove any loose decoration that might fall out.
- Minutes 11 to 14, write the note: Ask the student to complete the thank-you script or add a drawing. Attach the finished message where it will be easy for the teacher to find.
- Minute 14 to 15, do the final check: Confirm the teacher’s name, make sure everything is secure, and place the basket beside the school bag or another reliable morning reminder.
If you get stuck on a decision, ask, “What is the next physical step?” The answer might be folding the tissue or writing the teacher’s name. Completing that small action is more helpful than imagining every possible way the basket could look.
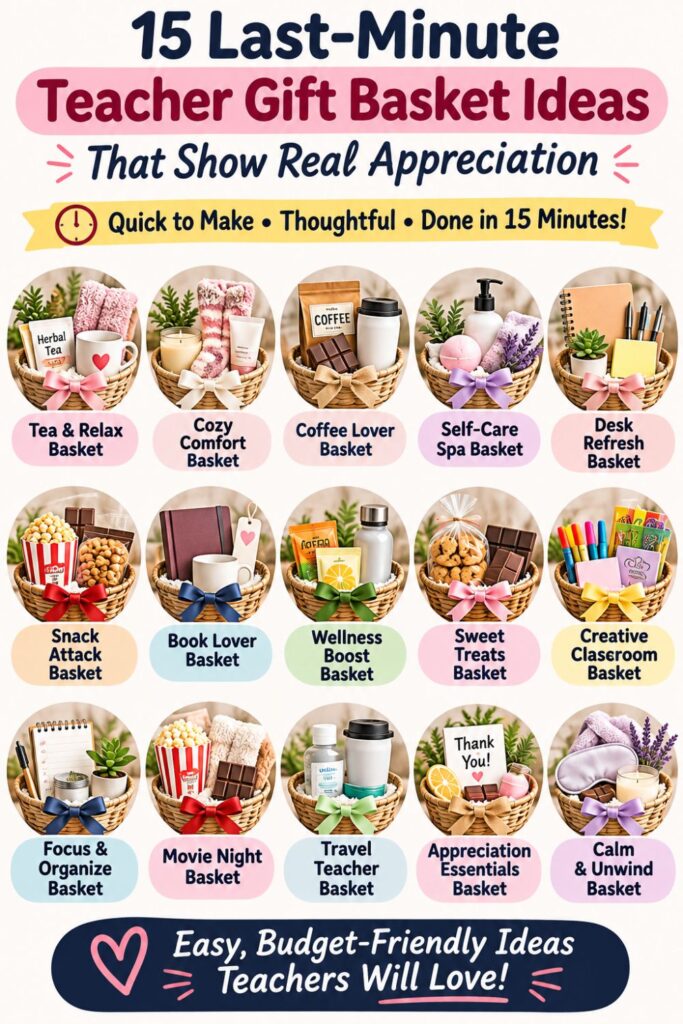
The finished gift does not need another round of improvements. When the items are coordinated, the card is attached, and the basket is ready to carry, you are done. That stopping point is part of what makes this a useful last-minute system.
7. How to Make Teacher Gift Baskets for Multiple Teachers Without Starting Over
When a child has several teachers, classroom assistants, or school staff members to thank, even a small gift project can multiply quickly. The solution is to repeat the same structure while personalizing one or two details. You do not need to invent a completely different basket for every recipient.
If you want to get more from your life, and are looking for concrete action steps to get you there, check out our Request a Coach page. It’s a “cut the fence-sitting and take action” way to tackle your issues and actually find success. To get off the fence and start to take action, click or tap here.
Begin by writing a recipient list. Next to each name, note anything your child actually knows, such as a favorite color, subject, or small preference. If you do not have those details, keep the gifts simple and let the individual notes provide the personal connection.
- Standardize the basic formula: Use one category of anchor item, two matching extras, and similar-sized containers for everyone. Keeping the structure consistent makes shopping and assembly easier to manage.
- Change one meaningful detail: Choose different tea flavors, notebook colors, or bookmarks when you know they suit the recipients. Avoid making guesses about food allergies or fragrance preferences just to create variation.
- Set up an assembly line: Arrange empty containers in a row, add tissue to each, place all the anchors, and then add the extras. Finishing one task across every basket is faster than repeatedly gathering and putting away supplies.
- Personalize the cards separately: Invite your child to share a distinct thank-you or favorite memory for each teacher. Place each finished card with the correct basket immediately so the names cannot be mixed up.
- Check the delivery plan: Make a short list of the recipients and where the gifts will go. If your child cannot carry several baskets safely, ask about an appropriate drop-off plan rather than overloading the school bag.
This method also makes it easier to share preparation duties. A parent can set up the containers while the student writes messages, and another family member can help check the names. Everyone has a concrete job instead of a vague instruction to “help with gifts.”
The baskets can look like a coordinated set without feeling mass-produced. Matching containers create visual consistency, while the different notes show that each teacher was considered as an individual. That is the balance to aim for when making several gifts at once.
8. How an Organizational Coach Can Help Busy Parents Stop the Last-Minute Gift Scramble
Sometimes a forgotten teacher gift is just a one-time oversight. But if school events, birthdays, forms, and family commitments repeatedly turn into last-minute emergencies, the larger problem may be how those tasks are captured and planned. An organizational coach can help a busy parent build a manageable system around those recurring responsibilities.
The first goal is not to create a complicated planner. It is to identify where a responsibility stalls. Perhaps dates never make it onto the family calendar, or perhaps the event is remembered but deciding what to buy takes too much energy.
- Find the recurring sticking point: Review the last few rushed tasks and notice whether the difficulty was remembering, choosing, shopping, or finishing. A coach can help separate these problems so each receives a practical solution.
- Turn the task into one next action: Replace a vague reminder such as “teacher gifts” with a concrete step such as “choose the main basket item.” Once that is complete, the next action can be to gather two extras or prepare the card.
- Create reminders at useful intervals: Put school appreciation dates and end-of-year events on a shared calendar. Add a reminder early enough to gather supplies, plus a later reminder for the actual assembly.
- Keep a small gift-preparation kit: Store blank cards, tissue paper, ribbon, and one or two reusable containers together. Review the supplies occasionally so you know what is available before the next occasion.
- Build a brief weekly planning habit: Spend a few minutes looking ahead at school events and choosing one action for anything upcoming. A coach can help adjust this routine to the family’s real schedule instead of imposing a system that feels like extra work.
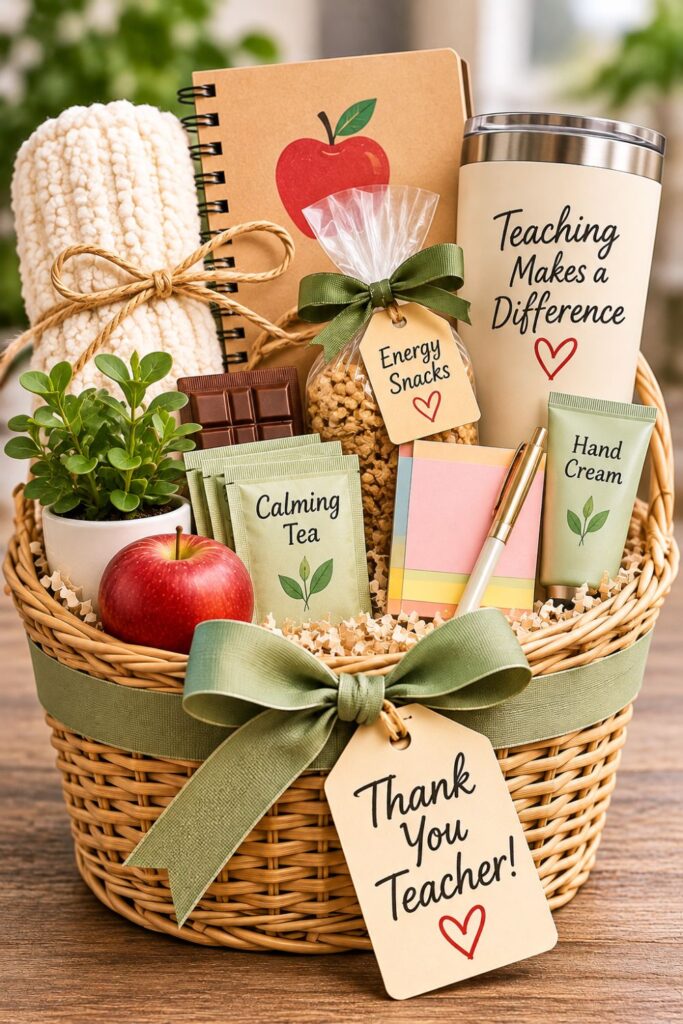
This kind of support is useful beyond teacher appreciation. The same approach can help with birthday invitations, activity supplies, holiday preparations, and other small obligations that quietly accumulate. By reducing the number of open decisions, a family can spend less energy reacting to deadlines.
You can also try the method without a coach. Start with the next school event, write down one physical action, and complete it today. A workable system often begins with a single task that no longer feels overwhelming.
A Thoughtful Teacher Gift Starts With One Simple Decision
A last-minute teacher gift can still show genuine care. What makes the difference is not how many products are packed into the container or how much money you spend. It is the way the pieces fit together and the personal message that explains why the teacher is appreciated.
If you want to get more from your life, and are looking for concrete action steps to get you there, check out our Request a Coach page. It’s a “cut the fence-sitting and take action” way to tackle your issues and actually find success. To get off the fence and start to take action, click or tap here.
Remember the basic formula: one main gift, two small extras, and a note from the student. The main item creates the theme, the extras make it feel complete, and the note gives the gesture meaning. A small container and a tidy arrangement bring those parts together.
If the idea of making a gift still feels overwhelming, do not start with a shopping list of twenty possibilities. Start with one question: “What is the main item?” Once you answer it, choose two things that naturally go with it. Then find a container that fits what you already have.
Need some relationship guidance? Drop on by our directories choc full of relationship coaches and dating coaches to help make your love life the best it can be. Or click here to have us match you to the best.
Keep a few practical guidelines in mind when finishing the basket:
- Choose usefulness over filler: A modest item the teacher can enjoy is more valuable than several products added only to occupy space.
- Keep presentation simple: Coordinating colors, visible items, and one ribbon or gift tag are enough for a polished result.
- Make the message specific: Let your child thank the teacher for a real lesson, act of patience, or favorite classroom experience.
- Know when to stop: Once the basket is secure, the note is attached, and the name is correct, the gift is ready.

Save the formula for teacher appreciation events, the last day of school, or an unexpected opportunity to say thank you. If you often prepare gifts, keep a few containers and blank cards together so future assembly is even faster. You can change the theme each time without rebuilding the method.
Most of all, let your child participate in handing over the gift and saying thank you. A thoughtful teacher gift is not a test of a parent’s creativity or planning skills. It is a small moment of appreciation, and that can be achieved one simple step at a time.
If you want to get more from your life, and are looking for concrete action steps to get you there, check out our Request a Coach page. It’s a “cut the fence-sitting and take action” way to tackle your issues and actually find success. To get off the fence and start to take action, click or tap here.
Read this next

What Level Are You Playing In Your Relationship?
According to human need psychology, there are three levels in any relationship. What level are you playing?
Read More
How To Move On After A Breakup When Still In Love With Your Ex
Coach Lee lays out how to move on after a breakup when you are still in love with an ex boyfriend or ex girlfriend. If you have been left and […]
Read More
Why Is My Ex Watching My Stories On Social Media?
Coach Lee explains why your ex is watching your social media, Instagram stories, Facebook, etc. If you are wondering what it means and if you should watch your ex’s social […]
Read More