


Talk to a coach about Organizational coaching

Crystal Faulk
ACC
I help overwhelmed women in transition gain clarity, confidence, and...

Terrie Hein
Certified Life Coach, Certified Insight Coach Practitioner
Coaching to declutter your life, organize your goals, and cook...

Dr Charlene Ashley
Doctorate - Behaviours
I coach individuals to design fulfilling lives through structure, clarity,...

Paloma Chiara

Lana's Gymnastics Club
"Where the best in gymnastics meets fun. Where every child is a star"
lgclubny.com

Anna Sosnina
ICF (ACC)
ICF ACC certified coach, founder of EssorVie Coaching, passionate about...

Travis Brown
Professional Life coach
With experience in guiding clients to achieve goals, build confidence,...

Lynn Yang
Certified Christian Leadership Coaching (CCLC)
I will help you gain new insights, habits, and plans...
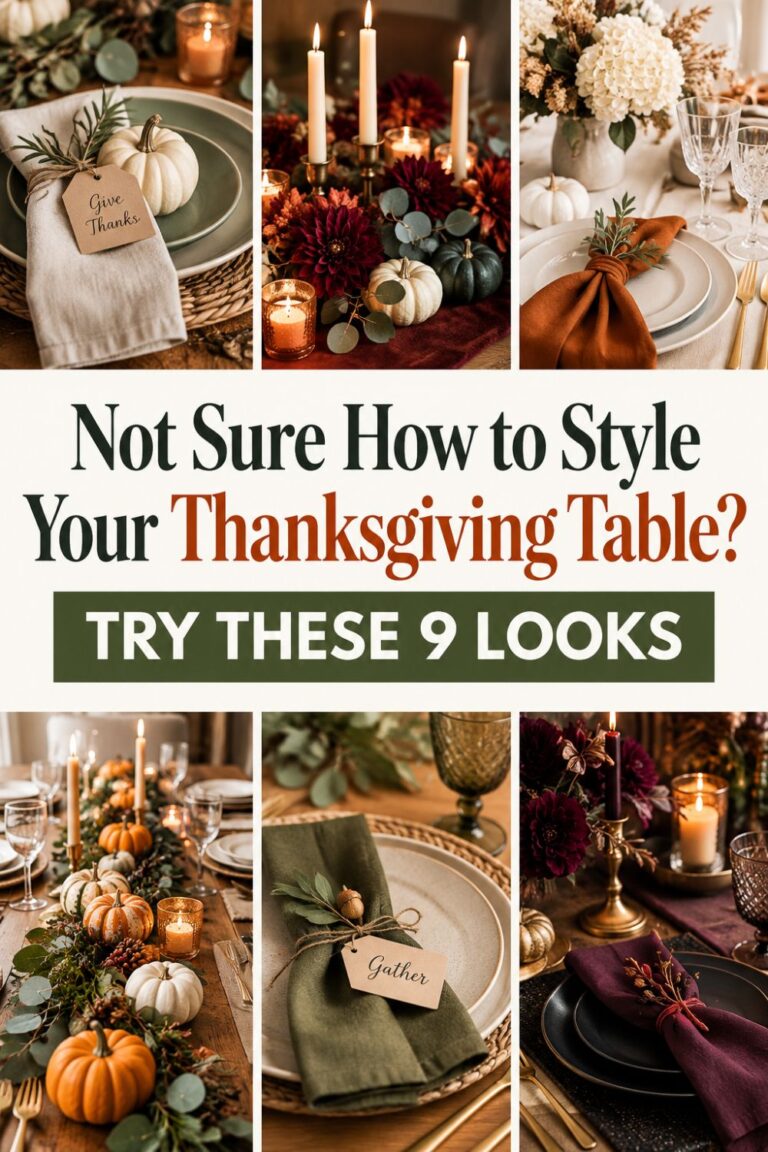




The Rustic Thanksgiving Table Trick That Makes Simple Decor Feel Special
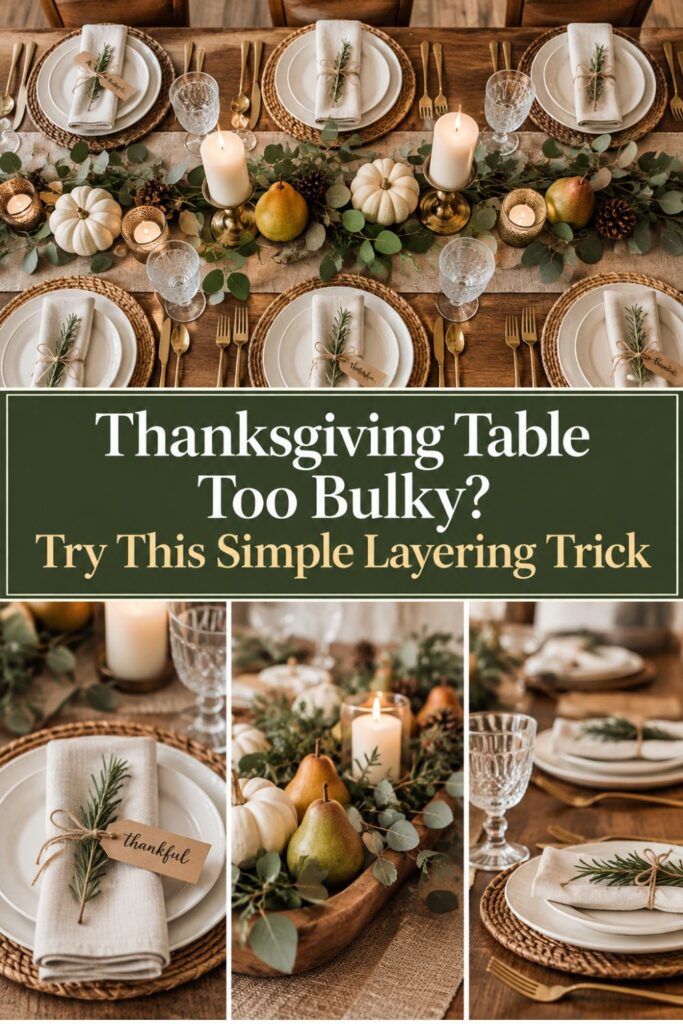
A rustic Thanksgiving table does not need to be covered in pumpkins, signs, or expensive seasonal decorations to feel festive. In fact, some of the warmest farmhouse tables are built from just a few simple materials used thoughtfully.
Burlap, rattan, wood, and kraft paper work especially well together because they all have natural texture without looking overly coordinated. The trick is knowing where each material should go so the table feels layered and welcoming rather than brown, bulky, or cluttered.
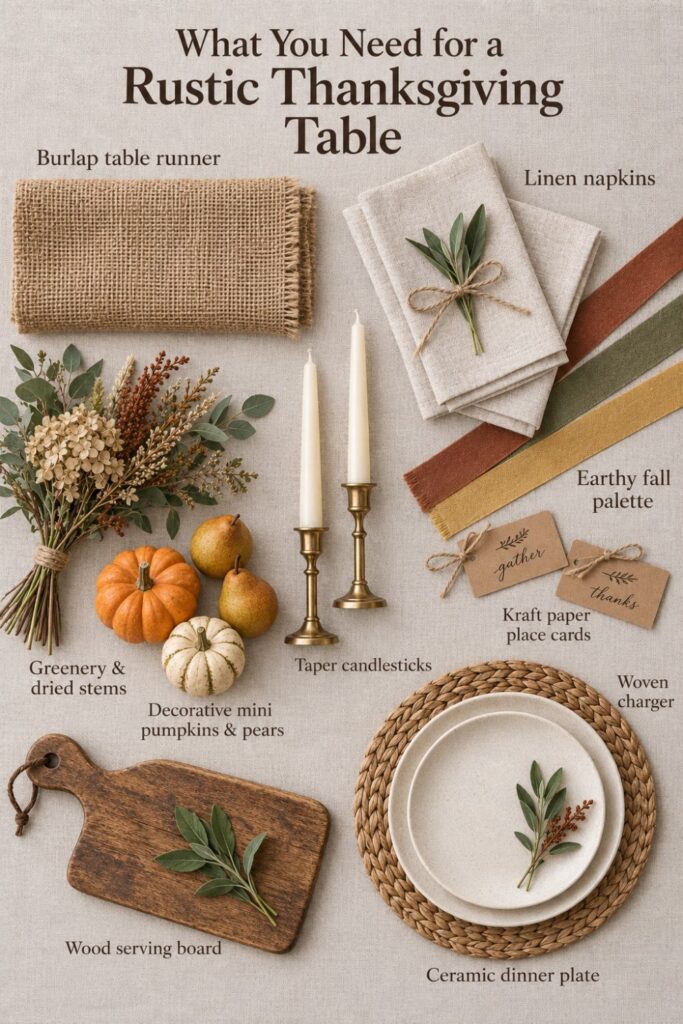
A simple rustic table usually works best when each material has one clear job:
- Burlap creates the soft foundation.
- Rattan adds woven texture around the place settings.
- Wood brings warmth and structure.
- Kraft paper adds inexpensive handmade details.
- Earthy fall colors connect everything visually.
Before you decorate, think about the table as a working space first. Guests still need room for plates, glasses, elbows, serving dishes, and conversation, so every decorative choice should support the meal rather than compete with it.
Start with what you already own: Pull out neutral dishes, wooden boards, woven chargers or baskets, simple glasses, plain napkins, and any burlap or natural fabric you already have before buying Thanksgiving-specific decor. You may find that the basic farmhouse ingredients are already sitting in your kitchen and linen cupboard.
Choose one earthy fall palette: Stick with two or three supporting shades such as rust, olive, muted gold, warm brown, cream, or beige. These colors complement natural materials and prevent the table from becoming visually busy.
Decide how the food will be served: Work out whether serving dishes will stay on the dining table or move to a buffet or counter. This decision determines how much room you can safely give to your centerpiece.
Once the practical pieces are clear, you can start building the table in layers. That order matters because a rustic Thanksgiving table looks most polished when the foundation is simple and the details are added gradually.
If you want to get more from your life, and are looking for concrete action steps to get you there, check out our Request a Coach page. It’s a “cut the fence-sitting and take action” way to tackle your issues and actually find success. To get off the fence and start to take action, click or tap here.
Need some help with style or organization? Drop on by our directories choc full of image coaches, organization coaches and minimalist coaches to help make your spaces beautiful. Or click here to have us match you to the best.
Build the Farmhouse Foundation Before Adding Thanksgiving Decor
The easiest way to make a Thanksgiving table look cluttered is to start decorating before establishing the foundation. Pumpkins, candles, greenery, and seasonal accents may look beautiful individually, but they need a calm backdrop if you want the final result to feel intentional.
Begin with the tabletop itself. If you have a wood dining table, leaving most of it uncovered immediately creates warmth and gives you a strong farmhouse base without any extra effort.
If the table surface does not fit the look you want, use a plain tablecloth in cream, oatmeal, warm white, or soft beige. Avoid bold prints at this stage because the burlap, rattan, wood, and kraft paper will provide plenty of texture later.
Choose the base surface first: Decide whether exposed wood or a neutral tablecloth will be the main background. Once that is in place, resist the urge to add multiple fabric layers right away.
Use only two dominant textures at first: Let the wood and burlap establish the rustic look before bringing in woven chargers, paper details, and decorative accents. Limiting the first layer makes it easier to see whether the table already feels balanced.
Plan where each material will repeat: Rattan might appear at every seat, wood might appear in the centerpiece and serving pieces, and kraft paper might appear in place cards and food labels. Repetition makes the table feel coordinated without requiring matching sets.
Leave some of the tabletop visible: Rustic styling looks more relaxed when there is breathing room. If every inch of the table is covered, the natural textures can start competing with one another.
If you want to get more from your life, and are looking for concrete action steps to get you there, check out our Request a Coach page. It’s a “cut the fence-sitting and take action” way to tackle your issues and actually find success. To get off the fence and start to take action, click or tap here.
Stand back and look at the table before moving on. At this point, it should already feel warm and grounded even though very little decorating has happened.
That is a useful test. If the foundation already looks inviting, the later Thanksgiving details only need to support it rather than rescue it.
Make the Burlap Runner Look Relaxed Without Looking Messy
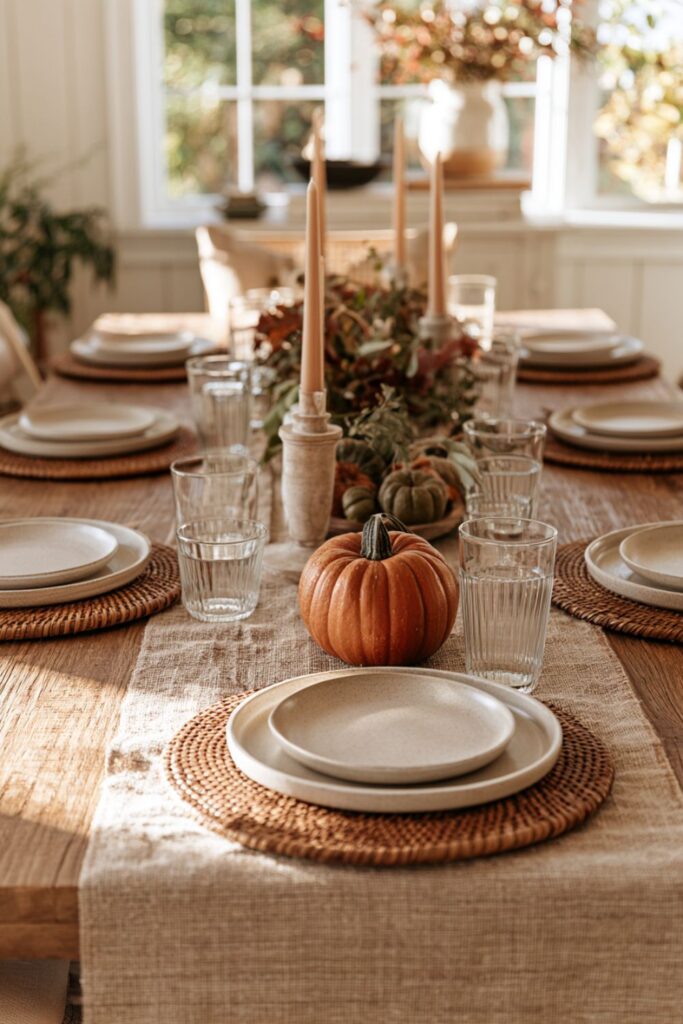
Burlap is one of the easiest ways to introduce farmhouse texture, but it can also overwhelm a table when it is too wide, too bulky, or overly frayed. The goal is to make the runner look casual and natural while still giving the table a clear center line.
Start by choosing a width that leaves plenty of tabletop visible on either side. You want the burlap to define the middle of the table, not make the entire surface look like it has been wrapped in fabric.
Choose the right width: A runner should create a central path for the centerpiece and serving pieces while leaving the place settings visually separate. If the burlap pushes too far underneath the plates, it can make the table feel heavy.
Decide how finished you want the edges: Hemmed burlap works well for a cleaner farmhouse style. Lightly frayed edges can create a more rustic effect, but trim loose strands so the fabric still looks deliberate.
Center it before adding anything else: Straighten the runner from both ends of the table and check it from the side. Once the centerpiece is built on top, repositioning it becomes much more annoying.
Soften the texture if necessary: If plain burlap feels too rough, layer a narrower piece of linen, gauze, cotton, or muslin over the center. A second softer fabric can lighten the look without losing the rustic foundation.
If you want to get more from your life, and are looking for concrete action steps to get you there, check out our Request a Coach page. It’s a “cut the fence-sitting and take action” way to tackle your issues and actually find success. To get off the fence and start to take action, click or tap here.
You can also use burlap in smaller ways if a full runner feels too strong. Narrow strips beneath serving boards, short crosswise runners beneath pairs of place settings, or small burlap napkin wraps can create the same texture in a lighter dose.
The most important rule is not to keep adding fabric simply because the table feels empty. The burlap should act as the visual road running through the center of the table.
Once that road is established, the next layers become much easier to place.
Layer Rattan and Wood Into the Place Settings
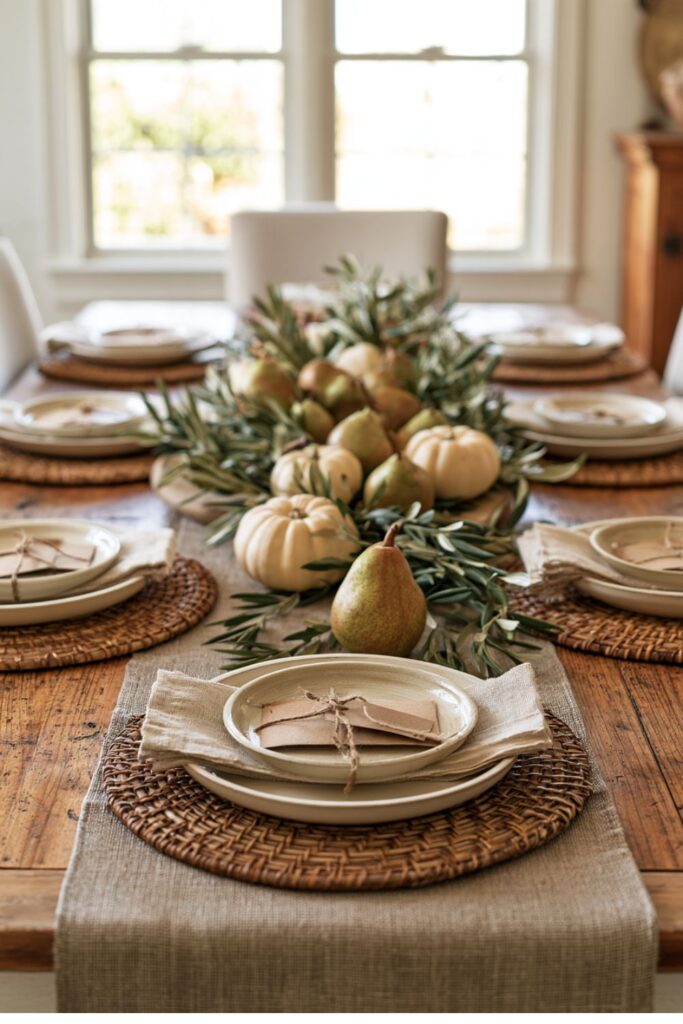
Rattan and wood are what make the table feel truly warm rather than simply seasonal. They introduce natural texture around each guest while also giving the table a repeatable visual rhythm.
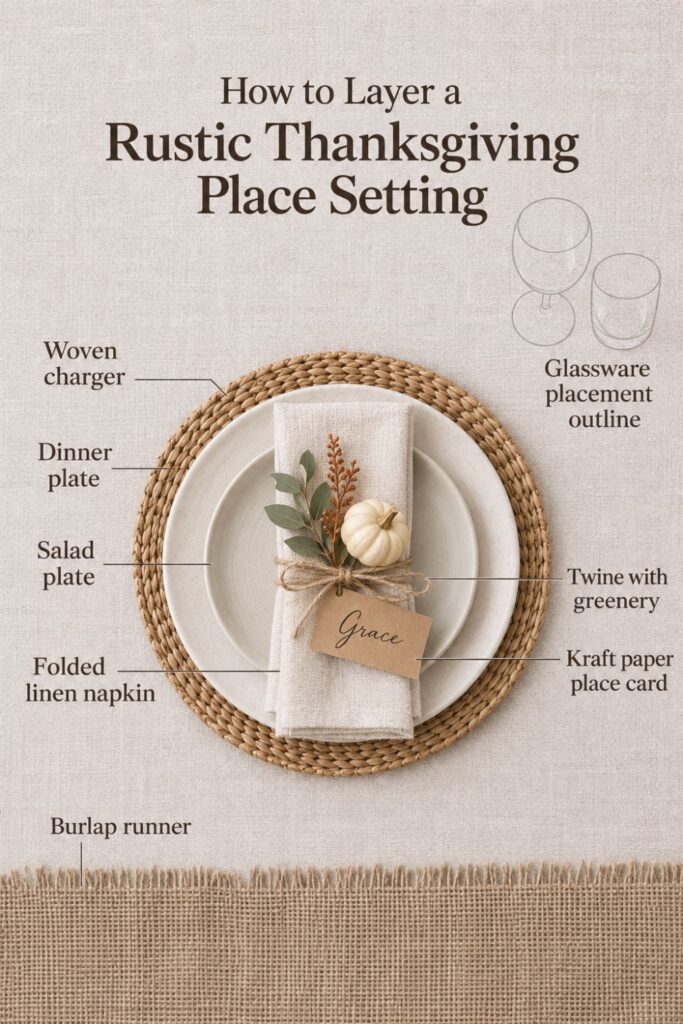
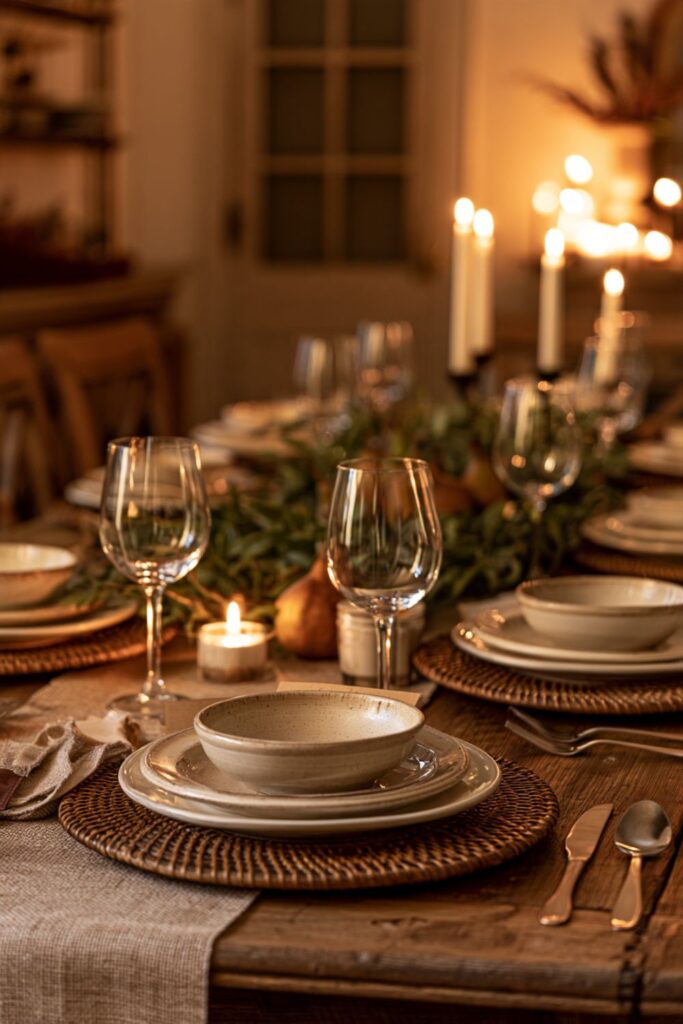
Start with woven chargers if you have them. Rattan, seagrass, wicker, or similar woven materials work beautifully under simple dinner plates because they create contrast without requiring a bold pattern.
Begin with one woven layer: Place a rattan or woven charger at each seat so the natural texture repeats evenly around the table. This repetition helps separate each individual place setting from the long burlap runner in the center.
Keep the dinnerware simple: White, ivory, stone, beige, or other understated plates give the eye somewhere to rest. Patterned plates can still work, but choose designs that feel subtle rather than introducing another dominant theme.
Add wood in smaller amounts: Wooden napkin rings, small wood slices, wood-handled utensils, or serving boards are usually enough. Too much wood can make the table feel heavy, especially when the dining table itself is already wooden.
If you want to get more from your life, and are looking for concrete action steps to get you there, check out our Request a Coach page. It’s a “cut the fence-sitting and take action” way to tackle your issues and actually find success. To get off the fence and start to take action, click or tap here.
Repeat the same basic stack: Try charger, dinner plate, smaller plate if needed, folded napkin, then one small accent. Keeping the order consistent makes the table look organized even if the individual pieces are not perfectly matched.
After setting one complete place, sit down and test it. Make sure the charger does not push the glassware too far away and that the napkin or decorative accent does not interfere with the plate.
Then copy the same arrangement around the rest of the table.
If your chairs or table are already heavily textured, use rattan more sparingly. A single woven charger or basket can give you the same rustic feeling without turning every surface into another competing pattern.
The purpose of these layers is not to make the table look complicated. It is to give every guest a warm, tactile place setting that feels connected to the rest of the farmhouse design.
Turn Kraft Paper Into the DIY Detail That Pulls Everything Together
Kraft paper is one of the most useful materials for rustic Thanksgiving table settings because it is inexpensive, neutral, and easy to personalize. It also gives the table a handmade element without requiring complicated craft skills.
The easiest place to start is with simple place cards. Cut small rectangles from kraft cardstock, fold them into tents, or create basic tags with a hole punch and a piece of twine.
Cut one simple shape: Avoid making every place card elaborate. A clean rectangle, small folded card, or luggage-style tag fits the farmhouse look and keeps the project easy to reproduce.
If you want to get more from your life, and are looking for concrete action steps to get you there, check out our Request a Coach page. It’s a “cut the fence-sitting and take action” way to tackle your issues and actually find success. To get off the fence and start to take action, click or tap here.
Use high-contrast lettering: Black, dark brown, or white ink is usually easiest to read against kraft paper. Handwriting is perfect for a relaxed table, but you can also print names if you prefer a cleaner finish.
Attach the cards to the place settings: Tuck each card under the edge of a napkin, tie it around a napkin with twine, or rest it against the plate. This makes the paper feel integrated rather than placed randomly on the table.
Add one natural detail if needed: A sprig of rosemary, dried leaf, wheat stem, or small piece of greenery can sit beside the card. Keep the botanical element small so the name remains the focal point.
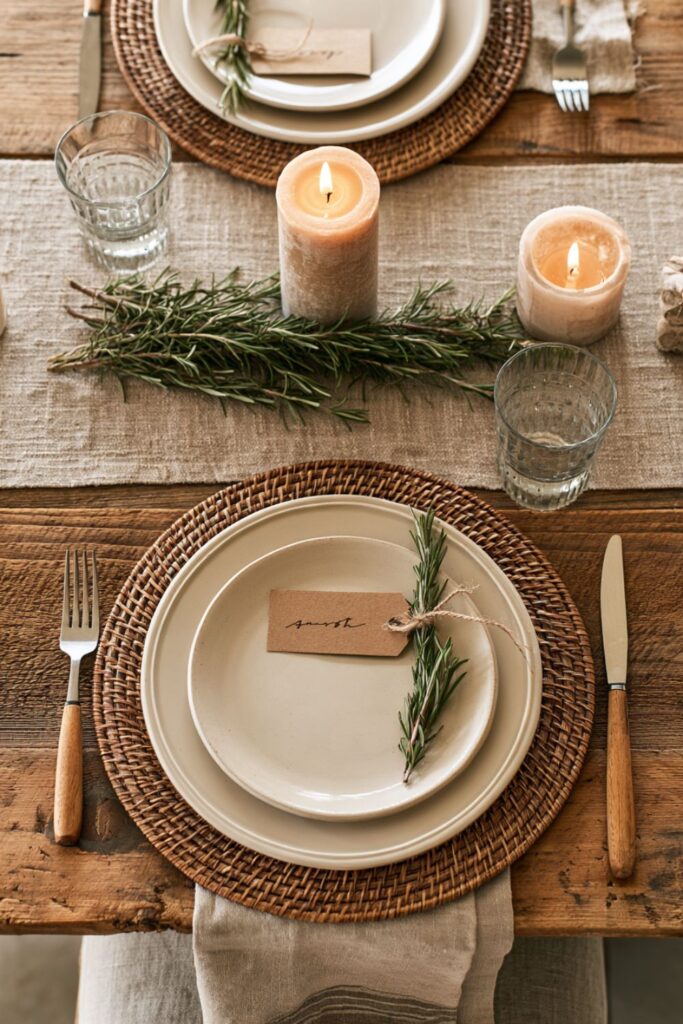
Kraft paper can also repeat elsewhere on the table. Small food labels, drink tags, menu cards, or gratitude prompts can help connect the handmade detail across the entire setup.
You could even place a small kraft card at each seat asking guests to write something they are grateful for. Keep the idea simple so it feels like part of the gathering rather than a formal activity everyone is forced to complete.
The best kraft paper details look effortless because they do not try to imitate expensive stationery. Their charm comes from the natural texture and the personal touch.
When repeated carefully, one inexpensive sheet of kraft cardstock can do more to unify a rustic table than a collection of unrelated seasonal decorations.
Create a Low Rustic Thanksgiving Centerpiece That Leaves Room for Dinner
A Thanksgiving centerpiece should make the table feel special, but it should never make eating dinner harder. If guests have to lean sideways to see each other or move decorations before passing potatoes, the centerpiece has become too important.
If you want to get more from your life, and are looking for concrete action steps to get you there, check out our Request a Coach page. It’s a “cut the fence-sitting and take action” way to tackle your issues and actually find success. To get off the fence and start to take action, click or tap here.
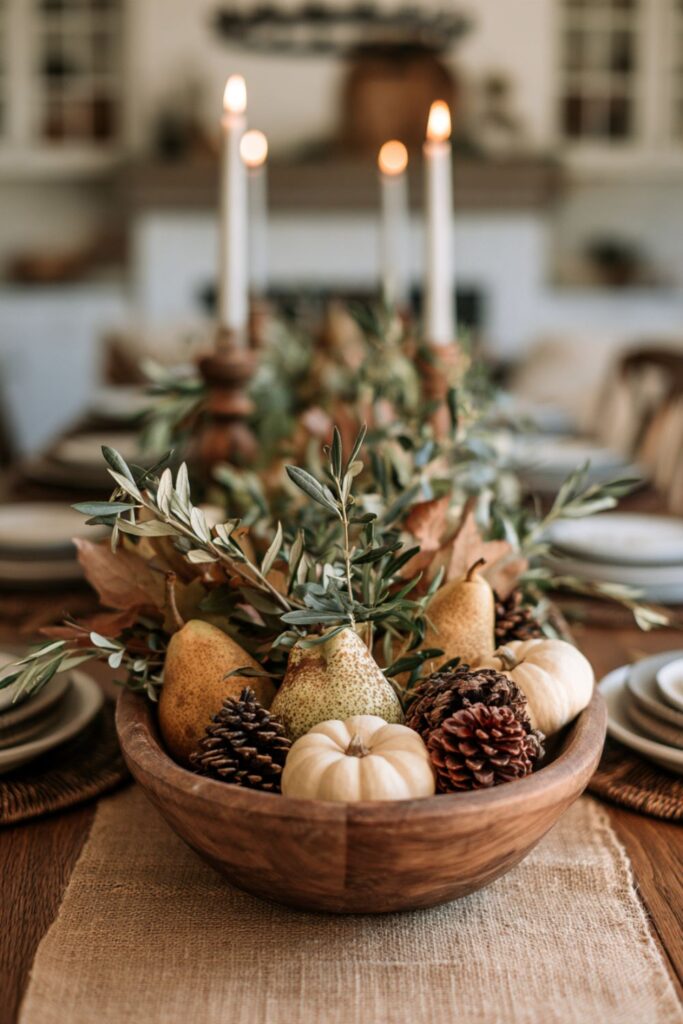
For a rustic farmhouse table, a long, low arrangement usually works better than one large centerpiece in the middle. It follows the burlap runner and helps connect the table without blocking conversation.
Choose one main natural element: Build the centerpiece around greenery, branches, dried grasses, small pumpkins, pears, apples, pinecones, or another seasonal material. Choosing one dominant ingredient keeps the arrangement from looking like a collection of leftover fall decorations.
Use wood as an anchor: A wooden bowl, dough bowl, narrow serving board, cutting board, or shallow tray can give the centerpiece structure. The wood also connects visually with the smaller wooden details in the place settings.
Add color in small amounts: Rust leaves, olive greenery, muted gold fruit, brown pinecones, or cream pumpkins can introduce the earthy fall palette without overpowering the neutral materials.
Keep everything low: Sit in one of the chairs while arranging the table. If the centerpiece blocks the face of someone seated opposite you, shorten it or remove the tallest pieces.
Leave spaces between decorative groups: A centerpiece does not need to form one solid line from end to end. Small gaps make the arrangement feel natural and create places where serving dishes can temporarily sit.
Odd-numbered groupings often work well, especially when you are using pumpkins, fruit, or candles. Three small pumpkins combined with greenery usually feels more relaxed than six identical pumpkins spaced at perfect intervals.
Most importantly, stop before the centerpiece feels finished in a showroom sense. Farmhouse tables look best when they feel collected and comfortable.
If you want to get more from your life, and are looking for concrete action steps to get you there, check out our Request a Coach page. It’s a “cut the fence-sitting and take action” way to tackle your issues and actually find success. To get off the fence and start to take action, click or tap here.
The food, glasses, plates, and people will complete the picture once Thanksgiving dinner begins.
Balance Burlap, Rattan, Wood and Kraft Paper Without Making Everything Brown
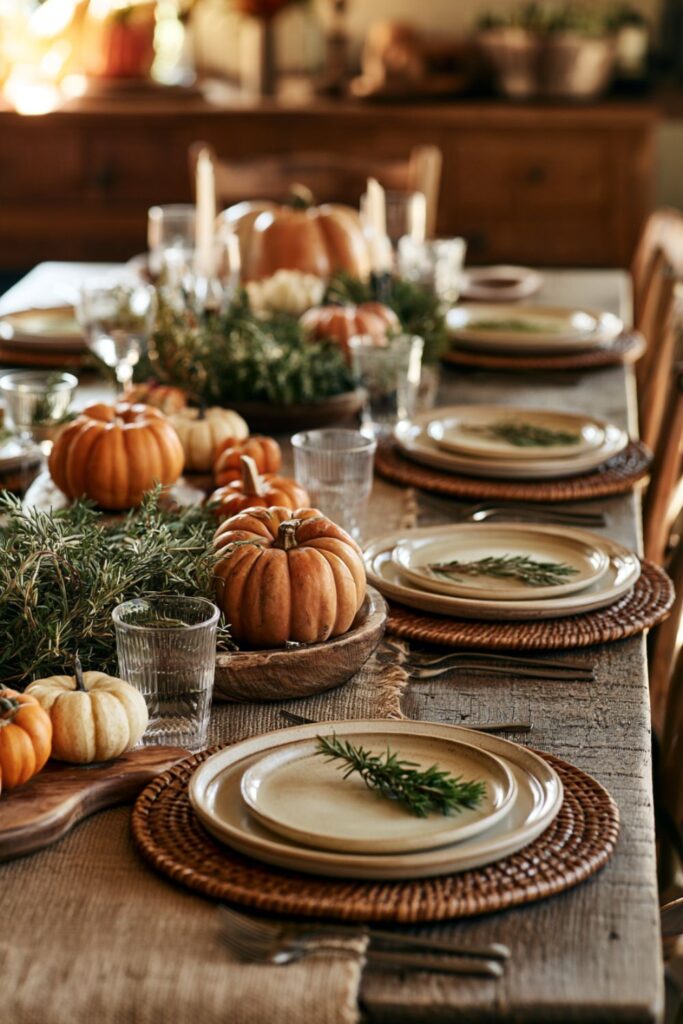
Natural materials work beautifully together, but they share similar warm tones. If you layer burlap, rattan, wood, kraft paper, dried leaves, brown napkins, and tan dishes all at once, the table can quickly become visually flat.
The solution is not necessarily to add more color. Instead, create contrast through light surfaces and different textures.
Give each material one primary job: Let burlap define the runner, rattan frame the plates, wood support serving pieces or accents, and kraft paper handle labels and personalization. When one material starts appearing everywhere, reduce it.
Break up warm browns with lighter pieces: White or cream plates are especially useful because they create clear visual separation between woven chargers and kraft paper. Pale napkins and clear glassware can provide similar relief.
Use texture instead of extra colors: Rough burlap, woven rattan, smooth ceramics, natural wood grain, crisp paper, and clear glass all look different even when their colors are quiet. That variation adds interest without making the table feel busy.
Repeat instead of adding: If the table feels unfinished, repeat something you already have rather than introducing a new object. Another small sprig of greenery or another matching kraft label usually works better than a completely different decorative material.
Remove one item at the end: After the whole table is styled, stand back and identify the least necessary piece. Taking away one decoration often improves the table more than adding another.
If you want to get more from your life, and are looking for concrete action steps to get you there, check out our Request a Coach page. It’s a “cut the fence-sitting and take action” way to tackle your issues and actually find success. To get off the fence and start to take action, click or tap here.
You can also use the food itself as part of the color story. A bowl of pears, apples, bread, or roasted vegetables can add natural fall tones once the meal is served.
The goal is warmth, not maximum rustic texture.
When the table has enough pale space between the browns, the burlap looks richer, the wood looks warmer, and the rattan becomes easier to see.
A good farmhouse table feels layered because of contrast and repetition, not because every possible natural material has been squeezed onto the surface.
Set Up the Table in the Right Order on Thanksgiving Day
Even a simple tablescape can become frustrating if you build it in the wrong order. The easiest approach is to set the practical pieces first and let the remaining space tell you how much decorating the table can actually handle.
Start with the runner and the place settings. Once every seat has a charger, plate, flatware, glass, and napkin, you will know exactly how much room remains in the middle.
Place functional pieces first: Set the burlap runner, chargers, plates, cutlery, glasses, and napkins before touching the centerpiece. This prevents you from designing a beautiful arrangement that leaves guests with nowhere to put their drinks.
Add handmade details second: Once the basics are positioned, add kraft paper place cards, napkin ties, menu cards, or other small personalized elements.
If you want to get more from your life, and are looking for concrete action steps to get you there, check out our Request a Coach page. It’s a “cut the fence-sitting and take action” way to tackle your issues and actually find success. To get off the fence and start to take action, click or tap here.
Build the centerpiece last: Use the remaining center space rather than deciding on a centerpiece width in advance. This keeps the arrangement proportional to the actual table.
Sit down and test the setup: Check at least two different seats. Make sure you can comfortably reach the glass, use your cutlery, talk across the table, and move your chair without bumping decorative elements.
Plan where the food will go: If serving bowls need to sit on the dining table, leave deliberate gaps in the centerpiece. If dinner will be served buffet-style, you have more freedom to use the center for decor.
It is also useful to decide which pieces can be removed quickly. A wooden board holding three decorative items is easier to lift away than nine individual accents scattered around the table.
Try to finish the styling before the busiest part of Thanksgiving Day begins. Even if the food is not ready, the basic table can often be set early.
That gives you time to notice anything awkward while there is still time to adjust it.
A practical setup order is what turns a Pinterest-inspired table into one that actually works when people sit down to eat.
Make Repurposed Candle Jars Useful Without Changing the Rustic Look
Empty candle jars can fit surprisingly well into a rustic Thanksgiving setup, but they do not have to become another decorative centerpiece. One of the best ways to use them is as practical containers around the hosting area.
If you want to get more from your life, and are looking for concrete action steps to get you there, check out our Request a Coach page. It’s a “cut the fence-sitting and take action” way to tackle your issues and actually find success. To get off the fence and start to take action, click or tap here.
Start with jars that have simple shapes and neutral or removable labels. Clean out the old wax completely so they look intentional rather than like containers you forgot to recycle.
Clean the jars thoroughly: Remove remaining wax, labels, and sticky residue. Wash and dry them well before using them near food, napkins, or table accessories.
Use them for small hosting essentials: Depending on their size, candle jars can hold:
- Wrapped cutlery
- Extra napkin rings
- Toothpicks
- Cocktail picks
- Matchsticks
- Small packets or condiments
- Spare place cards or labels
Keep them near the serving zone: A sideboard, drink station, kitchen counter, or buffet is often a better location than the main dining table. This allows the jars to stay useful without adding another container to an already layered tablescape.
Tie them into the farmhouse look: A narrow kraft paper label or simple twine wrap is usually enough. Avoid overdecorating the jars because the clear glass already provides a useful contrast to burlap and wood.
You can also group two or three jars together for related supplies. One might hold teaspoons, another drink stirrers, and another extra napkin ties.
This approach helps extend the rustic visual language beyond the dining table while still keeping the serving area organized.
Repurposed candle jars work best here because they solve a small hosting problem rather than existing purely as decor. They give loose items a place to live, make the buffet easier to navigate, and allow you to reuse something you already own.
If you want to get more from your life, and are looking for concrete action steps to get you there, check out our Request a Coach page. It’s a “cut the fence-sitting and take action” way to tackle your issues and actually find success. To get off the fence and start to take action, click or tap here.
That practical quality suits farmhouse styling especially well. The table feels more authentic when beautiful objects are also useful.
Make the Serving Area Feel Like Part of the Same Farmhouse Table
If the main Thanksgiving meal will not fit comfortably on the dining table, moving food to a buffet or sideboard can actually improve the entire setup. The key is making that serving area feel connected to the table instead of looking like a completely separate station.
You do not need to duplicate the tablescape. Simply repeat two or three of the same materials.
Carry over two main textures: Use a wooden serving board, kraft food labels, a narrow strip of burlap, or a woven basket on the buffet. Repeating familiar materials immediately connects the two areas.
Group items by purpose: Keep plates together, cutlery together, drinks together, and condiments together. Guests should be able to understand the setup without needing instructions.
Use height carefully: A wooden riser, cake stand, or sturdy board can lift one or two dishes and make the buffet easier to scan. Avoid creating so many different levels that guests have to reach around decorations.
Leave a landing area: Keep some of the serving surface empty. Hot dishes, lids, serving utensils, bottles, or items brought by guests often need somewhere temporary to go.
Keep labels simple: Kraft paper labels are useful for identifying sauces, desserts, or dishes with special ingredients. Use the same lettering style as the place cards so everything feels connected.
If you want to get more from your life, and are looking for concrete action steps to get you there, check out our Request a Coach page. It’s a “cut the fence-sitting and take action” way to tackle your issues and actually find success. To get off the fence and start to take action, click or tap here.
Greenery or a few small fall accents can be added if the serving area looks bare, but food should still be the focus.
Once the dishes are out, the colors and textures of the meal become part of the display. Bread baskets, pies, roasted vegetables, casseroles, and drinks often provide more visual interest than extra decor would.
The dining table can then remain calmer and more spacious.
Creating one visual language across both areas makes the entire room feel styled without forcing every decorative element onto a single surface.
How an Organizational Coach Could Help Simplify Holiday Table Prep
Thanksgiving table styling can become surprisingly complicated when you have years of linens, chargers, serving dishes, napkin rings, candles, and seasonal decorations stored in different places. An organizational coach can help by turning the setup into a repeatable system rather than another annual search through boxes.
The most useful starting point is separating reusable foundation pieces from Thanksgiving-specific decor. Neutral chargers, wood serving boards, simple napkins, woven baskets, and glassware can often work for many occasions, while turkey decorations and Thanksgiving signs have a much narrower purpose.
Create a table-setting inventory: List the basics you already own, including chargers, napkins, dishes, tablecloths, runners, serving boards, and centerpiece containers. This makes it easier to see what you actually need before shopping.
Group reusable farmhouse pieces together: Store rattan, burlap, neutral linens, wood accents, and kraft paper supplies in one clearly labeled area. When everything that fits the style is together, planning becomes faster.
If you want to get more from your life, and are looking for concrete action steps to get you there, check out our Request a Coach page. It’s a “cut the fence-sitting and take action” way to tackle your issues and actually find success. To get off the fence and start to take action, click or tap here.
Separate seasonal accents: Keep Thanksgiving-specific items in their own smaller container rather than mixing them with all fall decor. This reduces the amount you have to sort through each year.
Build a repeatable setup sequence: Use the same order every time:
- Runner
- Chargers
- Plates
- Napkins
- Glassware
- Place cards
- Centerpiece
- Serving check
Photograph the finished table: Save a few images showing the spacing, layers, and centerpiece proportions. Next year, you can recreate the setup without having to remember what worked.
An organizational coach may also help identify which items are creating unnecessary decisions. If you own six different fall runners but always use the same one, keeping all six may be adding more friction than variety.
The goal is not to make every Thanksgiving table identical.
It is to create a simple foundation you can reuse, then change one or two details each year. That gives you a table that still feels fresh without turning seasonal decorating into a major project.
Bring the Rustic Thanksgiving Table Together
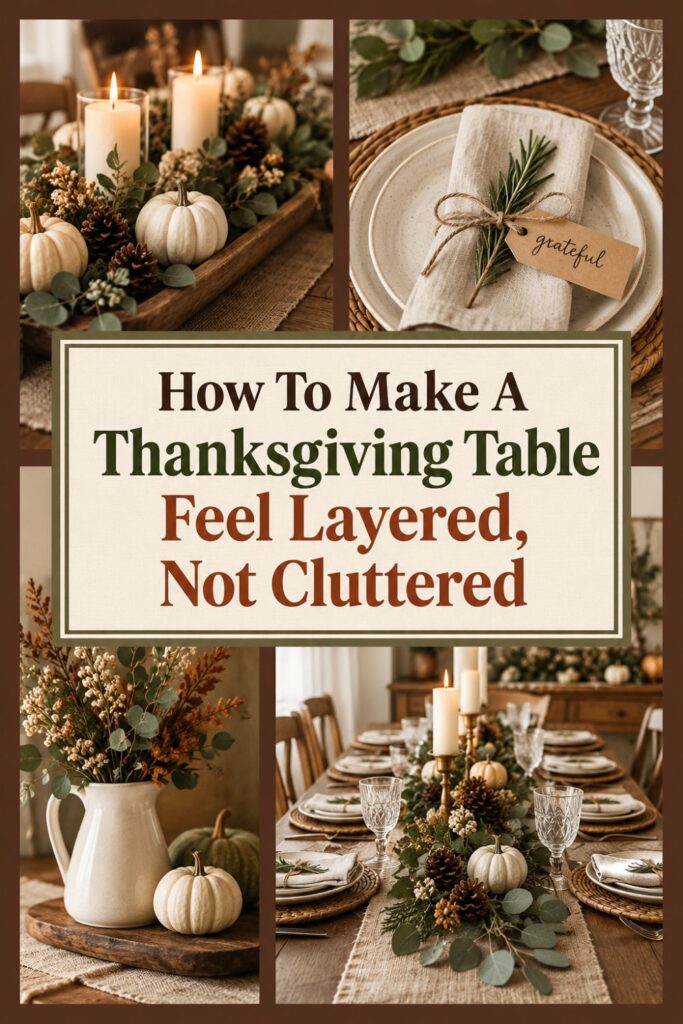
Once the table is fully styled, resist the urge to keep filling empty areas. A farmhouse Thanksgiving table should feel warm and abundant, but much of that feeling will come naturally once the food and guests arrive.
Take one final look at the table and check whether the four core materials are doing their jobs.
If you want to get more from your life, and are looking for concrete action steps to get you there, check out our Request a Coach page. It’s a “cut the fence-sitting and take action” way to tackle your issues and actually find success. To get off the fence and start to take action, click or tap here.
Burlap should create the central foundation. Rattan should bring woven texture to the place settings. Wood should add warmth and structure. Kraft paper should provide the handmade finishing details.
Check the balance of materials: Make sure one texture has not taken over the entire table. If everything looks brown and heavy, remove something or add a little more cream, white, glass, or exposed tabletop.
Protect conversation space: Sit in a chair and look across the table one last time. Lower or remove anything that blocks the view of the person opposite.
Make room for the meal: If serving dishes are going on the table, clear their spaces before guests arrive. It is much easier to remove decorations now than when someone is holding a hot casserole.
Keep the handmade touches visible: Do not bury kraft place cards or natural accents beneath unnecessary decorations. Small personal details often make the table feel more welcoming than large themed pieces.
Stop when the table feels warm: You do not need to decorate every gap. Rustic farmhouse styling works best when natural textures have room to be noticed.
The finished table should feel like a place people can actually gather, eat, talk, and stay awhile.
That is what makes burlap, rattan, wood, and kraft paper such a strong combination for Thanksgiving. They create seasonal warmth without requiring an elaborate decorating scheme, and most of the pieces can be reused long after the holiday is over.
If you want to get more from your life, and are looking for concrete action steps to get you there, check out our Request a Coach page. It’s a “cut the fence-sitting and take action” way to tackle your issues and actually find success. To get off the fence and start to take action, click or tap here.
When each material has a purpose, the result feels effortless, cozy, and unmistakably farmhouse.
Need some help with style or organization? Drop on by our directories choc full of image coaches, organization coaches and minimalist coaches to help make your spaces beautiful. Or click here to have us match you to the best.
If you want to get more from your life, and are looking for concrete action steps to get you there, check out our Request a Coach page. It’s a “cut the fence-sitting and take action” way to tackle your issues and actually find success. To get off the fence and start to take action, click or tap here.
Read this next

How to Decorate for Christmas Based on Your Aesthetic: The Luxury Lover, Modern Minimalist, Vintage Soul & Boho Dreamer
Are you all about style, decor and organization? Download a copy of our Decluttering Workbook. **** Your Christmas decor says more about you than any trend ever could. It’s not […]
Read More
Simplify Holiday Decorating
4 Things You Can Do This Year to Make Decorating for Christmas Next Year a Breeze
Read More
Before You Make a 2026 Vision Board, Read This
Before you build your 2026 vision board, learn the simple shifts that make it clearer, calmer, and easier to actually use.
Read More