


Talk to a coach about Organizational coaching
Jennifer Loehding
Success Architect | Certified DreamBuilder Coach | Certified NEUROFIT Trainer™ | Certified Keto, Carnivore, PSMF and Supplement Coach
Life, business, health, and wellness coaching for balanced personal and...

Crystal Faulk
ACC
I help overwhelmed women in transition gain clarity, confidence, and...

Christian Hartley, MSIOP, PCC
Professional Certified Coach
Our partnership will empower you to eliminate fear and doubt...

Terrie Hein
Certified Life Coach, Certified Insight Coach Practitioner
Coaching to declutter your life, organize your goals, and cook...

Dr Charlene Ashley
Doctorate - Behaviours
I coach individuals to design fulfilling lives through structure, clarity,...

Paloma Chiara

Lana's Gymnastics Club
"Where the best in gymnastics meets fun. Where every child is a star"
lgclubny.com

Anna Sosnina
ICF (ACC)
ICF ACC certified coach, founder of EssorVie Coaching, passionate about...


9 Easy Galentine’s Tablescapes That Feel Fun, Girly, and Put-Together: Which Style Are You?

Are you all about style, decor and organization? Download a copy of our Decluttering Workbook.
***
Galentine’s Day is the perfect excuse to make the table feel a little extra without making it a whole production. The best setups look pulled together because they stick to one clear idea, not because you used a ton of decor.
Think of your tablescape like an outfit; one statement piece, a few supporting details, and then you stop. The moment you repeat a color, shape, or finish on purpose, the whole table starts to look intentional.
Before you start any style, clear the table, count your seats, and set your basics first (plates, glasses, flatware, napkins). A tidy base makes every look feel more put-together.
In our original roundup, The Galentine’s Formula: Decor, Tables, and Activities That Just Work, we spotlighted the table as the emotional center of the night. This time, we’re breaking down how to design one that looks effortless but intentional — the kind of table that invites guests to linger long after dinner ends.
Need some help with style or organization? Drop on by our directories choc full of image coaches, organization coaches and minimalist coaches to help make your spaces beautiful. Or click here to have us match you to the best.
1) Pink Monochrome With One Metallic Accent

This is for you if you love a coordinated look, you’re drawn to soft color, and you want the table to feel sweet but still clean and put-together.
If you want to get more from your life, and are looking for concrete action steps to get you there, check out our Request a Coach page. It’s a “cut the fence-sitting and take action” way to tackle your issues and actually find success. To get off the fence and start to take action, click or tap here.
You’re the person who notices when everything “goes” together. You want pink, but you want it to feel intentional, not like you threw every cute thing on the table at once.
This style works because the color story does the heavy lifting. The metallic accent adds structure so the table doesn’t read as one big cloud of pink.
Items that fit: runner or placemats, cloth napkins, taper/pillar candles, candle holders, bud vases, flowers (fresh or faux), neutral plates, clear glassware, one metallic finish (flatware/chargers/rings), optional place cards.
- Choose your pink range: Pick one light pink, one medium pink, and one deeper pink so the table has depth instead of one flat tone.
- Commit to one metallic: Decide on one metallic finish and use only that finish so everything looks cohesive.
- Build a neutral base: Set plates and glassware at every seat first, spacing them evenly so the table already looks tidy.
- Lay your foundation textile: Add a runner or placemats centered and straight to give the table structure.
- Place your main pink consistently: Use your main pink for napkins or the runner and repeat the same fold at every setting.
- Introduce pink #2 with intention: Bring the second pink in through one category (candles or vases) so it reads clearly.
- Use pink #3 as the small accent: Add the deepest pink in the smallest dose (a few blooms or one candle color) so it anchors without overpowering.
- Repeat the metallic in key spots: Spread that metallic across 2–4 places (flatware + candle holders + chargers, for example) instead of clustering it.
- Create a low centerpiece line: Space bud vases evenly down the center so the table stays open and conversational.
- Balance flowers and candlelight: Alternate flowers and candles down the middle so color and glow feel even from end to end.

If the table starts to feel “too much,” remove one thing before you add anything else. Monochrome looks best when it’s airy, not packed.
2) Heart Motif, Used Once

This is for you if you want a cute Galentine’s nod, but you also want the table to feel calm, neat, and not like a theme party.
You like playful details, but you want them to feel curated. Your vibe is “little wink,” not “hearts everywhere.”
This works because restraint becomes the design. The heart detail stands out more when it’s the only motif on the entire table.
Items that fit: heart napkins or folds, printed place cards, small tags, simple dishes, neutral linens, candles, low flowers, tray for the center.
If you want to get more from your life, and are looking for concrete action steps to get you there, check out our Request a Coach page. It’s a “cut the fence-sitting and take action” way to tackle your issues and actually find success. To get off the fence and start to take action, click or tap here.
- Pick your one heart moment: Choose hearts on napkins or place cards or plates or tags, then stop there.
- Keep the base neutral: Use light plates, clear glasses, and plain linens so the heart reads clearly.
- Set the table first: Place plates, flatware, and glasses before adding the motif so placement stays consistent.
- Repeat the heart at every seat: Put the heart detail in the same spot at each setting so it looks deliberate.
- Choose one centerpiece style: Do a candle cluster or a small low floral moment so the center doesn’t get busy.
- Contain the center visually: Use a tray under candles or decor so the middle looks organized, not scattered.
- Add one accent color only: If you want extra color, pick one tone and use it lightly through candles or flowers.
- Keep everything low: Make sure the centerpiece stays below eye level so conversation is easy.
- Do a double-motif scan: Remove any second heart element you accidentally added so the “used once” rule stays true.
This table gets better the simpler it is. If you’re debating adding one more heart detail, that’s usually your sign to stop.
3) Red, Blush, and White Bistro Table

This is for you if you want classic Valentine color, but you want it to feel relaxed, casual, and welcoming instead of bold and formal.
You like the idea of a cute café moment at home. You want warmth and color, but you don’t want the table to feel too themed or too precious.
The secret is ratio. White leads, blush softens the vibe, and red shows up like punctuation—small, intentional hits that wake everything up.

Items that fit: white plates, blush or red napkins, clear glassware, simple flatware, runner or placemats, small florals, candles, a serving board or tray.
- Decide your color ratio: Plan for mostly white, then blush, with red as the smallest accent so it doesn’t take over.
- Start with a clean base: Set white plates and clear glasses at each seat so the table feels crisp and bright.
- Add a simple textile layer: Use a runner or placemats with a natural texture to make the table feel warm and lived-in.
- Bring in blush as the soft layer: Use blush for napkins or the runner so the table feels romantic without being loud.
- Use red as punctuation: Add red through candles, a few blooms, or one small detail per setting rather than large red pieces.
- Keep the centerpiece airy: Use one small low arrangement or a few bud vases spread out so the centerline doesn’t feel crowded.
- Add candlelight in a balanced pattern: Space candles down the center so the glow feels even, not clumped in one spot.
- Finish with one practical touch: Add a serving board, small tray, or shared plate to reinforce the bistro vibe.
- Edit back if needed: If it feels too bold, swap one red element for white or blush.
This style should feel effortless, like you could sit down and snack immediately. If it starts to look too “decor-only,” add one functional serving piece and simplify the center.
4) One Statement Floral Centerpiece

This is for you if you want the table to look like you really tried, but you’d rather let one big moment do all the work.
You love a centerpiece that makes people say “okay wow” as soon as they walk in. You don’t want to fuss with a dozen little decor items—one strong floral line feels easier and more impactful.
If you want to get more from your life, and are looking for concrete action steps to get you there, check out our Request a Coach page. It’s a “cut the fence-sitting and take action” way to tackle your issues and actually find success. To get off the fence and start to take action, click or tap here.
The trick is letting the flowers be the star. When everything else stays simple, the centerpiece looks fuller, richer, and more intentional.
Items that fit: low vases or bud vases, fresh or faux flowers, greenery, neutral plates, simple napkins, taper or pillar candles, a table runner.

- Choose one arrangement style: Do one long low centerpiece or a line of matching bud vases so the center looks designed, not mixed.
- Pick a tight flower palette: Choose 2–3 flower colors and add greenery if you want softness and movement.
- Set the base simply: Use neutral plates and plain linens so the centerpiece clearly becomes the focal point.
- Place vases before adding stems: Space them evenly down the center so the line looks continuous from end to end.
- Build the shape low and full: Keep arrangements below eye level so guests can talk across the table comfortably.
- Distribute the main color evenly: Place your main flower color throughout the whole line before you add your secondary colors.
- Add your secondary colors for depth: Work them in gradually so both ends of the table feel balanced.
- Use candles as the supporting glow: Place candles around the florals, keeping them similar in height so they don’t compete.
- Fill gaps, then stop: Step back from both ends, fill any obvious empty spots, and avoid overpacking the center.
If you’re unsure whether it’s “enough,” it usually is. A floral statement looks best when it’s lush but still airy.
5) Bow Details on Fabric Elements

This is for you if you love cute, feminine details and you want one repeatable signature touch that makes the table feel special.
You’re all about the little details that feel charming and intentional. Bows give instant personality, but they still look put-together because they’re consistent across the table.
This style shines when everything else stays simple. The bow is the statement, so you don’t need a lot of extra decor.
Items that fit: ribbon, cloth napkins, chair ties (optional), neutral plates, clear glassware, candles, small bud vases.
- Choose where bows will live: Put bows on napkins or chairs so the look stays clean and not overly decorated.
- Pick one ribbon type: Choose one ribbon width and texture so the bows match across the table.
- Prep ribbon lengths ahead of time: Cut each piece to the same length so bow tails look consistent and tidy.
- Set place settings first: Place plates, glasses, and flatware before styling bows so everything stays aligned.
- Fold napkins consistently: Choose one simple fold or roll, then repeat it at every seat for a uniform look.
- Tie bows the same way each time: Keep bow size and tail length similar so the table looks intentional, not random.
- Keep the center simple: Choose candles or bud vases rather than a busy centerpiece so bows remain the focus.
- Add one grounding element: Use a runner or a tray under candles to keep the table from feeling scattered.
- Do a final straighten: Adjust bow loops and tails right before guests arrive for the cleanest look.
This one is deceptively easy, but it looks like you put in real thought. Consistency is what makes it land.
If you want to get more from your life, and are looking for concrete action steps to get you there, check out our Request a Coach page. It’s a “cut the fence-sitting and take action” way to tackle your issues and actually find success. To get off the fence and start to take action, click or tap here.
6) Candy-Colored Glassware as the Statement

This is for you if you want maximum personality with minimal effort and you love a bright, playful pop of color.
You want the table to feel cheerful and fun right away. Colored glassware gives that instant mood shift without requiring a bunch of extra decor pieces.

This style is also incredibly reusable. You can keep everything else neutral and simply swap the glassware whenever you want a different vibe.
Items that fit: tinted glasses, champagne flutes, neutral plates, plain linens, a tray, candles, small bud vases.
- Choose your color plan: Use one glass color for a clean look, or mix 2–3 complementary tones for a playful feel.
- Keep glass shapes consistent: Use the same glass shape across the table so mixed colors still look coordinated.
- Set a neutral base: Choose simple plates and plain linens so the glassware remains the main character.
- Place glassware early: Set the glasses first so you can see the impact and avoid overdecorating.
- Choose a minimal centerpiece: Use a tray with candles or a short line of bud vases so the center stays clean.
- Repeat color subtly once: Match one candle or one flower color to the glass tone if you want cohesion, but keep it subtle.
- Avoid busy patterns: Skip patterned runners or loud napkins so nothing competes with the glassware.
- Check color distribution: If you mixed tones, spread them evenly so one color isn’t clustered in one area.
If you want a table that feels fun without feeling themed, this is it. It’s playful, bright, and still looks intentional.
7) Layered Galentine’s Brunch Table

This is for you if you love a hosted, abundant vibe and you want the table to feel like everyone’s about to linger.
You want the table to feel generous. Layering creates that “brunch moment” immediately, even if your dishes are simple and your menu is casual.
The key is purposeful layers. Every layer should add visual depth while still leaving the setting usable.
If you want to get more from your life, and are looking for concrete action steps to get you there, check out our Request a Coach page. It’s a “cut the fence-sitting and take action” way to tackle your issues and actually find success. To get off the fence and start to take action, click or tap here.
Items that fit: dinner plates, salad plates or bowls, napkins, optional menu cards, clear glassware, serving dishes, a low centerpiece.
- Choose a tight palette: Limit to 2–3 colors so layered settings don’t start to look cluttered.
- Start with a base plate: Place a large plate at each setting, centered and evenly spaced.
- Add a second layer: Top with a smaller plate or bowl to create depth and that hosted look.
- Place napkins intentionally: Tuck napkins between layers or set them on top, using the same fold at every seat.
- Add one paper detail: Include a place card or simple menu card if you want the setup to feel extra hosted.
- Keep the center low and narrow: Leave room for shared food by using a small centerpiece or candle line.
- Add serving pieces that match: Use trays and bowls in consistent materials so everything looks cohesive.
- Do a usability check: Make sure there’s still space for drinks, food, and hands reaching across the table.
This style feels “more” without requiring more decor. The layering itself is the visual interest.
8) Minimal Table With Personalized Place Cards

This is for you if you love a calm, tidy look and you care more about thoughtful touches than lots of decor.
You want the table to feel personal, not busy. This style works because it focuses on the guests, and the clean setup makes every small detail feel intentional.
Minimal tables depend on spacing. When everything is aligned and consistent, it reads warm and put-together instead of plain.
Items that fit: neutral plates, plain linens, clear glassware, place cards or small notes, candles, one low centerpiece option, optional tray.

- Build a clean base: Set neutral plates and clear glasses so the table looks calm and bright.
- Choose a personalization style: Do place cards, folded notes, or tags tied to napkins—one method only.
- Place personalization consistently: Put the name card in the same position at every seat so it feels intentional.
- Keep napkins simple and neat: Use one fold and repeat it across the table for a tidy look.
- Choose one centerpiece approach: Do a candle cluster or one low arrangement, not multiple centerpieces.
- Use a tray for containment: Place candles or decor on a tray so the center looks organized and clean.
- Straighten spacing at the end: Align place settings and cards so the minimal style looks polished.
This is the easiest style to pull off, but it looks high effort when it’s neat. Clean lines do the work.
9) Sweet Treats as the Centerpiece

This is for you if you want your table to feel fun, generous, and interactive, and you love decor that guests can actually eat.
If you want to get more from your life, and are looking for concrete action steps to get you there, check out our Request a Coach page. It’s a “cut the fence-sitting and take action” way to tackle your issues and actually find success. To get off the fence and start to take action, click or tap here.
An edible centerpiece solves the “what do I put in the middle” problem instantly. It’s festive, it’s functional, and it becomes a natural conversation starter.
The difference between “desserts on a table” and a true centerpiece is structure. Height, grouping, and spacing make it look designed rather than scattered.
Items that fit: cake stands, serving trays, tiered servers, small dessert plates, napkins, candles, runner, bud vases, optional labels.
- Choose your treat theme: Pick cookies, cupcakes, pastries, chocolates, or a small cake, and choose items that look consistent together.
- Start with height: Place a stand or tiered server in the center to create a clear focal point.
- Build a balanced cluster: Add two to four smaller trays around the stand so the centerpiece feels intentional and full.
- Group treats by type: Keep similar treats together so the display looks organized, not random.
- Leave negative space: Don’t pack trays edge-to-edge so the centerpiece looks styled and guests can reach it easily.
- Keep place settings neutral: Use simple plates and plain linens so the treats stay the focal point.
- Frame the display with candlelight: Place candles around the outer edge of the dessert cluster to give it glow without crowding it.
- Add small supporting details sparingly: Use a couple bud vases or a simple runner if needed, but keep it minimal so the desserts stay center stage.
This one feels like the party starts the moment the table is set. It’s generous, cute, and easy to enjoy.
How to Choose the Right Tablescape for Your Gathering

When deciding which idea to use, think about how you want the table to function. A seated dinner, casual brunch, and dessert-focused hangout all benefit from different focal points.
It’s also helpful to consider what you already own. Glassware, linens, and serving pieces can often guide the direction of your table without extra shopping.
Choosing one strong idea and committing to it will always look better than combining multiple concepts. Simplicity is what makes these tables feel put-together.
If you want to get more from your life, and are looking for concrete action steps to get you there, check out our Request a Coach page. It’s a “cut the fence-sitting and take action” way to tackle your issues and actually find success. To get off the fence and start to take action, click or tap here.
Bringing It All Together
Galentine’s tables don’t need layers of decor to feel special. They need clarity, repetition, and one detail that sets the tone.
Whether that detail is color, shape, florals, or food, the goal is the same. Create a table that feels welcoming, playful, and easy to enjoy.
When the setup feels effortless, the focus stays where it should; on good food, good conversation, and time spent together.
Are you all about style, decor and organization? Download a copy of our Decluttering Workbook.
Need some help with style or organization? Drop on by our directories choc full of image coaches, organization coaches and minimalist coaches to help make your spaces beautiful. Or click here to have us match you to the best.
If you want to get more from your life, and are looking for concrete action steps to get you there, check out our Request a Coach page. It’s a “cut the fence-sitting and take action” way to tackle your issues and actually find success. To get off the fence and start to take action, click or tap here.
Read this next
Vision Board Examples: How to Use Them in a Way That Actually Helps
Vision board examples can either distract you or make your next steps feel obvious. Here’s how to use them in a way that actually helps.
Read More
Why Your Vision Board Aesthetic Matters More Than You Think
A vision board that looks good but fades fast needs this simple aesthetic fix. See why calm design keeps your goals impossible to ignore.
Read More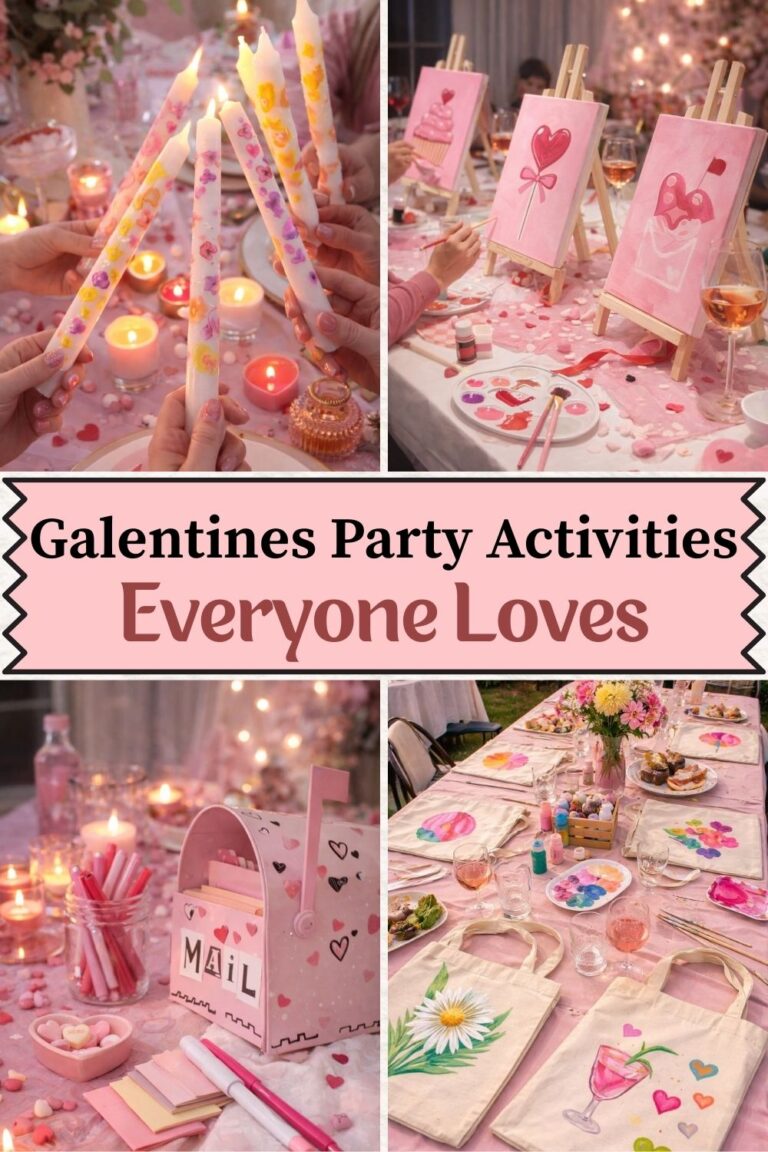
The Galentine’s Activities Everyone Ends Up Talking About
Plan Galentine’s activities that spark laughter, easy conversation, and the kind of moments guests keep talking about.
Read More